

Introduction
The timeline of caulk and paint application is crucial for a durable, crack-free finish. Understanding the duration of each step helps you plan your project efficiently.
From surface preparation to painting, follow this step-by-step timeline to ensure your sealant and paint work together seamlessly.
For the full guide, see Caulk and Paint Compatibility: Choosing Paintable Sealants That Don’t Crack.
The Caulk and Paint Timeline: Step-by-Step Duration
Follow this timeline to ensure a successful caulk and paint project:
- Surface Preparation (1-3 days): Clean, dry, and prime surfaces as needed. Allow drying time for primers.
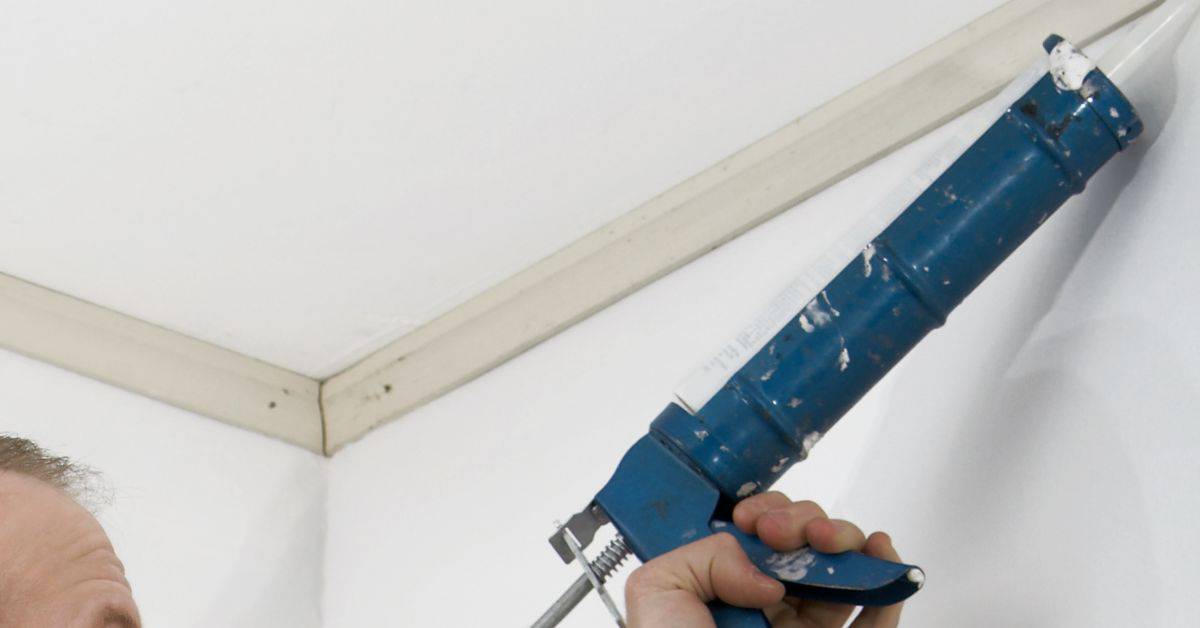
- Caulk Application (1 day): Apply the sealant, tool it smooth, and let it cure according to the manufacturer’s instructions (usually 24-72 hours).
- Curing Time (1-3 days): Allow the caulk to fully cure before painting. This ensures optimal adhesion and prevents cracking.
- Painting (1 day): Apply paint, following the manufacturer’s instructions for drying time between coats.
Total estimated duration: 4-7 days
Key takeaways
The timeline of your caulk and paint project is influenced by surface preparation, curing times, and painting. Plan accordingly to ensure a successful outcome.
- Match caulk chemistry to paint system for durable, crack-free results.
- Verify surface cleanliness and dryness before caulking to improve adhesion.
- Choose paintable sealants labeled for exterior or bathroom use as needed.
- Respect ventilation and fumes, and follow curing times to prevent hazards.
- Test a small joint first and check for cracking after curing.
- Use masking and correct tool technique to prevent squeeze-out and gaps.
Table of Contents
- Introduction
- Key takeaways
- Understanding Caulk Chemistries and Paintability
- How Paint Interacts with Sealants: Adhesion, Flexibility, and Curing
- Preparing Surfaces for Caulking and Painting
- Choosing Paint for Use over Sealants
- Application Best Practices to Prevent Cracking
- Testing, Visual Checkpoints, and Small-Scale Trials
- Troubleshooting Failures and Repair Methods
- Sealant Selection by Application and Environmental Factors
- Conclusion
- FAQ
Understanding Caulk Chemistries and Paintability
Caulks come in different chemistries—acrylic, acrylic-latex, silicone, polyurethane, and hybrid formulations—and each behaves differently when painted. Describe the basic composition and how surface energy, cure mechanism, and additives influence whether paint will stick.
For each type, note typical paintability characteristics and common limitations so homeowners can match product choice to the job. If a specific product’s behavior matters, check the label or product data sheet for the manufacturer’s paintability statement and recommended topcoats.
Acrylic Latex and Acrylic Latex with Silicone
These caulks are water-based, making them easy to clean up and low in volatile organic compounds (VOCs). They’re typically paintable right away. Here’s what you need to know:
Paintability: Excellent. You can apply latex paint directly after the caulk has dried.
Flexibility: Good. Acrylic latex caulks can handle some movement, but they’re not as flexible as silicone-based ones. For high-movement areas like windows and doors, consider acrylic latex with silicone.
Uses: Great for interior trim work, baseboards, and drywall seams where flexibility isn’t a major concern.
Pure Silicone, Silicone Hybrids, and Polyurethane
These caulks are known for their durability and resistance to mold, mildew, and extreme temperatures. However, they can be tricky when it comes to painting.
Paintability: It’s a mixed bag. Pure silicone and polyurethane caulks often cannot be painted due to their chemical makeup. Silicone hybrids may be paintable after special prep like sanding or using a primer designed for silicone-based sealants.
Flexibility: Excellent. These caulks can handle a lot of movement, making them ideal for areas with high expansion and contraction, like windows and doors.
Uses: Perfect for bathrooms, kitchens, and other high-moisture or high-traffic areas where durability is key. Just be aware that you might not be able to paint them.
How Paint Interacts with Sealants: Adhesion, Flexibility, and Curing
Paint adheres to a sealant through mechanical and chemical bonding, and the sealant’s modulus and cure profile determine how the two materials move together over time. Highlight how mismatches in flexibility or incomplete cure lead to stress, cracking, or delamination at the paint/caulk interface.
Also point out environmental and jobsite factors—like temperature, humidity, and dust—that alter curing and adhesion behavior in practice. When precise conditions matter for a product, consult the manufacturer’s instructions or technical data for cure times and allowable painting windows.
Adhesion factors to check
When it comes to paint and sealant, adhesion is key. Here are the main factors that affect how well they stick together:
Surface Energy: Paint needs a surface with enough energy to bond. Most sealants provide this, but some may need a primer to boost their energy.
Primer Needs: Some sealants require a primer before painting. This ensures the best adhesion and prevents peeling or cracking later on.
Surface Contamination: Dirt, grease, or old paint can stop paint from sticking to your sealant. Always clean and prep surfaces before applying any new product.
Movement compatibility and elasticity
Sealants and paints move differently when they expand or contract due to temperature changes. This can cause cracks if they’re not compatible:
Paint is generally more rigid than sealant. If the paint doesn’t flex with the sealant, it’ll crack under stress.
Movement Accommodation: To prevent this, choose a paint that can accommodate the same amount of movement as your sealant. This means they’ll flex together without putting too much strain on each other.
Most acrylic latex paints are flexible enough to work with most sealants. But always check the product specs to be safe.
Preparing Surfaces for Caulking and Painting
Good adhesion starts with a clean, dry surface: remove loose paint, old caulk, dirt, oils, and mildew before applying new sealant or paint. Walk through effective cleaning methods and safe ways to remove remnants so the new materials can bond to sound substrates.
Explain when to use a primer and how priming affects both caulk adhesion and paint compatibility, including situations where a primer is required. If a primer choice is critical, read the product label or technical sheet for surface compatibility and application guidance.
Cleaning, drying, and contamination removal
Before you caulk, clean the surface. Dirt, grease, or old paint can stop your sealant from sticking.
Use a degreaser or soap and water for most surfaces. For tough spots, use a wire brush or scraper. Be careful not to damage the surface.
Rinse with clean water and let it dry completely. A damp surface can ruin your caulk job.
Check for any contaminants like mildew, rust, or old paint. Remove them before you start.
When and how to use a primer or adhesion promoter
A primer helps your caulk stick better and lasts longer. It’s like a bridge between the surface and the sealant.
Use it on surfaces that are hard to stick, like bare wood, metal, or previously painted surfaces with poor adhesion. Check your sealant’s datasheet for recommendations.
Apply primer according to the manufacturer’s instructions. Usually, you’ll need to let it dry before caulking.
Some sealants come with an adhesion promoter mixed in. Follow the same rules as using a separate primer if that’s the case.
Choosing Paint for Use over Sealants
Not all paints tolerate joint movement equally; water-based, oil-based (alkyd), and specialty coatings differ in elasticity and adhesion to sealants. Compare general tendencies—such as relative flexibility and adhesion—so readers can prioritize paints less likely to crack over flexible joints.
Advise checking compatibility notes from both the sealant and paint manufacturers before committing to a combination. If in doubt, perform a small test patch or consult the product technical data for compatibility recommendations.
Water-based versus Solvent-based Paints
When choosing paint for sealant joints, consider the paint’s base – water or solvent. Each has its own flexibility and drying characteristics.
Water-based (latex) paints: These are flexible once dry, making them a good choice over sealants that may move slightly. They’re also quick-drying, allowing you to apply multiple coats in a day. However, they might not be suitable for areas with high humidity or moisture.
Solvent-based (oil) paints: These offer excellent adhesion and durability but are less flexible than water-based paints. They’re ideal for surfaces that won’t move much, like trim work. However, they take longer to dry and have strong odors.
Specialty Coatings, Stains, and Clear Finishes
While these can enhance the look of your project, they might not be the best choice over sealant joints.
Stain-blocking primers: These can help with tannin bleed but may reduce flexibility. Apply them sparingly or use a regular primer first, followed by a stain-blocker if needed.
Glossy enamels and clear coats: These offer great protection and shine but lack flexibility. They can crack at sealant joints over time, especially in areas with movement. Stick to semi-gloss or satin finishes for better flexibility.
Application Best Practices to Prevent Cracking
Proper joint preparation, correct bead size, and appropriate tooling reduce stress concentrations that lead to cracking in the paint layer. Describe practical steps like selecting the right joint width-to-depth ratio, tooling to ensure contact with substrate, and avoiding overworking the sealant.
Explain sequencing: when to allow sealant cure before painting, how to stagger work on large areas, and how multiple thin paint coats perform versus one heavy coat. If timing or sequencing depends on the product, follow the manufacturer’s cure and recoat guidance.
Proper joint design and bead technique
Size your joints right to keep caulk from cracking under paint. Too narrow, it’ll split. Too wide, it won’t stick.
Bead depth: Fill the joint about 3/4 full. Not too much, not too little. Use a backer rod for wider gaps to support the bead and keep it from sagging.
Tool your bead smooth with a damp finger or tool. This helps paint adhesion and hides imperfections.
Timing: cure times and paint-over windows
Patience is key when painting over caulk. You need to let it cure fully before slapping on the paint.
Curing means the sealant dries, hardens, and bonds with the surface. It’s not just about being touch-dry. Check your caulk tube for exact cure times.
If you paint too soon, trapped solvents can mess up your paint job. Worse, it might not stick at all. So wait, grasshopper. The longer, the better.
Testing, Visual Checkpoints, and Small-Scale Trials
Before painting an entire wall or facade, run quick on-site checks: adhesion pulls, thumb-surface tests after cure, and small painted mockups to watch for cracking or poor adhesion. Describe how to set up these small trials and what failure signs to look for during accelerated movement or temperature shifts.
Recommend documenting results and adjusting product choice or surface prep based on those findings rather than assuming lab claims translate perfectly to the jobsite. If a product’s test method is necessary, follow the manufacturer’s suggested test procedure or a recognized field test standard.
Patch Adhesion and Movement Test
Before committing to a full repaint, perform this test to check how your chosen paint interacts with the sealant under expected movement conditions.
- Apply test bead: Squeeze out a small bead of caulk on a hidden or inconspicuous area, following the joint design and bead technique mentioned earlier.
- Let it cure: Allow the caulk to cure for the recommended time. Skipping this can lead to inaccurate results.
- Prime if needed: If using a primer or adhesion promoter, apply it now. This helps ensure proper bonding between paint and sealant.
- Paint over: Apply your chosen paint over the cured caulk bead, following application best practices.
- Let it dry: Allow the painted area to dry completely before proceeding with the next steps.
- Introduce movement: Gently flex or move the surface where the test patch is applied. This simulates real-world conditions.
- Monitor for cracking: Check if any cracks appear at the sealant-paint interface. Cracking indicates incompatibility between the two.
- Check adhesion: Gently scrape or pull at the painted caulk bead to ensure it stays firmly in place. Any lifting or peeling suggests poor adhesion.
Quick rule: If the test patch shows no signs of cracking or delamination after introducing movement, your chosen paint and sealant are likely compatible for larger-scale application.
Visual Inspection Checklist
Before painting over a sealant, visually inspect the area to ensure compatibility. Look out for signs of incompatibility that could lead to issues later on.
- Bleeding: Check if the caulk is bleeding through or discoloring the paint. This indicates incompatibility between the two.
- Whitening: Look for any whitish areas on the painted surface, especially around the sealant bead. This could signal that moisture is being trapped and pushed to the surface.
- Poor wet-out: Ensure the paint wets out evenly across the caulk bead. Incompatibility can lead to poor coverage or uneven appearance.
- Early hairline cracks: Inspect for any fine cracks appearing at the sealant-paint interface, especially after introducing movement.
- Uneven surface: Check if the painted surface feels rough or uneven. This could indicate that the paint and caulk are not bonding properly.
- Discoloration: Look for any discolored areas around the sealant bead, which could suggest chemical incompatibility.
Quick rule: If you notice any of these signs during your visual inspection, it’s best to re-evaluate your chosen paint and sealant combination before proceeding with a full repaint.
Troubleshooting Failures and Repair Methods
When paint splits or delaminates over a joint, start with a targeted assessment: determine whether the failure is paint film, sealant failure, or substrate movement. Walk through logical repair options—spot sanding and repainting, resealing joints, or full removal and replacement—based on the failure type observed.
Give step-by-step practical fixes for common scenarios and note when a full replacement is the only reliable long-term fix. If a specific repair product or method is recommended, check that product’s instructions and suitability for the materials on your job.
Removing incompatible sealant and prepping for replacement
First, ensure safety by wearing gloves and eye protection. Use a utility knife to score the old sealant at intervals of about 1-2 inches.
Never use a razor blade or sharp knife without scoring first; it’s safer and prevents damage to the substrate.
Apply a suitable sealant remover, following the manufacturer’s instructions. Let it sit for the recommended time, then use a scraper or putty knife to remove the softened sealant.
Thoroughly clean and dry the area. Use denatured alcohol or a suitable cleaner to ensure no residue remains that could hinder new sealant adhesion. Lightly sand with fine-grit sandpaper (120-150 grit) to create a ‘bite’ for the new sealant.
Repairing minor cracks and touch-up techniques
For hairline cracks, use fine-grit sandpaper (220-320 grit) to lightly abrade the area. This helps new sealant adhere better.
If the crack is wider, you’ll need to fill it. Use a suitable filler or caulk, applying with a small putty knife. Let it cure according to the manufacturer’s instructions, then sand smooth using progressively finer grits of sandpaper (120-320).
Feathering the edges of your repair helps blend it into the surrounding surface. Use a flexible sanding sponge or folded sandpaper for this.
Clean and dry the area, then apply a thin bead of new sealant, ensuring it’s compatible with your paint. Allow it to cure as per the manufacturer’s guidelines before painting.
Sealant Selection by Application and Environmental Factors
Selecting the right sealant means matching movement expectations, UV exposure, moisture, and temperature ranges to the product’s properties for windows, trim, siding, or bathrooms. Outline which environmental stresses are most relevant for each application so readers can focus on the right performance attributes.
Stress the need to verify service-temperature ranges, UV resistance, and allowable joint movement with the manufacturer’s technical information before use. When local climate or extreme conditions apply, consider specialists’ recommendations or product lines designed for those environments.
Interior Trim and Baseboards
For interior trim and baseboards, you’re looking for sealants that can handle low movement joints. These areas don’t see much stress, but they do need to be paintable and have a low odor.
Prioritize low-odor sealants for indoor use. You’ll appreciate the difference when painting or living in the space. Also, look for sealants that are easy to paint over. This ensures a smooth finish and makes touch-ups a breeze.
While these joints don’t move much, they’re not completely static. Choose a sealant with some flexibility to handle minor expansions and contractions. But remember, too much movement can cause cracking, so keep it balanced.
Exterior Siding, Windows, and High-Movement Joints
When it comes to exterior use, weather resistance is key. You need a sealant that can stand up to the elements. This includes rain, snow, heat, and cold.
For high-movement joints like windows and doors, choose a sealant with high elongation. This means it can stretch and move with the joint without cracking. It’s crucial for areas that expand and contract with temperature changes.
UV stability is also important outdoors. Look for sealants that won’t degrade or discolor under prolonged sun exposure. And where paintability is required, ensure the sealant can be painted over successfully to match your home’s exterior color scheme.
Conclusion
One simple truth drives lasting results: use the right combination of sealant and paint, prep well, and test before you commit. That approach keeps water out, avoids cracking, and preserves a clean look without costly redo.
First, verify the caulk’s chemistry and the paint’s compatibility, read labels for paintability, and test in a small, inconspicuous area before any full-scale work; clean and dry the surface, apply with the correct tooling and timing, and let the sealant cure fully before painting or exposure to elements; then inspect under good light and in the actual conditions where the joint lives, and follow up with a small trial to confirm long-term behavior. Test first in a hidden spot, ensure proper ventilation, and keep conditions within the product’s recommendations so you can spot issues before they ruin a project.
Common mistakes to avoid include skipping the curing time, painting over an uncured or nonpaintable sealant, and neglecting surface preparation or environmental limits; always follow safety rules—work in a ventilated space, wear gloves, and keep tools clean and dry—because sloppy prep or rushed work leads to adhesion failures and visible cracks. If you’re unsure about compatibility after a failure or the environment is extreme (high movement, outdoors, or temperature swings), don’t force it—consider a professional, especially for critical joints, to prevent costly damage. Stay disciplined, follow the checks, and you’ll finish with a durable, clean seal.
FAQ
Can I mix any paint with any sealant, or do I need to match types?
Match the paint type to the sealant’s instructions. Check the label or manufacturer instructions for paintability notes. If in doubt, ask at the store or check the product datasheet.
Can I paint over silicone sealant, and will it crack later?
Most silicone sealants don’t take paint well. They can peel or fail to adhere. If you must, use a paintable sealant or follow the manufacturer’s priming and painting steps exactly.
What surface prep helps prevent cracking after painting over sealants?
Make the surface clean, dry, and free of old peeling material. Remove loose dust and paint where needed. Prime only if the sealant and paint specify it, and follow the recommended curing times.
How should I test the combo before doing the whole project?
Do a small test patch with the same sealant and paint setup. Let it cure as instructed on the labels and inspect for adhesion and any cracking over time. If you see issues, adjust the product choice or prep steps per the manufacturer guidance.