
Introduction
The process of tooling caulk for paint involves several steps that need to be completed within specific timeframes to ensure a smooth, hidden joint. Understanding the timeline and duration of each step is crucial for achieving the best results.
In this guide, we’ll walk you through the entire process, breaking down each step by time so you can plan your project effectively and avoid common mistakes.
For the full guide, see How to Tool Caulk for Paint: Profiles That Hide, Don’t Highlight, the Joint.
The Complete Timeline: Tooling Caulk for Paint
Tooling caulk for paint requires careful timing to ensure a successful outcome. Here’s a detailed timeline outlining each step, including preparation, tooling, curing, and painting:
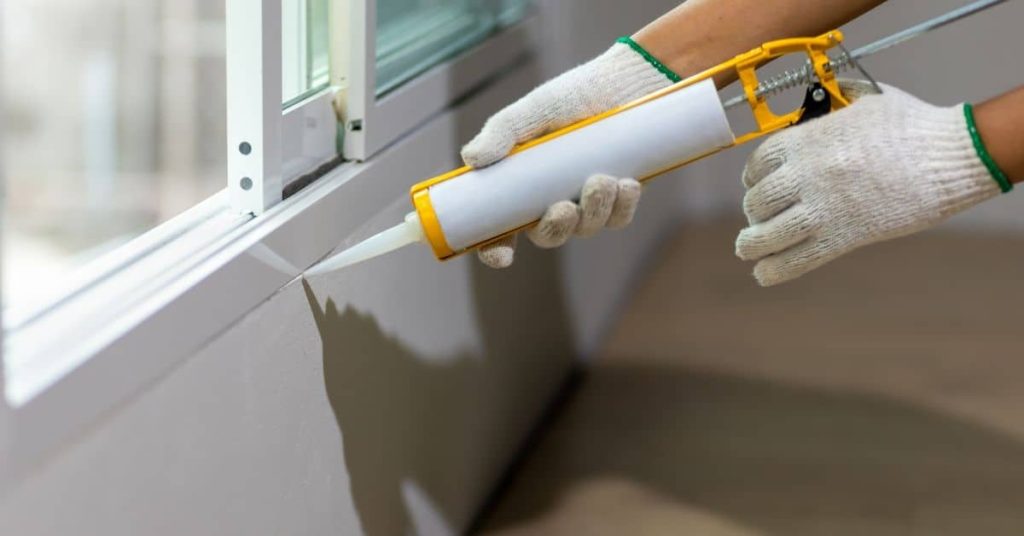
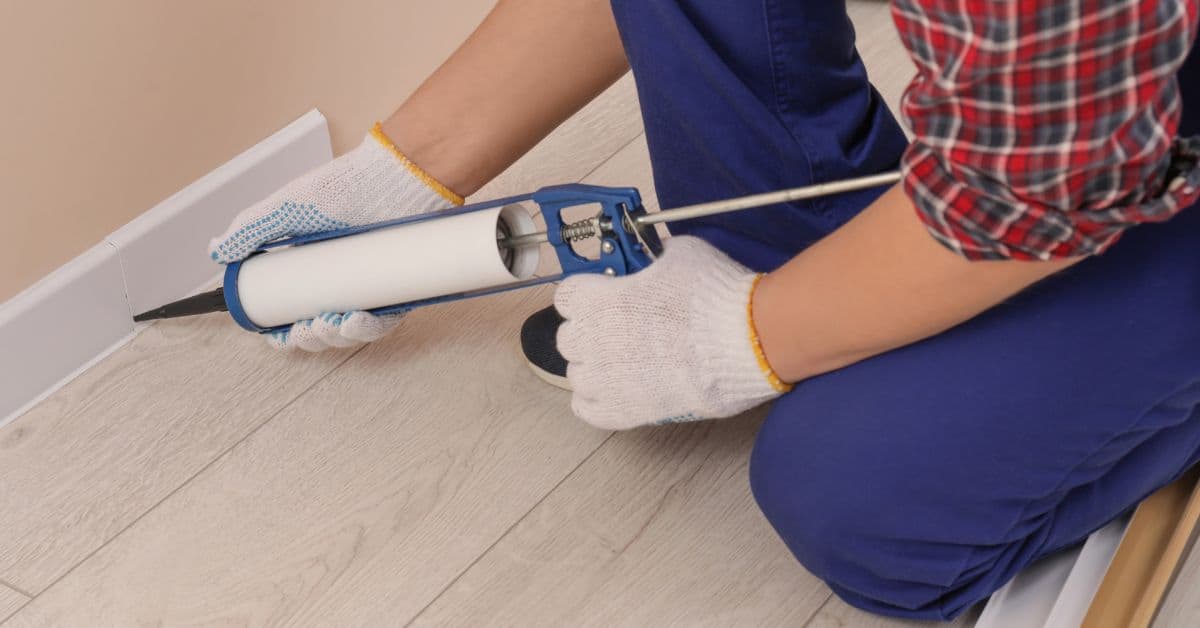
- Preparation (15-30 minutes): Clean the joint, apply painter’s tape, and cut the caulk nozzle.
- Caulk Application (2-5 minutes per linear foot): Apply a smooth bead of caulk along the joint using steady pressure.
- Tooling (1-3 minutes per linear foot): Tool the caulk immediately after application to create the desired profile. Work in manageable lengths to maintain consistency.
- Cleanup (5-10 minutes): Wipe away excess caulk and remove painter’s tape.
- Curing (24-72 hours): Allow the caulk to cure according to the manufacturer’s instructions. This step is crucial for ensuring proper adhesion and preventing paint from peeling or flaking.
- Priming & Painting (Variable): Once cured, prime the joint and apply paint as desired. The drying time for each coat will depend on the specific paint used.
By following this timeline and dedicating sufficient time to each step, you’ll achieve a professional-looking, hidden caulk joint that blends seamlessly with your painted surfaces.
Key takeaways
The preparation stage is essential as it sets the foundation for the entire project. Taking the time to clean the joint thoroughly and apply painter’s tape correctly will save you time and effort later on in the process.
- Match caulk to paint compatibility and test on a scrap joint first.
- Tool profiles should hide the joint line without creating glare.
- Clean joints thoroughly before tooling to improve adhesion and finish.
- Use masking or careful caulk bead control to avoid squeezing out.
- Allow recommended curing time by the product label and environmental conditions.
- Safety: wear gloves and ventilation; avoid skin contact with uncured caulk.
Table of Contents
- Introduction
- Key takeaways
- Purpose and When Tooling Matters
- Caulk Types and Paint Compatibility
- Tools and Materials Checklist
- Preparing the Joint for a Hidden Profile
- Tooling Profiles That Hide the Joint (with How-To)
- Step-by-Step Application and Timing Strategy
- Painting over Caulk Without Highlighting the Joint
- Troubleshooting Common Problems and Fixes
- Conclusion
- FAQ
Purpose and When Tooling Matters
Tooling caulk for paint aims to make the joint disappear under the finish by producing a smooth, paintable profile that matches the surrounding trim and wall surfaces. The goal is a blended edge that doesn’t catch light or shadow differently than the adjacent materials.
This matters most on visible interior transitions such as trim-to-drywall seams, baseboards, and window or door casings, where the eye follows lines and texture. Tackle tooling when you want a finished appearance rather than a highlighted gap, and check paint and caulk guidance if you’re unsure about compatibility with a specific substrate.
Visual vs. functional priorities
The goal of tooling caulk for paint is to create a smooth, paintable joint that blends with your trim and wall surfaces.
But remember: A joint that looks invisible might not be the best choice in terms of durability and movement allowance. You need to balance appearance with performance.
For instance, if you’re caulking a gap between a door casing and drywall, you want a profile that allows for some movement without cracking or breaking away from the surface.
So, while it’s important to create a joint that looks good, it’s equally important to ensure it can handle the demands of your specific project.
Caulk Types and Paint Compatibility
Different caulk chemistries—acrylic-latex, paintable silicone hybrids, and polyurethane—behave differently for adhesion, flexibility, and paintability. Each type has trade-offs: ease of tooling, sanding capability, and how paint sticks and moves with the joint.
Always read the product label or data sheet for the manufacturer’s paint window and substrate recommendations before using a specific caulk. If the label isn’t clear, consult the manufacturer instructions or technical support to confirm paint adhesion and drying behavior for your application.
Choosing paintable caulk for different substrates
When selecting a caulk, consider the substrate and its environment. For painted interior trim, acrylic latex caulks are your best bet. They’re water-based, easy to clean up, and stick well to common surfaces like wood and drywall.
For exterior trim, opt for paintable silicone hybrids or polyurethane caulks. These handle weather better than acrylics but may require a primer first. Check the label to be sure.
High-movement joints, like those around windows and doors, need flexible caulks. Silicone hybrids are great here, but again, check the label for recommended movement capability.
What to check on the product label
Before you start caulking, use this checklist to ensure you’ve got the right product for the job. It’ll save you time and prevent mistakes.
- Paintability: Make sure it says ‘paintable’ or ‘paintable after cure’.
- Recoat/Paint window: Check how long to wait before painting over the caulk.
- Cure time guidance: Know when the caulk is fully cured and ready for paint.
- Recommended substrates: Ensure your surface is on the list.
- Movement capability: For high-movement joints, check it can handle the expected movement.
- Weather resistance (exterior): If it’s for outdoor use, ensure it can withstand weather.
- Cleanup (interior): For interior jobs, water-based caulks are easier to clean up.
- Special instructions: Some caulks need a primer or special prep. Don’t skip these steps.
Quick rule: Always check the label before starting. It’s your guide to success.
Tools and Materials Checklist
Assemble a DIY-friendly kit: your chosen caulk cartridge, a caulk gun, a selection of profile tools or disposable smoothing sticks, painter’s tape, backer rod for deep gaps, a utility knife, rags, and a cleaner suitable for the surfaces. Include alternatives like a low-cost plastic spoon or your finger for smoothing and a pro-grade metal or shaped tool if you want crisper results.
Choose cleaners and primers per the caulk and substrate instructions; some chemistries require solvent wipe-downs while others need only soap and water. If unsure which consumables or tool shapes to use, check product labels or manufacturer guidance for recommended preparation and tooling aids.
Tooling implements and DIY substitutes
Before you start caulking, make sure you have the right tools to create smooth, professional-looking lines.
- Silicone tool: For wide gaps (1/4″ – 3/8″).
- Rounded plastic or wooden stick: Narrow gaps (less than 1/4″).
- Finger method: Tiny gaps, use a damp finger.
- Dental floss: For super narrow gaps (use as an alternative to wooden sticks).
- Popsicle stick: DIY substitute for wider gaps.
- Cotton swab: Tiny touch-ups, use the tip.
- Avoid: Using your fingers on wide gaps – it’s messy and ineffective.
Quick rule: Match tool size to gap width for best results.
Surface prep and cleaning supplies
Prepping surfaces properly ensures your caulk adheres well and looks great.
- Caulk remover: To clean old caulk before applying new.
- Degreaser: For greasy or oily surfaces (like kitchen backsplashes).
- Backer rod: For wide gaps, creates a base for caulking.
- Foam backer rod: Alternative for wider gaps, provides extra support.
- Painter’s tape: To create neat lines and protect surfaces.
- Blue painters tape: For delicate surfaces, less likely to damage paint.
- Manufacturer-approved cleaner: Use when required for best results.
Quick rule: Always clean and prep surfaces before caulking for a long-lasting seal.
Preparing the Joint for a Hidden Profile
Preparation starts with removing old caulk, peeling paint back where needed, and cleaning dust, grease, and loose material so the new joint bonds properly. For deep or wide gaps, insert an appropriately sized backer rod so the caulk sits at the correct depth and behaves as intended.
Match gap width to caulk depth per the product’s guidance so the tooling produces a flush profile that won’t stress or pond. If the label or technical sheet specifies a depth-to-width ratio, follow that; otherwise confirm with manufacturer instructions before filling large joints.
Masking and edge control for paint-ready lines
Before you start caulking, mask off the area to protect your painted surfaces. Use painter’s tape, but be careful – aggressive removal can pull fresh caulk or paint.
Press down firmly on the tape after applying it to ensure a good seal and prevent caulk from seeping underneath. For sharp transitions, use a straight edge like a putty knife or a caulking tool to press against the tape while you apply the caulk.
Pro tip: Use a level of tape that’s wider than your caulk bead to create a reservoir for any excess caulk. This helps keep lines neat and prevents drips.
When to use backer rod and why
A backer rod is a foam or rubber strip used in wide gaps to control caulk depth and reduce three-sided adhesion. It’s necessary when your gap is too wide for the caulk alone to fill.
Using a backer rod creates a compressible joint that can accommodate movement due to temperature changes or settling. This helps prevent cracking or pulling away of the caulk over time.
When to use: If your gap is wider than 1/4 inch, consider using a backer rod. For gaps up to 3/8 inch wide, choose a foam rod; for wider gaps, opt for a rubber or closed-cell foam rod.
Tooling Profiles That Hide the Joint (with How-To)
Pick a profile that minimizes shadow and texture difference: a shallow concave curve reduces shadowing, a flat/flush profile blends into adjacent planes, a tapered feather eases into painted textures, and a recessed roll hides edge contrast behind a small lip. Use the profile that suits the trim geometry and the direction of light in the room.
Form each profile with the matching tool or technique—concave tools for curves, a straightedge or putty knife for flush work, and a soft tapering motion for feathered edges—then inspect under typical lighting to ensure the joint disappears. If a profile doesn’t blend, try a different shape or retool after consulting product guidance on reworking time.
Concave (cove) profile
A concave, or cove, profile creates a shallow bead that reduces shadows and hides shrink lines. It’s great for horizontal surfaces where water can sit.
To create it, apply caulk then use your tool at a 45-degree angle. Apply light pressure, pulling towards you. This pushes the caulk into the joint, creating a cove.
Remember, less is more with this profile. Too much caulk or too steep an angle will create a visible bead.
Flush/feathered profile
A flush, feathered profile blends the caulk into both surfaces for a near-invisible finish. It’s perfect for trim with no significant texture difference.
Apply caulk then tool it using a light touch. Hold your tool at a 45-degree angle and pull it across the joint, feathering the caulk out onto both sides.
This profile is preferable when you want to minimize any visible caulk line. It’s less suitable for surfaces with significant texture or where water can sit.
Recessed/rolled profile for heavy paint buildup
A slight recess or roll prevents a caulk ridge that could grab paint sheen or create a visible bead. It’s useful with high-gloss paints and thick trim paint.
Apply caulk then tool it using a light touch. Hold your tool at a 90-degree angle to the surface, creating a slight recess in the caulk.
This profile is ideal when you want to minimize any visible caulk line and prevent paint buildup. It’s less suitable for surfaces where water can sit or where a more pronounced bead is needed.
Step-by-Step Application and Timing Strategy
Cut the nozzle to the bead size you need, apply a steady continuous bead, then tool immediately while the caulk is still workable to get the chosen profile. Keep a wet edge and consistent pressure so the bead lays down uniformly and you minimize ridges that will show through paint.
Check the product label for the skin-over and paint windows to time final cleanup and painting; if unsure, follow manufacturer instructions for exact timing. Look for signs such as tackiness, surface film formation, or manufacturer-recommended cues to know when the bead is ready for sanding, painting, or final inspection.
Step-by-Step Process
Follow this clear, numbered sequence to apply and time your caulking job like a pro.
- Preparation: Check the product label for safety instructions. Gather your tools and materials from the checklist earlier in this article.
- Cut the nozzle: Choose the right size for your desired profile (see ‘Tooling Profiles That Hide the Joint’).
- Main work: Apply a steady bead, using continuous motion to avoid blobs (see ‘Applying a controlled bead’).
- Tool immediately or wait: Decide based on product instructions and conditions (see ‘Wet tooling vs tooling after skin forms’).
- Cleanup: Remove excess caulk without marring paint (see ‘Cleanup and smoothing without marring paint’). Check your work for any missed spots or imperfections.
Applying a controlled bead
Laying a consistent caulk bead is key to achieving the desired profile. Here’s how:
Start by cutting the nozzle at an angle suitable for your chosen profile. A 45° cut works well for most applications.
Hold the caulk gun at a steady, controlled angle – around 45° to the surface. Apply even pressure as you move along the joint, maintaining a consistent distance from the wall or surface.
Tip: Keep your motion smooth and continuous to avoid creating blobs or uneven sections.
Wet tooling vs tooling after skin forms
Deciding when to tool your caulk depends on the product and conditions. Here are the pros, cons, and tips:
- Wet tooling: Pros – Cleaner lines; Cons – Can smear if not done carefully.
- Tooling after skin forms: Pros – Less smearing; Cons – May require more effort and leave visible tool marks.
- Deciding factor: Follow product instructions. Consider environmental conditions: wet tooling is better in cooler, drier conditions; waiting for skin formation works well in warmer, humid conditions.
- Tools: Use a caulk smoother or a damp cloth for wet tooling. For after-skin tooling, use a putty knife or a specialized tool like the ‘Caulk Smoother Pro’.
Cleanup and smoothing without marring paint
Removing excess caulk and getting crisp edges requires careful technique to protect adjacent paint:
For wet tooling, use a damp cloth or sponge to wipe away excess caulk immediately after application. Rinse the cloth frequently in clean water.
If you’ve waited for the skin to form, use a putty knife or caulk smoother to carefully scrape off excess caulk at a 45° angle. Be gentle to avoid marring the paint.
Solvents: For tough spots, use a solvent like denatured alcohol or acetone. Apply sparingly with a cloth, working quickly before it dries. Always test solvents on a small, hidden area first to ensure they don’t damage your paint or finish.
Painting over Caulk Without Highlighting the Joint
Paint film thickness, sheen, and application method all affect whether a caulk joint stands out; flatter sheens hide texture better, while high gloss emphasizes edges. Blend paint application across the trim and wall, using brushing or light rolling to match texture and avoid creating a visible ramp at the joint.
Confirm paint compatibility and recommended overcoat time from the caulk manufacturer before starting to ensure adhesion and minimize lift. If you don’t see the manufacturer guidance, test a small area and inspect under the room’s typical lighting before committing to the full paint pass.
Primer, adhesion, and sheen considerations
A primer is your first line of defense against a visible caulk joint. Use one to ensure uniform sheen and adhesion.
Sheen differences between the caulk and surrounding paint can make the joint stand out. Matching sheens minimizes contrast.
Tip: If you’re unsure, test a small area first before committing to the entire project.
Blending techniques when repainting trim and walls
The key to hiding caulk lines is creating a seamless transition between the joint and the surrounding surface.
For brushing, lightly feather out from the joint, barely touching the surface. Use long, smooth strokes.
For rolling, maintain a ‘W’ or ‘M’ pattern, slightly overlapping onto the caulked area to blend.
Troubleshooting Common Problems and Fixes
If you see ridges, shrinkage, cracking, paint lift, or gaps, diagnose whether the issue is tool technique, caulk selection, or surface prep and address accordingly. Small ridges can often be retooled or lightly sanded; shrinkage or adhesion failure usually requires removal and replacement with a compatible product.
Follow manufacturer instructions for reworking or full replacement intervals, and when in doubt check the product data sheet for approved corrective methods. For repeat failures, verify substrate compatibility, surface prep, and cure times with the manufacturer before repairing the joint.
Fixing shrink-back and visible seams
Shrink-back happens when caulk dries too fast, leaving a gap. Visible seams come from poor tooling. First, identify the issue.
For shrink-back: Reseal using compatible caulk. Apply a controlled bead, then wet-tool immediately to fill gaps and hide the joint.
For visible seams: Lightly sand the area with fine-grit paper, vacuum off dust. Reapply caulk, tooling carefully this time. Ensure adhesion by waiting for skin formation before painting.
Preventing paint delamination at the joint
Paint lift occurs due to incompatible caulk or painting too early. Here’s how to check and fix:
Test adhesion by gently tapping the joint with a screwdriver handle. If paint feels loose, use painter’s tape to lift off any flaking paint.
If it’s incompatible caulk: Remove all affected caulk, clean the area, and apply compatible caulk. Allow it to dry fully before painting.
If it’s premature painting: Wait for skin formation, then lightly sand, vacuum off dust, and repaint using blending techniques.
Conclusion
Tooling caulk for a hidden profile is about getting a clean, durable joint that won’t telegraph itself after you paint. Do it with attention to surface prep, choice of caulk, and a smooth, consistent tool pass so you avoid costly touchups and long-term failure. Safety and patience matter as much as technique, so move deliberate and ventilate the space.
First, choose the right caulk for the paint and surface, clean and dry the joint, mask the surrounding areas, test a small area, and then apply an even bead. Tool the profile in one steady pass, wipe away excess, allow proper curing, and then prime and paint with consistent strokes. Inspect the finished work and make any minor touch-ups before the final coat dries.
Common mistakes to avoid are skipping surface prep or masking, selecting a caulk that isn’t compatible with your paint, and trying to rush the tooling or painting. Don’t overwork or underwork the bead, don’t rush curing, and always work in a well-ventilated area with gloves and eye protection. If you’re unsure about movement, substrate, or the profile you need, test in a small area first and consider professional help if the joint is high-stress or shows ongoing movement.
When it makes sense to call a pro, it’s wise to step back if joints are cracking, shifting, or showing moisture, or if you’re unsure about material compatibility. Stay steady, follow the steps, and you’ll finish with a joint that hides the seam and holds up to paint for years to come.
FAQ
How do I know if the tooling profile will hide the joint and not highlight it after painting?
Look for a profile that introduces a soft edge and blends with the surrounding paint. Check manufacturer guidance or labeling on the caulk and tooling tools for recommended profiles for paintable finishes. If in doubt, do a small test in a hidden area before committing to the whole joint.
What are the most common mistakes that reveal the joint after painting, and how can I avoid them?
Avoid over-brushing or dragging paint over the edge of the caulk. Don’t skip letting the caulk cure properly or painting too soon. Use the right primer if required and apply paint evenly to prevent chasing or feathering around the profile.
Can I reuse leftover tooling tools or should I buy fresh ones for a hidden-profile job?
Reusing tools is fine if they’re clean and in good condition. Use a tool with a rounded edge or a dedicated slicker that matches the profile you’re aiming for. If the tool is dull or nicked, it’ll dull the line and may highlight the joint—replace or refresh as needed.
What should I check on the label or instructions if my joints aren’t behaving as expected?
Read the label for cure times, paint compatibility, and surface preparation tips. If something isn’t clear, compare with the manufacturer’s datasheet or speak with the retailer. Always follow local rules or installer instructions when in doubt.