
Introduction
The timeline of applying casein paint to lime plaster is crucial for a long-lasting, high-quality finish. Understanding the duration and sequence of each step ensures your project stays on track and avoids common pitfalls.
From surface preparation to final application, this guide walks you through the process, helping you allocate time effectively and achieve excellent results.
For the full guide, see Casein Paint Compatibility With Lime Plaster: Prep Steps That Prevent Flaking.
The Casein Paint on Lime Plaster Timeline: Step-by-Step
Preparation is key when working with casein paint and lime plaster. Here’s a detailed timeline to ensure your project stays on schedule:
- Week 1-2: Surface Assessment and Preparation
- Inspect the surface for loose material, salts, or moisture (15 minutes).
- Remove loose plaster using a stiff brush or grinder (30 minutes – 1 hour per wall).
- Allow the wall to fully dry (2-7 days, depending on humidity and temperature).
- Week 3: Priming and Repair
- Apply a suitable neutralizing or priming approach recommended by the paint maker or plaster supplier (15 minutes per wall).
- Repair any cracks or soft spots using a lime-compatible filler (15-30 minutes per repair).
- Week 4: Test Patch and Final Preparation
- Test a small patch of casein paint to check for flaking or adhesion issues (allow 24 hours to dry).
- Prepare the final mix of casein paint per label instructions, straining lumps if necessary (5-10 minutes).
- Week 5: Application and Finishing
- Apply the first coat of casein paint using a suitable brush or roller (30-60 minutes per wall).
- Allow the first coat to dry according to manufacturer instructions (usually 12-24 hours).
- Apply subsequent coats, sanding lightly between each if desired (repeat application and drying process).
Key takeaways
The timeline for preparing lime plaster surfaces significantly impacts the overall project duration. Allocating sufficient time for surface assessment, repair, priming, and drying ensures optimal adhesion and a durable finish.
- Test scrap areas for flaking before full project and plan repairs.
- Choose casein paint with proper binder and lime plaster compatibility.
- Clean dusty surfaces, repair cracks, and remove laitance to improve adhesion.
- Prime with recommended lime-friendly primer or lime plaster sealer if advised.
- Wear gloves and eye protection; lime dust and splashes irritate skin.
- Test adhesion on a small area; if flaking recalcitrant, pause.
Table of Contents
- Introduction
- Key takeaways
- Why Compatibility Matters: Casein Paint and Lime Plaster
- What Is Casein Paint? Types and Formulations
- Properties of Lime Plaster Relevant to Painting
- Assessing Surface Compatibility: Inspection and Tests
- Prep Steps to Prevent Flaking: Cleaning, Repairs, and Priming
- Mixing and Application Best Practices for Casein on Lime Plaster
- Common Mistakes, Troubleshooting, and Repair of Flaking
- Durability, Environmental, Safety, and Cost Considerations
- Conclusion
- FAQ
Why Compatibility Matters: Casein Paint and Lime Plaster
Incompatible finishes can cause flaking, poor adhesion, and trapped moisture that slowly damages breathable lime plaster and historic wall fabric. Those failures often start unseen, so checking substrate condition, moisture content, and running a small patch test are practical first steps.
Lime plaster needs breathable, non-silicone, and pH-friendly finishes; many acrylics, waxes, and non-breathable sealers will lock moisture in or resist a protein binder like casein. Choosing a compatible system preserves breathability, cuts maintenance, and improves long-term performance—so follow gentle cleaning, avoid non-breathable sealers, use lime-friendly primers or casein-compatible finishes, and control drying conditions.
Moisture and breathability considerations
Lime plaster is a breathable material, meaning it allows moisture to pass through. This is crucial for historic walls to prevent trapped moisture from causing damage.
Casein paint is also breathable, making it a good match for lime plaster. However, improper installation can trap moisture and lead to issues like flaking.
Proper preparation ensures the wall’s breathability isn’t compromised. This includes checking for and addressing any existing moisture problems before painting.
Chemical interactions and carbonation
Lime plaster is alkaline, with a pH around 12. This can react with certain paints, leading to poor adhesion or flaking.
Carbonation occurs when lime plaster reacts with CO2 in the air, forming a hard layer on the surface. Some paints may not bond well with this layer.
Using compatible primers or allowing sufficient time for carbonation can help ensure good adhesion. Avoid using additives or barriers that seal the wall and trap moisture.
What Is Casein Paint? Types and Formulations
Casein paint uses milk protein (casein) as the binder and has a long history as a breathable, matte finish compatible with mineral substrates like lime plaster. Modern ready-mix formulations often combine casein with stabilizers or modern binders; traditional artisan mixes are made on-site and behave differently in handling and durability.
Traditional preparations usually require on-site mixing and have shorter pot life and a different flexibility profile compared with factory-mixed products, while ready-mixes aim for consistency and added washability. When choosing, compare handling, adhesion, and breathability; consult the product label or technical data sheet for recommended substrates, and run a suitability checklist and patch test to avoid issues like cracking or color shifts.
Traditional casein (powder and reconstituted)
Traditional casein paints are made from powdered casein, a milk protein that’s been around for centuries. To use it, you’ll need to rehydrate the powder.
Here’s how: Mix one part casein with two parts water until smooth. Let it sit overnight to activate. Then, add more water to reach your desired consistency – usually 1:3 or 1:4.
Traditional casein has excellent adhesion and durability on lime plaster. It’s great for interior walls, providing a warm, matte finish. But it can be temperamental. If not mixed right, it might clump or separate.
Modern casein-based products and additives
Today’s casein paints are engineered for better performance. They often include stabilizers to prevent separation, pigments for color, and fungicides to resist mold.
Here’s what sets them apart: Modern caseins offer improved adhesion and water resistance compared to traditional ones. They’re easier to apply too – no overnight soaking needed.
But they’re not all created equal. Some are more breathable than others, which matters when painting on lime plaster. Always check the specs before you buy.
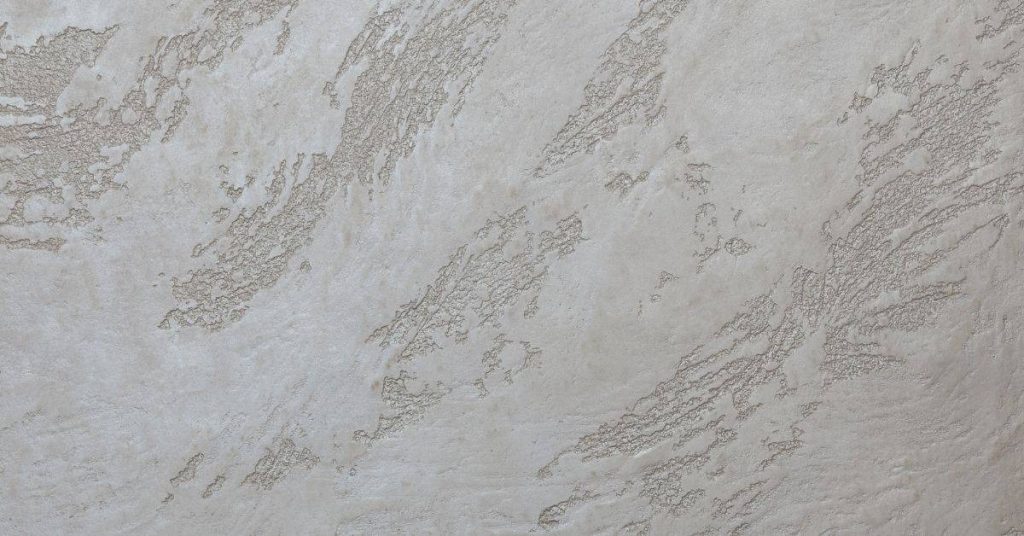
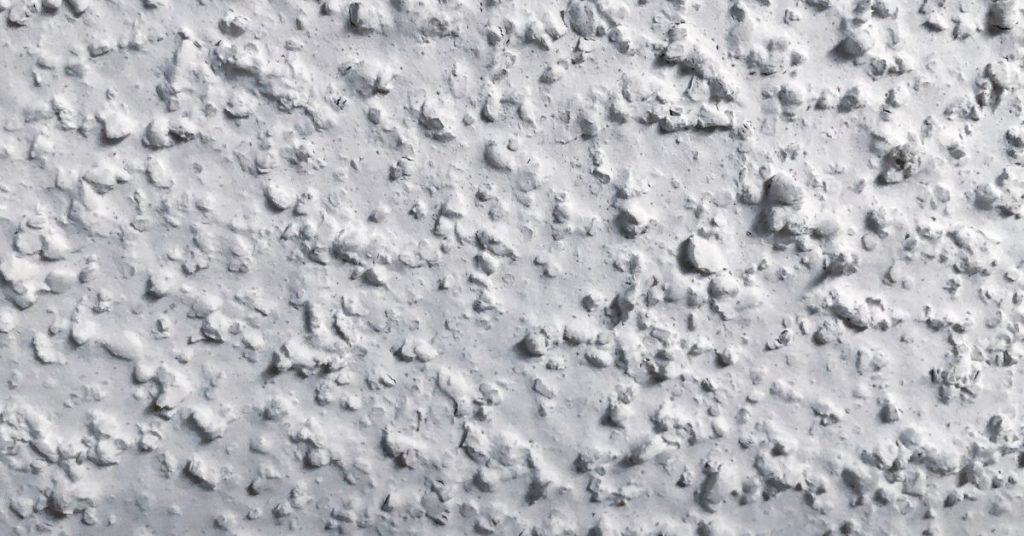
Properties of Lime Plaster Relevant to Painting
Lime plaster is porous and breathable with capillary pathways that move moisture; that porosity dictates how quickly a finish will dry and how well a casein binder will key into the surface. The plaster’s alkalinity (verify typical pH in product data or lab tests) can affect protein binders, so use pH-appropriate primers or barriers when required.
Curing (initial set) and carbonation (longer-term chemical change) are different stages—painting too early risks adhesion failures as the substrate continues to change. Test moisture, check for salts or efflorescence, and assess surface texture; these guide primer selection and film build so you avoid trapped moisture, flaking, or uneven appearance.
Porosity, alkalinity, and moisture movement
Lime plaster is highly porous. Those tiny pores allow for breathability but also absorb moisture. This can lead to issues with paint adhesion if not managed properly.
Alkalinity is another factor. Lime plaster has a high pH, typically around 12-13. This can affect casein binders in your paint, causing them to break down over time. A primer or barrier designed for alkaline surfaces can help prevent this.
It’s crucial to let the plaster dry and carbonate before painting. Carbonation is when the lime reacts with CO2 in the air to form a stable, non-alkaline surface. Rushing this process can lead to flaking later on.
Surface condition: new versus aged lime plaster
Newly applied lime plaster needs time to dry and carbonate before painting. Skim-coated or rough surfaces may require additional preparation, like sanding, to ensure a smooth finish.
Older lime plaster that’s already been painted might have a layer of carbonation on its surface. This is good as it’s no longer alkaline. However, if the old paint is flaking off, you’ll need to remove it first. If not, new paint won’t adhere properly.
Re-plastering over an existing lime plaster surface? Make sure the old surface is sound and clean before applying the new layer. Allow the new plaster to dry and carbonate before painting.
Assessing Surface Compatibility: Inspection and Tests
Start by confirming the plaster is lime-based and sound—look for loose render, cement-rich patches, gypsum skim, or salt bloom that will cause adhesion problems. Check surface moisture with a meter and do a small tack/ghosting test so you know the wall can dry and has suitable suction for casein paint.
Clean small areas and perform a patch adhesion test with your intended casein system on a prepared spot; evaluate for peeling or blistering after the manufacturer-recommended cure period. Record results, note any treatments needed (alkali-resistant primer, extra drying), and have a fallback plan if the test shows incompatibility.
Visual checkpoints and simple moisture checks
Before you start painting, use this checklist to visually inspect your lime plaster surface for any issues that could hinder adhesion.
- Loose powder: Gently rub the surface with a damp cloth. If it feels gritty or leaves a mark, there’s loose render.
- Efflorescence and salt blooms: Look for white, crystalline deposits on the surface. These can affect adhesion.
- Visible damp: Check for any wet patches or dark stains that indicate moisture.
- Moisture meter reading: Use a moisture meter to confirm dryness. Readings over 15-20% could mean the wall isn’t dry enough.
- Hygroscopic test (tack/ghosting): Apply a small piece of plastic film, leave it for 24 hours, then remove. If it sticks or leaves residue, the suction is too high.
- Cracks and holes: Inspect for any cracks or holes that need filling before painting.
- Previous paint layers: Check if there are any old paint layers. These might peel off with age, affecting adhesion.
- Alkalinity test (optional): Use a pH indicator to check alkalinity. Lime plaster should read around 10-12.
Quick rule: Always use visual checks alongside moisture meter readings for accurate results.
Pull-off adhesion and lime saturation test
Before applying casein paint, perform these simple tests to ensure your lime plaster is ready for painting and won’t peel off.
- Adhesion test: Apply a small patch of casein paint (around 50x50cm), let it dry, then try to pull off a corner with adhesive tape. If it peels, adhesion isn’t good enough.
- Scratch test: Use a sharp tool to scratch the surface. If the plaster comes away easily, it’s not well-bound or too soft.
- Saturation test: Apply water to the surface and let it soak in. If the plaster darkens evenly, it’s adequately saturated; if it stays light, it might be under-saturated.
- Casein paint compatibility: Follow manufacturer guidelines for adhesion tests using casein paint specifically.
- Consult a conservator (if needed): If test results are uncertain or inconclusive, consider consulting a professional conservator.
Quick rule: Always perform these tests on a small area first to avoid wasting materials and time.
Prep Steps to Prevent Flaking: Cleaning, Repairs, and Priming
Verify the plaster is sound and free of oils, waxes, silicone, or non-breathable coatings that block adhesion; note any moisture or efflorescence and resolve those before cleaning. Begin with dry cleaning—soft brushing, vacuuming with a HEPA tool—and follow localized damp wiping with a mild, breathable cleaner if necessary, taking care not to over-wet the plaster.
Consolidate and repair loose areas with lime-putty or lime-based fillers, feathering edges to smooth absorption differences, and document repairs. After full drying, apply a breathable, compatible primer or bonding coat recommended for lime and casein, keeping application thin and allowing the surface to stabilize before the finish coats.
Cleaning, de-dusting, and removing loose lime
Start by gently brushing the surface with a soft-bristle brush to remove dust and loose particles. Use a vacuum with a HEPA filter to suck up any remaining debris.
Never use aggressive scraping methods that could damage the delicate lime plaster surface.
If there are stubborn areas, dampen a clean cloth with water and gently wipe. Avoid soaking the plaster as it can cause new flakes to form. Ensure the area dries completely before moving on to repairs.
Filling cracks, consolidating, and leveling
Inspect the surface for cracks or delaminated patches. Use a lime-putty or lime-based filler to consolidate friable areas and fill cracks. Ensure you match the color and texture of the existing plaster.
Do not use cement-based products as they can cause damage due to their alkalinity and lack of breathability.
Feather the edges of repairs to create a uniform substrate. Document all repairs for future maintenance reference.
Tools and materials checklist (primers, sealers, PPE)
Use this checklist before starting your prep work to ensure you have everything needed.
- Soft-bristle brush: For gentle cleaning. Hard bristles can damage the surface.
- HEPA vacuum: To remove fine dust and debris. Regular vacuums may not capture all particles.
- Lime-putty or lime-based filler: For consolidating and filling repairs. Match color and texture to existing plaster.
- Breathable primer: Suitable for lime plaster and casein paint. Apply after drying and before painting.
- Safety glasses: Protect eyes from dust and debris during cleaning and repair work.
- Dust mask: To protect against inhaling fine particles while brushing and vacuuming.
- Gloves: For handling lime-putty and other materials to prevent skin irritation.
- Drop cloths or plastic sheets: To protect floors and surrounding areas from dust and debris.
Quick rule: Always ensure the area is well-ventilated during prep work to avoid inhaling harmful particles.
Mixing and Application Best Practices for Casein on Lime Plaster
Follow the product label or technical data sheet for mixing ratios, water temperature, and sequence when reconstituting casein to get a stable emulsion; watch for lumps and signs the batch has gone off. Prepare the plaster—verify dryness, clean properly, and ensure primer compatibility—before applying any finish.
Apply casein with brush, roller, or spray as the product instructions indicate, allowing appropriate drying between coats and avoiding rapid drying conditions that cause surface cracking. Control temperature, humidity, and ventilation during work, run a small full-process test patch, and adjust film thickness and timing based on adhesion and appearance.
Mixing, hydration, and test patches
Always follow your casein paint manufacturer’s mixing instructions. They know their product best.
Hydration time: Be patient. Casein needs time to absorb water fully. Rushing this step can lead to lumps and poor adhesion.
Test patches: Before diving in, do a small test patch on an inconspicuous area. This lets you check for any issues with adhesion or finish. It’s a small effort that could save you big headaches later.
Application techniques: tools, number of coats, and drying conditions
Choosing the right tool for the job is crucial. Here are your options:
- Brushing: Cheap, easy to use. Good for small areas or detailed work.
- Rolling: Faster coverage. Ideal for large, flat surfaces. Rentable rollers come in various sizes and nap lengths.
- Spraying: Fastest method. Requires a sprayer (rentable) and proper ventilation. Not recommended for DIY due to overspray and waste.
Coats: Lime plaster is porous. Build thin, compatible coats. One thick coat can lead to early drying cracks.
Drying conditions: Casein needs dry, draft-free conditions to cure properly. No fans or open windows until it’s fully cured.
Common Mistakes, Troubleshooting, and Repair of Flaking
Typical causes of flaking include moisture ingress, salt activity, poor surface prep, and previously applied non-breathable coatings; diagnosing correctly starts with moisture checks, absorption tests, and mapping flaky areas. Don’t skip cure times or use incompatible primers—these common missteps often lead to repeat failures.
For repairs, remove loose material safely, feather edges, patch with compatible lime-putty or lime plaster, allow proper curing, and re-prime with a breathable, compatible primer before repainting. If flaking persists, re-evaluate moisture sources and substrate repairs, and repeat controlled test patches before full-scale recoating.
Typical errors to avoid (overwatering, wrong primer, poor timing)
Here are some common mistakes that can lead to flaking when painting casein on lime plaster. Avoid these for a successful finish.
- Over-diluting paint: This reduces adhesion and increases the risk of flaking. Always follow the manufacturer’s instructions for mixing.
- Using incompatible primers: Non-breathable or non-compatible primers can trap moisture, leading to flaking. Stick with breathable, lime-compatible primers.
- Painting too soon after plastering: Lime plaster needs time to cure and dry. Painting before it’s ready can cause flaking. Wait at least 28 days for best results.
- Painting in high humidity: High moisture levels in the air can affect adhesion and cause flaking. Keep relative humidity below 60% during application.
Avoid these common pitfalls to ensure your casein paint job on lime plaster lasts.
Diagnosing flaking and step-by-step repair
Follow this sequence to identify the cause of flaking, remove failed paint, consolidate the substrate, re-test adhesion, and reapply using compatible materials.
- Remove loose material: Gently scrape or brush off any loose paint. Be careful not to damage the underlying plaster.
- Identify affected areas: Map out where flaking is occurring to prioritize repairs.
- Test substrate porosity/absorption: Use a damp sponge test to check if the plaster is still absorbing moisture, indicating it may need further curing or consolidation.
- Re-test adhesion: Perform a pull-off adhesion test using adhesive tape to ensure the remaining paint has good bond strength.
- Consolidate and patch: Apply lime-putty or lime plaster to consolidate weak areas and fill any cracks or holes. Allow it to cure properly.
- Prime with compatible primer: Use a breathable, lime-compatible primer to seal the surface and improve adhesion of the new paint layer.
- Spot test casein paint: Before repainting, conduct a spot test in an inconspicuous area to ensure compatibility and proper curing.
By following this sequence, you’ll be able to diagnose and repair flaking issues effectively.
Durability, Environmental, Safety, and Cost Considerations
Durability depends heavily on surface prep, substrate porosity, and product compatibility; well-prepared lime plaster with a breathable casein finish shows better long-term behavior and lower maintenance than poorly prepared systems. Natural paints can offer lower VOCs and improved indoor air quality, but check product data for VOC and lifecycle information before deciding.
Use PPE and control dust when cutting or repairing lime plaster, ensure ventilation during mixing and application, and manage waste and wash water per local guidance. To compare costs without prices, estimate using coverage rates, number of coats, and likely maintenance intervals and decide whether DIY or a pro makes sense for your scope and risk tolerance.
Longevity, maintenance, and expected performance
Casein paint on lime plaster can last up to a decade with proper care. Regular touch-ups and cleaning are key. Signs of wear include flaking or chalking.
Factors extending service life include quality materials, correct application, and minimal exposure to harsh conditions.
Repainting may be needed every 7-10 years, depending on usage and climate.
Health, safety, and environmental profile
Wear gloves, goggles, and a respirator when sanding or repairing plaster. Ventilate the area.
Casein paint is low VOC, promoting better indoor air quality. Lime plaster also regulates humidity naturally.
Proper disposal of materials follows local regulations to minimize environmental impact.
Cost comparison: traditional vs modern options and procurement tips
Compare coverage rates, number of coats, and long-term maintenance costs. Check supplier data sheets for material volume.
Labor costs vary. DIY application saves money but may impact longevity if not done correctly.
Get quotes from multiple suppliers for like-for-like products to ensure best value.
Conclusion
With lime plaster, the key to long-lasting casein paint is disciplined prep, careful test work, and honest evaluation of surface conditions. When you respect compatibility and take small, controlled steps, you protect your wall, your wallet, and the appearance you want to keep.
Start by inspecting a representative spot, clean thoroughly, patch as needed, and apply a compatible primer in a thin, even coat. Then mix and apply per the guidance, testing a discreet patch first and watching for signs of lag or flaking before moving to the full area. Do the work in a dry, temperate window and let each layer cure fully before the next, using a clean, damp wipe between steps if required by your prep method.
Common mistakes to avoid are skipping a compatibility check, skipping repairs in damaged plaster, and rushing the drying or curing times. Safety rules: wear a dust mask when cleaning dusty surfaces, protect nearby finishes, and don’t over-wet lime plaster or casein primer. If the surface is severely damaged, or you see persistent flaking after a planned test area, stop and consider professional help—fixing compatibility issues later can be costly. When you follow these steps and stay cautious, you’ll finish with a durable, even finish you can be proud of.
FAQ
What is lime paint and how does it differ from casein paint?
Lime paint is a mineral-based coating that hardens as lime slakes and water evaporates. Casein paint is a protein-based pigment binder made from milk; it dries to a flexible film. They act differently on lime plaster, so choose the one that suits your surface and climate and follow the manufacturer instructions.
Traditional lime paint vs. modern lime paint formulations—what should I know?
Traditional lime paint uses lime putty and natural pigments. Modern formulations may add binders or acrylics for easier workability and faster finish. Read the label to understand compatibility with lime plaster and any cautions for breathable finishes.
What surfaces are suitable for lime paint and limewash on a DIY project?
Lime paint and limewash work best on well-breathing, sound lime plaster or lime-based renders. They’re not ideal on sealed or hard, nonporous surfaces. Check the substrate condition and ensure porosity before applying.
What safety steps should I take when applying casein paint or lime-based finishes?
Wear basic eye and skin protection; work in a well-ventilated area. Avoid ingestion and follow manufacturer instructions for mixing and thinning. If you’re unsure about the surface, test a small patch and review product labels or data sheets before full application.