
Introduction
Burnishing is the shiny marring that happens when flat or matte paint gets rubbed, leaving a reflective or lighter streak on the surface. It often shows up after cleaning or heavy contact with shoes, furniture, or cleaning tools. The remedy starts with gentler cleaning and avoiding aggressive scrubbing on the finished paint.
Preventing burnish means using soft cloths or microfiber, avoiding sharp brushes, and limiting abrasive cleaners. If burnishing has occurred, do a light touch-up with the same flat paint using a clean brush or roller and follow the product’s curing and recoating guidance. Check the product label or manufacturer instructions for compatible cleaners and techniques, and consider mild polishing or a compatible matte topcoat option if the guidance allows.
Key takeaways
- Burnishing defined as marring where the paint surface becomes shiny from friction.
- Abrasion from cleaning or heavy traffic accelerates burnishing on flat paints.
- Prevent by thorough surface prep and using gentle cleaners with soft pads.
- Choose appropriate sheen and quality paint to reduce susceptibility.
- Safely remove existing burnish with light, circular motions and non-abrasive cloths.
- Wear eye protection and avoid aggressive scrubbing to prevent wall damage.
Table of Contents
- Introduction
- Key takeaways
- What Is Burnishing (Marring) and How to Identify It
- Primary Causes of Burnishing and Contributing Factors
- How Sheen and Paint Quality Impact Susceptibility
- Surface Preparation and Application Practices to Prevent Burnishing
- Cleaning and Reducing Existing Burnish Marks Safely
- DIY Techniques to Reduce Visible Burnishing Without Full Repaint
- Tools, Materials, and Cleaning Agents Compared
- Long-Term Maintenance, Common Homeowner Mistakes, and When to Call a Pro
- Conclusion
- FAQ
What Is Burnishing (Marring) and How to Identify It
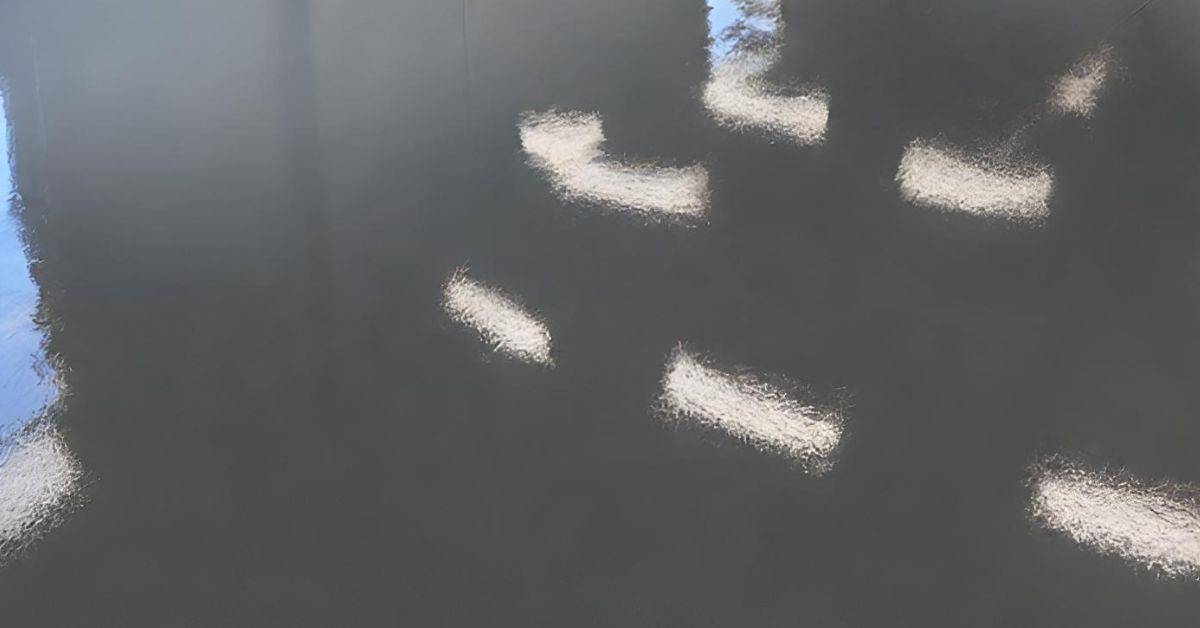
Burnishing, or marring, is a shiny rub mark that appears on flat or low-sheen paint when the surface is rubbed or abraded. It looks like a smooth, reflective streak that doesn’t match the surrounding texture. Flat finishes are typically more prone to showing this issue than glossier ones.
Distinguish burnishing from dirt, gloss variation, or contamination by looking for consistent shine along a defined path and a smooth, reflective area where the glaze feels slick to touch. Run a light drag test with a clean finger to see if the mark remains or wipes away with surface residue. Visual cues and a quick touch check help determine if the surface is truly marred or simply has surface contaminate that can be cleaned.
Visual characteristics
Burnishing, also known as marring, appears on flat or low-sheen paints as localized polished patches. These patches are usually small and scattered, but can sometimes cover larger areas. The sheen increases where the surface has been rubbed, giving it a glossy look compared to the surrounding area.
To spot them easily, change your lighting angle. Shiny rub marks will catch the light differently, making them stand out. Think of it like when you see shiny spots on a car’s paint job from far away – that’s burnishing in action.
Remember: Burnished areas look polished and glossy, unlike dirt or contamination which can be wiped off.
How burnishing differs from other paint failures
Burnishing isn’t the only way a paint job can go wrong. Here’s how it differs from some common finish failures:
Flashing: This happens when paint dries too fast, leaving visible streaks or lines. It looks different from burnishing – think of it as stripes instead of shiny patches.
Peeling: Peeling is easy to spot. Paint starts lifting off the surface in large sheets or small curls. Burnishing doesn’t cause paint to lift; it just makes it look shiny where rubbed.
Scuffing: Scuffs are usually larger and more random than burnished marks. They’re caused by friction, like when something heavy is dragged across the surface. Burnishing is more localized and often happens in high-traffic areas.
Primary Causes of Burnishing and Contributing Factors
Burnishing results from a combination of abrasion, cleaning practices, and frequent contact with the surface. It occurs when the protective film is softened or pressure is applied that smooths the top layer. This is more likely on finishes with lower sheen and softer film hardness.
Common scenarios include high-traffic zones, improper cleaners, and moisture exposure that loosens surface grip. Aged paint films or inadequate surface preparation can also raise the risk of shiny rub marks forming after contact. Documenting cleaning history and use helps identify the sequence of events that led to the issue.
Abrasion, Traffic, and Cleaning Interactions
Repeated rubbing on flat paint causes burnishing. This happens when you vacuum, scrub, or wipe surfaces.
High-traffic zones are at risk. Think hallways, kitchen counters, or doors. Every time something brushes against the paint, it’s abraded.
Cleaning with improper tools or harsh chemicals can speed up burnishing. Be gentle when cleaning painted surfaces.
Surface Contamination and Uneven Porosity
Dust, oils, or moisture on the surface before painting can cause uneven film formation. This leads to shiny spots later on.
Variable substrate absorption also plays a role. Some areas might absorb paint more than others, leading to inconsistent sheen levels.
Pro tip: Ensure your surface is clean and dry before painting for best results.
Paint Formulation and Sheen Level Role
Low-quality flat paints are more prone to burnishing. They might not have the right binders or pigments for durability.
Certain binders, like some acrylics, can be softer and more susceptible to burnishing. Check your paint’s ingredients if you’re having issues.
Sheen level affects mark visibility. Even a slight sheen increase makes marks more noticeable. That’s why flat paints are designed to minimize reflection.
How Sheen and Paint Quality Impact Susceptibility
Sheen level influences hardness and wear resistance, with matte finishes often showing more rub marks than glossier options. Practical examples include how a dull surface may require more careful handling to avoid shiny rubs. Understanding this trade-off helps set expectations for appearance and durability.
Film hardness and binder chemistry tailor resistance to scuffs. Different binders respond to abrasion and cleaning in distinct ways, and this interacts with flat or matte appearances. Choosing the right combination depends on where the paint will live and how it will be used.
Sheen levels explained (flat vs eggshell vs satin)
Sheen level is the first factor affecting burnish resistance. It’s how shiny or matte a paint finish appears.
Flat paints have the least sheen, making them ideal for hiding imperfections but also most susceptible to burnishing. They’re best for low-traffic areas like bedrooms and living rooms.
Eggshell and satin finishes have more sheen, reducing visible burnish marks. Eggshell is great for kitchens and bathrooms, while satin works well in high-traffic zones like hallways and entryways. They’re easier to clean but show imperfections more.
Remember: Higher sheen means less matte aesthetic but better durability and cleanability.
Binder chemistry and additives that improve resistance
The paint’s binder – the film-forming component – also impacts burnish resistance. Acrylic binders are durable, stain-resistant, and suitable for most interiors.
Epoxy binders offer excellent durability but can be too hard, making them prone to cracking. Alkyd blends combine oil and acrylic for good durability and flow, but they’re not as resistant to scuffs or moisture.
Scuff-resistant additives like silicone or wax enhance burnish resistance without sacrificing appearance. They’re often found in high-quality paints but may affect tactile feel.
Tip: Look for paints with ‘scuff-resistant’ or ‘washable’ on the label to ensure better durability.
Practical selection advice
For high-traffic zones like kitchens and bathrooms, opt for eggshell or satin finishes. They’re more resistant to burnishing and easier to clean.
Consider semi-gloss paints for trim work. They’re highly durable and can withstand frequent cleaning. Scuff-resistant interior options are ideal for high-traffic areas with furniture or heavy foot traffic.
Think about your use-case: Mattes hide imperfections best, while higher sheens show off your walls’ smoothness but require more care to maintain.
Key: Balance aesthetics and durability based on the room’s function and expected wear.
Surface Preparation and Application Practices to Prevent Burnishing
Critical prep involves a clean, dry, dust-free substrate with a known gloss level and porosity. Check for previous coatings or contaminants that could hinder adhesion before starting. Correct preparation reduces the likelihood of future burnish marks.
Cleaning, degreasing, and de-glossing steps set the stage for strong film adhesion. Sanding or abrading should be controlled to avoid raising shine in high-gloss finishes. Primer choice and proper film build are key to balancing sheen and durability, along with consistent curing conditions.
Proper surface cleaning and de-glossing
Before applying any finish, your surface needs to be clean, dry, and dust-free. But it’s not just about removing dirt – you’ve got to tackle waxes, oils, and residues too.
Mechanical cleaning is the first step. Use a scraper or wire brush to remove any loose material. Then, apply a solvent or household degreaser. Let it soak for a bit, then scrub with a stiff-bristle brush.
Rinse thoroughly with clean water and let it dry completely. If you’re dealing with glossy patches, you might need to de-gloss them. Lightly sand or use a chemical de-glosser to dull the shine and promote better adhesion.
Priming and equalizing porosity
A good primer does more than just seal the surface. It helps equalize porosity, ensuring your paint absorbs evenly and doesn’t leave shiny patches.
Choose a primer that’s suitable for your substrate and existing paint. If you’re unsure, ask at your local hardware store or consult the paint manufacturer’s guidelines.
Apply the primer according to the manufacturer’s instructions, usually with a roller or brush. Let it dry for the recommended time before recoating. The primer film thickness is crucial – too thin, and it won’t do its job; too thick, and you’ll have issues later on.
Application technique and environmental considerations
Applying paint isn’t just about slapping it on the wall. There’s a right way to do it, especially if you want to avoid burnishing.
Use consistent strokes, working in small sections at a time. Don’t overwork the paint – this can lead to uneven absorption and shine. Follow the manufacturer’s guidelines for target dry film thickness. Too thin, and you’ll have issues; too thick, and you risk burnishing.
Also, keep an eye on the weather. Paint doesn’t cure well in extreme temperatures or high humidity. Make sure your working conditions are within the recommended range.
Cleaning and Reducing Existing Burnish Marks Safely
Burnish/marring on flat paint commonly appears in areas of frequent contact or moisture exposure. Knowing where it tends to occur helps readers anticipate and plan. Expect to see a shiny patch where the film has been stressed or smoothed.
Begin with a quick assessment: inspect gloss impact and test substrate sensitivity before cleaners. Always test cleaners in an inconspicuous area first and document the results. Learn to stop at the first signs of wear to avoid making the issue worse.
Mild cleaning methods
Start with the gentlest methods to remove grime and reduce shine from flat paint. We want to avoid making marks worse, so take it slow.
Use a soft, dry microfiber cloth or non-abrasive sponge to dust off loose dirt and debris. Then, dampen the cloth with mild soap and water. Gently wipe in one direction, using minimal pressure.
Why these methods first? They’re least likely to cause further damage or increase gloss. Plus, they work well on everyday dirt and grease.
Targeted removal and stain-treating
If grime persists after mild cleaning, it’s time for some targeted action. But remember, we’re still being gentle.
For light stains, use a mild degreaser or paint-safe sugar soap. Apply with a soft cloth, let it sit briefly, then wipe off. Rinse thoroughly to remove any residue that could attract more dirt.
For tougher spots, you can try diluted isopropyl alcohol. But be careful – too much can damage the paint. Always test first in an inconspicuous area.
When cleaning won’t help—next steps
Sometimes, no matter how gently you clean, those burnish marks just won’t budge. It’s time to consider other options.
If the surface is in good condition but the gloss is uneven, try de-glossing. This involves lightly sanding with fine-grit paper and re-coating with a flat paint. It reduces shine without removing much material.
For severe cases or damaged surfaces, you might need to spot-sand and repaint. But be careful – aggressive sanding can worsen marks and damage the surface.
DIY Techniques to Reduce Visible Burnishing Without Full Repaint
Visible burnishing on flat paint is often characterized by shine variation and localized wear. Use quick diagnostics to confirm whether the area is simply glossy or genuinely worn. This helps determine the right approach without unnecessary work.
Light scuffing with a gentle pad can dull excess shine without removing film. Touch-up blending should feather edges and use compatible products in small amounts. Finish restorers can reduce glare if used carefully, keeping in mind their effect on texture and appearance.
De-glossing and Light Abrasion Technique
Visible burnishing on flat paint shows up as shiny spots, scuff marks, or texture changes. It’s not just honest wear.
Gently de-gloss: Use a soft pad with low-abrasive material, like 220-grit sandpaper or a green scrubbing pad. Apply controlled pressure to dull the shine without removing film.
After light abrasion, wipe clean with a damp cloth. Blend edges carefully to avoid sharp transitions and maintain overall appearance.
Spot Repair and Feathering
For small areas, clean first: Use mild soap and water, or a touch of rubbing alcohol to remove dirt.
Prime: Apply a thin coat of primer to seal the surface and even out porosity. Let it dry.
Spot-recoat: Match your paint sheen level exactly. Use a small brush or roller, applying minimal product. Feather edges by blending into existing paint for a seamless finish.
Restorative Products and Temporary Fixes
Finish-restoring wipes or mild abrasive pads can help reduce glare. Use them gently, following package instructions. They’re short- to medium-term remedies.
Protective coatings like satin-finish glaze can also help. Apply thinly, avoiding new hotspots. Remember, these aren’t permanent solutions and may need reapplication.
Caution: Always test on a small patch first to ensure compatibility with your paint and desired results.
Tools, Materials, and Cleaning Agents Compared
Keep a basic kit ready for burnish-proofed surfaces with soft pads, microfiber, and simple tools. Include a means to protect surrounding areas and proper PPE for safety. Choose tools that won’t scratch or add texture to the finish.
Compare finishes by sheen range and compatibility with topcoats or sealants. Review cleaners and pre-treatments recommended by paint labels and manufacturer instructions. Note odor, curing impact, and residue as you plan maintenance steps.
Tools and abrasives checklist
Before you start, make sure you have these non-destructive tools and application aids on hand to prevent burnishing.
- Microfiber cloths: Gentle yet effective for dusting and light cleaning. Skip them and you might end up with scratches.
- Soft sponges: Useful for applying cleaners or sealants without leaving marks. Don’t use harsh ones, they can scratch the paint.
- Fine sanding pads (220-320 grit): For light de-glossing when needed. Too coarse and you’ll damage the finish.
- Variable-speed dual-action polisher or hand-polish block: To buff out marks gently. Wrong speed can cause swirls.
- Painter’s tape: Protects edges from cleaner residue. Without it, you might end up with a messy line.
- Drop cloths: Covers the floor to prevent accidental damage or staining. Skip this and you could ruin your flooring.
- Gloves: Essential for protecting hands from cleaners. No gloves mean exposed skin can get irritated or damaged.
- Eye protection: Shields eyes from dust, debris, or cleaner splashes. Don’t risk eye injury by skipping this.
- Respirator/ventilation: Crucial for protecting against fumes from cleaners and sealants. Without it, you might inhale harmful chemicals.
Quick rule: Always have these tools ready to minimize damage and maximize results.
Cleaning agents: gentle to stronger options
Choosing the right cleaner is crucial. Start with gentler options and move to stronger ones if needed, always rinsing afterwards.
All-purpose cleaners: Mild detergents mixed with water are safe for most flat surfaces. They’re cheap but may not tackle tough marks.
Paint-safe sugar soap: A mild abrasive designed for painted surfaces. It’s stronger than all-purpose cleaners but won’t dull the finish if used correctly.
Commercial paint cleaners: These are strongest, tackling heavy residue and stains. They’re effective but can be harsh if not used carefully. Always spot test first to avoid damaging your paint.
Safety precautions and PPE
Your safety is paramount when cleaning painted surfaces. Follow these guidelines:
Adequate ventilation: Ensure the area is well-ventilated to minimize fume exposure. Without it, you could feel dizzy or sick.
Gloves and eye protection: Always wear gloves to protect your hands from chemicals. Eye protection shields against dust and cleaner splashes. Don’t skip these; they’re essential for safety.
Read product labels: Understand what you’re working with. Labels tell you how to use, store, and dispose of cleaners safely. Ignoring them can lead to accidents or improper disposal.
Proper storage and disposal: Store cleaners in their original containers, away from heat sources and out of reach of children and pets. Dispose of residues responsibly, following local guidelines to protect the environment.
Long-Term Maintenance, Common Homeowner Mistakes, and When to Call a Pro
Develop a practical maintenance plan that minimizes burnishing recurrence, including a routine check schedule and targeted surface upkeep. Use products and short-cuts that preserve flat finishes while staying within safe limits. Stay consistent in your approach for the best long-term results.
Identify common mistakes that worsen burnishing, such as aggressive cleaning or applying high-sheen touch-ups. Recognize red flags that signal professional assessment or repainting is needed, like peeling or pronounced moisture issues. Use a simple decision framework to weigh repair versus repaint and keep a small documentation file for future reference.
Routine maintenance and monitoring tips
Keep your flat paint finish looking fresh with these simple, repeatable cleaning habits and inspection points.
Monthly: Quickly wipe down walls with a damp cloth to remove dust. Use mild soap if needed.
Quarterly: Inspect for any developing burnish marks or other issues. Check corners, around doors, and near high-traffic areas first.
Annually: Do a thorough cleaning using the methods mentioned earlier in this article. This helps maintain the paint’s integrity and prevents buildup that could lead to burnishing.
Common mistakes to avoid
Here are some common homeowner mistakes that can worsen burnishing. Avoid these pitfalls for a longer-lasting, better-looking finish.
- Over-scrubbing: Aggressive scrubbing can remove the paint’s flat finish and cause sheen variation.
- Abrasive cleaners: Using harsh chemicals can break down the paint film, leading to burnishing and other issues.
- High-sheen touch-ups: Using a higher sheen for touch-ups will make burnish marks more noticeable.
- Skipping primer: Primer helps paint adhere better and reduces the risk of burnishing. Always use it before painting.
Remember, prevention is key with flat paint. Regular, gentle cleaning and proper preparation go a long way in preventing burnishing.
When to hire a professional
While DIY maintenance can help prevent burnishing, there are times when you should call in the pros. Here’s when to seek expert help.
Large-area damage: If more than 10-15% of your wall or ceiling is affected, it might be best to hire a pro for a consistent, long-lasting result.
Substrate issues: If you suspect moisture problems, mold, or substrate movement, have a professional assess the situation. These can cause extensive damage if not addressed properly.
Deep film breakdown: If your paint is peeling, cracking, or blistering, it’s time to call in an expert. These are signs of serious underlying issues that need immediate attention.
Conclusion
Burnishing is about what you do and how you do it. The goal is a durable, even finish that looks good and lasts. Stay safe, test first, and don’t push past what the surface can take.
Now treat the next steps like a simple checklist: inspect your painted area for dull spots or rub marks, confirm the sheen and paint quality you’re using match the existing coat, prepare the surface properly and clean it if needed, pick a gentle technique or targeted spot fix rather than a full repaint when possible, and test any method in a small, hidden area before broad application. Work in small passes, keep tools clean, and finish with a light, controlled touch to avoid creating new marks.
Common mistakes to watch for are rushing the process, using overly aggressive tools or cleaners, and applying products beyond what the manufacturer recommends for your paint finish. Safety rules are simple: wear eye protection and gloves, ventilate, test every step on a hidden area, and stop if you see changes you don’t intend. If the issue is widespread, the finish is poor, or you’re unsure about the paint type, calling a professional is wise. Stay deliberate, follow the steps, and you’ll protect the look and longevity of your walls. You’ve got this.
FAQ
What exactly is burnishing (marring) on flat paint, and how can I tell it apart from normal wear?
Burnishing is shiny rub marks that appear where the surface has been rubbed smooth by friction. It looks like a dull surface has been polished in spots, usually from touching, cleaning, or rubbing with a rough cloth. If you see bright, reflective streaks or patches after light contact, you’re likely seeing burnish.
What are the main causes of burnishing on painted surfaces?
Burnishing comes from abrasion, improper cleaning, and frequent contact with rough or dirty cloths. It can also happen when the paint film is soft, or when high-gloss areas are subjected to rubbing with sandy or gritty residues. Poor surface prep and overworking the surface with harsh tools can make it worse.
How can I prevent burnishing during cleaning and daily use?
Use gentle cleaning methods and soft cloths or sponges. Work in small sections, avoid circular scrubbing, and dry the surface with a clean, soft towel. For flat paint, skip harsh cleansers and limit rubbing on already polished areas to slow burnishing from happening.
What are practical ways to reduce or fix existing burnish marks without a full repaint?
Lightly re-wipe with a very smooth, non-abrasive cloth and a mild cleaner recommended for your paint type. For stubborn marks, look for a product labeled compatible with flat or low-sheen finishes and follow the label instructions. If in doubt, test on a inconspicuous area first and avoid aggressive scouring pads.