
Introduction
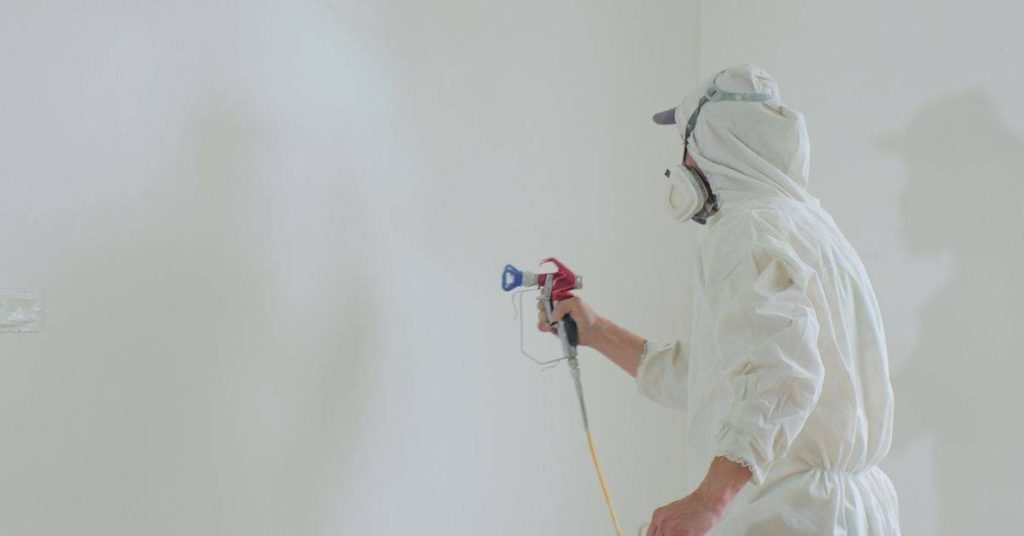
Back-brushing and back-rolling are hands-on techniques used after spray-applying coatings to work the material into the surface and even out coverage; in plain terms, back-brushing uses a brush and back-rolling uses a roller to finish what the sprayer started. They help when the surface texture, porosity, or overspray patterns need manual attention, but whether to use them depends on the coating type and manufacturer instructions. Check product labels and technical data for compatibility and recommended drying times before touching the wet film.
On a DIY jobsite, these methods can save you from runs, missed spots, or poor adhesion if done correctly and at the right tack or wet time. Done at the wrong time or with the wrong tool they can cause streaks, lift the spray film, or alter appearance, so if you’re unsure follow the product directions or ask the manufacturer. Use tools appropriate for the material and keep motions light and consistent to avoid digging into the film.
Key takeaways
- Understand back-brushing spreads paint evenly into pores to reduce spray halos.
- Back-rolling helps coat consistency on textured surfaces and near edges.
- Do back-brushing/rolling only after spray passes tack to avoid fiber raised.
- Inspect for over-brush or over-roll signs: slick sheen and ridge lines.
- Tools: use clean bristle brush and smooth roller; avoid cross-contamination.
- Safety: wear eye protection and mask; ensure good ventilation, prevent dust.
Table of Contents
- Introduction
- Key takeaways
- What Back-Brushing and Back-Rolling Are
- Why Professionals Use These Techniques
- When These Methods Help — Ideal Scenarios
- When They Make Things Worse — Common Failure Modes
- Technique and Timing — Step-by-Step
- Tools and Materials Checklist
- Material Specs and Testing to Confirm Effectiveness
- Visual Checkpoints and Quality Control
- Conclusion
- FAQ
What Back-Brushing and Back-Rolling Are
Back-brushing is literally dragging a brush through a fresh spray coat to work material into the surface; back-rolling is doing the same with a roller to even out thickness and texture. These are mechanical finishing actions taken immediately after spraying while the coating is still wet or tacky.
Both techniques modify the wet film by redistributing material, removing runs, and forcing coating into pores or texture profiles; the motions are short, overlapping passes rather than long dry strokes. Check the product label or technical data sheet for guidance on whether the wet film can be touched and how soon after spraying it can be worked.
Back-brushing defined
Back-brushing is a technique used immediately after spraying concrete with a coating. It involves using a stiff-bristled brush to work the sprayed-on material into the surface.
The motion is similar to brushing your teeth – short, firm strokes in one direction. This helps to ensure that the coating penetrates deep into the substrate, providing better adhesion and coverage.
Back-brushing is typically used on rough surfaces or where you want to achieve a textured finish. It’s also useful when applying sealers or primers before painting.
Back-rolling defined
Back-rolling is another technique used after spraying concrete with a coating. Unlike back-brushing, it uses a roller to even out the spray texture and promote penetration.
The motion involves rolling the coating into the surface using firm, steady pressure. This helps to distribute the coating evenly, ensuring that there are no missed spots or areas of over-application.
Back-rolling is ideal for smooth surfaces or where you want a consistent, even finish. It’s often used when applying topcoats or final finishes.
How these differ from spraying alone
Spraying concrete with a coating deposits material onto the surface, but it doesn’t guarantee even coverage or penetration. This is where back-brushing and back-rolling come in.
Back-brushing modifies the film thickness by working the coating into the substrate, creating a textured finish. It also improves adhesion by increasing the surface area for the coating to bond with.
Back-rolling, on the other hand, evens out the spray texture and promotes penetration without overworking the coating. It ensures an even film thickness and consistent finish.
Why Professionals Use These Techniques
Pros use back-brushing and back-rolling to improve coverage, promote adhesion into textured substrates, hide overspray patterns, and control the final texture for appearance or slip resistance. They also use these methods to correct fast-developing defects like sags or pinholes before the coating cures.
Specifications or job documents sometimes require one of these finishes, so confirm the coating manufacturer’s instructions or the project spec to know when it’s mandatory and acceptable. When unsure, follow the manufacturer’s drying and recoat recommendations before applying mechanical finishing.
Benefits for coverage and penetration
Back-brushing and back-rolling help improve contact with porous or profiled surfaces. These techniques push the material into the substrate, reducing pinholes or missed spots.
Porous surfaces, like rough concrete or weathered wood, can suck up spray-applied materials quickly. Back-brushing and rolling ensure even coverage and penetration.
These techniques also help reduce pinholes. Spraying alone can leave tiny voids in the finish. Back-brushing and rolling fill these in, creating a more uniform surface.
Benefits for texture and uniformity
Back-rolling helps reduce stipple and floating of spray finish. This creates a consistent appearance across the entire surface.
Stipple is when the material forms tiny peaks and valleys on the surface. Back-rolling smooths these out, creating a more uniform texture.
Back-rolling also helps reduce floating. This happens when the material doesn’t fully adhere to the substrate. Back-rolling presses the material down, ensuring it sticks properly.
When specifications or warranties require it
Some systems or manufacturers mandate back-brushing/rolling. Always check technical data sheets for specific instructions.
For example, EIFS (Exterior Insulation and Finish Systems) often require back-rolling to ensure proper adhesion and coverage of the finish coat.
Similarly, some warranties may only be valid if these techniques are used. Always follow manufacturer guidelines to maintain warranty coverage.
When These Methods Help — Ideal Scenarios
Back-brushing and back-rolling usually help on porous masonry, rough concrete, stucco, and textured metals where spray alone won’t force material into voids or around irregularities. They’re also useful with thicker coatings, primers, and sealers that benefit from being worked into the substrate for better contact.
These techniques perform well in calm conditions where the coating remains wet long enough to work; consult the product data sheet for acceptable application temperature and humidity ranges. If you need exact open time or tack-free cues, check the manufacturer’s instructions rather than guessing.
Porous or profiled substrates
Wood, stucco, and textured masonry are examples of porous or profiled surfaces. These surfaces have voids that can trap air and prevent proper coating penetration.
Back-brushing and back-rolling help work the coating into these voids, ensuring even coverage and penetration. It’s like giving your coating a helping hand to fill up all those tiny spaces.
Pro tip: For textured surfaces, use a brush with stiff bristles to really get into those nooks and crannies.
Low-viscosity or penetrating primers/sealers
Some primers and sealers are designed to penetrate deep into the substrate. However, their low viscosity can make it tricky for them to spread evenly on their own.
Back-brushing and back-rolling help agitate these thin coats, ensuring even penetration and film formation. It’s like giving your primer or sealer a gentle shake to distribute it properly.
Remember: These techniques are especially useful when using thinned coats or products designed for deep penetration.
Edge work, corners, and tight areas
Spraying alone can sometimes miss spots in edges, corners, and other tight areas. Back-brushing and back-rolling are perfect for these situations.
By working the coating into these areas with a brush or roller, you can eliminate missed spots and feather in edges. This helps create a smooth, uniform finish that looks like it was applied by a professional.
Tip: For corners, use a small roller or a corner brush to ensure complete coverage.
When They Make Things Worse — Common Failure Modes
Working a coating too soon, too aggressively, or with the wrong tool can create lap marks, streaking, foam entrapment, or thin spots that lead to premature failure. Using back-brushing on coatings that film-skin quickly or back-rolling over partly cured areas often causes adhesion breaks and visible defects.
Watch for drag marks, excess nap shedding, or textured roller pattern lines as signs you may be doing harm; stop and verify cure stage and tool compatibility with the product label. If the material has set up beyond its open time, do not attempt to force it—check manufacturer instructions for allowed touch-up methods.
Overworking and thinning the film
Back-brushing and back-rolling help distribute coating evenly. But be careful not to overdo it.
Too much brushing or rolling can reduce the wet film thickness below specification. This weakens protection, making your surface more susceptible to damage.
Pro tip: Lightly brush or roll in one direction only. Avoid going over the same area too many times.
Creating texture defects and lap marks
Incorrect timing or technique can lead to visible flaws on your surface.
Back-brushing or back-rolling too soon after spraying can cause ridges or stipple. Waiting too long before rolling can result in lap marks – visible overlap lines.
Pro tip: Back-brush or back-roll when the sprayed coating is still wet but not tacky. This ensures even distribution without creating defects.
Trapping solvent or causing blistering
Back-brushing or back-rolling when the coating is still solvent-rich can lead to problems.
Trapped solvent can cause adhesion failures, leading to peeling. It can also cause blistering as the solvents try to escape during curing.
Pro tip: Wait until the sprayed coating has partially set and is no longer tacky before back-brushing or back-rolling. This ensures proper solvent evaporation and adhesion.
Technique and Timing — Step-by-Step
Shoot an even spray pass, step back to inspect for runs or low spots, then immediately follow with short overlapping brush or roller passes while the film is still workable. Keep motions light and consistent—use enough pressure to level and force material into voids but not so much that you pull the film or create thin areas.
Use the product’s recommended open time and tack-free cues to decide when to stop working the film, and avoid reworking areas that show early skinning or partial cure. When in doubt, refer to the manufacturer’s application window and adjust timing to match site temperature and humidity.
Step-by-Step Process
Follow this clear, numbered sequence to achieve a smooth and even finish with your back-brushing and back-rolling after spraying.
- Preparation: Check safety gear (gloves, goggles), lay down drop cloths. Ensure the substrate is dry and clean.
- Spraying: Set up sprayer, test on a small area to confirm settings. Spray in even, steady passes, maintaining consistent distance from surface.
- Wait: Let sprayed coating sit for 5-10 minutes (or as recommended by the manufacturer) before back-brushing/rolling to allow it to level and prevent overworking.
- Back-Brush/Roll: Work in logical sections, using even pressure and overlap. Ensure you’re not thinning the film or creating lap marks.
- Final Checks/Cleanup: Inspect your work for any missed spots or defects. Clean equipment thoroughly with appropriate solvent to prevent clogging.
Pre-spray preparation and masking
Before you start spraying, ensure your substrate is ready to receive the coating. This step saves time and ensures a better final result.
Clean the surface: Remove any dirt, grease, or loose material using appropriate cleaners or solvents. Allow it to dry completely.
Masking strategy: Protect areas you don’t want coated with painter’s tape and plastic sheeting. Ensure edges are well-sealed to prevent overspray.
Test patches: Spray a small, inconspicuous area with your coating to confirm spray settings (pressure, nozzle size, distance) before committing to the entire job.
How to back-brush and back-roll correctly
Proper technique ensures even coverage and prevents over-thinning or creating texture defects.
Back-brushing: Work the coating into the substrate using a soft, bristle brush. Use steady, overlapping strokes, applying even pressure. Avoid scrubbing or working the surface too much.
Back-rolling: Follow up with a roller, using smooth, even strokes in an ‘M’ or ‘W’ pattern. Maintain consistent pressure and overlap each pass by about half the roller’s width to ensure full coverage without lap marks.
Pace yourself: Work at a steady pace that allows you to maintain control over your tools and achieve consistent results across the entire surface.
Coordinating spray and roll sequence
Timing is crucial for achieving a smooth, even finish. Here’s how to coordinate your spraying and back-brushing/rolling.
Wait after spraying: Allow the sprayed coating to sit for 5-10 minutes (or as recommended by the manufacturer) before back-brushing/rolling. This allows the coating to level and prevents overworking, which can cause blistering or texture defects.
Work in logical sections: Divide your surface into manageable sections. Spray one section, wait, then back-brush/roll that section before moving on to the next. This ensures you’re not rushing through the job and allows for consistent results across the entire surface.
Inspect as you go: Keep an eye out for any missed spots or defects as you work. Address them immediately to prevent larger issues down the line.
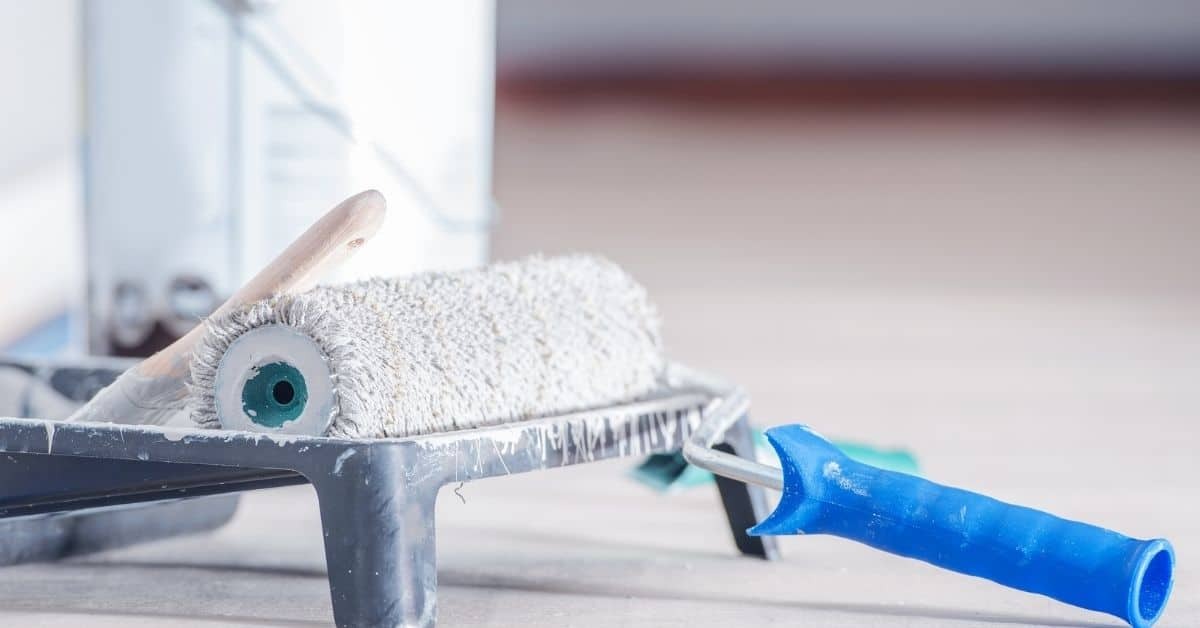
Tools and Materials Checklist
Select brushes with appropriate stiffness and solvent resistance and rollers with the correct nap for the coating and texture; choose extension poles and frames rated for the job. Bring extra rollers and brushes to swap out when they begin shedding or clogging, plus clean solvent, rags, and a trash container for fouled consumables.
Inspect spray equipment—nozzle size, tip condition, and pump pressure—before combining techniques so spray film thickness and atomization are correct. If you don’t know the right nozzle or pressure for the material, check the product data sheet or the sprayer manufacturer’s guidance.
Brushes, rollers, and nap selection
Before you start back-brushing or back-rolling, make sure you’ve got the right tools for the job. Here’s a quick checklist to ensure you’re using the best brushes and rollers for your coating.
- Brush filaments: Choose natural bristles for oil-based paints, synthetic for water-based. Avoid wire brushes for delicate surfaces.
- Roller naps: Short nap (1/4″ to 3/8″) for smooth surfaces, longer nap (3/8″ to 1/2″) for textured or porous substrates.
- Avoid steel wool: It can leave rust stains and damage surfaces.
- Extension tools: Have extension poles ready for high ceilings or hard-to-reach areas.
- Check brush condition: No missing bristles, no fraying. Replace if needed.
- Roller cover quality: High-quality covers last longer and apply paint more evenly.
- Avoid cheap consumables: They can leave streaks or cause texture defects.
- Right size frame: Match roller frame size to the width of your surface for even coverage.
Quick rule: Using the wrong brush or roller nap can lead to poor coverage, streaks, and texture issues.
Spray equipment and setup considerations
Before you start spraying, make sure your equipment is in top shape. Here’s a checklist to ensure smooth application and minimal back-rolling/brushing needed.
- Nozzle choice: Use wider nozzles (e.g., 2.0mm or larger) for thicker coatings, narrower ones for thin films.
- Pressure settings: Higher pressure = faster application but more risk of over-spraying. Adjust based on coating viscosity.
- Spray pattern: Wide, even fan patterns reduce the need for back-rolling/brushing.
- Check nozzle condition: No clogging, no leaks. Clean or replace if needed.
- Air cap intact: A damaged air cap can cause poor atomization and uneven coverage.
- Gun maintenance: Regularly clean your spray gun to prevent clogs and ensure consistent performance.
- Hose condition: No leaks, no kinks. Replace if necessary.
- Tip: Practice on scrap material: Before starting the job, test your setup on a piece of scrap to ensure even coverage.
Quick rule: Poor spray equipment setup can lead to over-spraying, uneven coverage, and increased back-rolling/brushing needs.
Safety, PPE, and ventilation
Protect yourself and your workspace before you start spraying. Here’s a safety checklist to ensure a healthy environment.
- Respirator: Use a proper respirator for spray application. Cartridge type depends on the coating used.
- Gloves: Wear gloves suitable for the paint type to protect your hands from chemicals.
- Eye protection: Safety glasses or goggles are a must to prevent eye irritation.
- Ventilation: Ensure proper ventilation in your workspace. Open windows, use fans, or set up a spray booth.
- Avoid smoking: No smoking near spray areas due to fire risk and health hazards.
- Wet surfaces before sanding: To minimize dust and potential health risks.
- Cleanup materials ready: Have rags, solvents, and disposal containers ready for cleanup.
- Remove flammable materials: Keep away from heat sources and open flames during application.
Quick rule: Skipping safety measures can lead to health risks, property damage, and poor coating performance.
Material Specs and Testing to Confirm Effectiveness
Look up the coating’s technical data sheet for listed wet film thickness, open time, recommended substrates, and any notes on brushing or rolling after spraying. Cross-check pot life, cure schedule, and solvent compatibility so your finishing action won’t interfere with film formation.
Perform simple field checks like a small test panel or a wet-film-thickness reading on a hidden area to confirm the combination of spray settings and mechanical finishing gives the desired coverage. If you need precise numbers for thickness or cure times, consult the manufacturer’s data sheet or contact their tech support.
What to check in technical data sheets
The first step before you start is checking the manufacturer’s technical data sheet (TDS). This tells you if back-brushing and back-rolling is suitable for your product. Here’s what to look for:
- Recommended application methods: Check if these techniques are listed.
- Acceptable film thickness: Ensure the recommended range covers your needs.
- Recoat windows: Know when you can apply the next coat without damaging the first.
- Dry time: Confirm it’s suitable for your project schedule.
- Surface preparation: Follow their guidelines to avoid issues later on.
- Temperature and humidity: Check if conditions on-site match the product’s requirements.
- Primer use: Some products need a primer, so check if one is required.
- Cleaning methods: Know how to clean your tools and equipment afterwards.
Quick rule: If it’s not in the TDS, don’t assume. Always double-check before you start.
Simple field tests (adhesion, solvent pop, wet film checks)
Before you apply the product to your entire surface, do some quick field tests. These help validate the back-brushing and back-rolling method before full application.
Adhesion test: Perform a simple tape pull test. Apply a piece of painter’s tape, let it sit for 30 minutes, then pull it off. If paint comes off with it, you’ve got adhesion issues.
Solvent pop check: Use a cotton swab dipped in the product’s solvent to gently touch the surface. If the color changes or blisters form, that’s ‘solvent pop’, and you need to address it before proceeding.
Wet film uniformity check: Apply a small patch of the product using your sprayer. Let it sit for a few minutes, then back-brush and back-roll it. If the film looks uniform and smooth, you’re good to go. If not, adjust your technique or equipment.
Pro tip: These tests help catch potential issues early. Don’t skip them; they save you time and money in the long run.
Visual Checkpoints and Quality Control
Immediately after finishing, inspect for runs, holidays, roller lines, brush dragged areas, and nap lint; during cure watch for blistering, loss of gloss, or edge lifting. At final inspection check adhesion, film uniformity, and texture consistency across production joints and penetrations.
Keep a simple log of environmental conditions, spray settings, and timing of back-brushing/back-rolling for any areas that fail so you can correlate cause and effect. If defects appear, refer to the coating manufacturer’s troubleshooting guide and confirm you followed their application sequence and timing.
Immediate post-application signs of problems
After spraying, use this checklist to spot issues right away. Timing is crucial here.
- Runs or sags: Check for drips and heavy spots. These indicate too much material or not enough back-rolling.
- Texture mismatch: Ensure the sprayed and rolled areas blend seamlessly. Discrepancies hint at incorrect nap selection or technique.
- Sheen differences: Uneven gloss or matte finish suggests inconsistent application or incorrect material use.
- Bubbles or craters: These indicate trapped air or contaminants, which can ruin the final look and durability.
- Missed spots: Inspect for bare areas. These need immediate touch-up to prevent visible flaws later on.
- Excess material: Wipe off any pooled paint with a damp cloth to avoid drips and runs as it dries.
- Inconsistent coverage: Check for thin or thick spots. These can lead to uneven color and poor durability.
- Poor adhesion: Gently pull at the edges of the coating. If it lifts, reapply and back-roll immediately.
Quick rule: The sooner you catch these issues, the easier they are to fix.
Mid-cure and final inspection signs
As the coating cures, keep an eye out for these potential problems. Early detection helps prevent costly rework.
- Blistering: Small bubbles under the surface indicate trapped moisture or solvents. These can pop as the coating dries, leading to unsightly craters.
- Adhesion loss: Check for lifted edges or corners. This could be due to inadequate surface preparation or incorrect material selection.
- Color/texture shifts: Monitor for changes in hue or finish. These can signal incompatibility with the substrate or other coatings, or improper curing conditions.
- Cracking or alligatoring: Fine cracks or deep, widespread cracking indicate insufficient flexibility or movement accommodation in the coating.
- Mildew or mold growth: Check for signs of fungal growth. This suggests inadequate surface preparation or material incompatibility with the environment.
- Dust mires: Small indentations filled with dust indicate insufficient curing or contamination during application.
- Wrinkling or orange peel texture: These defects suggest too much or too little material applied, or incorrect back-rolling technique.
- Yellowing or discoloration: Uneven coloration can indicate inadequate curing conditions, incompatibility with the substrate, or contamination during application.
Quick rule: Regular checks during cure help ensure a high-quality finish that will last.
Conclusion
Back-brushing and back-rolling can improve texture, even out color, and seal edge lines when you follow the material specs and timing. Done right, it adds durability and a clean look; done wrong, it can dull sheen, pull color, or scar the surface.
To turn this into action: check your tools and safety gear, test a small area first, mix and settle the product per the specs, spray or roll as directed, then back-brush or back-roll while the coating is in the right stage, inspect closely, and adjust pressure, passes, and timing before moving to the next area. Do each step in the order you learned, and always document what you did so you can reproduce or fix it.
Common mistakes to avoid are overworking the surface or applying too much pressure, using the wrong brush or roller for the coating, and trying to force the technique when the coating is still too wet or already too dry. Stay within the manufacturer’s timing, keep your work area clean, wear proper protection, and stop if you see tape lines, pulling, or peel—don’t chase a bad result. If you’re unsure about the material or the surface, test first and call it out before you commit more coats.
If the project scope or surface conditions feel uncertain, or you’re dealing with fragile or high-stakes finishes, don’t push ahead alone. A professional can verify the specs, test areas, and ensure you don’t compromise durability or safety. Stay practical, stay safe, and finish with a look you can trust. You’ve got this—stay deliberate, and you’ll get a solid, lasting result.
FAQ
When should I consider back-brushing or back-rolling after spraying?
Look for rough or uneven texture, runs, or splotches that the spray left behind. If you see thin patches or the surface feels dry in spots, back-brushing or back-rolling might help smooth it out.
What common mistakes signal it’s making things worse?
If the finish becomes muddy, the texture breaks down, or you notice new runs after brushing or rolling, stop and reassess. Don’t keep brushing if the coating is still curing or you’re pulling too much material off.
How can I test whether back-brushing or back-rolling is helping?
Check a small area first and compare to an untreated control spot. If the treated patch looks more even and shows the desired texture, proceed slowly on the rest of the surface. If it looks worse, stop until you review the product instructions.
How should I clean up and protect the surface after back-brushing or back-rolling?
Follow the product label for curing and protection steps, and avoid exposing the surface to abrasion until it’s set. Use clean tools to prevent recontamination, and cover adjacent areas if needed to prevent accidental transfer.