
Introduction
Leftover paint can be transformed into seven cool projects with simple steps and smart alternatives.
This introduction explains why salvaging paint matters for less waste and more creative reuse, and it sets up practical, real-world guidance you can apply at home.
You’ll learn how to choose projects, mix colors safely, and follow approachable tips and examples that help you decide what to reuse, repurpose, or substitute.
Key takeaways
- Prioritize ventilation, masks, and surface prep before any painting session.
- Label leftover cans and note mix ratios for reuse consistency.
- Use small jars for scraps; test colors on scrap cardboard first.
- Choose project by leftover volume: trays, hardware, textiles suit small amounts.
- Seal finished projects with appropriate topcoat to extend life.
- Clean brushes and tools promptly to prevent paint from drying.
Table of Contents
- Introduction
- Key takeaways
- Quick safety and paint-condition checklist
- Tools and materials checklist for small leftover-paint projects
- Project 1 — Painted accent trays and catchalls (great for tiny amounts)
- Project 2 — Refresh furniture accents and hardware
- Project 3 — Custom wall art and murals using paint scraps
- Project 4 — Outdoor and garden accents (pots, planters, birdhouses)
- Project 5 — Functional storage solutions painted to match decor
- Project 6 — Upcycling textiles and décor: dip-dye and stenciled fabrics
- Conclusion
- FAQ
Quick safety and paint-condition checklist
Quick safety and paint-condition checklist helps you spot bad leftovers and handle them safely. Check the smell, separation or skin on top, clumps, any mold signs, and the date on the can or label to judge usability. Wear the right PPE and ventilate the space: nitrile gloves, safety glasses, and a respirator or dust mask if you’re sanding or stripping.
Store cans upright with the lid sealed, in a cool, dry, well-ventilated spot away from heat or ignition sources, and label with the opened date and contents. Open cans carefully, avoid splashes, and keep pets and children away; never mix incompatible chemicals like latex and oil-based products. For disposal and cleanup, follow local hazardous-waste rules and either dry out or solidify leftovers, then clean brushes and tools with the appropriate method (soap and water for latex, solvent only if permitted).
How to tell if paint is usable
Before you start a project, quickly check your leftover paint for usability.
- Check smell: Fresh paint has a strong scent. If it smells musty or off, discard.
- Look for separation: Shake the can to see if there’s liquid on top and solids at bottom. Separate layers mean poor condition.
- Inspect date: Check the label or can for a manufacturing date. Paint older than 10 years is likely unusable.
- Look for clumps: Stir paint gently; if it forms lumps, it’s probably bad.
- Test on scrap wood: Apply a small amount to see if it dries smooth and evenly. Uneven finish or cracking indicates poor quality.
Quick rule: If in doubt, test before committing to the project.
Safety gear and best-practice handling
Ensure safety when working with leftover paint by following these steps.
- Nitrile gloves: Protect your hands from chemicals. Always wear them to avoid skin irritation.
- Safety glasses: Prevent splashes or dust from entering eyes. Essential for protecting vision.
- Ventilation: Work in a well-ventilated area or use local exhaust fans. Poor ventilation can cause headaches and dizziness.
- Avoid mixing chemicals: Never mix incompatible paints like latex with oil-based types. Mixing can create harmful reactions.
- Keep pets/children away: Ensure they do not come into contact with paint or fumes. Their safety is paramount.
Quick rule: Always wear protective gear and work safely to avoid accidents.
Tools and materials checklist for small leftover-paint projects
Here’s a concise checklist of essential tools and affordable consumables for small leftover‑paint projects. It calls out the must‑haves—brushes, foam rollers, stir sticks, mini rollers, trays, painter’s tape, drop cloths—and basic sealing/priming supplies, plus budget substitutes. Include where to substitute items to save money.
Understanding this kit helps you avoid buying duplicates and waste. Use generic brands, multi‑packs, thrift finds, and DIY substitutes when practical, and replace duplicates with a starter kit for small jobs. Always follow label instructions for priming and storage, and check local rules for disposal of leftover paint.
Low-cost must-haves for beginners
This checklist helps you set up your workspace efficiently, ensuring you have everything needed to tackle small leftover-paint projects.
- Small brushes: Essential for detailed work. Confirm by checking if you can reach tight corners and edges easily; skipping means missed spots.
- Foam rollers: Great for smooth surfaces. Check by rolling paint on a flat surface to see even coverage; missing this leads to uneven finishes.
- Stir sticks: Mixes paint well without damaging the container. Confirm by stirring thoroughly and checking no lumps remain; skipping causes clumping.
- Mini rollers: Perfect for small areas like trim or corners. Check by rolling on a test surface to see if it covers evenly; missing this leaves bare spots.
- Paint trays: Holds paint and keeps brushes clean. Confirm by pouring paint into the tray and checking if brushes stay clean; skipping leads to dirty work.
- Painter’s tape: Protects edges from overspray. Check by applying it around trim or edges before painting; missing this causes messy lines.
Quick rule: Always have these basics on hand for smooth, professional-looking results.
Materials to avoid or recycle
This checklist helps you save money and reduce waste by choosing sustainable alternatives for your leftover paint projects.
- Paper drop cloths: Biodegradable, easy cleanup. Confirm by laying it down before painting; skipping means more plastic waste.
- Peel-and-stick liners: Reusable and eco-friendly. Check by applying to surfaces needing protection; missing this leads to damaged floors.
- Ventilation fans: Keep air fresh during painting. Confirm by setting up before starting work; skipping causes poor indoor air quality.
- Sealants: Protects painted areas from moisture. Check by applying a thin layer over the paint; missing this leads to peeling and damage.
- Generic brands: Cost-effective alternatives. Confirm by comparing prices with name brands; skipping means higher costs.
Quick rule: Opt for sustainable materials that save you money and reduce waste.
Project 1 — Painted accent trays and catchalls (great for tiny amounts)
Leftover paint can become decorative trays, coasters, and key catchalls with simple prep and smart sealing. Prep starts with cleaning, drying, and light sanding, then selecting base materials like wood, MDF, or ceramic and masking for crisp lines. Finish options range from matte to glossy, with sealing choices such as a water-based polyurethane or epoxy resin for durability and note on odor during curing.
Doing it this way saves leftover paint, reduces waste, and makes tiny spaces feel organized with trays, coasters, or catchalls. You can vary shapes and finishes with color blocking, stenciling, or metallic flecks to suit the room. Always check paint labels and product instructions for sealing compatibility and follow local disposal rules and safety notes.
Surface prep and sealing options
To ensure your painted trays, coasters, and catchalls last a long time, start with clean, dry surfaces. Lightly sand the material using 220-grit sandpaper to create a smooth base for paint adhesion. Remove all dust before painting.
For porous materials like wood or MDF, apply a thin coat of primer to seal the surface and prevent paint from soaking in too much. Use painter’s tape around edges if you want crisp lines between colors.
When it comes to sealing your painted pieces, opt for water-based polyurethane for quick drying and low odor. For extra durability, especially on trays that might hold food or drinks, consider epoxy resin but be aware of longer cure times and potential odors during application.
Design tips for color mixing and patterns
Mix small amounts of paint to create unique shades. Start with a base color and add drops of another hue until you achieve the desired tone. Use a stir stick or palette knife to blend thoroughly.
Create interesting patterns by using simple techniques like dipping or ombre gradients. For more intricate designs, use stencils cut from cardstock or vinyl sheets. Apply paint through the stencil with a small brush for crisp lines and details.
Consider adding metallic accents or mottled finishes to enhance visual appeal. These touches can be achieved by mixing in glitter or metallic powder into your base coat before application.
Project 2 — Refresh furniture accents and hardware
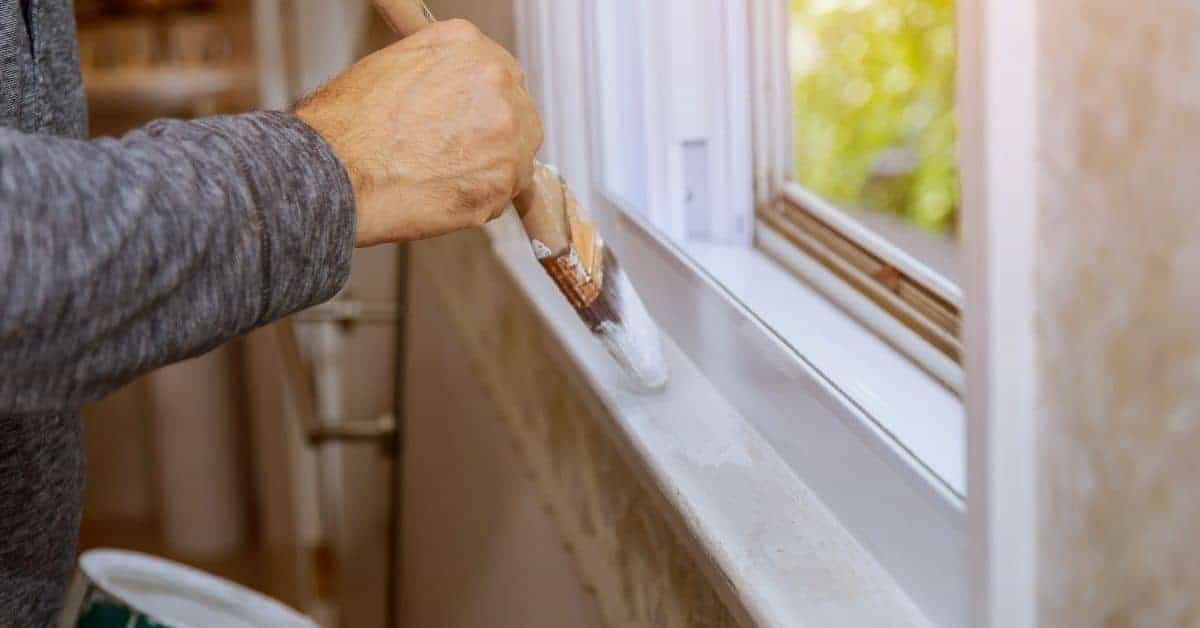
Use leftover paint to refresh chair legs, table edges, drawer fronts, or cabinet hardware. A small amount can make a big visual impact if you mask carefully and apply cleanly. This section covers prep, masking, and simple application to get sharp lines without a full refinish.
Prep the surfaces with cleaning and light sanding, then mask edges for clean lines. Pick colors and finishes that suit your space, and use appropriate tools for small surfaces to minimize coats. For hardware, remove knobs or pulls, paint in a controlled setup, and reattach for a refreshed look, then protect with a finish if needed.
Where a small touch makes the biggest visual difference
When it comes to refreshing your furniture with leftover paint, focus on high-impact areas that require minimal effort but make a big impact. Chair legs and table edges are prime candidates for this kind of update.
For instance, painting chair legs can instantly change the look of dining chairs or office stools without needing to repaint the entire piece. Similarly, giving table edges a fresh coat can modernize an old wooden table with just a few minutes of work.
Drawer fronts and cabinet hardware are also great spots for small touches that make a big difference. A quick paint job on drawer fronts can transform kitchen cabinets or bedroom dressers in no time. Updating knobs, pulls, and hinges not only cleans up the look but adds a fresh feel to your space.
These areas often go unnoticed until they’re done right, so taking care of them with leftover paint will give you a noticeable boost in room aesthetics without breaking the bank or spending too much time.
Durable finishes for frequently touched surfaces
To ensure your painted furniture accents and hardware last, choose durable finishes that can withstand daily use. A good primer is essential before applying any paint to create a solid base.
For high-traffic areas like drawer fronts or cabinet knobs, opt for a satin finish over matte as it’s more resistant to fingerprints and wear. Test the adhesion of your chosen topcoat by painting a small inconspicuous area first; if it holds up well after curing, you’re good to go.
After painting, consider adding an extra layer of protection with a clear polyurethane or protective sealant. This step is crucial for hardware like drawer pulls and hinges that get touched frequently.
Maintaining the finish involves regular cleaning with mild soap and water to prevent buildup from oils and dirt. With these steps, your painted accents will stay looking fresh and new for years to come.

Project 3 — Custom wall art and murals using paint scraps
This project shows how to turn paint scraps into custom wall art with geometric murals, color-block panels, or typography using stencils. Focus on planning layouts on the wall, using simple templates, and transferring edges crisply so you minimize extra coats and waste.
Plan the palette, patterns, and transfer method so you minimize mistakes and waste. Proper surface prep and a light protective finish help your wall art stay durable and easy to touch up using leftover paint.
Planning and measuring large-scale looks from small cans
When you’ve got leftover paint, the key is to plan your mural on a smaller scale first. Start by laying out your design on paper or using digital tools to map it out in sections that match the size of your wall. This way, you can see how different colors and patterns will look together before committing them to the wall.
Once you have your layout, measure and mark your wall with a pencil or chalk line. Use painter’s tape to create straight lines if needed. For geometric shapes, consider using stencils that are easy to cut out from cardboard or buy pre-made ones for precision. This helps keep everything neat and reduces the risk of mistakes.
Don’t forget to test your design on a small patch first. This lets you see how the colors look in real life and adjust if needed. If you find yourself running short, mix up some compatible tints or use leftover paint from similar projects to extend your palette without compromising quality.
Removing or changing murals later
If you ever want to change the mural down the line, plan ahead. Use a water-based primer before painting to make removal easier. When it’s time for an update, use a heat gun and scraper to gently remove old paint layers without damaging the drywall.
For less invasive changes, consider using removable wallpaper or vinyl decals that can be easily peeled off when you’re ready for something new. This way, you don’t have to repaint the entire wall just to change up your design.
If repainting is necessary, use a high-quality primer designed for covering old paint. Apply it evenly and let it dry completely before applying your new mural colors. This ensures good adhesion and helps prevent peeling or cracking in the future.
Project 4 — Outdoor and garden accents (pots, planters, birdhouses)
This section covers how to prep and use leftover exterior or interior paint on planters, terracotta pots, and garden markers, plus protecting finishes with weatherproof sealers. You’ll want to assess surface porosity, determine exterior compatibility, and decide if primer is needed for porous pots and birdhouses.
Why it matters: proper prep and sealing extend color life outdoors and save money by reusing leftovers. Look for low-VOC or water-based options, and always check labels for outdoor use and cleanup guidance; always follow local disposal rules for leftovers and sealers. If unsure, read the manufacturer instructions and test a small area first before full application.
Prepping outdoor surfaces for adhesion
To ensure your paint sticks well to terracotta pots, wooden planters, and metal birdhouses, start by cleaning the surface thoroughly. Use a mild detergent and water to remove dirt and grime. Rinse with clean water and let it dry completely before moving forward.
For porous materials like terracotta, sanding isn’t necessary but can help smooth out rough spots. If you’re using leftover interior paint on exterior items, consider applying a primer designed for outdoor use to seal the surface and prevent moisture from seeping in. This is especially important if your pots or planters will be exposed to rain.
When dealing with wood surfaces, sanding lightly can help remove any old finish or residue that might interfere with adhesion. Wipe down the sanded area with a damp cloth to clear away dust and let it dry before painting. For metal items like birdhouses, light rust removal is key—scrub off loose flakes and apply a rust-inhibiting primer if needed.
Remember, proper prep work upfront saves you time and hassle later on by ensuring your paint job lasts longer and looks better.
Weatherproofing small painted items
To protect your newly painted pots, planters, and birdhouses from the elements, apply a weather-resistant sealer. Look for sealants that are UV-protective to prevent fading and yellowing over time. Water-based polyurethane or acrylic sealers work well on most surfaces and offer good protection without being too heavy.
Apply your chosen sealer in thin coats using a brush or spray can, depending on the surface texture. For pots with intricate designs or patterns, a small brush allows for more precise application. Let each coat dry completely before applying another layer to build up durability gradually.
Timing is crucial when sealing—wait until your paint job is fully cured (usually 24-72 hours) and the weather forecast predicts no rain in the next few days. This ensures that your sealant adheres properly without being washed away during application.
Maintaining these items involves regular cleaning with mild soap and water to remove dirt buildup, followed by a light reapplication of sealer every year or two depending on exposure conditions. Proper upkeep keeps your outdoor accents looking fresh and vibrant season after season.
Project 5 — Functional storage solutions painted to match decor
This section shows how to revamp cheap storage bins, drawer organizers, and shelf backs with leftover paint to create a cohesive look that saves space and keeps things easy to maintain, with painted labels or color coding boosting daily use. It covers surface prep, primer choices, and selecting paint types suitable for plastic, wood, and metal, plus how many coats help durability without overdoing it. You’ll learn a color strategy that matches the room and practical ideas for decals, stencils, and clear labels that stay readable over time.
These ideas matter because a well-coordinated storage area speeds up tasks and reduces clutter, which is especially helpful in small spaces or busy setups. You’ll get a straightforward workflow for bins, organizers, and shelf backs, with dry times, reassembly tips, and lightweight mounting options like adhesives, hooks, or magnetic backs. By combining function with color cues, you’ll improve accessibility, keep track of what’s inside, and make maintenance easier while still protecting surfaces from wear and tear.
Painting for organization and visual clarity
To keep your space tidy, painting storage bins and organizers can make a big difference. Use colors to group similar items together or designate zones within the room. For instance, paint all kitchen utensils red and baking supplies blue.
Adding labels is key. You can stencil out names of contents directly onto the bin or use small painted tags attached with adhesive hooks. This helps everyone in the household know where things go without needing to open each container.
Consider using color-coded stickers for quick identification. For example, green could mean recyclables and black for trash. A little paint goes a long way in making your storage system functional and visually appealing.
Durable paint choices for frequent-handling storage
When it comes to painting items that see regular use, durability is key. For plastic bins, opt for a high-quality enamel paint designed for plastics. It sticks well and resists chipping.
If you’re working with wood organizers or drawer backs, an acrylic latex primer followed by two coats of semi-gloss acrylic paint will provide excellent coverage and longevity. The semi-gloss finish is easy to clean and looks great.
For metal shelving units, a rust-inhibiting primer plus one coat of oil-based enamel provides the best protection against wear and tear. This type of paint also holds up well in humid environments like basements or garages.
Project 6 — Upcycling textiles and décor: dip-dye and stenciled fabrics
Project 6 explores upcycling textiles and décor by safely using leftover latex or specialty paints on fabric for simple dip-dye and stencil projects like accent pillows and tote bags. It covers which paints work on natural fibers, blends, or synthetics, and notes when you should use fabric medium or sealants to avoid stiffness or cracking. It also gives quick tests to check washability and colorfastness, and tips for choosing fabric paints that hold up to washing on items meant to be washable.
This matters for DIY homeowners because it helps you repurpose leftovers without ruining textiles or creating hard-to-care-for finishes. You’ll learn practical step-by-step ideas for prep, dipping, stenciling, and layering, plus how to assess durability and adjust for different fabrics. The guidance emphasizes simple swatch tests, heat-setting or iron-on methods, and safe disposal practices so you can finish projects with confidence and longevity while avoiding common pitfalls.
When to use fabric-specific paint vs. household paint
If you’re thinking of using household paint on washable textiles, think again. Household paints are made for walls and surfaces, not fabrics. Using them can lead to cracking, peeling, or staining that won’t come out in the wash. You’ll end up with a mess that’s hard to fix.
Fabric-specific paint is designed to stick to textiles without ruining their texture or washing ability. It’s made for durability and flexibility on fabrics. So if you want your painted fabric to last through regular use, go with textile paint. Check the label or manufacturer instructions for specific care tips.
In summary, household paints are a no-go for washable textiles. Stick to fabric-specific paint for best results and less hassle down the line.
Simple DIY patterns that hide imperfections
If you’re working with textiles that have some flaws or if your paint supply is limited, consider using simple DIY patterns. Techniques like tie-dye and block printing can cover up uneven areas without needing a lot of material. Tie-dye works great for hiding small imperfections by creating random patterns across the fabric.
For a more controlled look, try stenciling or block printing. These methods allow you to focus on specific areas that need coverage, making them ideal when dealing with limited paint supplies. Just check your stencil design before applying it to ensure the pattern will effectively mask any flaws.
Remember, these techniques don’t just hide imperfections; they also add a unique touch of creativity and personality to your upcycled projects. So get creative and have fun with it!

Conclusion
Paint leftovers are a chance to finish small jobs fast, keep materials out of the landfill, and protect your space from wear and tear. Do it with care and you’ll get durable results that look right where they matter most.
Keep it simple and methodical: check the paint for clumps or foul odors, test a small patch in a hidden corner, prep the surface clean and dry, apply in thin coats with steady strokes, let each coat dry fully, and wipe up spills right away. Match tools and pads to the project, label cans, and store leftovers upright in a cool, dry place away from heat or flames.
Two common mistakes to avoid are skipping prep and rushing coats. Never skip sanding or cleaning a surface, and don’t pile on thick layers in one go—thin coats cure better and resist chipping. Always work in a ventilated area, wear a mask when needed, and keep a damp rag handy for drips and spills.
If a project needs more than a teeny amount of paint or involves structural changes, consider calling a professional. When in doubt, test first, measure twice, and proceed with steady hands. With the right approach, those leftover hues become real upgrades you can be proud of.
FAQ
What should I do with leftover paint?
Check the label for cure time and storage tips. Seal the lid tight and store in a cool, dry place away from heat sources. If it’s old or chunky, recycle or dispose of it according to local rules.
Can I reuse leftover paint on another project?
Yes, you can mix colors that are similar or recoat the same surface later. Stir well and test a small area first. If the color or texture looks off, don’t waste time reusing it on a big job.
Is it safe to mix different brands or types of paint?
Avoid mixing alkyd and water-based paints. They don’t cure the same way and can peel. Stick to one base type per can to keep things predictable.
What’s the fastest way to get rid of excess paint without wasting it?
Use smaller containers or apply thin coats to finish a project. If you have a lot left, check local hazardous waste programs or paint recycling drives. Don’t dump it down the drain or onto the ground.