
Introduction
Paint bubbles occur when moisture, heat, or dirt get trapped under the paint.
That trapped stuff lifts the coating and creates blisters you can see on walls. Check for damp spots, recent heat exposure, or dusty surfaces that weren’t cleaned before painting.
To diagnose, inspect the area for moisture, heat exposure, or dirt. Try pressing a bubble gently to see if the film lifts and if the surface is damp or dusty. Then review any recent painting conditions and the prep steps you used before repainting.
Key takeaways
- Identify if bubbles are raised, wrinkled, or blistered to narrow causes.
- Check moisture sources: leaks, condensation, or poor ventilation before repainting.
- Inspect substrate for moisture damage and coating compatibility with the substrate.
- Test with dry wipe and simple tape tests to gauge contamination.
- Prioritize safety: fix moisture before sanding or heat-based repairs.
- Document repair steps, monitor repaint success, and check for recurring bubbles.
Table of Contents
- Introduction
- Key takeaways
- Types of Paint Bubbles and What They Look Like
- Moisture-Related Causes and Typical Sources
- Heat and Temperature-Related Causes
- Dirt, Oils, and Contamination as Causes
- Substrate and Coating Compatibility Issues
- Diagnostic Toolkit and Practical Inspection Tests
- Repair Strategies: Temporary Fixes Vs Permanent Solutions
- Prevention, Maintenance, and Monitoring
- Conclusion
- FAQ
Types of Paint Bubbles and What They Look Like
Bubbles come in a few recognizable forms. Blisters lift the surface in rounded domes, while pinholes are tiny and pinlike pits. Fisheyes give a cratered look, and peeling shows large, curling edges ready to come off. Each type hints at a different underlying cause that is worth noting as you inspect.
Look at size, shape, and where the bubbles sit. Blisters often sit on new coats over slick or contaminated surfaces. Peeling usually starts at edges or corners where movement and adhesion are tested. Quick visual clues help you narrow down the next diagnostic steps without guesswork.
Blisters and large bubbles
Blisters are raised, fluid-filled areas on your wall. They’re like tiny ponds of paint stuck to the surface.
Texture-wise, they’re soft and squishy when you press them gently with a finger. Unlike peeling, blisters don’t lift off easily; they’re still attached at the base.
Key difference: Blisters are raised bumps, while peeling is paint lifting away from the wall.
Small pinholes and fisheyes
Pinholes are tiny holes in your paint, barely visible. They’re usually caused by trapped air or contaminants during application.
Fisheyes are small, circular defects with a ring around them. These happen when contaminants like dust, dirt, or oil get into the paint before it dries.
Tip: Use a magnifying glass to spot these tiny defects easily.
Peeling vs delamination
Peeling is when paint lifts off the wall in large sheets or strips. It’s usually due to poor adhesion, often caused by moisture or dirt.
Delamination, on the other hand, is when the paint separates from the substrate completely. This means the paint is no longer attached at all; it’s just floating on top of the surface.
Test for delamination: Gently scrape the edge of a peeling area with a coin or a blunt tool. If it lifts off easily, you’ve got delamination.
Moisture-Related Causes and Typical Sources
Moisture shows up in walls in several ways. Hidden roof or exterior leaks can push moisture into the substrate. Plumbing or plumbing-related leaks also create damp patches that bubble the film. Rising damp can travel from the ground up, while condensation forms where air moisture meets cold surfaces.
When you suspect moisture, check common source paths like ceilings, walls near plumbing, and areas with poor drainage. Look for staining, musty odors, or wet spots behind the paint. Trace the moisture to its likely origin before deciding on a fix.
Plumbing leaks and hidden water paths
If you’re seeing bubbles on interior walls, plumbing issues might be the culprit. Here’s how to spot them:
Signs of internal leaks: Warped drywall, discolored or damp patches, peeling paint.
Common locations: Behind sinks and bathtubs, near water supply lines, under toilets. Follow wet patches to trace the leak back to its source.
Use a moisture meter if you’re having trouble locating the exact spot. Once found, fix the leak promptly to prevent further damage.
Exterior water intrusion and flashing failures
Moisture from outside can cause bubbles too. Check these areas:
Failed seals: Around windows, doors, and where walls meet the foundation.
Flashing failures: Inspect roof flashings, step flashings on dormers, and flashing at chimneys or vents. Water can seep in through gaps or cracks.
Check siding for damage too. Wind-driven rain can get behind loose or damaged siding and cause bubbling.
Condensation and high indoor humidity
Condensation forms when warm, moist air meets a cold surface. In winter, that’s often on exterior walls or windows. Here’s what to look for:
Condensation signs: Water droplets on windows, walls, or ceilings; musty odors.
High indoor humidity can also cause recurrent bubbling. If you notice condensation frequently, consider these solutions:
Improve ventilation: Use exhaust fans in kitchens and baths. Consider a whole-house ventilator if needed.
Reduce moisture sources: Fix leaks promptly, vent clothes dryers to the outside, and use dehumidifiers if necessary.
Heat and Temperature-Related Causes
Heat can cause paint to behave badly. Direct sunlight or intense solar heating softens the coating and encourages blistering. Temperature changes can drive slight expansion and contraction that loosens adhesion. Painting on a surface that is too hot or during extreme heat can seal in moisture and worsen bubbles.
When evaluating heat effects, note sun exposure, shade patterns, and recent temperature swings. Check if coatings were applied to hot walls or when the air was unusually warm. Use this information to time future work and select appropriate products.
Sun-exposed walls and thermal blistering
Ever noticed paint bubbles on the south-facing wall of your home? That’s likely due to good ol’ Mr. Sun. Here’s how it happens:
Solar heat softens the paint film, making it flexible. At the same time, solvents inside the paint try to escape. If they can’t, they get trapped and create blisters. This is called thermal blistering.
Prevent it by using high-quality exterior paints designed to withstand heat and UV rays. Also, consider adding a layer of protection like an exterior primer or even some shade from nearby trees.
Heat sources inside the wall cavity
Walls aren’t just for keeping out drafts. Sometimes, they’re like little ovens too. Here’s why:
Warm ducts, heaters, or appliances inside your walls can raise the substrate temperature. When it gets hot enough, the paint film can’t take it and starts to fail. Bubbles are a common symptom.
Check if there are any heat sources behind the affected wall. If so, try to insulate them or redirect the heat elsewhere. If you’re unsure, consult with a pro.
Application during inappropriate temperatures
Paint’s not like soup – it doesn’t get better with age when it comes to temperature. Here’s what happens if you apply it wrong:
If the substrate’s too hot or dry, solvents can’t escape properly. They get trapped and cause bubbling. It’s like trying to pour water into a sealed bottle – something’s gotta give.
Check your paint’s manufacturer guidelines for ideal application temperatures. Generally, it’s between 50°F to 85°F (10°C to 29°C). And remember, ‘dry’ doesn’t mean ‘baked’. Keep an eye on humidity too.
Dirt, Oils, and Contamination as Causes
Surface contamination is a common, fixable culprit. Grease, oil, dust, or soap residues prevent the coating from bonding properly. Curing compounds or-release agents from forms can also interfere with adhesion. When these contaminants are present, you often see bubbling or fisheyes where the film didn’t grab.
Inspect the surface closely and consider a routine cleaning, especially on kitchens, bathrooms, and new drywall. Look for glossy patches or smudges that indicate residue. If in doubt, verify cleaning recommendations on the product label or manufacturer instructions before repainting.
Common contaminants and where they come from
Contaminants can be sneaky. They hide on your walls, preventing paint from sticking. Here are some common ones:
Kitchen grease – You’ll find this around cooktops, ovens, and cabinets. It’s a magnet for dust, turning into a grimy film.
Fingerprint oils – These come from handling walls during construction or renovation. They leave behind smudges that paint can’t grip onto.
Efflorescence – This is a white, powdery substance that forms when water evaporates from concrete or masonry surfaces. It’s like a salty crust that paint won’t adhere to.
Silicone – This can be left behind by caulking or sealants. It’s slippery and makes it hard for paint to stick.
How to test for contamination
Before you start painting, do these quick checks:
Water bead test: Splash some water onto the surface. If it beads up and doesn’t spread out, there’s a contaminant present.
Solvent wipe: Use a clean cloth dampened with rubbing alcohol or mineral spirits. Wipe the surface. If the cloth comes away dirty, you’ve found a contaminant.
These tests won’t tell you exactly what the contaminant is, but they’ll show you where to focus your cleaning efforts.
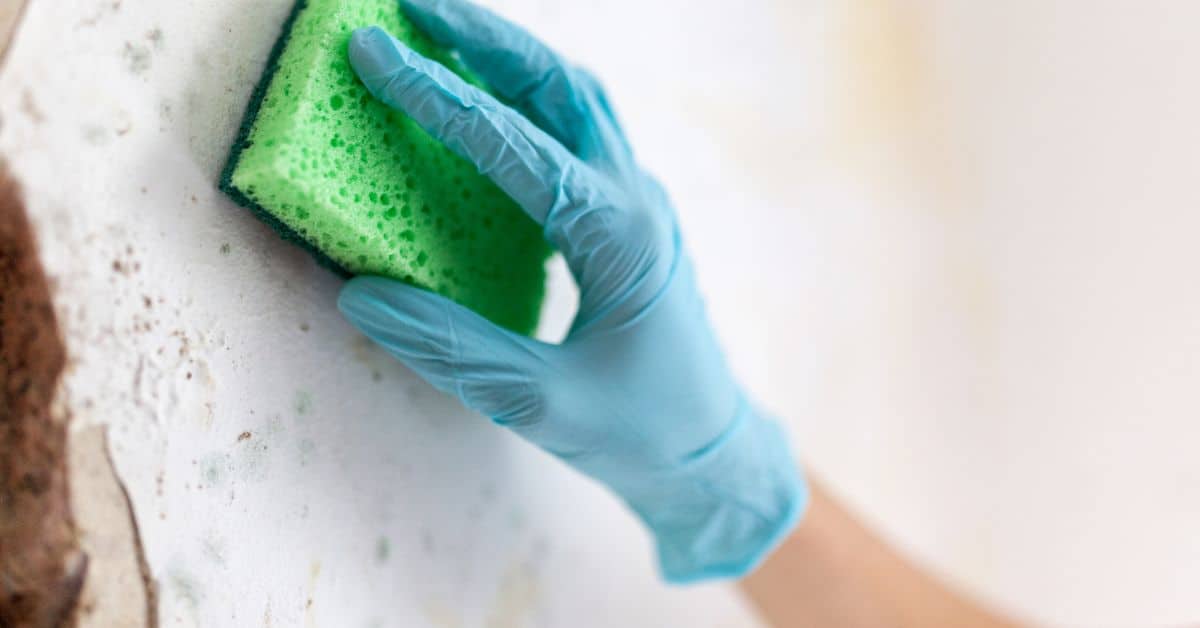
Proper cleaning and surface prep methods
To get rid of contaminants and give paint a clean slate, follow these steps:
Degrease: Use a degreaser like TSP (trisodium phosphate) or a similar product to cut through grease and grime. Follow the manufacturer’s instructions.
Wash: Scrub the surface with a stiff-bristle brush, warm water, and your chosen cleaner. Rinse thoroughly with clean water.
Allow to dry: Make sure the surface is completely dry before painting. This could take several days, depending on humidity levels.
Sand lightly: Once dry, lightly sand the surface with fine-grit sandpaper to help paint adhere. Wipe off any dust with a damp cloth.
Substrate and Coating Compatibility Issues
The interaction between substrate material and coatings matters a lot. Plaster, drywall, concrete, and masonry each respond differently to primers and paints. Incompatibilities can lead to poor adhesion and bubbling after a bake and cure period. Substrates may also have moisture or dust that worsens the problem.
Match the coating system to the substrate and follow the label directions for primers and topcoats. If unsure, consult manufacturer data sheets or local building guidance to confirm compatibility. Verify any required primers for your specific substrate type before applying new paint.
Incompatible primers and topcoats
Using the wrong primer or topcoat can lead to bubbles and delamination. For instance, using an alkyd (oil-based) paint over a latex (water-based) primer won’t stick well.
Why? Different paints have different chemical compositions. If they don’t play nice together, the top layer will lift off.
To avoid this, match your primer to your topcoat. If you’re unsure, ask at the paint store. They’ll guide you right.
Substrate deterioration (powdering, efflorescence)
Crumbling substrate or salt migration can force paint to lift. This is common with concrete and masonry.
Powdering happens when the surface crumbles. Paint won’t stick to dust. Efflorescence is when salts migrate to the surface, pushing paint off.
Inspect your walls. If you see powder or white salt deposits, these issues are at play. Scrape off loose material and clean the area before painting.
Old coatings and multiple layers
Thick paint build-ups or unstable existing layers increase bubbling risk. Each new layer adds weight, stressing the one beneath.
Old paint can also degrade over time, losing its ability to stick. Multiple layers complicate repairs because you’ll need to strip back to a stable surface.
Before painting, inspect your walls. If you see thick layers or peeling paint, consider stripping it all off and starting fresh. It’s more work but ensures a solid base for your new paint job.
Diagnostic Toolkit and Practical Inspection Tests
Start with a simple visual checklist and tactile test. Note where bubbles appear, their size, and whether the surface feels soft. A tap test can reveal whether the film is only on the surface or has lost adhesion.
More advanced tools help you confirm moisture levels without damage. A moisture meter or infrared camera can indicate hidden dampness. If you have access to a probe, use it carefully to check substrate moisture, not just surface color changes.
Visual checkpoints and mapping affected areas
Before you start poking or prodding, get a clear picture of the problem. This helps narrow down causes.
- Bubble size: Check if they’re small (1/8″ – 1/4″) or large (1/2″ and up). Smaller bubbles often indicate contamination, while larger ones can signal moisture issues.
- Location: Note where the bubbles are. If they’re on lower walls or near plumbing, it might be a moisture problem. Upper walls could point to heat or dirt.
- Pattern: Are they random, in lines, or clusters? Random suggests contamination, while lines or clusters might indicate heat or moisture sources.
- Progression: Have they been growing over time? Rapid growth could signal an active problem like moisture ingress.
- Color change: Check if the bubbles have discolored. This can indicate moisture or contamination.
- Wall texture: Feel the wall. Soft, spongy areas suggest moisture, while hard, brittle areas might be due to heat or old coatings.
- Surrounding walls: Compare with adjacent walls. If only one wall is affected, it’s likely a local issue like plumbing leaks.
- Ceiling and floor: Check above and below the bubbles. Issues here could be causing problems on your wall.
Quick rule: The more you know about the bubbles’ behavior, the better you can diagnose the cause.
Tap test, scrape test, and small probe
These simple tests help check adhesion and find hollow areas without causing damage.
- Tap test: Gently tap the wall with a screwdriver handle. A dull thud could indicate loose paint or hollow areas behind, suggesting moisture or heat issues.
- Scrape test: Use a utility knife to lightly scrape at a bubble. If it’s easy to lift off, there might be poor adhesion due to contamination or moisture.
- Small probe: Gently poke bubbles with a small tool like an ice pick. If it goes in easily and hits something solid, it’s likely a heat blister. If it meets resistance, it could be moisture behind the paint.
- Listen: Tap and listen. A hollow sound suggests air pockets or voids behind the paint, which could indicate moisture or heat issues.
Quick rule: These tests help confirm what you’ve seen visually, but they won’t tell you everything. Use them alongside other methods.
Using a moisture meter and infrared camera
These tools help confirm if there’s excess moisture behind your walls, but they won’t tell you everything. Use them alongside other methods.
- Moisture meter: Insert probes into the wall at bubble locations. High readings (above 15-20%) suggest moisture issues. Low or no readings don’t necessarily mean there’s no problem; they might just not be reaching it.
- Infrared camera: These show heat patterns, which can help locate moisture or heat sources. Cold spots could indicate moisture, while hot spots might signal heat blisters.
Quick rule: If you find high moisture readings or cold spots, don’t stop there. You’ll likely need to call a specialist for invasive investigation to find the exact source and extent of the problem.
Repair Strategies: Temporary Fixes Vs Permanent Solutions
Temporary fixes split into isolating moisture and addressing surface issues. If moisture is ongoing, contain the source first before cosmetic work. For adhesion problems, spot repairs may suffice when the cause is limited in scope.
Permanent solutions depend on the root cause and may require more extensive steps. This can include repairing leaks, replacing damaged substrate, or re-applying a full coating system after proper preparation. Plan repairs around the diagnosis and verify steps with product instructions.
DIY small-bubble repair workflow
Got a few isolated paint bubbles driving you mad? Here’s your step-by-step guide to fix ’em safely and quickly.
Step 1: Safety first! Put on gloves, goggles, and old clothes. Ventilate the area.
Step 2: Pop those bubbles gently with a pin or needle. Wipe off any residue with a damp cloth.
Step 3: Lightly sand the affected areas (120-grit sandpaper) to smooth out any roughness and improve paint adhesion. Vacuum and wipe clean.
Repairing moisture damage at the source
Moisture’s causing your bubbles? You gotta fix that leak first, or it’ll keep happening. Here’s how:
Step 1: Find the culprit. Use a moisture meter and infrared camera to trace back to the source – could be leaks, condensation, or poor drainage.
Step 2: Fix that leak! That might mean repairing plumbing, improving ventilation, or regrading your yard to direct water away from walls.
Step 3: Let it dry out. Before you paint, make sure the area’s completely dry. Use fans and dehumidifiers if needed. Then, prime with a moisture-blocking primer before repainting.
Recoating and material specs to use
Choosing the right materials makes all the difference in your paint job’s longevity. Here’s what to look for:
- Primer: Use a primer designed for your substrate (walls, ceilings) and specific moisture issues. Look for ratings like ‘moisture-resistant’ or ‘sealer-prime’.
- Paint: Choose a 100% acrylic latex paint with good adhesion and stain resistance. Check the paint can for specs – look at ‘Hide’, ‘Coverage’, and ‘Stain Resistance’ ratings.
- Avoid: Don’t use oil-based paints in high-moisture areas. They can peel, crack, or mildew.
- Topcoat: Consider a satin or semi-gloss finish for easy cleaning and better durability.
- Compatibility: Always check manufacturer’s instructions to ensure your primer and paint are compatible.
Prevention, Maintenance, and Monitoring
Long-term prevention centers on moisture control and surface upkeep. Ensure ventilation and proper humidity levels in the space. Regularly inspect exterior conditions and drainage to catch leaks early. Keep the painted surfaces clean and free of pollutants that could interfere with adhesion.
Establish a routine monitoring plan and document changes. Revisit the diagnostic steps after weather events or plumbing work. Use manufacturer guidelines to refresh primers and coatings when performing future maintenance.
Ventilation and humidity control best practices
Keeping your walls dry is half the battle against paint bubbles. Here’s how:
Use exhaust fans in bathrooms, kitchens, and laundry rooms to remove moist air. Run them for 15-20 minutes after showers or cooking.
Promote air circulation. Keep windows open when possible, especially in humid weather. Consider using ceiling fans or wall-mounted fans to move air around.
Check for condensation. If you find water droplets on walls or windows, it’s a sign of excess moisture. Address the source and improve ventilation.
Routine inspection checklist
Regular checks help catch problems early. Use this seasonal guide:
- Spring: Check for water damage after winter thaws.
- Summer: Inspect areas prone to heat and humidity, like south-facing walls or rooms with poor ventilation.
- Fall: Before cold weather sets in, ensure there are no gaps or cracks where cold air could cause problems.
- Winter: Keep an eye on areas near heating vents. If paint bubbles here, it might be a sign of heat-related issues.
- Monthly: Walk around your home, checking for new bubbles or signs of moisture like musty smells or peeling wallpaper.
- Annually: Use a moisture meter and infrared camera to check walls for hidden moisture. See earlier for details.
Quick rule: If you find bubbles, don’t wait. Address the issue promptly to prevent it from spreading or causing more damage.
When to consider upgrades or material changes
The right materials can make a big difference in preventing paint bubbles. Here’s when to consider upgrades:
- Switching to more durable finishes: If you’re dealing with frequent bubbles, consider switching to a more durable paint or wall covering.
- Specialist primers: If you’re painting over new drywall, plaster, or problem surfaces like concrete, use a primer designed for that substrate. See earlier for details.
- Exterior claddings: If your exterior walls are prone to moisture, consider installing a cladding system that allows water to drain away from the wall.
- Changing material specs: Look for paints and primers with better adhesion, higher durability ratings, or better resistance to heat and humidity.
Tip: Always test new materials in a small, hidden area first. This helps you avoid costly mistakes.
Conclusion
Bubbles on walls are a warning not a cosmetic issue. Fixing the problem right protects safety, keeps moisture from spreading, and keeps paint looking good longer.
Start by identifying moisture sources, then do a simple, step-by-step check: test visible areas for moisture, note any changes with temperature or humidity, look for dirt or contamination, verify that the substrate and coating are compatible, run the recommended diagnostic tests, decide between temporary fixes or a permanent repair, patch or recoat in small areas first, and keep monitoring after work is done.
A few traps to avoid: don’t ignore active moisture or mold, don’t rush repairs or skip a small-area test, don’t seal in moisture behind a poor patch, and don’t use mismatched coatings or aggressive heat to dry it out. Follow basic safety rules—shut off electrical near wet areas, wear eye protection and a mask when sanding or scraping, ventilate well, and test fixes on a discrete spot before wider application.
If water intrusion continues, you see mold growth, the wall shows structural signs, or you’re unsure about results, call a professional. When you stick to the plan, you preserve the wall, prevent costly damage, and keep the project moving forward with confidence.
FAQ
What’s the simplest way to tell if bubbles come from moisture, heat, or dirt?
Moisture usually shows as damp or wet edges and may keep forming after you dry the wall. Heat issues often come with a bluish tinge or random blistering where heat sources hit the paint. Dirt or oils leave greasy-looking spots and fingerprints that don’t disappear with a dry, clean wipe.
How should I check for moisture without tearing the wall apart?
Look for staining, peeling near windows or plumbing, and areas that stay damp after a dry day. Feel the surface; a cool, damp feel means moisture could be present behind the paint. If possible, run a simple moisture test you can apply to the surface and follow the label directions.
What steps should I take if I suspect heat or sun exposure is the cause?
Note where the sun or heat source hits the wall and check for consistent blistering in those spots. If the paint bubbled after a heater or sunny wall, you may need to address the heat source and recoat with proper temperature- or shade-tolerant products as per manufacturer instructions.
What should I do if dirt or contamination is the issue?
Wipe with a cleaner or degreaser labeled safe for your wall surface and rinse as directed. If contaminants remain, you may need to remove the paint or treat the surface more aggressively before repainting, following product labels and local guidance.