
Introduction
Soft spots in new concrete are areas where the surface feels mushy or weak while it cures.
They commonly form when extra bleed water rises to the surface or when the mix is overworked during finishing.
Identifying the cause helps you choose the right fix and prevent this from reoccurring.
Watch for shiny patches, dimples, or depressions that settle after the surface sets.
For localized soft spots, remove the loose material, re-screed or fill gently, and re-cure with appropriate covering or moisture.
Focus on proper curing and avoiding excessive troweling to prevent bleed water from drying in too quickly.
Key takeaways
- Bleed water weakens surface paste; avoid over-tamping during finishing and screeding.
- Watch for depressions and bleed marks; trap and patch before final set.
- For localized soft spots, cut, clean, and repair with appropriate patch materials.
- Proper curing (moist or seal) reduces surface paste weakness in early hours.
- Wear gloves and eye protection when patching; avoid skin contact with cement.
- Plan for local climate; adjust finishing and curing to avoid bleed.
Table of Contents
- Introduction
- Key takeaways
- Quick Overview: What a “Soft Spot” Is and Why It Matters
- Core Cause #1 — Bleed Water and Surface Paste Weakness
- Core Cause #2 — Overworking, Troweling and Surface Disturbance
- Other Technical Causes: Mix, Water Content, Segregation, and Subgrade
- How to Identify and Test Soft Spots on New Concrete
- On-Site, Immediate Fixes for Fresh Pours (First-Day to Early Curing Window)
- Repair Strategies After Concrete Has Set: Patches, Overlays, and Stabilization
- Prevention Checklist: Planning, Finishing, Curing, and Local Climate Adjustments
- Conclusion
- FAQ
Quick Overview: What a “Soft Spot” Is and Why It Matters
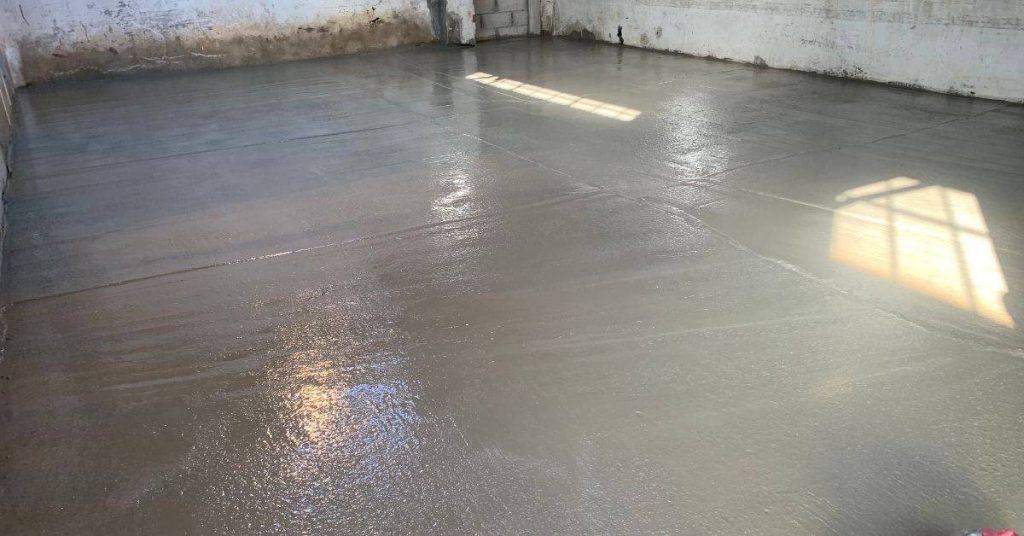
A soft spot is not a cosmetic blemish. In fresh concrete, it can mean free water and laitance at the surface, while in early age it reflects settling and bleed water that leave a weak, paste-rich layer. Framing the idea this way helps you distinguish surface issues from deeper problems that affect durability and workability.
Soft spots matter because they can reduce early strength, make finishing uneven, and invite cracking, curling, or shrinkage as the slab cures. Knowing the main culprits helps you spot risk early and plan fixes before hard-to-repair defects set in. Watch for bleed water sheen, surface calm versus wandering sheen, overworking, and signs of a subgrade or subbase problem that traps moisture or shifts under load.
What homeowners and contractors see as a soft spot
A ‘soft spot’ in concrete isn’t always obvious at first. Here’s what to look for:
Visible signs: You might see dull, dusty patches or areas that look different from the rest of the slab.
Tactile signs: Gently press on the surface. Soft spots feel weak and may compress under light force. In extreme cases, you might even see flaking or crumbling.
Why soft spots lead to bigger problems
A soft spot isn’t just a cosmetic issue. It’s a weak point that can cause serious trouble down the line:
The weak surface layer makes it easy for water and dirt to seep in, leading to scaling and delamination. This means chunks of concrete can break off, ruining your finish.
Soft spots also stain easily. That dull patch you saw earlier? It might turn into a permanent eyesore as dirt gets trapped in the weak surface layer.
Lastly, soft spots have reduced wear resistance. They’re more susceptible to damage from foot traffic, vehicles, or even weathering. This can lead to cracking and other long-term issues.
Core Cause #1 — Bleed Water and Surface Paste Weakness
Bleed water carries fines and cement paste to the surface, leaving a thin, paste-rich layer that can be weaker than the rest of the slab. This surface paste can compromise bond with toppings and reduce surface hardness, especially where finishing passes are frequent or too aggressive.
During placement, segregation, capillary action, and rapid evaporation pull cement and fines to the top. That makes the uppermost surface thinner and less cohesive than the interior. Look for signs like sheen, laitance, or shallow cracking, and assess bleed depth without destructive tests while planning fixes that protect the surface during curing.
How bleed interacts with finishing timing
Bleed water can wreak havoc on your concrete’s surface if not managed properly during finishing. Here’s what you need to know:
Finishing over standing bleed water embeds weak paste into the surface, leading to a soft top layer.
Check for bleed before final finishing. Use a screed or trowel to gently touch the surface. If it feels wet or leaves a milky residue, wait until bleeding stops before proceeding with final finishing.
Indicators of excessive bleed on a fresh pour
Excessive bleed can be identified by several visible signs. Keep an eye out for:
– Glossy patches of water or a milky sheen on the surface, indicating standing bleed water.
– Delayed initial set time, as bleed water slows down cement hydration.
– Dusting or shallow cracking that appears soon after finishing, which could be due to a weak, paste-rich surface.
Core Cause #2 — Overworking, Troweling and Surface Disturbance
Excessive troweling or multiple passes while bleed water is present disrupts the surface microstructure. It can push fines up and remove coarse particles, concentrating paste and weakening the top layer where finish is most visible.
Signs to watch include persistent surface sheen, slickness, or a chalky look that suggests bleed water is being trapped rather than released. Avoid heavy finishing once bleed begins; plan the sequence, use appropriate trowels, and keep working to a minimum on the surface while bleed is active to prevent delamination or a weak skin.
Common finishing mistakes that create soft spots
Avoid these common finishing errors to prevent soft spots in your concrete.
- Over-troweling: Too many passes with the trowel remove coarse aggregates and increase paste concentration, weakening the surface.
- Finishing too early: Starting finish work before bleed water has dissipated leaves a weak skin prone to delamination.
- Reworking after initial set: Disturbing the surface after it’s begun to set can cause soft spots and weaken the concrete.
- Using wrong tools or speeds: Incorrect trowel type, size, or speed for your mix consistency can lead to overworking and soft spots.
Avoid these mistakes by understanding your mix design, timing your finishing work correctly, and using appropriate tools.
Best practice to avoid overworking
Follow these best practices to prevent overworking your concrete during finishing.
- Delay aggressive finishing: Wait until bleed water has dissipated before using power trowels or aggressive finishing techniques.
- Use lighter techniques initially: Start with hand troweling and use lighter, slower passes to avoid disturbing the surface.
- Check mix readiness: Instead of relying solely on the clock, check if bleed water has stopped before starting finish work.
- Avoid repeated passes: Make each pass count; too many repeated passes can lead to overworking and soft spots.
By following these best practices, you’ll help ensure a strong, durable concrete surface.
Other Technical Causes: Mix, Water Content, Segregation, and Subgrade
A high water-cement ratio can boost workability but also promotes excessive bleed and long-term weakness. You may see a softer top or more surface dusting in areas with higher ratios or poor hydration control.
Segregation during placement—differential compaction and particle separation—can create bands or honeycombing that weaken localized areas. Weak top-layers from fines or laitance, plus unstable, saturated, or inadequately compacted subgrade, all contribute to soft spots that persist after finishing and curing begin. Check slump, look for bleed signs, and review subgrade drainage and preparation before adjusting mix or placement technique.
Mix and placement issues to check before the pour
Before pouring, ensure your concrete mix is right. A high water-cement ratio makes concrete too wet, leading to soft spots later.
Check slump: It should be 4-6 inches for most jobs. Too much (over 8 inches) means excess water, which can lead to bleed water and weak spots.
Use admixtures wisely. They can help control workability but too many can weaken the mix. Make sure they’re compatible with your cement type.
Delivery and placement matter too. Keep concrete moving gently to avoid segregation – coarse particles sinking, fines rising. This can cause weak top layers and soft spots.
Subgrade and drainage factors that create local soft spots
A stable, dry subgrade is crucial for strong concrete. Soft, organic, or wet soil causes settlement and voids under your slab.
Inspect the base: It should be well-compacted, free of organic matter, and not too wet. If it’s soft or holds water, you’ll get soft spots on top.
Check drainage. Standing water undermines the subgrade, leading to settlement and soft patches. Ensure water can drain away from your slab.
If you find issues, address them before pouring. Excavate and replace poor subgrade, improve drainage, or use a stabilizing agent for weak soil.
How to Identify and Test Soft Spots on New Concrete
Visual clues include surface sheen, uneven texture, footprints, or damp patches that look different from surrounding concrete. These cues help you decide where to focus more detailed checks later in the cure.
Texture tests—gentle finger presses or light taps—can reveal sponginess or hollow sounds. Use non-destructive checks like probing with a punch, moisture readings near the top inch, and light deflection tests to map firmness and prioritize repairs without heavy damage.
Step-by-Step Process
Follow these practical steps to identify and test soft spots on new concrete.
- Prepare the area: Ensure safety by keeping traffic off the pour. Set up temporary barriers and signage.
- Visual inspection: Look for sheen from bleed water, uneven texture, footprints, discoloration, or damp areas.
- Texture check: Perform gentle tactile tests using gloves. Press lightly or tap to feel for sponginess or hollowness.
- Non-destructive testing: Use a punch or screwdriver for surface sounding, a moisture meter for elevated moisture, and apply light pressure for deflection checks.
- Prioritize action: Categorize zones as urgent (ongoing bleed water or traffic exposure) vs. watch-list (minor softness). Document size, location, firmness, and map out repairs.
Visual and Tactile Checkpoints
Use this checklist to identify potential soft spots on new concrete pours.
- Powdery surface: Indicates excessive bleed water or weak surface paste. Confirm by gently brushing the area with a broom.
- Easily abraded areas: Lightly scratch the surface with a coin or key to check for softness. If it’s too easy, it’s a soft spot.
- Discoloration: Darker or lighter patches may indicate inconsistent curing or moisture issues. Check with a moisture meter if unsure.
- Inconsistent sheen: A shiny patch could be bleed water sitting on the surface, causing softness. Wipe it away to check for underlying hardness.
Quick rule: If you find any of these signs, perform tactile and field tests to confirm before taking action.
Simple Field Tests and When to Call a Pro
Perform lightweight knock/tap tests using a hammer or screwdriver handle. Tap the surface gently, listening for a dull or hollow sound indicating delamination.
Scratch tests can also help. Use a coin or key to lightly scratch the surface. If it’s too easy, it might be a soft spot. Be careful not to damage the concrete further.
For sounding, use a punch or screwdriver to tap the surface and listen for voids or hollowness. If you find large areas of delamination or structural-sounding defects, stop and call a professional immediately.
On-Site, Immediate Fixes for Fresh Pours (First-Day to Early Curing Window)
When the pour is fresh, the safest move is to pause finishing and minimize traffic on the slab. Protect the surface from rain and fast drying; delay final finishing until bleed water has settled enough to avoid pinholes and streaks.
Manage bleed water by letting it rise and evaporate or be absorbed as appropriate. Use plastic, breathable blankets, or mats to shield the surface, and keep drainage clear. Weather and mix sensitivity matter, so check with the supplier or contractor for exact timing in your conditions.
Short-term actions: delay, protect, and monitor
Once your concrete is poured, it’s crucial to take immediate action to prevent damage during the early curing stage. This phase, lasting from first-day pour to early curing window, requires careful management.
Delay any finishing operations like troweling or floating until bleed water has cleared and the surface is stable. This could take anywhere from 2 to 6 hours depending on weather and mix type.
Protect your slab from external elements that can cause damage. Use plastic sheeting, breathable curing blankets, or temporary enclosures to shield it from rain or rapid drying. Set up windbreaks or shade to prevent excessive evaporation.
Monitor the bleed-out duration closely. Keep an eye on the surface for signs of water rising and evaporating. Once this process is complete, you can proceed with a light touch-up or re-finishing.
Emergency local corrections without full replacement
If soft spots are discovered during the early curing window, don’t panic. There are low-risk fixes you can attempt before deciding on a full replacement.
After bleed water has cleared, lightly re-texture the affected areas using a light trowel or broom finish. This helps to even out the surface and remove any minor imperfections caused by excess bleed water.
If the soft spots are more severe, you might need to remove the weak surface layer and patch it with fresh concrete. Ensure you’ve identified the cause of the soft spot (e.g., overworking, subgrade issues) before proceeding with this fix.
For significant weaknesses or if in doubt, always consult a professional for evaluation. They can provide tailored advice based on your specific situation and help prevent further damage.
Repair Strategies After Concrete Has Set: Patches, Overlays, and Stabilization
Start with a severity assessment: cosmetic cracks or delamination may take patches, while extensive voids or ongoing movement call for overlays, stabilization, or even replacement. Choose methods based on how the problem affects load transfer and long-term performance.
Patch options range from cementitious patches to epoxy or polymer-modified mortars with proper feathering and curing. Polymer overlays can smooth minor defects, while stabilization (polyurethane foam lifts) addresses localized soft spots with minimal downtime. For larger or persistent failures, full slab replacement may be the most cost-effective path, with proper demolition and recycling notes to consider.
Surface-level repairs and overlays
For minor cosmetic issues, surface-level repairs and overlays can restore your concrete’s appearance and service life. These methods are quick and cost-effective but require a sound base to succeed.
Patching: Use cementitious patches or epoxy/polymer-modified mortars for small cracks and chips. Feather the edges to blend with the surrounding surface. Allow 24-72 hours cure time before light traffic, depending on the product used.
Overlays: For minor defects like hairline cracks or discoloration, consider a bonded overlay. These thin layers of polymer-modified concrete can smooth and level surfaces, encapsulating minor defects. Proper surface preparation, including cleaning and profiling, is crucial for good bonding. Allow 24-72 hours dry time before light traffic.
Structural fixes and slab-level solutions
When concrete has underlying support problems, voids, or delamination, structural fixes are necessary. These methods address the root cause but can be more invasive and costly.
Void Filling: Inject expanding grouts or foams into voids to restore support. This method is non-invasive but may not always provide a solid base for overlays.
Foam Lifting: For settled slabs, polyurethane foam can be injected under the slab to lift and stabilize it. This method is minimally invasive but requires professional evaluation to ensure proper load transfer and moisture considerations.
Full Replacement: If extensive delamination, large voids, or persistent movement is present, full slab replacement may be necessary. Consult a pro to evaluate costs and appropriateness.
Cost and lifecycle considerations
When deciding on repair methods, consider the trade-offs between quick cosmetic fixes and more durable repairs. Long-term performance and local climate should factor into your decision.
Cosmetic Fixes: Surface-level repairs and overlays are quick and inexpensive but may not address underlying issues or last as long as structural fixes. They’re suitable for minor defects in stable concrete.
Structural Repairs: These methods address the root cause of problems but can be more expensive and time-consuming. They provide longer-lasting results, especially in harsh climates or high-traffic areas. Always consider long-term performance over short-term costs.
Before proceeding with any repair, consult a pro to evaluate your specific situation. They can provide tailored advice based on the severity of damage, local climate, and other factors.
Prevention Checklist: Planning, Finishing, Curing, and Local Climate Adjustments
Before pour, verify subgrade stability, compaction, moisture control, and rough grading to prevent future soft spots. Confirm mix specs, including slump targets and admixtures, and tailor them to the project and climate.
During finishing, time trowels and use proper joints to minimize curling and cracking, then implement appropriate curing with blankets, misting, or sealers. Plan for weather, heat, cold, and humidity, and adapt formwork, pour rate, and curing to reduce bleed water and weak spots while keeping the work within local guidelines.
Tools, materials, and procedural checklist for a successful pour
Before you start pouring, ensure everything is in order to prevent soft spots. Use this checklist to verify essentials.
- Quality mix: Confirm cement type, water-cement ratio, aggregate size, and slump target with your supplier.
- Proper tools: Check trowels, floats, screeds, and other equipment for wear and tear. Replace if needed.
- Finishing plan: Know your timing for bull-floating, power-troweling, and joint placement.
- Curing materials: Have curing blankets, misting equipment, or chemical sealers ready.
- Surface protection: Prepare protective coverings to shield concrete from rain and wind.
- Formwork inspection: Ensure forms are secure, level, and properly braced.
- Subgrade verification: Confirm soil stability, compaction, and moisture control before pouring.
- Admixtures check: Verify air-entraining agents, accelerators, or retarders are added as per mix design.
Quick rule: Skipping any of these can lead to weak spots, curling, or cracking. Double-check everything before pouring.
Curing methods and timing guidance
Proper curing is crucial for strong concrete. Use this guide to choose the right method and duration.
- Wet curing: Keep concrete moist with water, either by misting or ponding. Ideal for hot weather.
- Curing compounds: Apply liquid membranes or sprays to retain moisture. Use in cold or windy conditions.
- Curing blankets: Cover concrete with insulated blankets to maintain heat and humidity. Best for cold nights.
- Timing duration: Follow supplier guidance, typically 3-7 days depending on climate and concrete temperature.
- Temperature control: Keep concrete within 50-80°F (10-27°C) during curing for optimal strength gain.
Quick rule: Inadequate or improper curing leads to weak, porous concrete prone to soft spots and scaling.
Climate-specific adjustments and scheduling tips
Account for local weather conditions to minimize risks of soft spots. Here’s how:
- Hot weather: Pour early morning or late evening, use retarding admixtures, and increase curing duration.
- Cold weather: Pour during warmest part of day, use accelerators, and protect with insulated blankets at night.
- Humid conditions: Increase curing duration, apply curing compounds, and avoid pouring in rain.
- Wind: Shield concrete from wind using barriers or protective coverings to prevent rapid drying.
Quick rule: Ignoring climate factors can cause excessive bleeding, weak spots, and delayed setting times.
Conclusion
Soft spots in new concrete threaten strength, appearance, and safety, so you fix them now with clear checks and solid steps you can trust. Stay focused on quick, practical actions that protect the job from costly damage and call-backs.
Start by inspecting for bleed water, surface paste softness, and any disturbed finish, then confirm by pinching or pressing small areas to see if they stay firm; next, review the mix and water content and check the subgrade and curing plan, then apply on-site fixes for fresh pours if you’re still within the early curing window, and plan patches or overlays only after the concrete has set if needed.
Common mistakes to avoid include overworking the surface or adding water to the slab to “fix” a weak spot, skipping a proper test before re-troweling, and ignoring unexpected softness that persists after initial curing; keep safety first, wear proper PPE, and test in a small area before expanding your fix).
If you’re dealing with a large area, structural concerns, uncertain causes, or a job with warranty implications, call in a professional rather than pushing on alone. With careful checks, timely fixes, and good planning, you can restore durability and confidence in the finished surface.
FAQ
What are the main causes of soft spots beyond bleed water and overworking?
Soft spots come from how the mix behaves on the slab and how you finish it. Check the concrete data for water content, slump, and how the subgrade was prepared, then match those to your local conditions.
If the surface paste is weak, or your mix was too dry or too wet at pour, you’ll get areas that feel mushy or hollow. Always refer to the product instructions and local guidance when diagnosing, and don’t guess on ratios or timing.
How can I spot bleed marks and depressions on a fresh concrete surface?
Bleed marks show up as shiny, wet streaks that migrate across the surface. Depressions feel hollow or soft when you drag a trowel or straightedge over them.
Use a straightedge or level to check for high and low spots, and run your hand lightly across the surface to feel for texture changes. If you see any bleed or depressions, note them before closing the surface.
What are practical, localized repair options for soft spots on a DIY job?
For fresh pours, you can rework the spot lightly and re-finish as needed, then protect it with proper curing or cover. If the concrete has begun to set, patch with a compatible mortar mix or an approved resurfacing product labeled for use on fresh-to-set concrete, following the label directions.
Avoid over-troweling or grinding after a patch, and don’t mix a patch that’s incompatible with the existing surface. Always verify the repair method with the product instructions and your local rules before proceeding.
What curing methods help prevent soft spots and what happens if they’re not done right?
Keep the surface moist and protected from rapid drying during the early curing window. Use approved curing methods such as damp coverings, misting, or curing compounds as recommended by the concrete supplier.
If you skip proper curing, you risk surface paste cracking, bleed-related weaknesses, and longer-term durability issues. Check product labels and local guidance for acceptable curing practices and durations.