
Introduction
Dark spots on cured concrete usually indicate moisture issues, improper curing, or contamination. This article will help you tell which cause is at play and what to check on a DIY jobsite. We’ll cover practical signs to look for and simple checks you can do with common tools.
Curing methods include keeping moisture with water and using plastic covers to slow evaporation. Curing plastic helps protect concrete during the cure, but it can trap moisture or soil if not used correctly. If you see dark spots after removing the cover, check the curing setup, surface cleanliness, and potential contamination, and always follow the product label, manufacturer instructions, and local rules.
Key takeaways
- Dark spots signal uneven moisture or contamination; identify root causes before repair.
- Water curing vs. plastic covers influence spot patterns; inspect deployment and timing.
- Plastic curing covers offer moisture retention but require proper sealing to prevent marks.
- Visual checks and simple tests help distinguish water, plastic, or contamination causes.
- Remediation ranges from cleaning and resealing to full resurfacing, depending on cause.
- Use approved curing covers, follow label instructions, and prioritize safety and ventilation.
Table of Contents
- Introduction
- Key takeaways
- Quick Diagnosis: What Dark Spots Look Like and Why They Matter
- Main Causes: Water Issues, Plastic Curing Effects, and Contamination
- How Different Curing Methods Influence Dark Spot Formation
- Visual Checkpoints and Simple Field Tests to Identify the Root Cause
- Repair and Remediation Options by Cause (from Least to Most Invasive)
- Prevention and Best Curing Practices to Avoid Dark Spots
- Choosing and Maintaining Concrete Curing Covers and Materials
- Safety, Environmental, and Cost Considerations
- Conclusion
- FAQ
Quick Diagnosis: What Dark Spots Look Like and Why They Matter
Dark spots on a cured slab come in distinct patterns. You’ll see water-related halos, film residues from plastic curing, or surface/embedded stains from contamination. Correctly identifying the type guides the repair choice and affects long-term durability.
Use a visual taxonomy to separate patterns by location, timing, and pattern clarity. Note color intensity, edge definition, and whether spots stay after cleaning or grinding. Build a simple on-site checklist that maps spot types to fixes, so you decide between surface prep, re-curing, or patching—and prevent recurring issues.
Typical spot appearances and patterns
Dark spots on cured concrete can vary in appearance, giving clues about their cause. Here are some common visual cues:
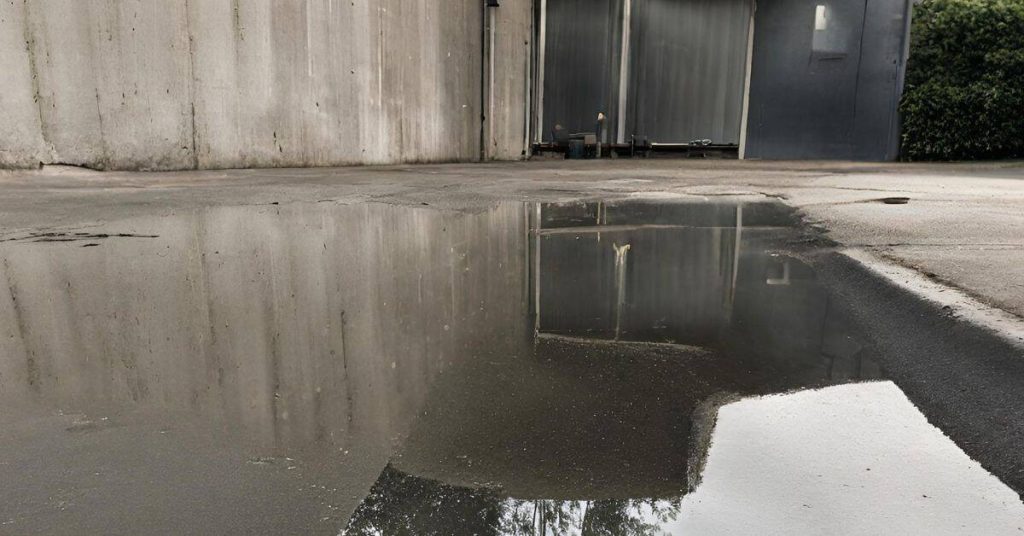
Water-related dark spots often appear as uniform discoloration or rings, especially around edges where water tends to pool. They might be light gray to dark gray.
Plastic curing film residues leave behind localized dark patches or speckles, usually small and scattered. They’re often light brown to dark gray.
Contaminant stains, like oil or dust, show up as blotchy discoloration, often with uneven edges. They can be brown, black, or even green (efflorescence).
When dark spots matter for performance vs. aesthetics
Not all dark spots are created equal. Some are purely cosmetic, while others can impact your concrete’s long-term performance:
Cosmetic-only spots are usually light in color, small, and scattered. They don’t typically indicate moisture retention or contamination.
Spots that signal potential issues include those that are dark, large, or concentrated. These could hint at moisture retention, which can lead to cracking and spalling. Contaminants like oil can also weaken the surface.
If spots are persistent, even after cleaning or grinding, they might indicate an underlying issue. It’s best to address these promptly to prevent further damage.
Main Causes: Water Issues, Plastic Curing Effects, and Contamination
Identify the core culprits: evaporation or pooling on the surface, interactions with plastic curing films, and residues left on or in the slab. Each cause leaves a different color shift and texture signature. Diagnostic cues help you distinguish moisture-driven changes from film effects or contamination.
Look for edge and mid-area drying patterns, sheen presence or absence, and whether spots fade with drying or heat. Consider how the curing cover or film might trap moisture or react with pigments. Keep a simple workflow: dry test, inspect with cover removed, wipe surfaces, and test moisture if unsure.
Water-related causes (evaporation, pooling, uneven hydration)
Uneven moisture during the curing process can lead to dark spots on your concrete surface. Here’s how:
Evaporation: When water evaporates faster from some areas than others, those areas may appear darker due to increased cement concentration.
Pooling: Water collecting in low spots or edges can cause rewetting and darkening where it sits. You might see edge/medge drying patterns here.
Uneven hydration also plays a role. If some parts of the slab dry out quicker than others, they’ll appear darker once dried.
Plastic curing cover effects (trapped moisture, thermal sheen, condensation)
Plastic sheeting used for curing can cause color changes due to trapped moisture and heat:
Trapped Moisture: Plastic holds in water vapor, causing darker patches where it sits. Remove the cover to check if spots disappear.
Thermal Sheen: Heat buildup under plastic can create a shiny or lighter patch when it’s removed. This is usually superficial and disappears with time or heat application.
Condensation marks may also appear as dark patches where water droplets form and leave stains.
Contamination and surface deposits (form oils, curing compounds, dirt, salts)
Foreign materials left on or in the slab can cause darkening. Here’s how to spot them:
Form Oils: These leave a sheen and may not disappear with heat/air flow. Check for residual traces around form ties or edges.
Curing Compounds: Residues can cause dark spots that don’t disappear after drying. Wiping the surface may reveal their presence.
Dirt, salts, and other contaminants may also leave visible marks. Unlike moisture-related spots, these often appear more uniform or concentrated in specific areas.
How Different Curing Methods Influence Dark Spot Formation
Different curing methods produce characteristic surface outcomes. Wet curing tends to retain moisture longer, while plastic-sheet curing can trap pockets of moisture or debris. Curing compounds influence evaporation and color uniformity, depending on film thickness and surface cleanliness.
Check the cure enclosure, thickness coverage, and presence of puddles or condensate. Compare treated versus untreated sections to separate process-induced spots from contamination. Use quick field tests, such as a touch test for moisture or a small water spot test, to guide next steps like changing the method or re-curing.
Wet Curing and Water-Based Methods
Wet curing involves continuous wetting of the concrete surface to maintain a moist environment. This method helps achieve uniform hydration, but it can also lead to dark spots where water ponds or drainage is poor.
Moisture retention is key here, but too much water in one spot can cause discoloration. Make sure your curing setup allows for even water distribution and proper drainage.
Pro tip: Regularly inspect the surface to ensure no puddles form, and adjust your wetting schedule as needed to prevent over-saturation.
Plastic-Sheet and Membrane Curing
Plastic sheets or membranes create an impermeable barrier, trapping moisture and heat. This can lead to localized sheen or condensation marks, which may appear as dark spots.
The risk is higher where the plastic touches the surface directly or if there are trapped pockets of air. Ensure your plastic sheeting is well-sealed but not in direct contact with the concrete.
Pro tip: Use a small amount of water on the underside of the plastic to create a humid environment without causing condensation marks.
Curing Compounds and Sealers
Liquid membrane-forming products like curing compounds and sealers create a protective film that slows down evaporation. However, improper application or interaction with subsequent cleaning can result in dark patches.
Inadequate film thickness, surface contaminants, or poor cure times can all contribute to spotting. Ensure you follow the manufacturer’s guidelines for application and allow sufficient cure time before exposing the concrete to other substances.
Pro tip: Always perform a small test patch to check for any adverse reactions before applying curing compounds or sealers across your entire project.
Visual Checkpoints and Simple Field Tests to Identify the Root Cause
Start with a thorough visual inspection: look for uniform color, edge halos, gloss differences, and blotches across large areas. Note whether plastic sheets were used and if they overlapped or were installed too early or late. Look for signs suggesting contamination or moisture ingress.
Carry out low-tech tests on a small area: observe absorption versus beading with a water drop, test film solubility by gentle rubbing, and perform a quick wipe to see if color change is surface or penetrative. Document color change before and after cleaning to gauge depth and plan repairs appropriately.
Pattern/location clues and context questions
Before diving into tests, map out dark spot patterns to narrow down causes.
- Edge halos: Check if spots follow edges. Water evaporation often leaves halos near formwork.
- Joint lines: Dark spots along joints might indicate water ingress or improper curing.
- Covering overlap: Overlapping plastic sheets can trap moisture, causing uneven curing.
- Worksite activities: Consider recent rain, sprinklers, or other water sources that could have affected the concrete.
- Plastic sheet usage: Assess if plastic sheets were used and when they were applied/removed.
- Glossy vs. matte finish: Uneven glossiness can indicate trapped moisture or improper curing.
- Streaks or blotches: Large-scale patterns might suggest water-related issues or film problems.
- Efflorescence: White powdery deposits could signal moisture intrusion and salt migration.
Quick rule: Mapping patterns helps focus tests and saves time.
Quick moisture and adhesion checks
Perform these simple tests to detect trapped moisture or surface films before proceeding with repairs.
- Plastic-sheet test: Place a clear plastic sheet on the spot. If it fogs up, there’s trapped moisture.
- Cold-metal thermometer: Check for cool spots using a cold-metal thermometer. Cool spots might indicate trapped moisture or poor curing.
- Tape/residue peel: Apply painter’s tape to the spot, let it sit, then peel off. If residue comes off, you likely have a surface film.
- Water droplet test: Place water droplets on the spot. If they bead up, the surface is likely contaminated or has a film.
Quick rule: These tests help confirm moisture issues and save you from unnecessary repairs.
Small-area solvent or rinse test
Spot-clean a small patch to see if discoloration is removable before committing to larger-scale repairs.
- Water rinse: Use clean water to rinse the spot. If color comes off, it’s likely a surface film or contamination.
- Mild detergent: Apply a mild detergent solution and scrub gently. If discoloration lifts, you’ve found the culprit.
- Appropriate solvent: For tougher films, use an appropriate solvent (like acetone for form oils) following safety guidelines. Test in a small area first.
Quick rule: Always test in a small, hidden area to avoid damaging the concrete or causing further discoloration.
Repair and Remediation Options by Cause (from Least to Most Invasive)
Define the causal categories clearly: moisture-related curing issues, plastic-cover interference, and surface or embedded contaminants. Use quick checks to support each diagnosis, including timing of spots and surface feel.
Arrange remediation from least to most invasive: light cleaning and rinsing for contaminants; controlled drying or re-curing for moisture; mechanical removal or surface restoration for embedded stains. Include safety notes and material compatibility to limit impacts on strength and finish, and know when to escalate to a professional for ongoing moisture or deep staining.
Cleaning and non-destructive treatments
For surface contaminants, start with gentle cleaning methods to avoid damaging the concrete. Test a small area first.
Use detergents, pressure washing, or biodegradable degreasers. Dilute detergents in warm water and apply with a soft-bristle brush. Rinse thoroughly afterwards.
For tougher stains, consider using a concrete cleaner specifically designed for removing surface contaminants. Always follow the manufacturer’s instructions.
Chemical and etching approaches (use with caution)
For stubborn stains, you might need to use stronger chemicals. Acid washing can help remove tough stains, but it must be done carefully to avoid damaging the concrete.
Use a specialized chemical cleaner if necessary. Always test on a small area first and follow safety procedures. Neutralize any remaining acid with a base like baking soda after use.
Remember, chemicals can affect the concrete’s finish and strength. Only use them as a last resort and after careful consideration.
Mechanical correction and resurfacing
For persistent or structural discoloration, mechanical methods might be necessary. Grinding, light abrasion, or shot-blasting can remove the top layer of concrete where stains are present.
Overlays can also be used to resurface the concrete and hide discoloration. However, these methods require professional evaluation for large areas to ensure they won’t compromise the concrete’s structural integrity.
Always consult with a professional before attempting mechanical correction or resurfacing. They can assess the damage and recommend the best course of action.
Prevention and Best Curing Practices to Avoid Dark Spots
Plan site prep to support proper curing: clear formwork gaps, remove standing water, and provide a clean, dry surface. This reduces moisture-driven discoloration before finishing begins. Align curing approach with expected conditions for the project.
Control initial moisture, manage bleed water, and time form removal to avoid trapped moisture. Document why a chosen curing method minimizes spots given climate, mix, and slab thickness, and monitor for signs of contamination during curing to adjust as needed.
Preparation and timing before covers are applied
Before applying curing covers, ensure your concrete surface is clean and ready. Here’s how:
Clean the surface: Remove any dirt, debris, or form oil that could cause discoloration.
Manage bleed water: Use a broom or trowel to spread out excess water evenly across the surface. This helps prevent dark spots caused by trapped moisture.
Wait for initial set: Before covering, wait until the concrete has started to set but is still soft enough to accept moisture. This usually takes 3-6 hours after placement.
Installing, securing, and removing covers correctly
Proper installation of curing covers is crucial to prevent dark spots. Here’s how:
Lay plastic or membrane covers smoothly: Start from one edge and lay the cover flat across the slab, avoiding wrinkles that can trap moisture.
Secure against wind: Use weights, stakes, or tape to keep covers in place and prevent them from flapping in the breeze, which could cause discoloration.
Avoid ponding: Ensure water doesn’t collect under the cover. If using plastic sheets, make sure they overlap properly to prevent standing water.
Remove at the right time: Take off covers when the slab has gained enough strength, usually after 3-7 days. Remove too early and you risk exposing the concrete to contaminants; leave them on too long and condensation can form, leading to dark spots.
Choosing the right curing strategy for conditions
The best curing method depends on your project’s conditions. Consider these factors:
Temperature and wind: In hot, dry conditions, water curing or membrane-formers can help retain moisture. In cold weather, plastic sheets may be better to prevent freezing.
Slab exposure: For exposed slabs, consider using curing compounds or sealers to protect against rain and dust.
Project priorities: If speed is important, plastic sheets might be best as they allow for earlier removal. If long-term protection is needed, consider membrane-formers or curing compounds.
Choosing and Maintaining Concrete Curing Covers and Materials
Compare material types (polyethylene sheets, breathable membranes, reinforced sheets) and where each fits on project size and climate. Consider reuse potential and how each affects moisture transmission and color outcomes. Check compatibility with your slab and finish goals.
Outline practical selection criteria: project duration, concrete thickness, ambient conditions, and whether a breathable or non-breathable cover is best. Include installation steps, seam handling, edge sealing, and keeping covers off fresh concrete. Plan for maintenance, inspection, and when to retire covers to prevent curing defects.
Material types, performance traits, and standards to check
The choice of curing cover material significantly impacts concrete’s final quality. Here are key options:
- Polyethylene Sheets: Impermeable, cheap, easy to use. Check UV resistance (ASTM D4587) and reflectivity (manufacturer spec). Avoid direct sunlight.
- Breathable Curing Membranes: Allow moisture release, prevent cracking. Look for recommended vapor transmission rates (ACI 306R). Prevent over-curing.
- Reinforced Sheets: Durable, suitable for large projects. Check thickness (ASTM D5199) and reuse limits. Avoid excessive wear.
Reusable vs. disposable covers and care tips
Reusable covers save money but require maintenance:
Cleaning: Remove dirt, debris after each use. Use mild detergent, avoid harsh chemicals.
Storage: Store flat, dry to prevent mold growth and damage.
Inspection & Repair: Check for tears or punctures every few uses. Patch small holes with manufacturer-approved tape.
Site-securement, sizing, and wind/exposure considerations
Secure covers properly to prevent damage:
Sizing: Measure accurately. Overlap seams by at least 6 inches.
Wind Exposure: Check manufacturer’s wind ratings. Use weights or anchors in exposed areas. Avoid gaps that trap moisture.
Exposure to Elements: Protect covers from direct sunlight and heavy rain. Retire or replace if damaged.
Safety, Environmental, and Cost Considerations
Safety comes first: PPE for hands, eyes, and breathing, plus adequate ventilation when handling curing agents or cleaners. Follow lockout/tagout and safe handling practices near fresh concrete. Work within the site rules to protect you and others.
Environmental responsibilities include controlling runoff, proper disposal of cleaners and curing products, and complying with local regulations. Compare costs and long-term value between methods, considering durability and maintenance needs. Plan routine inspections and timely re-treatment to prevent reoccurrence.
Safety and PPE when curing and treating surfaces
When working with concrete, your safety is paramount. Here’s what you need to know:
Personal Protective Equipment (PPE): Wear gloves, eye protection, and a respirator if handling chemicals or pressure washing. Follow the manufacturer’s instructions on PPE usage.
Ventilation: Ensure proper ventilation when using chemicals. If working under covers, make sure there’s enough airflow to prevent suffocation.
Lockout/Tagout: Before mixing or handling chemicals near fresh concrete, follow lockout/tagout procedures to prevent accidental activation of equipment.
Environmental controls and disposal best practices
Maintaining a clean jobsite is not only about safety but also about protecting the environment:
Runoff Control: Use containment barriers and silt fences to prevent wash-water runoff from entering waterways. Always follow local regulations regarding stormwater management.
Chemical Disposal: Dispose of chemical cleaners and curing compounds responsibly. Follow the manufacturer’s instructions or contact your local waste management department for guidance.
Reporting/Compliance: Keep records of chemical usage and disposal. Report any spills or releases as required by local, state, and federal regulations.
Cost, scheduling, and decision trade-offs
Understanding the costs involved in concrete curing can help you make informed decisions:
Capex vs. Opex: Consider both upfront capital expenditure (capex) like high-quality covers or labor, and operating expenses (opex) such as maintenance and repairs.
Durability Implications: Higher initial costs may lead to better durability and reduced long-term maintenance. Cheaper options might require more frequent re-treatment or replacement of curing covers.
Prevention vs. Repair: Investing in proper curing methods can prevent dark spots, saving you the cost of corrective repairs down the line. Always weigh the costs of prevention against potential repair expenses.
Conclusion
Dark spots on cured concrete signal potential trouble that can affect strength, appearance, and safety. Acting now with a clear plan protects the project and your investment, and it keeps you from chasing symptoms instead of the root cause.
To move forward, confirm the likely cause by inspecting water exposure, curing method, and any contaminants, then apply the least invasive fix first. Start with a visual check in a small area, run the simple field tests you learned about, address water issues or plastic-curing effects if obvious, and only then consider remediation steps that match the root cause. If a test area shows no improvement, re-evaluate and proceed to the next option in a controlled, stepwise way.
Avoid these common missteps: rushing curing without proper cover or humidity control, trying aggressive cleaners or additives without a test patch, and ignoring safety gear or ventilation. Always wear eye protection and gloves, minimize dust and overspray, and work in a well-ventilated space. Do not mix approaches or jump to invasive repairs without confirming the root cause through careful checks and small-area testing.
If the cure issues are severe, repeat tests over a few days, or call in a pro when you see persistent dark spots that aren’t tied to a clear cause or when the project scope requires specific curing covers, materials, or sealing options. With patient checks and disciplined steps, you’ll protect the concrete and finish strong, and you’ll finish with confidence. Stay practical, stay safe, and keep the work moving forward.
FAQ
What are the main curing methods and how do plastic covers differ from water curing?
Plastic curing covers seal the surface and keep moisture in, so the concrete cures slowly and evenly. Water curing involves keeping the surface wet or moist in some way, which can be done with watering or wet burlap. Both aim to keep moisture in, but they work differently and have their own setup needs.
How do you choose the right curing covers and what should you look for?
Look for covers that fit your slab size with minimal gaps and good edge seals. Check the label or instructions for how long they should stay in place and whether they are designed for your climate. If in doubt, compare options by talking to the supplier or reading the manufacturer’s instructions.
What problems can happen with curing covers and how can I spot them?
Poorly fitted covers can trap heat or leave edges dry, causing dark spots or uneven cure. Wrinkles or large folds can create air pockets and affect the surface. Inspect edges, corners, and any spots that stay darker after the surface loses its sheen.
Other uses and safety concerns with curing materials?
Curing covers can be used to protect fresh pours from wind and sun during the early cure, not just for moisture retention. Watch for debris under the cover, ensure it won’t cause slips, and remove or vent if it fogs or overheats. Always follow product instructions and local guidance for safe use.