
Introduction
Bubbles in joint sealant are air pockets that form as the material cures, usually from offgassing or trapped moisture. In DIY work, you may see these as foamy spots or gaps that weaken the seal. Check the label and manufacturer guidance to know what conditions or temps are allowed.
Prevention comes from clean joints, proper substrate, and following the product’s instructions for temperature and curing time. Avoid applying in conditions that promote moisture release or rapid temperature changes, and work in small sections to observe any signs of bubbling. If you see bubbles forming, pause and check the environment and the sealant’s label.
Key takeaways
- Offgassing and trapped moisture cause bubbles in cured sealants; identify early signs.
- Temperature and humidity during install affect cure rate and bubble formation tendencies.
- Choose sealant chemistries with moisture tolerance and proper accessories to minimize bubbles.
- Pre-test substrate, perform mockups, and watch for edge lift or blistering outcomes.
- Surface prep and consistent tooling pressure reduce air pockets and adhesion failures.
- Safety and environmental rules require proper ventilation, PPE, and disposal per local regs.
Table of Contents
- Introduction
- Key takeaways
- What Causes Joint Sealant Bubbles?
- How Temperature and Weather Affect Sealant Quality
- Identifying Signs, Symptoms, and Failure Modes
- Selecting Sealant Chemistries and Accessories to Minimize Bubbling
- Pre-Application Testing and Substrate Assessment
- Surface Preparation and Application Best Practices
- Safety, Environmental, and Regulatory Considerations
- Cost, Scheduling, Common Mistakes, and Remedies
- Conclusion
- FAQ
What Causes Joint Sealant Bubbles?
Joint sealant bubbles are the visible pockets or foamy areas that form in the sealant as it cures. They can disrupt adhesion, durability, and water tightness if left unchecked. Recognizing what starts them helps you target fixes.
Key root causes include outgassing during curing, trapped moisture migrating to the sealant, substrate porosity and temperature, sealant chemistry compatibility, and surface preparation or priming issues. Look for patterns in new slabs versus framed joints and how bubbles form over time to guide the diagnosis. A practical checklist and initial tests can point to the most likely culprit.
What is offgassing and how it produces bubbles
Offgassing is a natural process where concrete releases trapped air and volatile compounds during curing. This happens as the concrete sets and gains strength.
The gases produced can be anything from water vapor to carbon dioxide, depending on the concrete mix and additives used. These gases can get trapped under the sealant if it’s applied too early in the curing process.
As the gas tries to escape, it creates pressure beneath the sealant, forming bubbles. If these bubbles can’t escape, they’ll disrupt the cure of the sealant, compromising its adhesion and durability.
Moisture-related causes (vapor drive, wet substrates, humidity)
Moisture can cause bubbles in sealants through a process called vapor drive. This happens when moisture from the substrate or ambient humidity gets trapped under the sealant.
Wet substrates can lead to this issue if they’re not properly dried before application. High humidity levels can also drive moisture into the sealant, creating bubbles.
Even if the surface seems dry, moisture can migrate through the concrete and become trapped beneath the sealant, causing bubbles to form over time.
Other causes: mixing, contaminants, and application errors
While less common than offgassing or moisture-related issues, there are other causes of bubbles in sealants that stem from mistakes during the process.
- Trapped air from mixing: Incorrect mixing can introduce air into the sealant. To avoid this, follow the manufacturer’s instructions for mixing and use a clean, dry container.
- Contamination from oils/curing compounds: Oils or curing compounds on the surface can prevent proper adhesion of the sealant, leading to bubble formation. Ensure the surface is clean and free of contaminants before application.
- Incorrect application: Applying the sealant too thickly or not allowing it to spread evenly can trap air and create bubbles. Always apply sealants in thin, even coats.
- Temperature issues: Applying sealants at temperatures outside their recommended range can cause bubbles due to changes in the sealant’s viscosity. Always check the manufacturer’s recommendations for application temperature.
By avoiding these common mistakes, you can minimize the risk of bubbles forming in your joint sealant.
How Temperature and Weather Affect Sealant Quality
Ambient and surface temperatures influence viscosity, spread, and how well the sealant fills gaps. This affects both performance and the chance of bubble formation. Expect to adjust product choice or mixing to suit conditions.
Cure rate and film formation depend on humidity and wind, so too-fast or too-slow curing can raise bubbling risk. Plan around forecasted conditions and use shade or coverings as needed to minimize temperature swings. Always verify that the concrete and sealant are within recommended temperatures before application.
Temperature during application and cure
Low temperatures can thicken sealant, making it hard to apply. High temps speed up curing, leading to bubbles if it sets too fast.
Check product datasheets for ideal temp ranges (usually 50-90°F or 10-32°C). Too cold? Warm the sealant gently. Too hot? Add a bit of solvent to thin it out.
Cure rate also matters. Too fast, bubbles form. Too slow, they grow bigger. Plan your work around temps and cure times.
Thermal expansion, contraction, and movement
Concrete expands in heat, contracts in cold. This can open voids or stress the sealant bead, causing bubbles.
Apply sealant when temps are stable. Avoid applying on hot days if cooler nights are forecasted. Conversely, don’t apply on cold mornings if hot afternoons are expected.
Use flexible sealants in areas with extreme temp swings to accommodate movement.
Weather timing and wind effects
Wind can blow off moisture, speeding up drying but also causing bubbles. Rain can wash away sealant or trap moisture, leading to bubbling.
Apply sealant on calm days with no rain forecasted. If it’s breezy, work in sheltered areas. After application, protect the joint from wind and rain until fully cured.
Monitor weather forecasts. Sudden temp drops or heavy dew can cause offgassing bubbles during cure.
Identifying Signs, Symptoms, and Failure Modes
Distinguish between harmless texture like fine crazing and actual sealant failure that needs remediation. Not every sheen change means a failure, but certain signs require action. Use your judgement to separate normal curing variances from issue indicators.
Build a practical inspection checklist for visibility, adhesion, and moisture signs. Look for delamination, edge lift, pinholes, discoloration, or moisture staining around joints. Quick field tests with simple tools can help confirm whether remediation is needed.
Visual indicators and severity assessment
Inspecting your joint sealant visually is the first step in identifying issues. Here’s what to look for:
Surface blisters: These are usually harmless if small and few, but large or numerous ones indicate a problem.
Pinholes: Tiny holes can be normal, but clusters or larger ones need attention as they may allow moisture in.
Internal voids: If your sealant is translucent, look for bubbles or voids beneath the surface. These could indicate trapped air or moisture.
When bubbles indicate adhesion or substrate problems
Sometimes bubbles signal more than just cosmetic issues:
Substrate outgassing: Bubbles that form soon after application and continue to grow may be due to moisture or chemicals in the substrate.
Poor adhesion: If sealant peels off easily, it might not have adhered properly. Check for bubbles at the edges first.
Chemical incompatibility: Bubbles that form after a while could be due to incompatible materials. Check if other parts of the joint are affected.
Documenting issues and inspection protocol
Use this checklist: whenever you suspect a problem, or during regular maintenance checks.
- Bubbles: Size, number, and distribution. Take photos.
- Delamination/Spalling: Check edges for peeling or flaking.
- Pinholes/Rough spots: Feel and look for these. They can trap dirt and moisture.
- Edge lift/Discoloration: Check all edges and surfaces for lifting, discoloration, or staining.
- Moisture staining: Look for water marks around joints.
- Odor/Musty smells: Note any unusual odors. They could indicate trapped moisture or offgassing.
- Exposure to humidity/rainfall: Check recent weather conditions.
- Cure/Rehydration timing: Compare with product data sheets.
Quick rule: Always document issues with photos, location, date, and environmental conditions. This helps track progress and makes warranty claims easier.
Selecting Sealant Chemistries and Accessories to Minimize Bubbling
Compare common chemistries—silicone, polyurethane, epoxy, and acrylic—based on moisture tolerance, outgassing resistance, and permeability to concrete. Note typical failure modes that relate to bubbling with each type. Consider the niche advantages and limitations you might encounter on a project.
Evaluate accessories like primers, backer rods, tapes, and moisture barriers and how they affect moisture migration and adhesion. Check compatibility and follow the recommended application sequence to reduce trapped gas. Use practical decision criteria tied to substrate porosity, humidity, and curing conditions to guide your choice.
Sealant types: pros and cons for outgassing/moisture-prone jobs
Choosing the right sealant is crucial to prevent bubbling due to offgassing and moisture. Here’s a quick rundown of common sealant types:
Pros
- Silicones: Excellent outgassing resistance, flexible, long-lasting.
- Polyurethanes: Good moisture tolerance, durable, can be painted.
- Polysulfides: Highly flexible, excellent for movement joints, but less resistant to UV.
- Hybrids (e.g., silicone hybrids): Combine benefits of silicones and other chemistries, versatile.
Cons
- Silicones: Can stain porous surfaces, not paintable.
- Polyurethanes: Sensitive to moisture during application, can bubble if not properly primed.
- Polysulfides: Less UV-resistant, may require additional protection.
- Hybrids: May have limited color options, some types less durable than pure silicones.
For moisture-prone jobs, consider silicones or silicone hybrids for their outgassing resistance. Always match the sealant to your specific job conditions and substrate.
Backer rods, primers, and bond-breakers
These accessories play a vital role in preventing bubbling by controlling joint geometry, adhesion, and gas escape:
Backer rods maintain joint depth and width, allowing sealant to fill the joint properly. They also provide a path for trapped gases to escape.
Primers improve adhesion and prepare the surface for sealant application. Some primers also act as moisture barriers, preventing vapor drive from the substrate.
Bond-breakers, or back-up tapes, prevent the sealant from bonding to the substrate at the joint edges. This allows for easier removal of old sealant during maintenance and prevents stress cracks due to substrate movement.
Material specs and standards to check
Reviewing material specifications ensures you’re using the right products for your job. Here’s what to look for:
- Recommended substrates: Check if the sealant is suitable for your concrete substrate type.
- Cure profile: Follow manufacturer guidelines for application temperature and humidity to prevent bubbling during cure.
- Permeability rating: Lower permeability means better resistance to moisture vapor drive, helping prevent bubbles.
- Outgassing data: Look for low outgassing rates to minimize bubble formation due to trapped gases.
- VOC limits: Check if the product meets local VOC regulations to avoid environmental issues and potential health hazards.
- Industry standards (e.g., ASTM C834, ASTM C920): Ensure the sealant meets relevant industry standards for quality and performance.
- Compatibility with accessories: Check if the sealant is compatible with your chosen primers, backer rods, etc.
Ignoring these specs can lead to cracking, staining, weak bond, or excessive bubbling. Always read and follow manufacturer data sheets for best results.
Pre-Application Testing and Substrate Assessment
Explain essential pre-tests such as moisture-related measurements and substrate porosity checks that flag outgassing risks. These tests help avoid surprises during full-scale work. Document results to guide material selection.
Use mockups that mirror the planned substrate, including variations in cleaning and surface treatment. Establish an outgassing protocol and monitor bubbling or gas release under controlled curing. Record substrate condition details to support decisions later.
Moisture testing methods and what to interpret
Before applying joint sealant, test for moisture. Here’s how:
Relative Humidity (RH) Probe: Insert into drilled holes. RH over 75% indicates risk.
Surface Moisture Meter: Measures surface moisture content. Readings over 4% warrant caution.
Calcium Chloride Test: Places a sealed packet on the slab. If it turns blue, moisture is present.
Mockups and small-area cure trials
Before full-scale application, do small tests:
Use the exact sealant, surface prep, and conditions. Apply on small areas (6″ x 6″).
Observe bubbling, adhesion, and cure behavior during curing. This helps predict real-world performance.
If results are satisfactory, proceed with confidence. If not, adjust materials or methods.
When to consult lab testing or manufacturer tech support
Sometimes, additional help is needed:
If tests and mockups fail repeatedly, consider lab analysis. They can provide detailed moisture profiles.
If substrates are unusual (e.g., lightweight concrete), consult the manufacturer’s tech support. They may offer specific guidance or troubleshooting.
Don’t hesitate to ask for help when needed. It could save time and money in the long run.
Surface Preparation and Application Best Practices
Assess and control moisture before sealing: check substrate moisture and ensure the surface is dry to the touch. Remove laitance and curing compounds that could trap air. A clean, dry base reduces bubbling risk.
Clean and profile the surface for uniform adhesion. Test compatibility with primers and sealants and follow manufacturer guidelines. Apply with proper technique to minimize bubbles and ensure consistent thickness across joints.
Cleaning, profiling, and contaminant removal
Start by removing any loose material with a wire brush or power washer. This helps create a uniform surface for the sealant to adhere to.
Curing compounds: If present, remove them using a suitable solvent or mechanical means like sandblasting. They can prevent adhesion and cause bubbling.
Oils and contaminants: Use a degreaser or appropriate cleaning agent to remove any oils, grease, or other contaminants that could interfere with sealant bonding.
Finally, profile the surface using a grinder or scarifier to create a uniform, slightly rough texture. This promotes better adhesion and helps prevent bubbles.
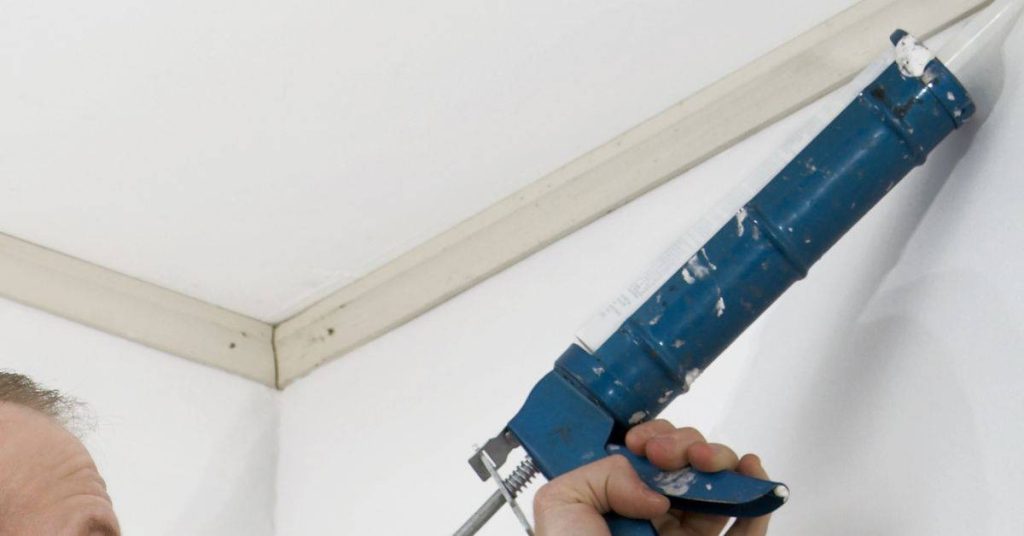
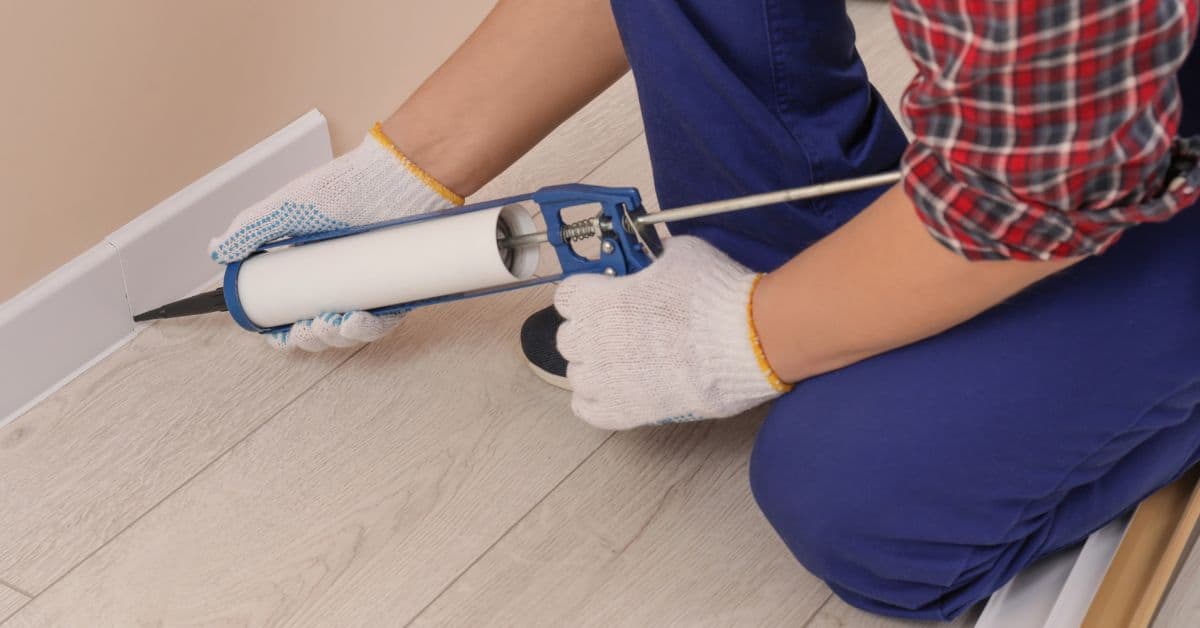
Application technique, bead geometry, and tooling
Proper application technique is key to minimizing bubbles.
- Gun technique: Hold the gun at a 45-degree angle to the surface. Apply sealant in steady, smooth passes, overlapping previously applied beads by about half their width.
- Bead geometry: Aim for a consistent bead shape and size. Too thin or too thick can trap air and cause bubbles.
- Tooling: Use a notched trowel or squeegee to tool the sealant, expelling excess material and trapped air. Rentable tools start around $20/day.
- Mixing: Follow manufacturer guidelines for mixing. Over-agitation can introduce air bubbles.
- Bead size: Larger beads have more surface area exposed to air, which can lead to outgassing and bubbles. Keep bead sizes consistent and reasonable.
Venting, relief measures, and staged cures
Staged application: Apply sealant in small sections, allowing each to cure slightly before moving on. This gives trapped gases time to escape.
Relief cuts: Incorporate small, shallow relief cuts into the sealant at regular intervals. These allow air to escape and prevent larger bubbles from forming.
Access points: Leave access points or gaps in the sealant where possible. This allows trapped gases to escape without causing bubbles in the main seal.
Always check product guidance for specific venting recommendations. Some sealants may require more or less ventilation than others.
Safety, Environmental, and Regulatory Considerations
Outline PPE requirements such as protective eyewear, gloves, and suitable clothing. Include respiratory protection options and fit testing where applicable. Store and handle materials safely to maintain protection levels.
Discuss ventilation and air quality controls on site, including exhaust placement and monitoring needs. Cover environmental controls, regulatory references, and documentation to stay compliant throughout the job.
Personal protective equipment and ventilation
The right PPE and ventilation are your first line of defense against sealant fumes. Here’s what you need:
- Eye Protection: Safety glasses or goggles, $10-$20. Protect eyes from splashes and dust.
- Gloves: Disposable nitrile gloves, $5-$10/box. Keep hands clean and protect against chemicals.
- Respiratory Protection: P100 or organic vapor cartridges, $20-$40 each. Filter out harmful particles and vapors. Fit test and maintain regularly.
- Coveralls: Disposable Tyvek suits, $5-$10 each. Shield clothing from contamination.
- Ventilation: Portable fans or local exhaust systems, $50-$200. Keep work area well-ventilated to minimize exposure.
Disposal, VOCs, and local regulations to check
Proper disposal and understanding VOC content are crucial. Here’s what you need to know:
VOC Content: Check sealant VOC levels. Lower is better for the environment and your health.
Follow SDS Guidelines for disposal. Typically, sealants can go in regular trash but check local rules. Some areas require hazardous waste collection.
Contact your local environmental agency or waste management department to confirm regulations. They may provide free disposal services or have specific guidelines for your area.
Site-specific hazards and planning
Every job site has unique challenges. Plan ahead to stay safe:
Confined Spaces: If working in tight spaces, ensure proper ventilation and emergency rescue plans are in place.
Elevated Work: Use fall protection when working at heights. Permits may be required for lifts or scaffolding.
Traffic Control: Plan for pedestrian and vehicle traffic around your work area. Barriers, signs, or permits might be needed to ensure safety.
Always create a Safety Plan before starting work. Include emergency contacts, first aid provisions, and specific hazards present on the site.
Cost, Scheduling, Common Mistakes, and Remedies
Weigh upfront material costs against performance and potential rework from bubbling. Consider how durability and maintenance influence overall value. Use practical decision points rather than fixed prices to guide choices.
Plan around concrete curing, ambient conditions, and humidity to avoid timing conflicts that promote bubbles. Learn common mistakes and practical fixes, including surface prep and choosing compatible sealants and primers. Use quick pre-work checks and a go/no-go guideline to prevent costly rework.
Cost versus quality and lifecycle implications
Upfront, cheaper materials might seem appealing. But they often lack performance and longevity. High-quality sealants, proper surface prep, and correct application reduce long-term costs by minimizing failures and extending service life.
Premium sealants offer better UV resistance, flexibility, and adhesion. They’re worth the extra cost if your joint sees heavy traffic or harsh weather.
Proper prep – like thorough cleaning and profiling – ensures better adhesion. This prevents bubbling due to delamination, saving you repair costs down the line.
Scheduling and planning considerations to avoid bubbling
Proper scheduling helps prevent bubbles. Plan around substrate dryness, ambient conditions, and cure time.
- Wait for concrete to cure: Seal too early, and moisture can cause bubbles. Wait at least 28 days before sealing new concrete.
- Avoid hot or cold surfaces: Extreme temperatures speed up curing but increase the risk of outgassing-driven bubbles. Seal when temps are between 50-90°F (10-32°C).
- Monitor humidity: High humidity can trap moisture and cause bubbles. Keep relative humidity below 85% during application.
- Plan around weather windows: Seal during dry, calm conditions to prevent rain or wind from interfering with cure.
Communicate with other trades to schedule work accordingly. Allow sufficient time for concrete to cure and sealant to dry before installing flooring or other finishes.
Common application mistakes and how to remediate bubbles
Even with the best materials, mistakes happen. Here’s how to avoid them and fix any bubbling issues.
- Insufficient surface prep: Dirt, grease, or moisture can cause bubbles. Thoroughly clean, profile, and dry surfaces before applying sealant.
- Wrong backer rod: Using the wrong size or material for your joint can lead to bubbling. Choose a backer rod that’s slightly smaller than your joint width and compatible with your sealant.
- Rushed cure: Allowing traffic too soon can cause bubbles due to incomplete curing. Follow manufacturer guidelines for cure time before exposing sealed joints to heavy foot or vehicle traffic.
If you find bubbles, remove and reapply the sealant if the substrate is still sound. For localized issues, consider a localized repair. If unsure, always consult the manufacturer’s tech support for advice tailored to your specific product and situation.
Conclusion
Keep the job simple, safe, and durable by choosing the right sealant for the conditions, doing solid surface prep, and following the cure plan to avoid bubbles that ruin appearance and performance.
Check the area in plain steps: inspect the substrate, clean and dry it, select the proper chemistry and accessories, test a small patch, apply only at the right temperature and dew point, lay the sealant with steady pressure, backer support if needed, and protect the joint until it cures fully. Keep the work inside the rough order above, document anything unusual, and never skip safety warnings or ventilation.
Common mistakes to avoid include using the wrong temperature or weather window, skipping proper surface prep, overworking the sealant or skinning surfaces, and neglecting masking or cure times. Always wear appropriate PPE, keep pets and kids away, and ventilate the area. If you face persistent bubbling after following the plan, or if the joint is structural or on a large scale, call in a professional—the cost and risk of failure aren’t worth DIY risk. With careful prep, steady technique, and smart choices, you can seal it right the first time. Stay deliberate, stay safe, and you’ll protect the space and your time in the long run.
FAQ
What causes joint sealant bubbles besides bad mix or dirty joints?
Offgassing from certain sealants can trap gas bubbles as they cure. Moisture in the substrate or in the air can also form pockets that show up as bubbles after the sealant sets.
How can I prevent air bubbles during application?
Clean and dry the joint area thoroughly before you apply. Use a compatible sealant for the joint and follow the manufacturer’s flashing and tooling guidance. Apply in steady, even strokes and avoid overworking the sealant, which can trap air.
How do temperature and humidity affect sealant application and bubbling risk?
Extreme heat, cold, or rapid changes can cause the sealant to cure unevenly and trap air. High humidity can interfere with solvent flash and adhesion. Check the product instructions for the recommended conditions before you start.
What surface prep steps help reduce bubbles and defects?
Remove old sealant and clean substrates with the right cleaner for the material. Ensure the surface is dry, free of dust, oils, and release agents. Use a proper backing or backer rod where required, and mask edges to keep a clean bead line.