

Introduction
The best residential roofing material depends on your home and priorities. This article gives a practical look at basics and pro tips for choosing and installing roof coverings. We’ll cover what to check, how to compare options, and what DIY steps make sense.
Think about durability, maintenance, and cost over time, and don’t skip local rules. Always verify manufacturer guidelines and local building requirements for flashing, underlayment, and ventilation. If a detail matters, check the product label and trusted supplier or authority for the correct guidance.
Key takeaways
- Check roof structure and weight limits before selecting heavy materials or vent additions.
- Evaluate long-term costs, maintenance needs, and replacement frequency instead of upfront price.
- Ensure proper underlayment, ventilation, and flashing to prevent leaks and ice dam risk.
- Verify local building codes, roof loads, and contractor qualifications before starting.
- Choose materials that balance aesthetics with neighborhood harmony and structural compatibility.
- Wear fall protection and use proper ladders; avoid working alone on steep roofs.
Table of Contents
- Introduction
- Key takeaways
- Quick Overview of Common Residential Roofing Materials
- How to Evaluate Roof Material Performance
- Cost Comparison and True Lifecycle Cost
- Roof Design, Structure, and Weight Limits (What to Check)
- Installation Quality and Common Mistakes to Avoid
- Aesthetic and Neighborhood Considerations
- Maintenance, Repair, and DIY Troubleshooting
- Choosing the Best Material for Your Situation (Decision Guide)
- Conclusion
- FAQ
Quick Overview of Common Residential Roofing Materials
Common materials include asphalt shingles; metal; wood shakes; slate; clay or concrete tile; synthetic membranes. Each has a typical role in residential roofs, from cost-conscious upgrades to long life options. Trade-offs you’ll see are usually about cost, durability, appearance, and climate suitability.
Asphalt shingles are widely used for first-time homeowners and remodels. Metal roofs offer longevity and energy efficiency, while wood shakes provide a natural look. Slate and clay/concrete tile bring high durability and distinctive appearance, and synthetic membranes give flexible options for flat or low-slope roofs. Match the material to your climate, home style, and budget by checking product labels and manufacturer guidance when needed.
Asphalt shingles
Asphalt shingles are the most common roofing material due to their affordability and wide availability. They come in two types: fiberglass (more durable) and organic (less expensive).
Lifespan: 20-30 years on average, depending on climate and maintenance.
They’re easy to install, making them a popular choice for DIY homeowners. However, they don’t hold up as well in extreme heat or cold compared to other materials.
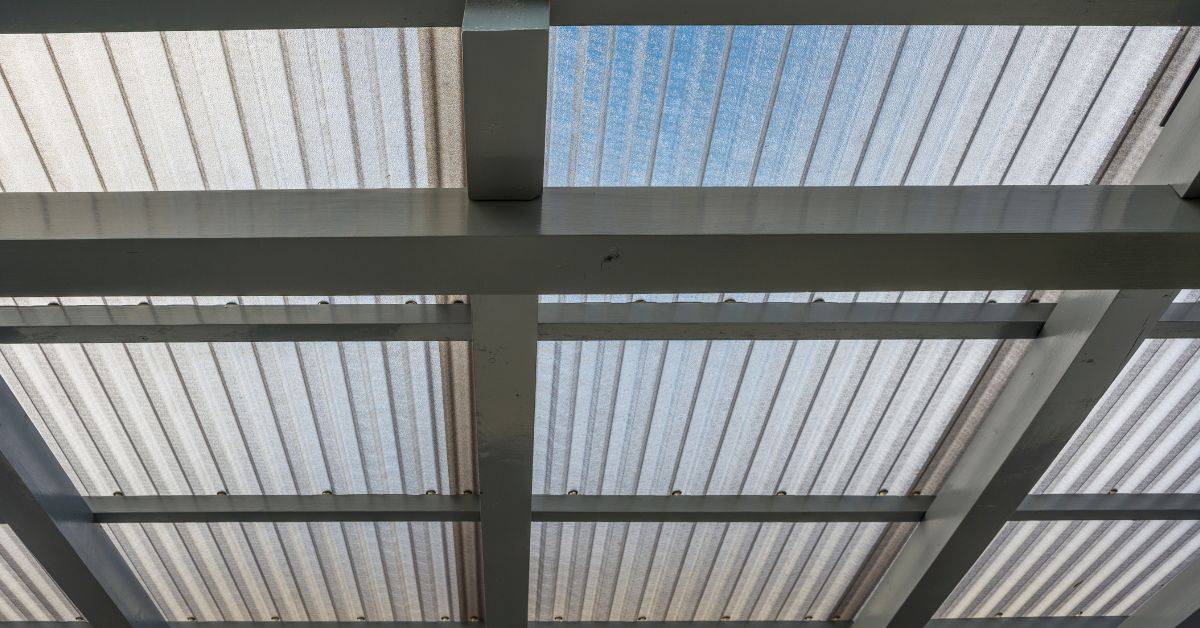
Metal roofing
Metal roofs are durable and long-lasting, made from steel, aluminum, or copper. Standing seam metal roofs offer a more modern look with vertical panels.
Durability: Can last 40-70 years, depending on the type of metal.
They’re energy-efficient, reflecting heat in summer and retaining it in winter. However, they can be noisy during rain or hail and are more expensive than asphalt shingles.
Tile, slate, wood, and synthetics
Clay or concrete tiles offer a classic look with good durability. Natural slate is even more durable but comes at a higher cost.
Maintenance: Tiles require regular cleaning to prevent moss growth.
Wood shakes provide a rustic appearance, but they’re less durable and more susceptible to fire compared to other materials. Synthetic membranes mimic the look of wood or slate with lower maintenance needs and better fire resistance.
How to Evaluate Roof Material Performance
Key performance criteria include lifespan, durability, weather resistance, and fire rating. Weight, energy efficiency, and maintenance requirements also matter for long-term satisfaction. Cost should be weighed against expected performance over time.
Explain to yourself why each criterion matters: will a longer lifespan save labor and replacement costs? Does weather resistance suit your area’s storms or heat? Check labels, data sheets, and local building guidance to verify the material’s claimed performance before deciding.
Step-by-Step Process
Follow these practical steps to evaluate roof material performance like a pro.
- Preparation: Gather safety gear (harness, helmet), check weather, and inform neighbors about noise.
- Safety checks: Inspect your ladder’s condition and secure it properly. Ensure the roof is dry and free from ice or snow.
- Main work: Walk carefully on the roof, inspecting for damage, checking material condition, and measuring dimensions. Take notes and photos.
- Ventilation check: Ensure there are no blocked vents or ridge caps. Proper ventilation extends lifespan.
- Cleanup & final checks: Remove all debris, secure any loose materials, and double-check your findings with a pro if needed.
Lifespan and durability
Understanding lifespan helps you make an informed decision. Expect these service life ranges:
Asphalt shingles: 15-30 years (climate-dependent).
Metal roofing: 40-70 years, with proper installation and ventilation.
Tile, slate, wood, synthetics: 50+ years, but installation quality and climate impact lifespan.
Factors shortening or extending lifespan include:
– Poor installation
– Inadequate ventilation
– Harsh climates (UV, freeze-thaw cycles)
Weather & climate considerations
Climate plays a significant role in material choice:
Wind: High winds can lift or damage materials. Look for Class A (120 mph) wind resistance.
Hail, UV, Snow load: These factors impact durability. Choose materials with suitable ratings and consider snow guards for heavy loads.
Coastal salt: Salt air accelerates corrosion in metal roofs. Consider using stainless steel or aluminum, or apply a protective coating.
Energy efficiency and insulation impacts
Roof materials interact with attic insulation to affect energy costs:
Reflectivity: Light-colored or reflective materials (metal, light-colored shingles) can reduce cooling costs by reflecting heat.
Thermal mass: Dense materials like tile and slate absorb heat during the day and release it at night, helping regulate indoor temperatures.
Underlayment: Quality underlayment provides a vapor barrier, preventing moisture buildup that can damage insulation. Adequate attic ventilation is crucial to maintain insulation’s effectiveness.
Cost Comparison and True Lifecycle Cost
Compare upfront material and installation costs with long-term lifecycle costs such as maintenance, repairs, insurance impact, and replacement timing. Consider the expected service life and potential energy savings when evaluating value. Do not assume numbers; verify ranges with local contractors or supplier data sheets.
Use a simple framework: list initial cost, expected maintenance per year, and replacement interval. Then ask a few local pros to provide a lifecycle estimate for your roof size and climate. Rely on verified quotes and documented ranges rather than guesses.
Upfront vs. long-term expenses
The cheapest option isn’t always the best when it comes to roofing. Sometimes, a higher upfront cost can save you money in the long run.
For instance, asphalt shingles are cheap but need replacing every 15-20 years. Meanwhile, metal roofs cost more initially but last 40-70 years. So, while metal might seem expensive at first, it’s cheaper over time as you won’t be replacing it as often.
Tile and slate roofs are another example. They’re pricey upfront but can last over a century with minimal maintenance. That’s a serious long-term savings compared to frequent asphalt shingle replacements.
Tip: Consider your budget, but also think about how long you plan to stay in your home and what future costs might look like.
Insurance, warranties, and ROI
Warranties are crucial. They protect you from unexpected repair or replacement costs. Most roofing materials come with a manufacturer warranty covering defects. Some contractors also offer workmanship warranties.
Understand these warranties before signing any contract. Check if they’re transferable too, in case you sell your home.
Insurance can also impact lifecycle cost. Impact-resistant roofs often qualify for discounts on premiums. These roofs usually cost more upfront but could save you money over time through reduced insurance costs and fewer repairs from severe weather.
Tip: Talk to your insurer about potential discounts or credits for different roofing materials. Also, ask contractors about warranties before making a decision.
Roof Design, Structure, and Weight Limits (What to Check)
Roof slope, framing, and overall load capacity limit which materials you can safely install. Heavier options like tile or slate require a stronger structure and sometimes reinforcement. Always verify structural capacity and local code requirements before choosing a heavy material.
Check with a licensed contractor or structural engineer about load calculations and possible retrofits. Review local building code requirements and HOA rules that may affect allowable materials. Use manufacturer installation instructions to confirm weight allowances and fastening methods.
Roof pitch and drainage compatibility
Before choosing your roofing material, check if your roof’s slope can handle it. Here’s a quick checklist.
- Asphalt shingles: Minimum 4/12 (18.4 degrees), optimal 6-9/12 (26-39 degrees).
- Metal roofing: Minimum 2/12 (9 degrees), optimal 4-7/12 (17.5-30 degrees).
- Tile/slate: Minimum 4/12, optimal 6-9/12.
- Wood shingles: Minimum 4/12, optimal 6-9/12.
- Synthetics: Similar to asphalt, minimum 4/12, optimal 6-9/12.
- Low-slope warning: Below 3/12 (14 degrees), water may not drain properly, leading to leaks and damage.
Quick rule: Always choose a material that fits your roof’s slope to ensure proper drainage and longevity.
Structural assessment checklist
Before you install heavier materials like tile or slate, check if your roof structure can handle it. Here’s a simple homeowner checklist.
- Load capacity: Check local building codes for required load capacity based on material and snow/rain loads in your area.
- Framing members: Ensure rafters, joists, and trusses are adequately sized and spaced. Look for signs of sagging or overstressing.
- Attic inspection: Check if the attic floor can support the additional weight. It should feel solid underfoot.
- Ceiling cracks: Inspect ceilings below the attic for any cracks, which could indicate structural issues.
- Engineer consultation: If unsure about your roof’s capacity or see signs of stress, consult a structural engineer.
Quick rule: Never risk overloading your roof. Always check and upgrade if needed to prevent costly damage and safety hazards.
Installation Quality and Common Mistakes to Avoid
Installation quality often matters more than the material itself. Poor flashing, improper nailing, or wrong underlayment can shorten a roof’s life dramatically. Vetted crews with solid warranties mitigate a lot of risk.
Common mistakes include skipping airflow and ventilation checks, rushing through critical steps, and improper sealing at hips, dormers, or chimneys. Vet installers by checking references, asking about their install practices, and ensuring they follow manufacturer installation guidelines and local codes.
Flashing, underlayment, and ventilation best practices
Proper installation of flashing, ice-and-water barriers, underlayment, and ridge/soffit ventilation is crucial for a durable roof. These components work together to prevent leaks and premature failure.
Flashing: Protects valleys, chimneys, and other penetrations from water intrusion. Ensure it’s properly installed with no gaps or overlaps.
Ice-and-water barriers: Applied at the eaves, these barriers prevent ice dams from causing leaks. Make sure they extend up the roof slope as recommended by the manufacturer.
Underlayment: Provides a secondary barrier against water penetration. It should be laid in an overlapping pattern and secured properly to avoid wind uplift.
Ventilation: Proper ridge and soffit ventilation helps maintain attic temperature and moisture levels, preventing damage from heat buildup or condensation. Ensure vents are unobstructed and installed correctly.
Red flags during installation and inspection
Knowing when to inspect your roof’s installation can help you catch potential issues early. Use this checklist during and after the installation process.
- Improper nailing: Nails should be driven flush with the shingle surface, not too high or low. Too many nails can cause leaks, while too few may result in blow-offs.
- Missing starter strips: Starter strips at eaves and rakes help prevent wind damage. Ensure they’re installed on all edges.
- Poor flashing: Check that flashing is properly installed around chimneys, vents, and other penetrations to prevent water intrusion.
- Inadequate attic ventilation: Insufficient airflow can lead to heat buildup, condensation, and mold growth. Ensure there are enough intake and exhaust vents.
- Incorrect shingle overlap: Shingles should be overlapped properly to ensure water runs off the roof correctly. Check for proper alignment and exposure.
- Damaged or improperly installed underlayment: Tears, gaps, or wrinkles in underlayment can cause leaks. Ensure it’s laid flat and secured properly.
- Unsecured ice-and-water barriers: Loose or improperly installed barriers can lead to leaks at the eaves. Check that they’re securely fastened.
- Incompatible materials: Ensure all components, like shingles and underlayment, are compatible and follow manufacturer recommendations for best results.
Quick rule: Regular inspections during installation and after severe weather can help catch issues early, saving you time and money in the long run.
Aesthetic and Neighborhood Considerations
Color, texture, and profile affect curb appeal and resale value. A familiar roof style helps the home blend with surrounding houses. Consider how the roof will age in your neighborhood and street view.
Be aware of HOA rules, historic district restrictions, and matching local architectural styles. Compare how different materials look from the ground and in photos, then confirm any color or profile restrictions with the homeowner’s association or local planning office.
Color and energy implications
When choosing your roof’s color, consider its impact on energy efficiency. Dark colors absorb more heat, making your home hotter and increasing air conditioning costs.
Cool roofs, typically light-colored or coated with reflective materials, can help keep your home cooler by reflecting sunlight. They make sense in hot climates but may not be as effective in colder regions where snow cover provides natural insulation.
However, don’t sacrifice curb appeal for energy efficiency. You can find balance by choosing a color that complements your home’s design and offers some energy-saving benefits.
Matching style and resale value
Your roof should complement your home’s architectural style. A well-matched roof enhances curb appeal, making your home more attractive to potential buyers.
For instance, asphalt shingles work well with most traditional homes, while clay tiles suit Spanish Mission or Mediterranean styles. If you live in a historical district, check local guidelines before choosing a roof material.
While luxury materials like slate or copper can boost resale value, they might not be worth the extra cost if your neighborhood doesn’t support them. Stick with materials common to your area to maximize resale potential without overspending.
Maintenance, Repair, and DIY Troubleshooting
A practical maintenance schedule keeps roofs performing like new. Schedule seasonal checks for loose fasteners, damaged flashing, and clogged gutters. Address small issues before they become leaks.
Perform simple tasks safely, like debris removal and visual inspections from the ground or a stable ladder. Call a qualified pro for repairs that involve the flashing, structure, or anything beyond basic maintenance or if you’re unsure about steps or safety.
Routine Maintenance Checklist
Use this checklist every month and seasonally to keep your roof in top shape. Regular checks help prolong its life and prevent costly repairs.
- Inspect gutters: Ensure they’re clear of debris, securely attached, and draining water away from the house.
- Check flashing: Inspect around chimneys, vents, and skylights for any cracks or gaps. Seal with roofing caulk if needed.
- Examine shingle condition: Look for missing, cracked, or curling shingles. Replace or repair as necessary.
- Trim trees: Cut back branches that overhang the roof to prevent damage from falling limbs and leaves.
- Clean off moss and algae: Use a solution of water and bleach (1:1 ratio) to kill growth, then rinse with low-pressure water spray.
- Inspect vents and valleys: Ensure they’re clear of debris and in good condition. Valleys are common areas for leaks.
- Check for animal damage: Look for signs of nesting or entry points created by pests like squirrels or birds.
- Inspect interior for leaks: Check your attic and ceilings for water stains, which could indicate a leaky roof.
Quick rule: Always prioritize safety. Use stable ladders and secure footing when inspecting your roof.
Common Repairs and Temporary Fixes
Before attempting any repairs, ensure it’s safe to be on your roof. Use stable ladders and maintain three points of contact.
Patching flashing: If you find cracks or gaps in the flashing, use roofing caulk to seal them temporarily. For larger issues, consider hiring a professional.
Replacing shingles: If a few shingles are damaged, they can be replaced individually. Lift the edges of surrounding shingles, remove the nail(s) from the damaged one, slide it out, and replace with a new shingle, securing it with nails.
DIY limits: While these fixes can buy you time, complex repairs or widespread damage should be left to professionals. They have the experience and safety equipment needed for larger jobs.
Choosing the Best Material for Your Situation (Decision Guide)
Follow a step-by-step process: assess climate, budget, roof structure, and aesthetic priorities. Map out long-term plans for the house and how long you intend to stay. Use this to narrow down material options that fit your scenario.
Include short sample profiles for three common homeowner situations: budget-minded, longevity-focused, and aesthetic/heritage. Use these profiles to compare what would work in your region, then verify with local contractors and manufacturer guidelines before deciding.
Decision checklist for homeowners
Use this checklist to make an informed decision about your roofing material. It’s best to go through these points before you start planning or getting quotes.
- How long do you plan to stay in the house? If it’s a short period, consider cheaper materials. Long-term? Invest in durability.
- What are your local climate risks? Heavy snow? Consider asphalt or metal. Hot sun? Think about tile or slate.
- How flexible is your budget? More flexibility means you can afford premium materials and better installation.
- What are your roof’s weight limits? Check with a structural engineer if unsure. Lightweight materials for weak structures.
- Do you have any aesthetic preferences? Consider style, color, and how it fits with neighbors.
- Are there any local building codes or HOA rules? Some areas require specific materials or styles.
- How important is energy efficiency to you? Some materials can help lower heating/cooling costs.
- Do you plan to do any major renovations soon? It might be better to wait and re-roof then.
Quick rule: The more time, money, and structural support you have, the more premium materials you can consider.
Sample profiles and recommended options
Here are three typical homeowner scenarios and their best roofing material choices:
Budget-conscious Bob: Bob wants a cheap, quick solution. Asphalt shingles are his best bet. They’re affordable, easy to install, and have a decent lifespan.
Longevity-focused Linda: Linda plans to stay in her house long-term and wants durability. She should consider tile or slate. These materials last over 50 years, but they’re heavy and more expensive.
Heritage-hungry Harry: Harry loves his home’s historic style and wants a roof that matches. He might choose clay tiles or wood shakes. They’re pricey and require maintenance, but they offer excellent curb appeal.
Conclusion
Choose a roofing path that keeps people safe, protects the structure, and looks right for the house. Get a clear handle on weight limits, the actual performance of the material, and how it will hold up under local weather so you don’t gamble with durability.
Check in this order: confirm the roof takes the chosen material without overloading the structure, test your chosen material for performance and expected life, compare true lifecycle costs including maintenance, and verify installation steps and tool needs before you start. Then confirm access, edge protection, and a safe working area, and plan for weather windows and a dry run on a small section if possible.
Avoid common missteps like rushing a full replacement without confirming attic ventilation, flashing compatibility, or proper fasteners, and never skip safety gear or ladder anchoring. Keep these rules simple: work with a partner, isolate power to anything near the work zone, and test a small area first to confirm fit and weather resistance. If you run into uncertain weight limits, complicated flashing, or structural questions, call a professional instead of pushing on alone. With clear checks and careful steps, you’ll finish confident, with a roof that stands up to time and look great on the street.
FAQ
How do I choose a roofing material when I’m worried about weight, climate, and DIY safety?
Start with the manufacturer’s guidance on weight and wind or temperature limits. Check the label or datasheet for any installation cautions. If you’re unsure, ask in-store or check local rules and what’s commonly used in your area.
What should I look for on product labels and datasheets before buying?
Read about installation requirements, underlayment needs, and supported roof types. Note any ventilation or spacing recommendations and the warranty basics. If something isn’t clear, call the supplier or consult the manufacturer instructions.
What installation mistakes can ruin a roof material quickly?
Avoid improper nailing or fastener patterns, skipping underlayment, and not aligning panels or shingles correctly. Don’t modify pieces to force them into place, and don’t speed through flashing details. If you’re unsure about any step, stop and verify with the instructions.
How can I tell if my existing roof structure can handle a new material?
Check the roof deck condition, spacing, and any known sag or damage. Verify the structure’s weight limits with the new material’s specs and any added underlayment. When in doubt, have a quick assessment done or review the manufacturer’s guidance for weight and compatibility.