
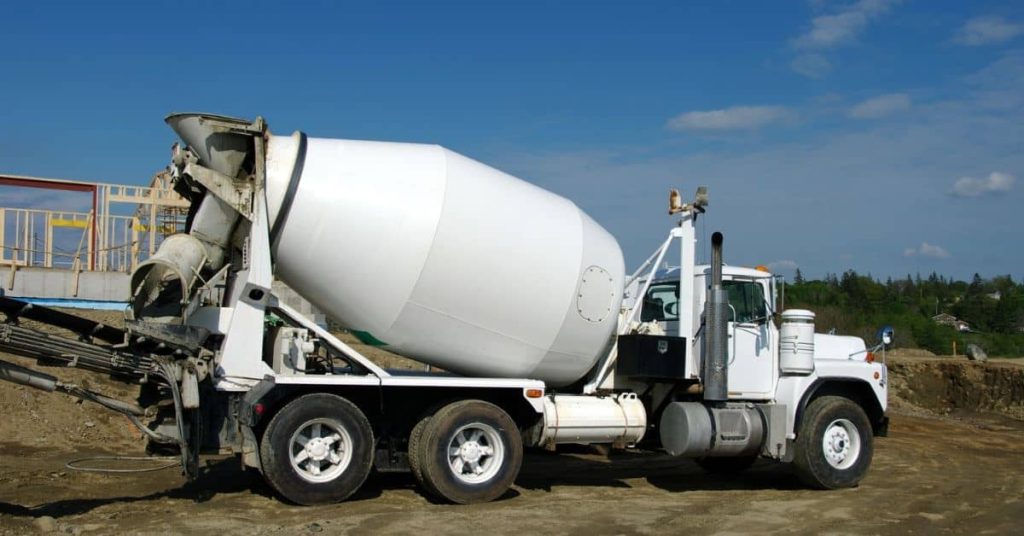
Introduction
Water reducers are additives that improve workability without adding extra water. They help concrete flow and finish smoother, so you can spread and trowel more easily while keeping the mix consistent. Check the product label and manufacturer guidance to use them safely on your project.
Adding extra water can make work easier in the short term but often weakens the finished strength and durability. Using a water reducer lets you keep the right water level while still achieving good flow and consolidation. When in doubt, compare how the mix behaves with and without the reducer and follow local rules and label instructions for best results.
Key takeaways
- Water reducers improve workability without adding water that weakens strength.
- Extra water reduces slump but lowers long-term strength and durability of concrete.
- High-range water reducers (superplasticizers) help flow while maintaining strength and finish quality.
- Specify dose with manufacturer instructions and test each mix with a slump test.
- Wear gloves and eye protection when handling water-reducing admixtures.
- Track workability, set time, and yield to avoid over-reduction or waste.
Table of Contents
- Introduction
- Key takeaways
- Why Workability Matters and the Core Trade-Off
- What Are Water Reducers and High-Range Water Reducers (Superplasticizers)
- How Adding Extra Water Weakens Concrete
- Direct Comparison: Extra Water Vs Water Reducer
- Benefits of Using High-Range Water Reducers on Projects
- How to Specify, Dose, and Test Water Reducers on the Job
- Common Mistakes, Safety, and Quality Control
- Decision Guide, Metrics to Track, and Case-Study Prompts
- Conclusion
- FAQ
Why Workability Matters and the Core Trade-Off
Workability is more than making concrete easy to place. It affects pumpability, extrusion, and how well the mix consolidates without trapping air voids. Getting this right helps finish quality and reduces touch-up tasks later.
The core trade-off is simple: adding water can raise slump and flow, but it dilutes cementitious material and weakens the early-age strength. This trade-off also touches durability and long-term performance, so decisions should balance placement ease with strength targets. Look to practical indicators like slump, flow table, and Vebe, plus concrete temperature, to guide you. Admixtures can improve workability with minimal changes to the water-cement ratio, while viscosity modifiers or air-entraining agents have their own roles. For placement and finishing, consider formwork stripping, vibration technique, and consolidation methods, and be aware of finish quality risks if workability is off. Use case-based rules of thumb, safety margins, and a QA checklist to avoid oversaturation or over-vibration and keep strength on track.
What ‘workability’ means in practical terms
Workability is how easily you can move, place, and finish concrete. It’s crucial for a smooth pour and a durable final product.
On-site, workability affects tasks like:
- Pumping: Easily moving concrete through hoses to hard-to-reach areas.
- Screeding: Leveling concrete surfaces without leaving voids or air pockets.
- Finishing: Achieving a smooth, even surface with minimal effort.
The strength–workability trade-off explained
Adding water to concrete increases its ‘slump’, making it flowier. But be careful – too much water weakens your mix.
Here’s why: More water means less cement per gallon, reducing the bond between particles. This leaves tiny pores, weakening strength and durability over time.
Think of it like this: Too little water, concrete is stiff (low workability). Too much, it’s weak (low strength). Find that sweet spot!
What Are Water Reducers and High-Range Water Reducers (Superplasticizers)
Water reducers and high-range water reducers (HRWRs) are chemical admixtures designed to boost flow without adding water. They differ in how quickly they act and how much they can extend workability under the same cementitious load. This distinction affects set behavior and strength development over time.
The primary purpose is to improve flow and workability while keeping the water content, or even lowering it, to maintain strength. Typical target slump ranges and workability goals vary by mix and job, so verify with the product label or data sheet. Major chemical families include lignosulfonates, naphthalene/sulfonated melamines, and polycarboxylate ethers, each with unique effects on setting, strength, and cement compatibility. Dosage strategies influence early vs. long-term strength and can cause retardation if overused, especially in air-entrained mixes. Match the HRWR with cement type, aggregates, and supplementary cementitious materials for best results. On-site guidance includes testing workability with slump or flow table, adjusting dosages, and following proper mixing order and safety procedures.
Types and basic function of admixtures
Water reducers and high-range water reducers (HRWRs), also known as superplasticizers, are chemical admixtures that improve concrete workability. They do this by dispersing cement particles to free up water for flow.
Normal water reducers, like lignosulfonates, reduce water demand by about 10-15%. HRWRs, such as polycarboxylate ethers or naphthalene/sulfonated melamines, can cut water demand up to 30% while boosting slump.
Their primary purpose is to boost flow and workability without adding extra water. This helps maintain concrete strength by preserving the cement’s binding power.
Compatibility and selection considerations
When choosing a water reducer or HRWR, consider your mix design’s components. Performance depends on cement type, supplementary cementitious materials (like fly ash or slag), and other admixtures.
Check with the supplier for compatibility guidance. Some admixtures may react poorly with certain cements or supplementary materials, affecting setting time, strength development, or even causing discoloration.
Also, consider the aggregate type and size, as well as any viscosity modifiers or previous water content in your mix. These factors can impact how well the admixture disperses cement particles and improves workability.
How Adding Extra Water Weakens Concrete
The core mechanism is a higher water-to-cement ratio that dilutes the cement paste and increases porosity. This makes the microstructure less dense and weaker as hydration products form more slowly. Early-age strength and long-term durability can suffer as a result.
Extra water enhances porosity and capillary networks, allowing more voids to connect and moisture to move through the concrete. This increases permeability and accelerates the ingress of deleterious ions, which can hurt durability. Observable signs include misinterpreted workability from slump, surface laitance, and early cracking. Practical tests like slump or flow tests and 7- or 28-day strength cylinders help quantify impact. Distinguish legitimate workability gains from HRWR dosing and avoid relying on extra water as a cure. Favor admixtures or proper HRWR dosing to meet flow without compromising strength, and follow field best practices to sustain performance. Be wary of myths and ensure any limits align with code and manufacturer guidance.
Short-term vs long-term consequences
Adding extra water to concrete might seem like a quick fix for better workability, making it easier to place and finish. But don’t be fooled by the immediate benefits.
Long-term, you’re setting yourself up for trouble. The increased water-to-cement ratio reduces cement paste density, diluting the cementitious material and expanding porosity. This weakens your concrete’s microstructure, leading to lower compressive strength over time.
Moreover, those extra capillary pores created by excess water connect voids within the concrete, enhancing permeability. This accelerates the ingress of deleterious ions and moisture, further compromising durability and service life.
So while you might save a few bucks upfront, you’re likely to face costly repairs and replacements down the line.
Durability risks: freeze-thaw, chloride ingress, and abrasion
Concrete with higher water content is more susceptible to durability issues, especially in aggressive environments. Here’s how:
Freeze-thaw damage is accelerated when excess water turns into ice, expanding and causing micro-cracks. These cracks allow even more water to enter, setting up a vicious cycle.
Chloride ingress is also expedited in porous concrete. Chlorides from de-icing salts or seawater can reach the steel reinforcement, leading to corrosion and eventual failure.
Abrasion resistance is compromised when water weakens the cement paste that binds aggregate together. This makes your concrete more vulnerable to wear and tear from traffic, weathering, or other external forces.
Direct Comparison: Extra Water Vs Water Reducer
Start with a decision framework: extra water may seem tempting for ease of placement, but it can undermine strength and durability. A water reducer (HRWR) is often a safer path to required flow and workability with controlled dosage. Use this lens to guide your choices on the day of the pour.
Compare workability metrics like slump or flow consistency, and consider how each option affects initial and final set times. Finishing should remain achievable with good surface quality and minimal laitance, under typical pot-life. In terms of strength, extra water can reduce 28-day strength if water is added excessively; HRWR helps preserve target strength at the same w/c ratio. Bleed, segregation, and surface laitance must be weighed for finishability. Durability considerations include permeability and freeze-thaw behavior over time. Use a practical decision checklist and a project-specific factor set to decide between extra water and HRWR, and beware common misconceptions and misdosage pitfalls.
Performance and finishability comparison
Adding extra water to concrete might seem like an easy way to boost workability, but it’s a false economy. Here’s why:
Water reducers (HRWR) maintain or even improve flow consistency without weakening the mix. They do this by altering the surface tension of cement particles, allowing them to slide over each other more easily.
Extra water, on the other hand, dilutes the cement paste, reducing its binding power. This weakens the concrete and increases the risk of segregation and poor finishability.
With extra water, you might get initial easy pouring, but you’ll struggle with trowelability due to excessive bleeding and surface dusting. Plus, the reduced strength will haunt you in the long run.
When extra water is (temporarily) tempting and why to avoid it
There are times when adding water might seem like the quick fix, but resist the temptation. Here’s why:
-
- Hot weather: Water evaporates faster in high temperatures, leading to premature stiffening. Instead, use a retarding admixture to slow down set time.
- Crane/placement issues: If concrete is setting too fast before placement, adding water might seem like the only option. But it weakens the mix. Use vibration instead to help consolidate and place the concrete quickly.
- Inadequate mixing: Poor mixing can lead to a stiff mix. Rather than adding water, ensure your mixer is running long enough and consider using a high-shear mixer for better dispersion of admixtures.
- Low slump requirement
: If you need low slump concrete, adding water will only make it worse. Use a water reducer to maintain strength while achieving the desired slump.
Benefits of Using High-Range Water Reducers on Projects
HRWRs boost productivity by enabling faster form stripping and easier finishing without compromising mix integrity. They also contribute to tighter slump control and more consistent air-void distribution, which assists durability and surface quality. These factors translate into smoother pours and fewer callbacks for rework.
In terms of quality, HRWRs help reduce cold joints and laitance-related delamination by maintaining the intended moisture state longer and more predictably. Durability benefits include improved permeability resistance and better freeze-thaw resilience when used correctly. For practice, select dosage ranges carefully, verify compatibility with cement types and other admixtures, and plan within project timelines. Consider material costs, labor savings, and the risk of over-dilution or premature set, and monitor through site QA checks and batch records. A trial batch protocol helps verify expected results before large pours, and a simple decision tree can guide temperature and placement decisions as conditions change.
Climate and exposure advantages
High-range water reducers (HRWR) help in extreme temperatures. In hot weather, they reduce bleed water, keeping the mix workable longer.
In cold temps, HRWRs improve consolidation, reducing voids that could freeze and cause damage.
In freeze-thaw zones, HRWRs lower permeability, making concrete more resistant to water ingress. This helps prevent internal damage from freezing cycles.
Cost and lifecycle considerations
The upfront cost of HRWR is often recouped through reduced cement usage, faster placement, and less waste.
Long-term savings come from fewer repairs and extended service life. Concrete with HRWR has better durability, lasting longer before needing replacement.
To assess trade-offs, consider a project-level cost trial. Calculate the admixture cost against savings from faster placement, reduced call-backs, and extended service life.
How to Specify, Dose, and Test Water Reducers on the Job
Set a clear specification framework: define target workability, slump range, air-entrainment, and set-acceleration limits. Map how HRWR or combinations contribute without compromising long-term strength. This guides dosages and sequencing on site. Rely on product labels and data sheets for exact parameters.
Outline dose strategies and practical field steps, including stepwise additions, temperature considerations, mixing time, and batch-to-batch consistency. Plan a testing matrix that covers slump, workability, and early-age strength, and define decision criteria for advancing a particular dose. A trial-mix protocol should specify batch sizes, testing cadence, and pass/fail criteria. Document everything and establish QC gates to confirm spec conformance before production pours.
Step-by-Step Process
Follow this clear, numbered sequence to specify, dose, and test water reducers on your job site. It starts with preparation, moves through the main work, and ends with final checks.
- Preparation: Gather safety gear, tools, and materials. Review project specs and admixture data sheets.
- Set up mixing area: Ensure it’s clean, level, and has adequate space for mixing and testing.
- Main work:
- Calculate cementitious materials and water needed.
- Add water reducer at the recommended dosage (see ‘Dose strategy’ below).
- Mix according to standard concrete mixing procedures.
- Testing: Perform slump flow, unit weight, and early-age strength tests as outlined in your test plan.
- Cleanup: Clean tools, dispose of waste responsibly, and store materials properly for future use.
- Final checks: Ensure all tests meet project specs. Document results and sign off on compliance.
Trial mixes and performance verification
Running controlled trial mixes helps ensure your water reducer delivers the desired workability, strength, and finishability. Don’t rely solely on nominal dosages.
Start with a base mix design without any admixture. Then, add different doses of the water reducer to separate batches while keeping the water-cement ratio constant.
Test each batch for slump retention (initial and final), compressive strength at 7 and 28 days, and finishability. Compare results to select the optimal dosage that meets your project’s targets without compromising long-term strength.
Pro tip: Always perform compatibility tests with your specific cement type before using a new admixture to avoid unexpected issues.
Mixing sequence, addition time, and placement tips
Adding water reducers at the right time in your mixing sequence helps ensure uniform performance and avoid segregation.
Start by adding the cement and fine aggregates to the mixer. Once they’re well-mixed, add the coarse aggregates. Then, introduce the water reducer just before adding the mixing water. This allows the admixture to coat the cement particles evenly.
Mix for the recommended time (usually 2-5 minutes) after adding the water reducer. Ensure the concrete is homogeneous and free of lumps before placing it. Place the concrete as soon as possible after mixing to maintain workability.
Quick tip: Avoid adding water reducers directly onto the cement or aggregates, as this can cause clumping and uneven distribution.
Tools and materials checklist for implementation
Use this checklist to prepare for trials and pours. It ensures you have everything needed for a successful job.
- Technical data sheets: Have them on hand for reference during mixing and testing.
- Compatibility tests: Results from these tests ensure the admixture works well with your chosen cement type.
- Mixing equipment: A reliable concrete mixer, shovel, and wheelbarrow are essential.
- Quality-control forms: Use these to document test results and sign off on compliance.
- Slump cone (or flow table): For measuring slump or slump flow.
- Portland cement: Ensure it’s compatible with the water reducer and meets project specs.
- Aggregates: Check for proper grading, cleanliness, and moisture content.
- Water: Use clean, potable water free of contaminants that could affect concrete performance.
- Safety gear: Include hard hats, safety glasses, gloves, and steel-toed boots.
- Test equipment: Early-age strength indicators, unit weight gauge, and other necessary tools.
Quick rule: Always double-check your calculations and measurements to prevent errors that could compromise the concrete’s performance.
Common Mistakes, Safety, and Quality Control
Frequent mistakes include overdosing WRAs, adding extra water, and mixing incompatible admixtures. Skipping trials or relying on guesswork also leads to failures. Prevent these with quick checks and a documented plan for adjustments.
Safety and handling revolve around proper storage, labeling, PPE, and having SDS accessible. Keep products dry, labeled, and segregated to avoid cross-contamination. Establish QC checkpoints like trial batches, slump tests, air content, set time, and result documentation to stay aligned with the spec.
Typical on-site errors and how to avoid them
Here are some common mistakes you should steer clear of when working with concrete.
- Overdosing water-reducing admixtures (WRAs): Stick to supplier’s recommended dosage. Too much can weaken concrete.
- Adding extra water: This reduces strength and durability. Follow mix designs precisely.
- Using incompatible admixture combinations: Don’t mix high-range water reducers with air-entraining agents or accelerators without checking compatibility.
- Skipping trials or relying on guesswork: Always do small trial batches before main pours to ensure consistency.
Prevention is key. Train staff, follow supplier instructions, and maintain strict batching protocols.
Handling, storage, and safety precautions
Safety starts with proper handling and storage of concrete admixtures. Keep them in a cool, dry place away from heat sources and moisture.
Check product labels for specific storage conditions and follow them closely. Rotate stock to use oldest first.
Wear appropriate PPE when handling. Gloves, safety glasses, and protective clothing are usually required. Always have Safety Data Sheets (SDS) on hand for quick reference in case of spills or accidents.
Testing and acceptance criteria to enforce quality
Regular testing is crucial to ensure concrete meets required standards. Slump or slump flow tests check workability, while compressive strength tests measure final strength.
Follow ASTM C143/C143M for slump tests and ASTM C39/C39M for compressive strength tests. Compare results to project specifications to set acceptance limits.
Visually inspect the finished product for any signs of poor workability, segregation, or other defects. Document all test results for future reference and quality control review.
Decision Guide, Metrics to Track, and Case-Study Prompts
Create a practical decision framework that clarifies when to favor extra water versus admixtures, tuned to project type and durability targets. Use this framework to guide daily choices on site. Rely on objective metrics to support decisions and minimize guesswork.
Track essential metrics such as slump/workability, yield, w/cm, air content, and 28-day strength. Monitor early-set timing and bleed water to catch issues early. Use a simple decision tree or case prompts to illustrate different project scenarios, with details on environmental conditions and observed outcomes. End with a quick on-site checklist owners and contractors can use before pours.
Key performance metrics to compare
The key metrics help you understand how your concrete is performing. Keep records of these for each pour.
Workability (Slump): Measure slump to ensure mix consistency and easy placement. Aim for 4-6 inches for most projects.
Strength: Early strength helps schedule follow-up work, while 28-day strength ensures long-term durability. Targets vary by project but aim for at least 3000 psi for most residential work.
Case-study template and what to document
Use this checklist when trying new admixtures or mix designs. It helps you learn from past pours.
- Mix Design: Record cement, aggregate, and sand proportions. Note any adjustments made.
- Admixture Type/Dosage: List type (HRWR, PC-based), dosage rate, and addition time.
- Lab Results: Include slump, air content, 28-day strength, and other relevant test results.
- Site Observations: Note any issues with segregation, bleeding, or cracking. Also record weather conditions during pours.
- Cost Comparison: Estimate material costs for each option. Consider long-term benefits like reduced maintenance.
Quick rule: The more details you record, the better informed your future decisions will be.
Conclusion
Workability matters for safety, durability, and a good look. The right water management keeps concrete strong without cracking or flaking, and it helps you finish cleanly instead of fighting the mix.
When you proceed, keep this flow in mind: confirm the mix target and your specs, choose a high-range water reducer if you need more workability without adding water, test a small batch first, adjust within safe ranges, and document the results before scaling up. Make sure you’re in a well-ventilated area, use clean containers, and follow label directions for any additive used.
Common mistakes to avoid include adding extra water to “ease” placement, overcorrecting with a reducer without testing, and skipping quality checks on fresh and hardened concrete. Safety rules are simple: never exceed manufacturer-recommended dosages, always wear eye protection and gloves, and guard against wind, sun, or heat that can change curing. Start tests in a small area, observe setting and finish, and stop if the appearance or strength feels off.
If the project is large, the mix is critical, or you’re unsure about measurements, call in a concrete supplier or a qualified pro. A little professional help now saves costly repairs later. Stay disciplined, test early, and you’ll finish strong and safe.
FAQ
What exactly are water reducers and superplasticizers?
They are concrete additives that let you keep workability without adding extra water. They work by changing how the cement hydrates so the mix stays workable longer.
Why does adding extra water weaken concrete?
Extra water increases the water-cement ratio. That ratio controls strength, so more water usually means a weaker, more porous finish.
What are the main benefits of using water reducers?
They improve flow and glide, reduce slump loss, and help you place and finish without overwatering. They can save time on the job and help you meet workability targets without sacrificing strength.
How should I decide between water reducers and adding more water?
If you need better workability without changing the strength, use a water reducer per the label. If you’re considering extra water, check the manufacturer instructions and local rules, and be aware it will typically lower strength.