
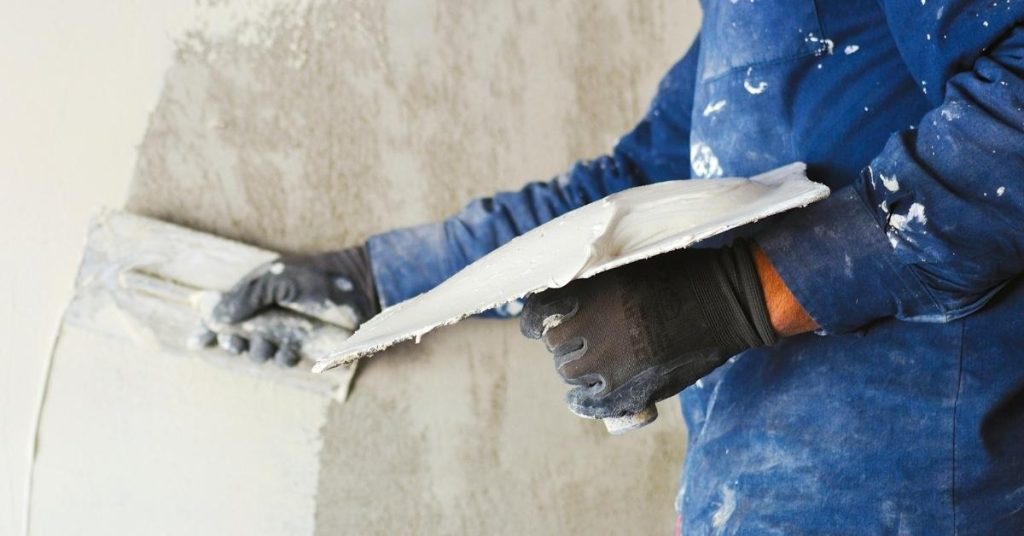
Introduction
Venetian plaster over existing tile is applying plaster onto a tile surface to create a seamless, stone-like finish. Prep and bond are critical, because you’re sticking plaster to a non-porous base. You’ll need to clean, roughen, and seal as needed, then choose a compatible bonding product and follow its directions.
Start with careful prep, bridge any gaps with compatible products, and plan edge detailing to keep joints clean. Follow manufacturer instructions and local rules for adhesion, curing, and finishes, and check labels for dry times. If in doubt, test a small area first and adjust for your tile type and room conditions.
Key takeaways
- Assess tile condition and substrate integrity before any plaster coat or primer, avoid loose tiles.
- Choose bond bridge primer compatible with tile and plaster system per label.
- Ventilate work area, wear eye protection and mask; avoid inhaling plaster dust.
- Apply multiple thin coats of plaster over bond bridge, observing manufacturer’s guidance.
- Edge detailing requires consistent movement joints and clean transitions at seams.
- Treat finish with appropriate cure and monitoring; address discoloration or cracking promptly.
Table of Contents
- Introduction
- Key takeaways
- Project Assessment and Tile Suitability
- Tools and Materials Checklist
- Surface Preparation and Cleaning
- Choosing and Applying Bond Bridges/Primers
- Mixing and Preparing Venetian Plaster
- Application Techniques over Tile
- Edge Detailing, Trims, and Movement Joints
- Sealing, Curing, Troubleshooting, and Maintenance
- Conclusion
- FAQ
Project Assessment and Tile Suitability
Before you lay Venetian plaster over tile, verify the existing tile and the substrate are sound and stable. Look for cracked or loose tiles, hollow spots, moisture damage, or any sign of movement. If the surface isn’t solid, don’t proceed until you fix it.
This matters because a weak or incompatible base will make the finish fail, crack, or peel. Check product labels and manufacturer instructions for substrate requirements and moisture limits, and follow them. If you’re unsure, test a small area and consult a professional or skip to preparing a solid base.
Inspect adhesion and substrate condition
Before you start, check every tile. Tap each one gently with a rubber mallet. If it sounds hollow or feels loose, mark it.
Loose tiles need to be removed and reattached or replaced. Check for substrate delamination too – if the tile moves more than 1/8 inch, there’s a problem under there that needs fixing.
Look out for cracks in the grout or between tiles. These could indicate movement in the wall or floor beneath. If you find any, they need to be addressed before proceeding.
Tile types, porosity, and surface finishes
Not all tiles are created equal when it comes to Venetian plaster. Glazed tiles have a non-porous surface that won’t bond well with plaster. You’ll need to sand them lightly first.
Unglazed ceramic and porcelain tiles, along with natural stone, are porous and will bond better. But they might require sealing before applying the plaster to prevent staining.
If you’re unsure about your tile type or surface finish, consult a professional or the manufacturer’s guidelines before proceeding.
Codes, wet-area requirements, and manufacturer limits
First things first – check your local building codes. Some areas have specific rules about tile overlays in residential buildings.
In wet areas like bathrooms or showers, you’ll need to ensure the plaster is waterproof. This might involve applying a primer or sealant before and after the plaster application.
Always check the manufacturer’s guidelines for their Venetian plaster product. Some plasters are designed for specific tile types or require certain primers to be used. Don’t skip this step – it could save you a lot of trouble down the line.
Tools and Materials Checklist
This section gives a complete, practical checklist of the tools, primers/bond bridges, plaster materials, trims, and the PPE you need. It helps you line up what to have on hand before you start so you can work without constant trips. Use labeled products and follow the manufacturer instructions.
Having the right stuff matters because it keeps the job moving and the finish solid. If you’re unsure about a product, check the label or datasheet for usage notes and safety guidance. Disposal rules vary—check local household hazardous waste rules and never dump waste down drains or into the soil.
Adhesion primers, bond-bridge options, and substrate primers
Before you start tiling or applying plaster, use this checklist to ensure your surfaces are properly prepared with the right adhesion promoters. This will save you from costly rework and ensure a strong, long-lasting finish.
- Check substrate type: Ensure you’re working on a suitable surface like concrete, plywood, or existing tiles. What goes wrong if you skip this: Inadequate adhesion leading to tile or plaster failure.
- Inspect surface condition: Look for cracks, holes, or other defects. The surface should be clean, dry, and free from contaminants. What goes wrong if you skip this: Poor adhesion and premature delamination.
- Choose the right primer: Select a primer compatible with your substrate and intended finish (tile or plaster). Common options include:
- Acrylic primers for tiles on plywood or existing tiles
- Epoxy primers for concrete or problem surfaces
- Plaster primers for new plasterwork
- Check primer coverage: Follow the manufacturer’s guidelines to ensure adequate coverage. Typically, 1-2 coats are required. What goes wrong if you skip this: Insufficient protection and adhesion issues.
- Allow proper drying time: Wait for the recommended time (usually 24-48 hours) before applying your final finish. What goes wrong if you skip this: Premature application can lead to poor adhesion and compromised performance.
- Consider using a bond-bridge: For difficult surfaces or when tiling over plaster, use a bond-bridge product designed for the specific situation. What goes wrong if you skip this: Inadequate bonding leading to tile or plaster failure.
- Check bond-bridge compatibility: Ensure the chosen bond-bridge is compatible with your tile adhesive and substrate. Always follow manufacturer guidelines. What goes wrong if you skip this: Poor adhesion and potential product reactions.
- Apply bond-bridge correctly: Follow the manufacturer’s instructions for application, including mixing ratios, spreading techniques, and drying times. What goes wrong if you skip this: Incorrect application can lead to poor bonding and compromised performance.
Quick rule: Always choose adhesion promoters based on the specific substrate and intended finish. Following manufacturer guidelines ensures optimal results and prevents costly rework.
Venetian plaster types, sealers, and accessory materials
Use this checklist when selecting your Venetian plaster, sealers, and accessories to ensure a smooth application process and long-lasting results.
- Plaster Type: Check if it’s Lime, Venetian/Polished Plaster, or Synthetic. Each has different properties and applications.
- Lime Plaster: Verify it’s NHL (Natural Hydraulic Lime) 3.5 or higher for durability. Avoid quicklime as it’s too harsh.
- Venetian/Polished Plaster: Ensure it’s specifically designed for Venetian plasters and follows manufacturer instructions for application.
- Synthetic Plasters: Check if they’re acrylic or cement-based. Acrylic is more flexible, cement-based is stronger but less elastic.
- Sealer Type: Choose between water-based (easier to apply) and solvent-based (better protection).
- Sealer Compatibility: Ensure the sealer is compatible with your chosen plaster type. Check manufacturer guidelines.
- Additives: Consider using additives for specific properties like anti-microbial, fire-retardant, or color enhancement. Always test a small area first.
- Color Consistency: If using colored plasters, ensure the batch is consistent by mixing well and checking before application.
Quick rule: Always follow manufacturer instructions for specific product usage. Don’t assume all plasters and sealers are interchangeable.
Tools, PPE, and mixing equipment
Before you start your Venetian plaster project, ensure you have all the necessary tools, safety gear, and mixing equipment. Use this checklist to verify each item.
- Trowels (4-6″ & 8-12″): Check for straight edges and no nicks. Trowels should be flexible but sturdy.
- Hawks (12×16 & 16×20): Ensure they’re flat, smooth, and free of cracks or warping.
- Sanders (random orbital, 5-8″): Confirm sandpaper discs are secure and in good condition. Check sander’s safety features.
- Mixing drill (1/2″ – 3/4″): Ensure it has enough power for your mixers. Check speed settings.
- Plaster mixers (paddle & ribbon): Verify they’re securely attached to the drill and in good working order.
- Safety glasses: Check for no cracks or scratches. Ensure they fit well.
- Dust mask/respirator: Confirm it fits properly and is suitable for plaster dust. Check filters.
- Gloves (latex or nitrile): Ensure they’re in good condition with no holes or tears.
- Ear protection: Check if they fit well and provide adequate noise reduction.
- Protective clothing: Verify it covers skin, including long sleeves, pants, and closed-toe shoes.
Quick rule: Always inspect your tools before starting. Damaged or unsuitable equipment can lead to poor results and safety hazards.
Surface Preparation and Cleaning
Surface prep is the foundation for a good bond. Start by cleaning the area to remove dust, oil, and any loose material. Degloss glossy surfaces and repair holes or irregularities so the substrate is smooth and ready.
Skip it and you’ll chase problems later, even if you think you’re in a hurry. Doing the prep right gives better adhesion, fewer repairs, and a longer-lasting job, which is worth the extra effort.
Remove contaminants and degloss glossy tiles
Start by degreasing your tile surface. Use a suitable cleaner like TSP (trisodium phosphate) or a heavy-duty degreaser to remove any dirt, grease, or soap residue.
Important: Avoid using harsh chemicals that could damage the tile’s glaze.
For glossy tiles, you’ll need to degloss them to improve adhesion. You can do this by lightly abrading the surface with a fine-grit sandpaper or using an etching solution designed for ceramic surfaces.
After degreasing and deglossing, wipe down the tile with clean water and let it dry completely before moving on to the next step.
Grout joints, leveling, and feathering transitions
Inspect your grout lines. If they’re proud (higher than the tile surface), you’ll need to recess them. Use a grout saw or a sharp chisel to carefully cut away excess grout.
Check for lippage – where tiles are not level with each other. Use a leveling compound to fill any low spots and sand down high spots until all tiles are even.
Tip: For transitions between different tile types or sizes, feather the edges using a flexible filler. This creates a smooth transition for your plaster application.
Once you’ve addressed grout lines, leveling, and transitions, wipe down the entire surface with a damp cloth to remove any dust before proceeding.
Visual checkpoints before priming
Before applying your bond bridge or primer, perform a visual inspection to ensure your surface is ready. Use this checklist:
- Tile movement: Gently push and pull on tiles to ensure none are loose.
- Consistent porosity: Check that the tile’s surface has consistent absorption – it should look evenly damp when misted with water.
- Smooth transitions: Ensure there are no sharp edges or abrupt changes in level between tiles.
- No cracks or chips: Inspect for any hairline cracks or chips that could compromise adhesion.
- Grout lines: Check that grout lines are even and not proud or recessed.
- Dust-free: Wipe down the surface to ensure it’s free of dust and debris.
- No moisture: Make sure there’s no standing water or excessive dampness on the tile.
- No efflorescence: Check for white, powdery deposits (efflorescence) that could interfere with adhesion.
Quick rule: If anything fails these checks, address it before moving forward to ensure a successful Venetian plaster application.
Choosing and Applying Bond Bridges/Primers
Choosing the right bond bridge or primer creates a reliable bond between tile and plaster. Pick a product that matches your substrate and follow the manufacturer’s directions for application. Read the label and datasheet for surface prep and curing notes.