
Introduction
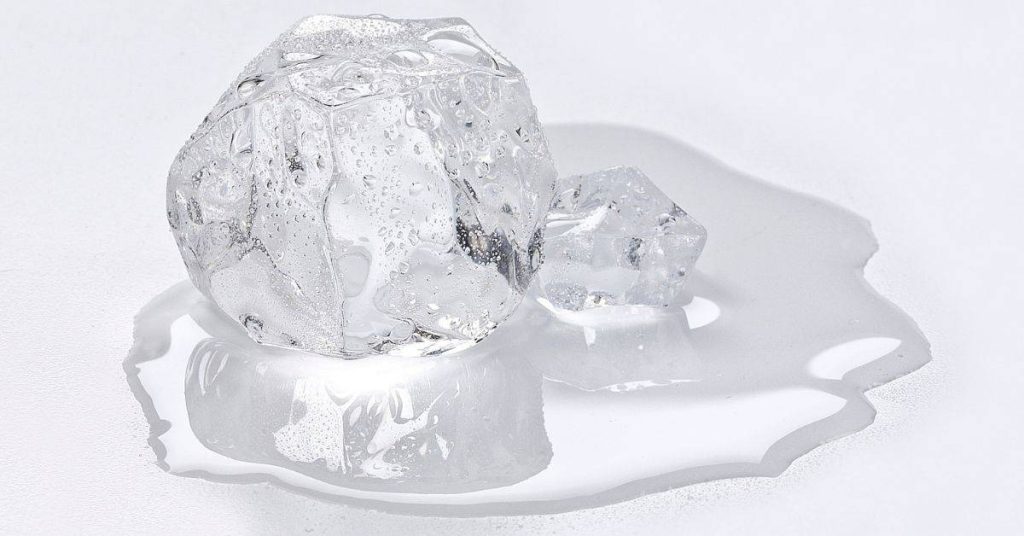
Using ice in concrete for hot days means cooling the mix with ice to slow heat buildup and control the curing process. When the weather is hot, concrete can set too fast and crack or craze if it dries out too quickly. Ice helps manage temperature during placement and early curing so you have a better final surface.
Practical methods include adding ice to the mix or using chilled water and ice in the right amounts, while avoiding sudden temperature swings that stress the mix. Focus on even distribution, gradual cooling, and not overdoing it with the ice to prevent too much water or weakening of the concrete. Always follow product labels and manufacturer instructions, check local rules, and wear PPE; keep the work area safe from pooling water and melting ice, and plan for proper disposal of excess melt and runoff.
Key takeaways
- Plan to use ice only when cure temperatures threaten premature evaporation and cracking.
- Pre-chill aggregates and water when allowed by project specs and supplier.
- Introduce ice gradually during mixing to avoid sudden temperature shocks.
- Document dosing approach with standard procedures and note ice source and quantity.
- Monitor slump and curing environment; adjust water content to prevent excessive bleeding.
- Safety: wear gloves and eye protection; handle cold storage and spills responsibly.
Table of Contents
- Introduction
- Key takeaways
- Why Hot Weather Threatens Concrete—and Why Ice Can Help
- Specific Scenarios Where Integrating Ice Is Appropriate
- Methods for Using Ice in Concrete Mixing (What to Add and How)
- Dosing Ice Safely — How to Plan and Control Quantities
- How Ice Affects Setting, Curing, and Long‑term Quality
- Risks, Common Problems, and Troubleshooting
- Tools and Materials Checklist, Safety, Environmental and Cost Considerations
- Visual Checkpoints, Quality Assurance, and When to Involve a Lab or Supplier
- Conclusion
- FAQ
Why Hot Weather Threatens Concrete—and Why Ice Can Help
Hot weather creates a faster initial set, increasing the risk of plastic shrinkage cracks and workability loss. You may also see a higher early hydration heat that can affect finishing marks or curling. Understanding these tendencies helps you plan ice use without compromising strength.
The cooling principle relies on ice melting to absorb heat, slowing the early temperature rise. When dosed properly, ice can extend the workable time and help control slump while keeping final strength on target. Check project specs and local rules to confirm acceptable approaches and limits.
Heat effects on setting, workability, and durability
Hot weather speeds up concrete hydration. This means your mix sets faster than it would in cooler temps.
Rapid set can lead to issues like incomplete mixing or not having enough time for proper finishing. It also increases the risk of plastic shrinkage cracking, as water evaporates quicker from the surface.
High heat reduces workability too. Slump loss happens faster in hot weather, making it harder to place and finish your concrete. Plus, elevated early hydration heat can cause problems like accelerated finishing marks or curling.
How ice changes the thermal environment of the mix
Adding ice to your concrete mix cools it down. Here’s how:
As ice melts, it absorbs heat from the mix. This slows down the early hydration temperature rise. That means you get more time before the concrete sets.
Extended workable time gives you a better chance to finish your concrete properly. Plus, maintaining a cooler mix helps preserve slump and reduces the risk of heat-related issues.
Specific Scenarios Where Integrating Ice Is Appropriate
Certain jobs benefit from ice on hot days, such as short hauls or long mixing cycles in high ambient temperatures. Projects with hot or reactive aggregates often see temperature control advantages with ice addition. Use field judgment to determine if ice will meaningfully help without delaying curing or finishing.
There are conditions where ice is unnecessary or unsafe, such as cool sites needing heat in the mix or small, fast-curing jobs. If slump, air content, or other specs demand tight control, verify with the mix design and supplier before proceeding. Plan accordingly for batch size and cement type.
Typical use cases
Ice is your friend when you’re working in hot conditions. Here are some common scenarios where it’s practical to use:
Ready-mix trucks: If hauling time is short, ice can keep the mix cool during transit.
Small batch pours: For quick turnaround jobs, adding ice helps maintain workability and set time.
Hot aggregates: When your aggregates are hot from stockpiling or direct sunlight, use ice to lower their temperature before mixing.
When to avoid using ice
There are times when adding ice can do more harm than good. Here’s what to avoid:
- Strict water content limits: If your mix design strictly controls water, adding ice will mess with that.
- No lab testing: Without knowing how ice affects your specific mix, you’re playing with fire.
- Freezing risks: Don’t use ice if there’s a risk of freezing during curing. That can wreck your concrete.
- Small or fast-curing jobs: For quick jobs, the time spent cooling and re-mixing might not be worth it.
Bottom line? Know your mix, know your job, and use ice wisely.
Methods for Using Ice in Concrete Mixing (What to Add and How)
The three primary approaches are replacing part of the mixing water with ice, pre-chilling aggregates, and adjusting admixture timing to maintain workability. Each method has its best use depending on batch location, ambient conditions, and concrete type. Decide which pathway fits your setup and targets.
Describe practical steps to estimate ice contributions and adjust workflows. Include simple ways to measure and verify the cooling effect and how to prevent segregation or overcooling during mixing. Always align with the project data and supplier guidance.
Replacing mixing water with ice (field and truck methods)
When it’s hot, you can beat the heat by replacing some of your mixing water with ice. Here’s how:
Measure temperatures: Before you start, check the ambient temperature and the temp of your aggregates.
Add ice: Replace 10-20% of your mixing water with crushed or block ice. For every cubic meter, that’s about 50-100 liters of ice. Keep an eye on slump and temperature during mixing to ensure you’re not overcooling the mix.
Monitor: Keep checking slump and temp until you reach your target. If it gets too cold, add some warm water to bring it back up.
Pre-chilled aggregates and chilled water alternatives
Instead of adding ice directly, you can cool your aggregates or use chilled water. Here’s when and how:
Chilled aggregates: If you’ve got the time and facilities, pre-cool your aggregates to around 10°C before mixing. This reduces the overall mix temp without diluting it with ice.
Chilled water: Use refrigerated water in place of some or all of your mixing water. This works best when you can’t add ice directly, like in ready-mix trucks. Aim for a water temp around 15-20°C to keep the mix cool without overcooling it.
Remember, these methods take planning and time. They’re best suited for plant batch operations where you’ve got control over prep work.
Interaction with admixtures and sequencing
When using ice in your mix, keep these admixture considerations in mind:
Retarding admixtures: These can help slow down setting time when you’re working with cold mixes. Follow manufacturer guidance on dosage and addition timing.
Water-reducing admixtures: These can help maintain workability in cold mixes. Again, follow the manufacturer’s instructions for dosing and sequencing. Generally, add ice/water before these admixtures to ensure they’re well-dispersed.
Always check with your admixture supplier for specific guidance on using their products with ice-cold mixes.
Dosing Ice Safely — How to Plan and Control Quantities
Set a clear target batch temperature and outline a permissible range to stay within workability and strength goals. Temperature control is central to reliable finishing and long-term performance. Establish the guardrails before you batch.
Outline a straightforward measurement plan that tracks mix temperature, ice/water temperature, and ambient conditions. Use small test batches to calibrate how ice mass changes temperature and adjust incrementally. Document the readings for traceability.
Planning: target temperature and what to measure
The first step is defining a target batch temperature. This should be around 70-85°F (21-29°C). It’s critical for workability and strength.
Next, decide which temperatures to monitor:
- Ambient: affects all materials
- Concrete mix: controls workability and setting time
- Ice/water: influences the cooling effect
Check these every 15-30 minutes during batching and placement.
Practical dosing workflow (test batch, measure, adjust)
Start with a small test batch. Replace some water with ice, aiming for your target temperature.
Record temperatures and slump. If it’s right, scale up. If not, adjust the ice amount and try again.
Here’s how to calculate ice needed: (Target temp – Current temp) x Batch volume / Specific heat of water
Red flags and verification steps
If you see unexpected slump changes, an excessively long set time, or slurry separation, stop immediately.
These could indicate dosing issues. Retest with your ready-mix provider or lab to confirm.
Always verify maximum ice fraction, expected slump, hydration heat limits, and warranty considerations with your supplier and mix design.
How Ice Affects Setting, Curing, and Long‑term Quality
Lowering mix temperature via ice slows hydration in a practical sense and shifts the window for placing and finishing. Note the acceptable internal temperatures during batching and placement based on your project’s guidelines. Stay within those ranges to avoid issues.
Reduced hydration rate influences early strength and workability, with implications for curing and maximum temperature exposure. Consider how slump, viscosity, and potential cold joints interact with your curing plan to protect long-term quality. Monitor water–cement balance when ice replaces part of the mixing water.
Short-term effects on setting time and workability
Adding ice to your concrete mix on hot days slows down the hydration process. This is because lower temperatures reduce chemical reactions in the cement.
Expect a longer setting time, which means you’ll have more time for placing, finishing, and compacting your concrete. But remember, too much ice can cause excessive delays, leading to cold joints if not managed properly.
Workability is also affected. Cooler mixes retain their slump better in hot weather, giving you a wider workable window. However, be aware that the increased viscosity from melting ice might make your concrete stiffer and harder to place.
Long-term strength and durability considerations
While using ice can help control temperature, it’s crucial to maintain the designed water-cement ratio for long-term quality. Replacing mixing water with ice can dilute your mix if not dosed correctly.
Improper dosing can reduce ultimate strength and increase permeability, making your concrete more susceptible to cracking and deterioration over time. To avoid this, always calculate the correct amount of ice to replace water in your mix.
Proper curing is also vital. Cooler internal temperatures from added ice slow down evaporation, allowing for better moisture retention during the initial curing phase. However, this doesn’t mean you can skimp on curing time or methods. Follow recommended durations and use coverings, misting, or curing compounds to prevent shrinkage cracks.
Risks, Common Problems, and Troubleshooting
Inadvertent extra water from melted ice can thin the mix and affect water-to-cement ratio. Look for signs of excess moisture and know how to compensate without compromising strength. Prepare to adjust aggregate ratios or defer ice addition if needed.
Uneven cooling, segregation, and cold joints are common concerns. Use uniform placement, insulation, and controlled curing to mitigate these risks. Keep an eye on admixture compatibility and perform quick checks if issues arise.
Common problems from improper dosing
Improper ice dosing can lead to several issues. Low slump means your mix is too stiff, likely due to adding too much ice. Delayed set could indicate not enough ice or excessive admixtures.
Surface dusting, where fine particles separate and rise to the top, suggests segregation. Reduced cohesion might mean your mix is too wet from melted ice.
Check slump, look for surface defects, and measure temperature to diagnose problems.
Onsite fixes and when to stop the pour
If you notice issues, act fast. Add more admixtures to boost slump if it’s too low. Re-evaluate water content if cohesion is poor.
If segregation occurs, re-mix or adjust batch sizes. If problems persist, consider diverting the pour until resolved.
Halting work might be necessary if issues can’t be fixed onsite. Run lab tests to understand why and adjust your mix design accordingly.
Tools and Materials Checklist, Safety, Environmental and Cost Considerations
Assemble a concise toolbox of ice sources, containers, thermometers, and basic mixing tools. Include any additives or sealants that may be appropriate for your site. Ensure all items are suitable for concrete work and hot conditions.
Track measuring devices, dosing methods, PPE, and handling rules to stay safe and compliant. Review environmental impacts such as runoff and potential effects on rebar and soil, and weigh costs and scheduling implications for your project.
Tools, materials, and monitoring equipment checklist
Before you start, make sure you have all the necessary tools and materials to safely use ice in your concrete mix. This checklist will help you prepare.
- Thermometers: To monitor concrete and ambient temperatures.
- Calibrated scales/measuring jugs: For accurate dosing of ice and other materials.
- Crushed/block ice sources: Clean, safe ice for your mix. Avoid using ice with unknown contaminants.
- Slump cone: To test concrete workability after mixing.
- Temperature log forms: To record temperatures at different stages of the process.
- Refractometers or SPRAS: Optional, for precise temperature measurements.
- Mixing tools: Shovels, hoes, or power mixers to combine materials evenly.
- Accelerants/sealants: Consider using these if recommended by your concrete supplier.
Quick rule: Always double-check your equipment and materials before starting. Missing something can lead to improper mixing and weak concrete.
Safety and jobsite controls
Safety is paramount when using ice in concrete. Follow these guidelines to keep your jobsite safe.
- PPE: Wear gloves, goggles, and a respirator if fumes are present.
- Slip management: Be cautious around melted ice water. Keep surfaces clean and dry.
- Lifting practices: Use proper lifting techniques when handling bags of ice or other materials to prevent injury.
- Communication: Inform your ready-mix supplier about using ice in your mix to ensure they provide compatible materials.
- Ice storage: Keep ice in a clean, covered container until use to prevent contamination and melting.
- Emergency plan: Have a plan for handling exposure to cold materials or spills.
Quick rule: Always prioritize safety. A safe jobsite ensures everyone can work efficiently without risks.
Environmental and cost implications
Consider the environmental and cost impacts of using ice in your concrete mix to make informed decisions.
- Water usage: Using ice increases water usage. Consider this, especially in drought-prone areas.
- Runoff management: Plan for additional meltwater runoff and dispose of it responsibly.
- Potential additives: Ice source water may contain additives that could impact your concrete’s quality or the environment.
- Disposal considerations: Dispose of any unused ice and melted water according to local regulations.
- Alternatives: Consider other cooling methods like coolers, insulated forms, or non-chemical alternatives.
- Material costs: Compare the cost of using ice with other cooling methods.
- Energy costs: Consider the energy required to produce and maintain the ice.
- Labor time: Using ice may increase labor time due to mixing and monitoring requirements.
Quick rule: Weigh the environmental and cost impacts of using ice against other cooling methods. The best choice depends on your specific situation.
Visual Checkpoints, Quality Assurance, and When to Involve a Lab or Supplier
On-site checks should cover temperatures at multiple stages, a quick slump test, and a visual assessment of surface finish for uniformity. Look for signs of segregation or unusual setting behavior that warrants attention. Use simple cues to gauge readiness for the next step.
Document placement conditions, curing methods, and any deviations from the plan. Escalate to the supplier or a laboratory if consistency wanes, or if you observe unexpected strength or air content readings. Maintain clear records for QA and traceability.
Onsite visual and measurable checkpoints
Use this checklist during placement to ensure your ice-dosed concrete is performing as expected.
- Batch temperature: Check before unloading. Too hot? Ice dosing might not help.
- Slump test: Quickly check workability. Out of spec? Adjust ice dosing or pause the pour.
- Finishability: Observe surface appearance. Flash set or cracks? Slow down curing or adjust mix.
- Segregation: Check for layering during placement. Found any? Stop the pour and remix.
- Bleeding: Too much? Excessive bleeding weakens concrete.
- Initial set time: Track with a maturity meter or time-to-park reference. Too slow/fast? Adjust ice dosing.
- Finger/rod indentation: Test early strength. No mark? Concrete might be too soft.
- Unexpected stiffening: Watch for rapid loss of workability. Happens? Slow down placement or adjust mix.
Quick rule: If anything’s out of spec, pause, adjust, or stop the pour to prevent costly mistakes.
When to request lab tests or supplier help
Use this checklist when issues arise that need expert intervention.
- Inconsistent batches: Notice variations in slump, set time, or strength? Request lab cylinders for testing.
- Unusually slow set: Concrete not setting as expected? Contact the supplier for advice.
- Unexpected strength results: Early strength tests low? Send samples to a lab for compressive strength testing.
- Air-void issues: Suspect excessive air entrapment? Request air content testing.
- Unit weight concerns: Think concrete might be too light or heavy? Request unit weight testing.
- Mix design review: Consistently having problems? Ask the supplier to review your mix design.
- Concrete temperature advisory: Need help managing placement temperatures? Consult with the supplier.
- Lab testing turnaround: Urgent results needed? Discuss rush testing options with the lab.
Quick rule: If you can’t fix it onsite, don’t hesitate to escalate. Better safe than sorry.
Conclusion
Using ice to cool concrete on hot days can protect strength and appearance, but it only pays off when you follow a careful plan and keep safety at the center of every step. The right approach reduces cracking, limits setting problems, and helps you finish on schedule without costly rework.
Check in this order: verify the air and concrete temperatures and your pour window, determine the ice fraction you will use and how you will add it (gradually, with clean, pre-chilled water), prep and test a small batch first, mix ice in with clean equipment and PPE, monitor slump and early set, keep curing temperatures stable, and document everything for QA and future pours. Do a small-batch test in a separate area or form, adjust the ice and water mix based on the test results, and proceed only if the test shows no excessive heat gain or early stiffening. If you’re unsure, err on the side of more curing time and less rushing, and plan additional curing checks as you go.
Common mistakes to avoid are overloading the mix with ice, skipping a small-batch test, and ignoring curing/temperature control after placement. Always run the ice addition in stages, wear proper PPE, and keep notes on quantities and conditions so you don’t exceed safe limits. If in doubt about material compatibility, weather timing, or curing, stop and reassess rather than pushing forward and risking cracking or surface flaws.
If the project feels large, complex, or you’re dealing with specialized mixes or high temperatures, it makes sense to bring in a pro or supplier for a quick check before pouring. When you stay disciplined, follow the plan, and monitor the results, you’ll finish with a solid, durable surface and the confidence to tackle the next hot-day pour.
FAQ
How does hot weather affect curing, and why should I consider ice?
Heat speeds up evaporation and can lead to faster surface drying and uneven curing. Ice helps slow temperature rise in the mix and gives you a bit more time to work, but it’s not a magic fix—follow the product instructions and local guidelines.
What are practical ways to use ice on hot days?
You can add crushed or chipped ice to the mixing water, or replace a portion of the mixing water with ice until it melts. You can also use cold water or pre-chill containers and then adjust the mix as needed, but don’t rely on ice alone—watch slump and set times closely.
How should I dose ice safely and effectively?
Follow the ice as part of your overall mix plan and check the manufacturer’s guidance for your materials. Don’t exceed safe limits for the specific mix and equipment, and document the approach so others know what was done. If in doubt, check product labels, datasheets, or local rules before proceeding.
What safety steps and common mistakes should I avoid?
Wear appropriate PPE and protect workers from slips when ice changes the mix. Common mistakes include adding too much ice, not adjusting curing or formwork, and neglecting proper curing coverage after placing the concrete. If you’re unsure about steps, pause, review the material instructions, and consider a small test batch.