
Key Takeaways
- Essential tools include protective gear, cleaning supplies, and application tools like trowels and sanders for applying acrylic render over painted stucco.
- The process involves preparation, surface inspection, primer application, render mixing, and application, taking approximately 6-11 days to complete.
- Potential pitfalls include insufficient surface preparation and not allowing enough drying time, which can affect the render’s adhesion and durability.
Introduction
Did you know that applying acrylic render over a painted stucco surface can significantly enhance its durability and aesthetic appeal? This technique, which combines modern materials with traditional surfaces, offers a practical solution for those looking to refresh and protect their exteriors without a complete overhaul.
Imagine standing in your backyard, staring at the faded stucco walls that have seen better days. The idea of a costly renovation looms large, but there’s a more accessible way to achieve that fresh, new look—by applying an acrylic render. This guide will walk you through the process, helping you transform
your space efficiently and effectively.
Essential Tools and Materials
Embarking on a project to apply acrylic render over painted stucco requires a solid understanding of the necessary tools and materials. This foundational knowledge ensures efficiency and effectiveness throughout the process. Here’s a comprehensive list of what you’ll need:
- Protective Gear: Safety goggles, gloves, and a mask to protect against dust and debris.
- Cleaning Supplies: A power washer or a stiff brush along with mild detergent for surface preparation.
- Scrapers and Sanding Tools: Metal scrapers and sandpaper (preferably 120-grit) for removing loose paint and smoothing the surface.
- Primer: A high-quality bonding primer to ensure the render adheres well to the painted surface.
- Acrylic Render Mix: Ready-mixed or dry acrylic render that you can prepare according to the manufacturer’s instructions.
- Trowel and Hawk: For applying and smoothing the render onto the stucco.
- Mixing Tools: A mixing bucket and a drill with a mixing paddle for preparing the render mix.
- Drop Cloths and Tape: To protect areas that you don’t want to be covered in render.
Having these tools and materials ready before you begin ensures a smoother workflow and helps avoid unnecessary delays. Quality tools can make a significant difference in the finish and durability of your render application.
Key Points
- Protective gear including safety goggles, gloves, and a mask.
- Cleaning supplies such as a power washer or stiff brush with mild detergent.
- Tools for application including scrapers, sanding tools, primer, acrylic render mix, trowel, and hawk.
Quick Facts
- Approx. Time: Gathering and preparing the necessary tools and materials can take a few hours, depending on the availability of items and the complexity of the project setup.
- Potential Pitfalls: One potential pitfall is not thoroughly cleaning the surface before applying the primer, which can lead to poor adhesion of the render. Another is using low-quality tools or materials, which can affect the finish and durability of the render.
- Best Practice: Ensure all tools and materials are of high quality and suitable for the specific project requirements. Thoroughly clean and prepare the surface to ensure optimal adhesion of the render.
Note: Times and steps vary by local codes and manufacturer instructions.
Edge cases
- If the painted stucco is in poor condition or has structural issues, applying acrylic render may not be advisable without addressing these underlying problems first.
- In environments with extreme weather conditions, such as very high humidity or freezing temperatures, the application process and materials may not perform as expected.
- If the existing paint is not compatible with the acrylic render or is peeling, additional preparation or different materials may be required.
- For historical or heritage buildings, specific guidelines or restrictions may apply that could make this advice inapplicable.
- If the surface is not properly cleaned or prepared, the render may not adhere correctly, leading to potential failure.
- In areas where local building codes or regulations prohibit or restrict the use of certain materials or methods, this advice may not be applicable.

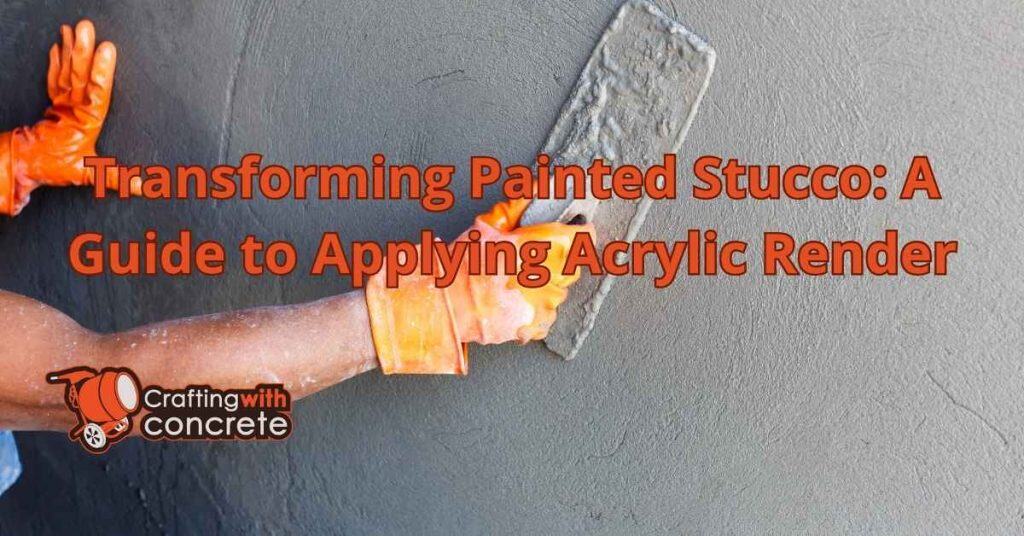
Step-by-Step Process & Timeframe
Applying acrylic render over painted stucco involves a series of carefully executed steps. Following this process ensures a professional finish that enhances both the aesthetic and durability of your walls. Here’s a breakdown of the procedure along with an estimated timeframe for each phase:
- Preparation (1-2 days): Begin by cleaning the surface thoroughly. Use a power washer or scrub with a brush and mild detergent to remove dirt, loose paint, and debris. Allow the surface to dry completely.
- Surface Inspection and Repair (1 day): Inspect for cracks or damages. Use filler to repair minor cracks and sand down any rough patches. This ensures a smooth base for the render.
- Primer Application (1 day): Apply a high-quality primer to the painted stucco. This step is crucial for bonding, so ensure even coverage. Allow the primer to dry as per the manufacturer’s instructions.
- Mixing the Render (As Needed): Prepare the acrylic render mix as per the instructions. Consistency is key, so use a mixing paddle attached to a drill for best results.
- Render Application (1-2 days): Using a trowel and hawk, apply the render in sections. Work in manageable areas to maintain a wet edge. Ensure even thickness and a smooth finish.
- Final Touches and Curing (2-5 days): Once applied, allow the render to cure. This process can take a few days depending on weather conditions. Avoid disturbing the surface during this time.
Patience and attention to detail at each stage are crucial for a successful outcome. Plan your schedule to accommodate the curing time, ensuring the render sets properly for maximum durability.
Key Points
- Preparation involves cleaning the surface and allowing it to dry, taking 1-2 days.
- Surface inspection and repair, including filling cracks and sanding, requires 1 day.
- Render application and curing take 3-7 days, with attention to even coverage and curing time.
Quick Facts
- Approx. Time: The entire process takes approximately 6-11 days, including preparation (1-2 days), surface inspection and repair (1 day), primer application (1 day), render application (1-2 days), and curing (2-5 days).
- Potential Pitfalls: One pitfall is not allowing sufficient drying time between steps, which can compromise the adhesion and durability of the render. Another pitfall is applying the render in sections that are too large, making it difficult to maintain a wet edge and achieve an even finish.
- Best Practice: Ensure thorough cleaning and drying of the surface before starting the process to promote better adhesion. Additionally, work in manageable sections during render application to maintain a wet edge and achieve a smooth, even finish.
Note: Times and steps vary by local codes and manufacturer instructions.
Edge cases
- If the painted stucco is not structurally sound or has significant damage, this process may not be suitable.
- In extremely cold or wet weather conditions, the drying and curing times may be extended, making the process impractical.
- If the existing paint is of a type that does not bond well with acrylic render, such as oil
- based paints, this method may not be effective.
- In areas with high humidity, the drying and curing times may be significantly longer, affecting the overall timeframe.
- If local building codes or regulations require specific materials or methods not covered in this process, it may not be applicable.
Comprehensive Guide
For those seeking to delve deeper into the art of applying acrylic render over painted stucco, this comprehensive guide offers a more detailed exploration. Here, we’ll cover not only the how but also the why, providing insights that empower you to make informed decisions throughout the process.
Understanding the Surface: Painted stucco presents unique challenges due to its textured nature and existing paint layers. The key is to ensure the new render adheres properly, requiring meticulous surface preparation.
Choosing the Right Render: Acrylic render is favored for its flexibility and ease of use. It’s less prone to cracking, making it ideal for areas subject to environmental stress. Consider the finish you desire—smooth, textured, or patterned—and select a product that meets your aesthetic preferences.
Techniques for Application: Mastery of troweling techniques will impact the final look. Practice on a small section to get a feel for the material. Consistent pressure and angle are crucial for an even application.
Weather Considerations: Weather can significantly affect rendering. Aim to work in mild conditions, avoiding extreme heat or cold, which can alter drying times and adhesion quality.
Aftercare and Maintenance: Once applied, acrylic render requires minimal maintenance. Regular cleaning and inspections for any signs of damage will help maintain its appearance and integrity over time.
This guide serves as a resource for both novices and seasoned DIY enthusiasts, offering a wealth of information to ensure your project’s success. With a thorough understanding of each aspect, you’ll be well-equipped to
transform your walls with confidence.
Edge cases
- Surfaces with significant structural damage or instability.
- Areas with severe moisture issues or water damage.
- Surfaces with oil
- based or glossy paint that may prevent adhesion.
- Environments with extreme weather conditions during application.
- Surfaces with existing render that is loose or flaking.
Common Mistakes & Solutions
Even with the best preparation, mistakes can occur when applying acrylic render over painted stucco. Recognizing these common pitfalls and their solutions can save you time and frustration, ensuring a smoother project execution.
1. Inadequate Surface Preparation: One of the most frequent errors is failing to properly clean and prime the surface. This can lead to poor adhesion and peeling.
Solution: Invest time in thoroughly cleaning the stucco and applying a high-quality primer.
2. Incorrect Mixing: The consistency of the render mix is crucial. Too thick or too thin can lead to application issues.
Solution: Follow manufacturer instructions precisely when mixing the render, using a drill and paddle for uniformity.
3. Overworking the Render: Excessive troweling can cause the render to dry out or become uneven. Solution: Work in sections and maintain a consistent application technique, avoiding unnecessary reworking of the material.
4. Ignoring Weather Conditions: Applying render in unsuitable weather can result in poor curing and finish. Solution: Check forecasts and plan your work for days with mild, stable weather conditions.
5. Skipping Curing Time: Rushing the process can compromise the render’s durability. Solution: Allow adequate time for the render to cure properly before exposing it to stress or weather.
By being aware of these common mistakes and their solutions, you can approach your project with confidence, avoiding setbacks and achieving a professional finish.
Quick Facts
- Approx. Time: The time required can vary depending on the project size, but adequate surface preparation and curing can extend the timeline significantly.
- Potential Pitfalls: Inadequate surface preparation and ignoring weather conditions can lead to poor adhesion and finish.
- Best Practice: Thoroughly clean and prime the surface before application and check weather forecasts to ensure suitable conditions for rendering.
Note: Times and steps vary by local codes and manufacturer instructions.
Edge cases
- Surfaces that are not suitable for acrylic render, such as those with significant structural damage or instability.
- Environments with extreme weather conditions that cannot be avoided or predicted.
- Situations where local building codes or regulations prohibit the use of acrylic render over painted stucco.
- Projects where the existing paint is incompatible with acrylic render, leading to chemical reactions or poor adhesion.
- Scenarios where the surface is contaminated with substances that cannot be adequately cleaned or primed.
- Instances where the user lacks the necessary skills or tools to properly mix and apply the render.

Understanding the Methodology
The methodology behind applying acrylic render over painted stucco is rooted in both scientific principles and practical techniques. A deep understanding of these can enhance your ability to execute the task effectively.
The Science of Adhesion: At its core, the process involves ensuring that the new render layer bonds securely to the painted stucco. This is achieved through mechanical and chemical adhesion. Mechanical adhesion comes from the
render physically gripping the surface textures, while chemical adhesion involves bonding agents within the primer and render.
Material Dynamics: Acrylic render is chosen for its flexibility and resilience. It expands and contracts with temperature changes, reducing the risk of cracking compared to traditional cement-based renders. Understanding these properties helps in selecting the right product and application techniques.
Application Techniques: The methodology requires a blend of art and science. Skillful troweling ensures even coverage and thickness. The angle and pressure of the trowel affect the finish, so mastering these techniques is crucial.
Environmental Considerations: Factors such as humidity, temperature, and sunlight exposure play roles in the curing process. Knowledge of these influences allows for adjustments in application timing and technique.
This understanding of the methodology not only aids in the practical application but also empowers you to troubleshoot and adapt to any challenges encountered during your project.
Edge cases
- Surfaces with significant structural damage or instability.
- Painted stucco with peeling or flaking paint.
- Environments with extreme temperature fluctuations beyond the flexibility range of acrylic render.
- Surfaces exposed to constant moisture or water intrusion.
- Areas with poor ventilation, affecting curing.
- Surfaces with incompatible previous coatings that prevent adhesion.
Advanced Advice & Adjustments
For those looking to refine their technique and achieve a superior finish when applying acrylic render over painted stucco, this section offers advanced advice and potential adjustments to enhance your results.
Texture Variations: Experiment with different trowel sizes and textures to achieve unique finishes. Consider using a sponge float for a softer, more uniform texture, or a brush for a more rustic appearance.
Additives and Enhancements: Certain additives can be mixed into the render to enhance properties such as waterproofing, flexibility, or color. Research options that align with your specific needs and desired outcomes.
Layering Techniques: For thicker applications or unique textures, consider applying multiple layers. Allow each layer to partially cure before adding the next for better results and reduced cracking.
Custom Coloring: While acrylic renders come in various colors, custom tinting can offer personalized aesthetic appeal. Use color swatches and sample areas to test before full application.
Maintenance and Longevity: Implement a maintenance schedule to address any minor repairs swiftly. Regular cleaning and inspection can prevent small issues from escalating.
These advanced techniques and adjustments allow you to tailor the render application to your specific project needs, achieving a high-quality finish that stands out both in aesthetic and durability.
Edge cases
- Incompatible Surface: If the painted stucco is not properly prepared or is incompatible with acrylic render, the advice may not apply.
- Structural Issues: If the underlying stucco or building structure has significant damage or instability, applying render could be unsafe.
- Severe Weather Conditions: In areas with extreme weather conditions, some additives or techniques might not provide the desired durability or protection.
- Inadequate Skill Level: If the person applying the render lacks the necessary skill or experience, advanced techniques might lead to poor results.
- Regulatory Restrictions: Local building codes or regulations might restrict certain additives or techniques.
- Health and Safety Concerns: If proper safety measures are not followed, especially when mixing additives, it could be unsafe.
Key Concepts Explained
Understanding the key concepts involved in applying acrylic render over painted stucco is essential for both beginners and seasoned DIYers. This section breaks down the critical ideas that form the backbone of the rendering process.
Adhesion: The ability of the render to stick to the underlying stucco is paramount. Primers enhance adhesion by creating a bond between the painted surface and the new render layer.
Flexibility: Acrylic render’s flexibility is one of its significant advantages. It accommodates expansion and contraction due to temperature fluctuations, reducing the likelihood of cracking.
Porosity: Understanding the porosity of the painted stucco helps in selecting the right primer and render. Porous surfaces may require a sealer to prevent moisture-related issues.
Texture and Finish: The final appearance of the render is influenced by the techniques and tools used. Different tools and methods can create smooth, rough, or patterned finishes.
Curing: Proper curing is essential for durability. It involves allowing the render to set and harden over time, ensuring it withstands environmental stresses.
These concepts are fundamental to achieving a successful render application. By grasping these ideas, you can approach your project with a comprehensive understanding, leading to better planning and execution.
Edge cases
- Applying acrylic render over surfaces with significant structural damage or instability.
- Using acrylic render in extremely cold or hot climates without proper adjustments.
- Applying render over surfaces with oil
- based or glossy paints without proper surface preparation.
- Ignoring manufacturer
- specific instructions for primers and renders.

Conclusion
In conclusion, applying acrylic render over painted stucco is a meticulous process that requires careful planning and execution. Key points to remember include the importance of using protective gear to ensure safety, the necessity of thorough surface cleaning to promote adhesion, and the selection of high-quality tools and materials to achieve a durable and aesthetically pleasing finish.
Each step, from preparation to curing, plays a crucial role in the success of the project. Potential challenges include ensuring that the painted stucco is in good condition before starting, as underlying structural issues can compromise the render’s effectiveness. Weather conditions, such as high humidity or freezing temperatures, can also impact the drying and curing times, potentially extending the project timeline.
Additionally, compatibility issues between the existing paint and the acrylic render can necessitate further preparation or alternative materials. It is essential to follow local building codes and manufacturer instructions to avoid complications and ensure compliance with safety and licensing regulations.
Failure to adhere to these guidelines can result in poor adhesion, reduced durability, and potential legal issues if local codes are not met. Therefore, it is advisable to consult with professionals or local authorities if there are any uncertainties regarding the process or materials.
To successfully complete your acrylic render project, take action by gathering all necessary tools and materials, ensuring the surface is thoroughly cleaned and prepared, and following each step of the process diligently. By doing so, you will be well on your way to transforming your painted stucco surfaces with a fresh and durable acrylic render finish.
Quick Facts
- Time Needed: Approximately 6-11 days, including preparation, surface inspection, primer application, and render application.
- Common Pitfalls: Insufficient surface preparation and inadequate drying time can lead to poor adhesion and durability issues.
- Best Practice: Ensure thorough cleaning and preparation of the surface, and use high-quality tools and materials for optimal results.
FAQ
Question 1 What are the essential tools and materials needed for applying acrylic render over painted stucco?
To apply acrylic render over painted stucco, you’ll need protective gear like safety goggles and gloves, cleaning supplies such as a power washer, scrapers, sanding tools, a high-quality primer, acrylic render mix, a trowel and hawk, mixing tools, and drop cloths. Having these ready ensures a smooth workflow and a professional finish.
Question 2 What potential pitfalls should I be aware of when applying acrylic render?
Common pitfalls include not thoroughly cleaning the surface before applying primer, which can lead to poor adhesion, and using low-quality tools or materials that affect the render’s finish and durability. It’s crucial to ensure all tools and materials are of high quality and suitable for the project.
Question 3 How long does the entire process of applying acrylic render over painted stucco take?
The process typically takes 6-11 days, including preparation (1-2 days), surface inspection and repair (1 day), primer application (1 day), render application (1-2 days), and curing (2-5 days). Patience and attention to detail are key for a successful outcome.
Question 4 Are there any specific conditions under which applying acrylic render might not be advisable?
Applying acrylic render may not be advisable if the painted stucco is structurally unsound, in environments with extreme weather conditions, or if the existing paint is incompatible with the render. Additionally, local building codes or regulations may impose restrictions that affect the process.