
Introduction
Exposed or apparently loose reinforcement is not automatically a drill-and-epoxy repair. It can mean loose tie wire, loss of bond between steel and concrete, corrosion-driven spalling, inadequate original reinforcement, or a deeper slab problem. Those conditions have different remedies. Related guidance: How to Install Rebar Dowels to Tie a New Slab to an Existing One.
Stop work and obtain a structural engineer or qualified concrete-repair professional before exposing, bending, cutting, drilling near, supplementing, or re-anchoring reinforcement in a load-bearing, suspended, post-tensioned, heavily cracked, sagging, extensively spalled, actively leaking, historically significant, or uncertain slab. Stop as well if a bar is badly pitted, has lost section, cannot be traced, or drilling finds unexpected steel, a void, water, utilities, or abnormal resistance.
Condition assessment, repair design, substrate preparation, placement, curing, and inspection are connected parts of a concrete repair—not interchangeable DIY steps. See the ACI concrete repair guide for the broader repair methodology.
Key Takeaways
- Do not assume a loose bar needs an anchor. First identify whether the issue is tie wire, failed bond, corrosion, lost steel section, or unsound concrete.
- Post-installed rebar is an engineered connection. Bar size alone does not set the hole size, embedment, spacing, edge distance, adhesive, or capacity.
- DIY work is limited to observation, documentation, and only nonstructural surface work that a qualified professional has approved.
Essential Tools and Materials
Do not buy adhesive or replacement bar until the repair approach is specified. A locator can help map likely steel, but it is not dependable clearance for all embedded hazards or post-tensioning tendons.
Tools
- Inspection tools: flashlight, straightedge, marker, camera, tape measure, and a sounding tool for mapping cracks, spalls, staining, and hollow areas.
- Protection and containment: eye protection, hearing protection, gloves, protective clothing, barriers, wet methods or local dust collection, and a HEPA vacuum.
- Only when specified: a rotary hammer, correct bit, depth control, hole-cleaning brushes, oil-free air equipment, adhesive dispenser, and placement tools required by the approved repair system.
Materials
- Specified adhesive: an adhesive approved for the exact post-installed rebar or anchor use and site conditions—not a generic epoxy resin.
- Specified reinforcement: bar grade, diameter, length, splice or development requirements, and placement must come from the repair design. Matching diameter alone is not enough.
- Compatible repair mortar or concrete: selected for the prepared substrate, repair depth, exposure, placement method, and curing requirements.
- Steel treatment only if specified: do not apply a generic rust inhibitor. Some systems require clean bare steel; others specify a compatible passivating treatment.
Before-Work Checklist
- Identify the slab: slab-on-ground, elevated, suspended, or post-tensioned.
- Map cracks, spalls, hollow areas, rust staining, leakage, and any deflection; photograph and date the findings.
- Confirm that the surrounding concrete is sound and that embedded hazards have been investigated by an appropriate method.
- Obtain the repair design, product instructions, required permits, and inspection or testing requirements before drilling.
Important
- Do not rely on a fixed schedule or price: repair scope depends on access, damage, engineering, testing, permits, moisture control, and cure requirements.
- Do not load the repair early: use the adhesive and repair-material cure limits specified for actual jobsite temperatures and conditions.
A qualified professional should determine whether local patching, supplemental reinforcement, partial replacement, strengthening, or slab replacement is appropriate.
Key Steps in the Process
The sequence below explains an engineered repair workflow. It is not a generic installation specification for structural reinforcement.
Step 1: Assess and classify the defect
Review available drawings, previous repairs, loading, moisture exposure, and slab type. Map visible cracks, spalls, rust staining, leakage, and hollow or delaminated areas. Sounding can help locate delamination; ultrasonic or other nondestructive testing is professional-directed, not a routine DIY way to prove anchorage or capacity.
- Loose tie wire: may not mean the bar has lost bond. Tie wire is not structural anchorage.
- Exposed but intact steel: requires a cause-of-deterioration review before patching.
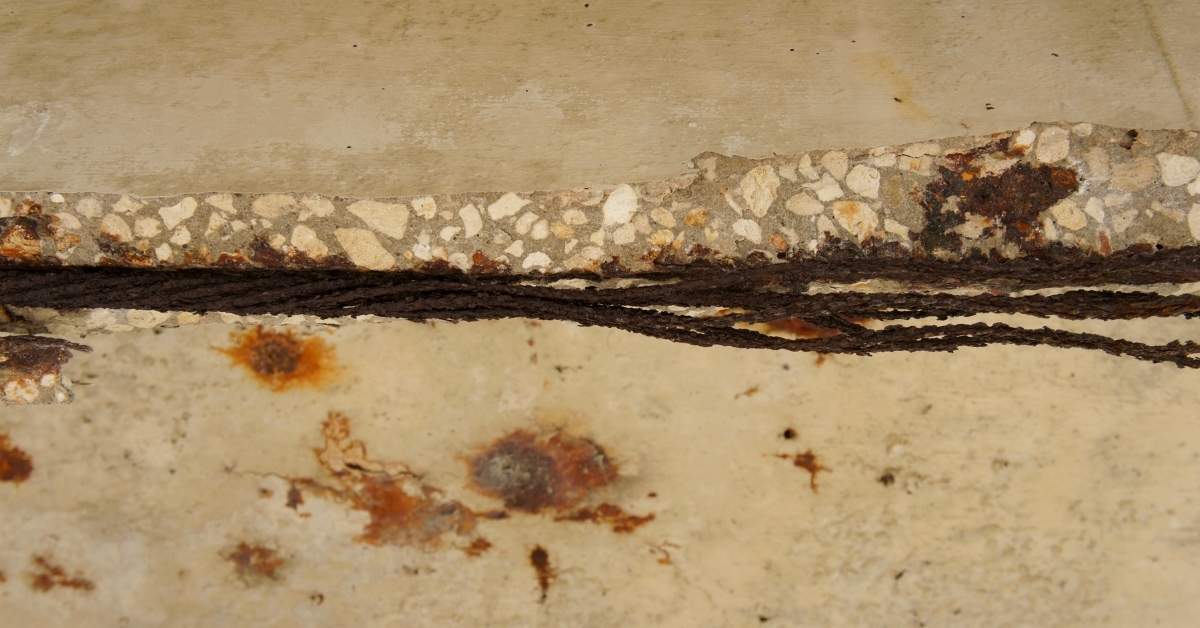
- Debonded or corroded steel: may indicate voids, cracking, active corrosion, or inadequate development length.
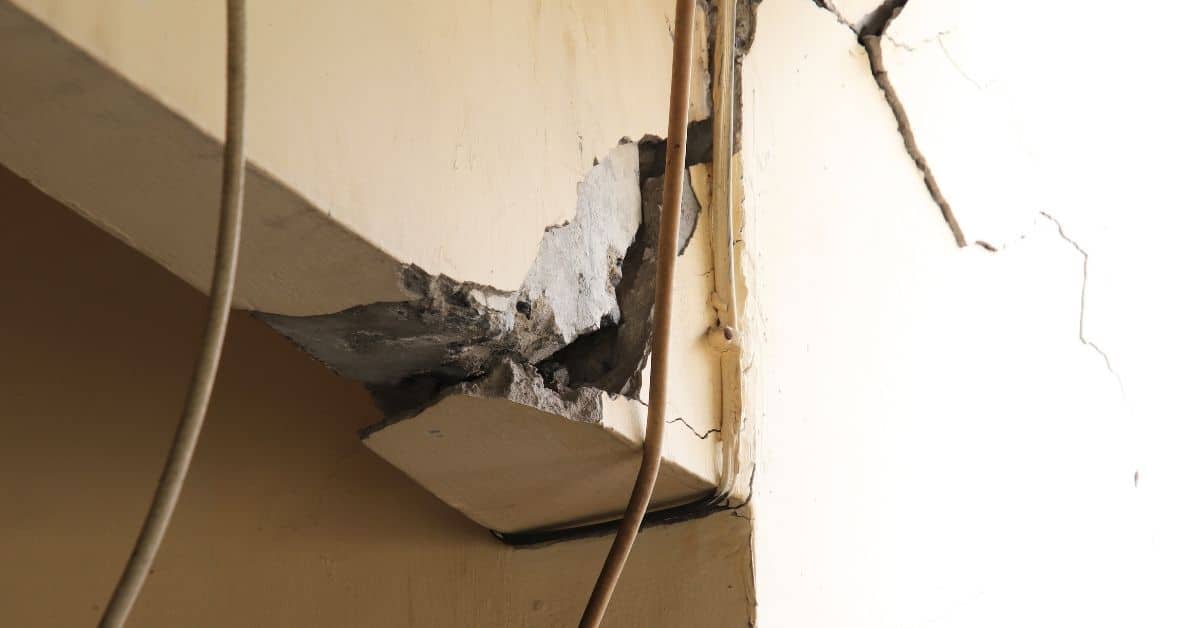
- Section loss or widespread distress: requires structural evaluation; a one-point anchor cannot replace missing capacity.
Step 2: Establish a controlled repair area
Clear occupants and protect adjacent finishes. Verify utilities, reinforcement, and possible tendons before chipping or drilling. Remove only concrete identified as unsound, using controlled methods that do not cut or bend reinforcement. Expose enough steel for the professional to determine the corrosion extent and whether section loss is present.
Clean concrete and steel by the specified method. The repair substrate must be sound, clean, and free of loose material, dust, laitance, oil, and other bond-breaking contamination. Do not coat steel unless the selected repair system expressly permits that treatment. Guidance for corrosion-related spalls includes exposing and cleaning the affected reinforcing steel and seeking structural review where steel section has been lost; see ACI RAP Bulletin 7.
Step 3: Drill only to an approved layout
For a designed post-installed bar, the drawings and adhesive documentation must define the bar, loads, concrete strength and crack condition, embedment, hole diameter, edge distance, spacing, member thickness, drilling method, hole orientation, and any shoring or unloading. They must also address damp or wet holes, temperature, working time, cure time, and the adhesive evaluation report.
- Mark the approved location and depth; do not improvise around existing steel.
- Stop immediately if drilling encounters unexpected steel, a tendon, a void, water, a utility, or unusual resistance.
- Clean the hole exactly as the approved product requires. Hole diameter, brush size, blowing and brushing sequence, and air quality are system-specific.
Step 4: Install the specified bar and adhesive
Check product expiration, cartridge condition, concrete and material temperature, and hole condition before dispensing adhesive. Follow the current manufacturer procedure for dispensing, injection, bar insertion, rotation if required, embedment, and cure. Do not substitute a different adhesive or load the bar before the required cure period.
Installation alone does not prove capacity. The engineer, code official, or project specifications may require special inspection, proof testing, or pull testing. Record the product, batch, temperatures, hole and bar dimensions, installation time, and cure completion.
Step 5: Place, cure, and protect the concrete repair
Place the compatible repair material after the adhesive installation is complete as required by the repair sequence. Consolidate and finish it without leaving voids, and cure and protect it according to its product data. A surface sealer is not automatic; use one only when it is compatible with the repair system and suitable for the exposure.
After repair, monitor for renewed cracking, hollow areas, rust staining, leakage, or moisture intrusion. Recurrence signals that the underlying cause may not have been corrected.
Observable Checks
- All loose, hollow, or friable concrete within the repair boundary has been addressed as directed.
- The bar condition, final position, and cover match the approved repair details.
- Adhesive and patch material were installed within their stated condition and curing limits.
- Required inspection and any specified testing are complete before the slab returns to service.
Common errors
- Assuming a locator clears a drilling path, rather than treating it as preliminary information.
- Anchoring into cracked, wet, dusty, delaminated, or otherwise unsuitable concrete.
- Using an unapproved coating, adhesive, bar, hole size, or cure period.
If the repair changes load paths, needs temporary shoring, or reveals broader damage, stop and obtain a revised professional repair plan.
DIY Guide for Home Enthusiasts
A homeowner can usefully document conditions, keep water away from the slab where practical, and obtain qualified evaluation. Do not treat this as permission to create structural post-installed reinforcement without a design.
Understanding the Project
Concrete carries compression well; reinforcement carries tensile demands in a designed layout. Its performance depends on development, laps, cover, spacing, bar grade, concrete condition, and loads. A replacement bar that merely looks like the old one may not satisfy those requirements.
Planning Your Approach
Give the evaluator photos, crack and spall locations, slab access, known water sources, and any drawings or repair history. Ask whether the bar is actually loose, whether active corrosion is present, and whether the recommendation is a patch, designed post-installed bar, supplemental reinforcement, partial replacement, or full replacement.
Executing the Project
- Document and protect: map distress and prevent traffic or falling debris hazards.
- Get hazard clearance: do not drill based only on a basic rebar locator.
- Follow the approved scope: use only the specified material system and installation controls.
- Keep records: retain product data, repair photos, inspection results, and curing notes.
Safety Considerations
Concrete drilling, grinding, and chipping create respirable silica dust. Use the required wet method or local exhaust/HEPA collection, contain the work area, and use a properly selected respirator when required. Wear eye, hearing, hand, and skin protection; use GFCI-protected electrical equipment around wet work; avoid blowing dust with compressed air; and follow the adhesive and cementitious-product SDS requirements.
Final Thoughts
The safe decision can be to leave the reinforcement untouched until a repair professional evaluates it. That is especially true for elevated slabs, garages over occupied space, balconies, foundations with major cracking, and any suspected post-tensioned construction.
Common Challenges and Their Solutions
Challenge 1: Unknown embedded conditions
Response: Pause. Review records and obtain appropriate scanning or specialist investigation. Do not chip or drill near suspected tendons, utilities, or unverified steel.
Challenge 2: Corrosion or section loss
Response: Do not assume wire brushing solves it. Determine why moisture reached the steel, clean only as the system specifies, and obtain structural review if pitting or reduced bar section is visible.
Challenge 3: Hole size, depth, or location does not match the plan
Response: Stop and contact the designer or product technical support through the approved project channel. Do not enlarge, relocate, or reuse a hole without authorization.
Challenge 4: Damp, cracked, or contaminated concrete
Response: Do not assume adhesive will bond. Confirm that the selected system is qualified for the actual concrete and hole conditions, then follow its exact cleaning and installation procedure.
Challenge 5: A patch cracks, sounds hollow, or leaks
Response: Treat this as a repair-performance concern, not a cosmetic issue. Protect the area, document it, and have the repair reviewed before covering it or putting it into service.
Rationale Behind the Method
A localized repair can be appropriate when deterioration is limited, the cause is controlled, surrounding concrete is sound, and a qualified professional has confirmed the required capacity. In other cases, re-anchoring is the wrong remedy: active corrosion, inadequate original detailing, widespread delamination, recurring moisture, or lost steel section may require deeper repair, supplemental reinforcement, strengthening, or replacement.
Structural Integrity
Capacity is established by the complete repair design and verified installation—not by epoxy alone.
Cost-Effectiveness
Local repair may avoid replacement only when it addresses the deterioration mechanism and remaining capacity. Engineering, access, shoring, testing, permits, and curing can materially change the scope.
Preservation of Existing Structures
Historic concrete requires preservation-sensitive investigation, documentation, and approval before drilling or removing original material.
Environmental Considerations
Repair can reduce demolition waste, but durability depends on controlling water and corrosion causes rather than simply covering damaged concrete.
Longevity and Durability
Service life cannot be promised from a generic method. Material compatibility, moisture exposure, correct placement, curing, and monitoring all matter.
Creative Suggestions and Workarounds
Do not substitute carbon-fiber reinforcement, hybrid systems, embedded sensors, custom drilling rigs, or a faster-curing adhesive for an approved repair design. These can be legitimate engineered strengthening or monitoring options, but they require project-specific design and specialized installation.
Safety, Codes & Local Considerations
Structural concrete repair may require permits, engineered drawings, special inspection, and testing. Contact the local building authority and use a licensed professional when required. A post-tensioned or suspended slab should be treated as a no-DIY-drilling condition until a specialist confirms a controlled plan.
Follow the current product instructions and SDS for each adhesive, repair material, and coating. Conditions such as cracked concrete, sustained loading, hole moisture, temperature, and cure time can determine whether a product is suitable.
Conclusion
Loose reinforcement is a condition to diagnose, not a standard DIY anchoring task. Document the distress, control immediate hazards and moisture where possible, and obtain professional evaluation before altering steel or drilling a structural slab. If a designed repair is selected, its dimensions, materials, installation, cure, inspection, and follow-up monitoring must all follow the approved repair system.
Frequently Asked Questions
Q1: Can I re-anchor a loose rebar myself?
Not when the slab is structural or its construction and condition are uncertain. A loose bar may indicate loss of bond, corrosion, or inadequate reinforcement that needs engineering assessment. DIY work should be limited to observation and approved nonstructural tasks.
Q2: Does exposed rebar always need replacement?
No. Exposed steel may be intact, but it must be evaluated for corrosion, section loss, bond condition, and the reason concrete cover failed. Replacement or supplemental reinforcement must be designed; matching diameter alone is insufficient.
Q3: Why can’t I use ordinary epoxy and drill a hole that fits the bar?
Post-installed rebar performance depends on the approved adhesive, loads, concrete condition, bar properties, embedment, edge distance, spacing, hole preparation, moisture, temperature, and cure. Those inputs are project- and product-specific.
Q4: When might replacement be more appropriate than repair?
Widespread cracking, delamination, active corrosion, significant bar section loss, deflection, inadequate original reinforcement, or uncertain capacity can make strengthening, partial replacement, or full slab replacement more appropriate than local anchoring.