
Introduction
Keying the scratch coat means creating a rough, gripping surface on the lath so the plaster adheres without excessive manipulation. It gives the base a bite that helps the next layer hold.
Start with thorough surface preparation: clean and dampen the lath so dust is removed and the surface isn’t drawing moisture too quickly. When mixing mortar for parging, follow the manufacturer’s instructions and local rules, and check that the mix has a workable consistency without being too dry or too wet. Use appropriate tools to apply and scratch the coat, and keep an eye on avoiding overworking the mix while still achieving a uniform, keyed texture.
Key takeaways
- Keying scratch coats relies on proper lath bite without overworking the mix.
- Thorough surface prep improves adhesion and reduces hairline cracks in parge.
- Mix consistency should be workable, firm, and cohesive, not overly wet.
- Use compatible tools and steady technique to avoid gouging lath.
- Apply parging in even coats, keying to surface for durable bite.
- Safety: protect eyes, hands, and neighbors from dust and falling debris.
Table of Contents
- Introduction
- Key takeaways
- Understanding Stucco Scratch Coat Keying — Purpose and Fundamentals
- Surface Preparation for Optimal Key Formation
- Mix Design: Getting the Right Consistency Without Overworking
- Tools and Materials Checklist
- Application Techniques to Maximize Bite on Lath
- Common Problems, Diagnostics, and Repairs
- Safety, Curing, and Environmental Considerations
- When to Call a Professional and Cost/Lifespan Factors
- Conclusion
- FAQ
Understanding Stucco Scratch Coat Keying — Purpose and Fundamentals
Keying is creating a rough profile on the scratch coat so the cement matrix can grip the lath and substrate. A strong mechanical bite improves adhesion, interlock, and protects against cracking and moisture transfer. Stake: without proper keying, adhesion can fail, leading to delamination and moisture infiltration.
Good keying supports bond strength and a stable base for subsequent coats, while limiting substrate movement and moisture transfer. Quick checks: run a finger along the scratched surface; it should feel rough and uniform, not smooth. If you see delamination, strip and reapply with improved keying techniques.
What keying actually does for a stucco system
Keying in a stucco scratch coat creates mechanical interlocks that play a crucial role in the overall performance of your stucco system. These keys form as you apply and tool the scratch coat, providing a rough profile that the cement matrix can grip.
The primary function of these keys is to transfer loads from the stucco to the lath, reducing stress on adhesion alone. This helps prevent delamination and cracking, ensuring durable, long-lasting performance.
To ensure effective keying, inspect the scratch coat during application for adequate key depth and uniformity. If keys are shallow or absent, reapply with deeper keying. Proper trowel technique is crucial for forming adequate keys.
Lath types and attachment methods that affect bite
The type of lath used and how it’s attached significantly influence the quality of key formation in your stucco scratch coat. Common lath materials include metal, paper-backed, and plastic.
Metal lath provides good strength and holding capacity but can be more susceptible to corrosion if not properly protected. Paper-backed lath offers good adhesion but may require additional support for heavy coats. Plastic lath is lightweight and durable but may have lower holding capacity.
Regardless of the lath type, proper attachment is crucial. Follow manufacturer guidelines for spacing and attachment methods using appropriate fasteners. Inspect fasteners during installation to ensure secure attachment. If lath is improperly attached, reattach or replace as needed.
Surface Preparation for Optimal Key Formation
Inspect the surface for cracks, delamination, efflorescence, dust, oil or grease, curing compounds, and signs of moisture intrusion that could hinder bonding. Clean and repair the substrate by removing loose material, sweeping and vacuuming, scrubbing with a suitable cleaner, repairing cracks and hollow areas, and reattaching or shimming loose lath as needed. Lift roughness to a suitable level with light wire brushing or grinding, and verify with a simple drag or key-etch check.
A final inspection by an experienced installer confirms contaminants are cleaned, repairs are done, and surface roughness is ready before applying scratch coat. Delay application if the surface is damp or freezing, protect the prep area from wind and dust, and perform a quick drag test to verify adhesion. Skipping key checks can result in weak bond strength and premature delamination.
Inspecting and repairing lath and substrate
Before applying the scratch coat, thoroughly inspect your surface to ensure a solid foundation for key formation. Look for any signs of weakness or damage that could hinder bonding.
Check for: loose lath, bent or missing fasteners, rust, deteriorated sheathing, and any other defects. Use a simple tap with a handle to identify loose components, but always perform a visual inspection of the entire surface area.
If you find any issues, repair or replace as necessary. Reattach or shim any loose lath sections to ensure a sound base for your scratch coat. Common mistake: Not reinspecting after repairs. Always double-check that your surface is solid before proceeding.
Cleaning, wetting, and priming surfaces
Proper cleaning of the substrate is crucial to remove contaminants and prepare the surface for optimal key formation. Start by removing any dust, oils, efflorescence, or other debris that could hinder adhesion.
Use a suitable cleaner to scrub the surface thoroughly. Rinse with clean water and allow it to dry completely before proceeding. Pro tip: Perform a wet check to ensure suction control, especially in hot, windy conditions.
If your substrate requires suction control, lightly dampen it before applying the scratch coat. Additionally, determine if a bonding agent or primer is recommended for your specific scratch coat mix and lath type. Apply these per manufacturer specs and allow proper tack time before application. Common mistake: Skipping reinspection after cleaning. Ensure your surface is free of contaminants before proceeding.
Mix Design: Getting the Right Consistency Without Overworking
The right scratch coat mix should be stiff but pliable, providing bite onto lath without tearing or slumping. It should be mixed in a sequence that minimizes air voids and avoids retempering, with water content judged by feel and consistency rather than time alone. Check the product label or datasheet for any specific guidance and test small batches before broader use.
Practical on-site checks and small-batch trials help confirm the mix will perform: a squeeze test should yield a cohesive but not overly sticky material, and the mix should not slump when placed. A pro check involves evaluating air voids and ensuring the water content supports early strength and key formation. If the mix feels too runny or slumps, reduce water and remix; if overmixed, discard instead of retempering to avoid weakening the final coat. Stake: skipping key checks can lead to inadequate bite or excessive slump, so document batch information and follow manufacturer guidelines for best results.
Cement-based mixes vs. acrylic-modified options
When choosing a scratch coat mix for your stucco system, you have two primary options: traditional cement-based mixes and acrylic-modified mixes. Each has its own advantages and is suited to different project requirements.
Cement-based mixes offer excellent durability and resistance to cracking. They are ideal for projects where long-term performance and stability are paramount. However, they may not provide the same level of flexibility as acrylic-modified mixes.
Acrylic-modified mixes, on the other hand, offer improved bonding characteristics and increased flexibility. This makes them an excellent choice for complex or movement-prone substrates where a more forgiving mix is needed. They also typically have faster curing times compared to cement-based mixes.
To determine which mix type is best suited for your project, consult product labels or datasheets for specific recommendations based on your project requirements. It’s crucial not to assume one mix type is universally superior; always consider the unique needs of your project and seek expert advice if unsure.
Mixing practice, hydration, and work time (safe guidance)
Proper mixing technique is crucial for achieving a consistent scratch coat mix that provides optimal key formation and workability. Here are some guidelines to help you maintain the right balance of hydration and work time:
First, follow the manufacturer’s instructions or local standards for recommended water content. Adding too much water can lead to excessive slumping and compromised performance, while not adding enough can result in a mix that is too stiff or dry.
During mixing, monitor the slump consistency of your mix. If it becomes too fluid or slumps excessively, add dry ingredients (cement or sand) to restore the desired consistency, following manufacturer guidelines for maximum retempering times. Conversely, if the mix becomes too stiff or dry, gradually add small amounts of water, ensuring thorough incorporation and maintaining workability within acceptable limits.
It’s essential not to exceed recommended water content or allow excessive retempering, as this can lead to compromised scratch coat performance. Always follow hydration and work time guidance to ensure the best possible results for your project.
Tools and Materials Checklist
This checklist covers the core tools and materials that directly support forming a good scratch key on lath: a hawk, trowel set, darby, gauge rake, a mixing drill with paddle, mixing bucket, and a sturdy straightedge for keying, plus lath-related items like corner beads, bonding agents, and proper scratch coat mix guidance. It also emphasizes mixing discipline, clean water, and pre-wetting lath as needed to prevent dry patches. Stake, quick-check cues, and practical finishing tools are included to keep bite consistent without overworking the mix.
What it buys you is consistent adhesion, uniform texture, and fewer rework cycles, saving time on larger jobs. A disciplined workflow—checking lath spacing, bond strength, and mix consistency before applying the coat—helps catch issues early, while on-site inspections for adhesion and moisture retention guide finishing and curing steps. Pro checks and common mistakes are noted to keep the process smooth, with practical reminders about weather, shade, and edge control to maintain quality from first pass to final finish.
Essential tools for throwing, packing, and scratching
The right tools ensure efficient mix handling and optimal bite on lath.
- Hawk: Supports trowel during application. Choose size matching job requirements.
- Trowels (Superior & Margin): Apply and smooth mix. Verify straightness before use; replace damaged ones.
- Darby: Screeds and levels scratch coat. Inspect for damage; choose width matching lath size.
- Plaster/Bricks Jointer: Creates key lines. Keep edges sharp for clean cuts.
- Gauge Rake: Scratches surface, creating bite. Use light pressure to avoid overworking.
- Mixing Drill with Paddle: Blends mix evenly. Check paddle size; ensure it fits drill securely.
- Mixing Bucket: Contains mix during preparation. Choose size matching batch needs.
- Sturdy Reference Straightedge: Ensures consistent key depth and pattern. Inspect for straightness before use.
Optional tools and accessories that save time and improve consistency
These extras enhance efficiency, reduce overworking, and maintain consistent mix quality.
- Mechanical Mixer: Speeds up mixing process. Check compatibility with existing equipment; clean after use.
- Mortar Boxes (Trowel Racks): Organize trowels for quick access. Choose size matching trowel width.
- Adjustable Hawk & Darby: Accommodate varying lath sizes. Inspect for stability; adjust to fit job requirements.
- Screeds and Edge Guides: Ensure consistent coat thickness. Choose size matching job needs; keep clean for smooth results.
- Mixing Station with Containment: Reduces mess, improves efficiency. Check size for adequate workspace; ensure proper drainage.
- Water Spray Bottle: Pre-wets lath, prevents dry patches. Inspect nozzle for even mist; keep water clean.
- Temporary Supports (Stakes & Boards): Maintain coat thickness during curing. Ensure stability; remove once cured to avoid damage.
Application Techniques to Maximize Bite on Lath
The goal is to create deep, consistent keys on lath by using proper trowel pressure, vertical and diagonal key formation, and controlled withdrawal to avoid gouging or overworking the mix. Use back-buttering where appropriate and time the passes so the scratch coat remains cohesive rather than smear or slump. Focus on forming uniform keys while building thickness without stressing the lath.
Why it matters: surface prep, lath type, render adhesive compatibility, and substrate cleanliness influence bite and longevity. A consistent slump, proper timing, and re-tempering if needed help you avoid under-keying and edge feathering, while layering instructions prevent cracking or weak spots. On-site checks for lath alignment, cleanliness, and adhesive compatibility, plus addressing misalignment or unclean substrate before proceeding, support long-term performance and easier subsequent coats. Stake this approach by ensuring your mix holds its shape and trowel contact stays even across the surface for best results.
Throwing, Trowel-Pressing, and Packing for Best Key Formation
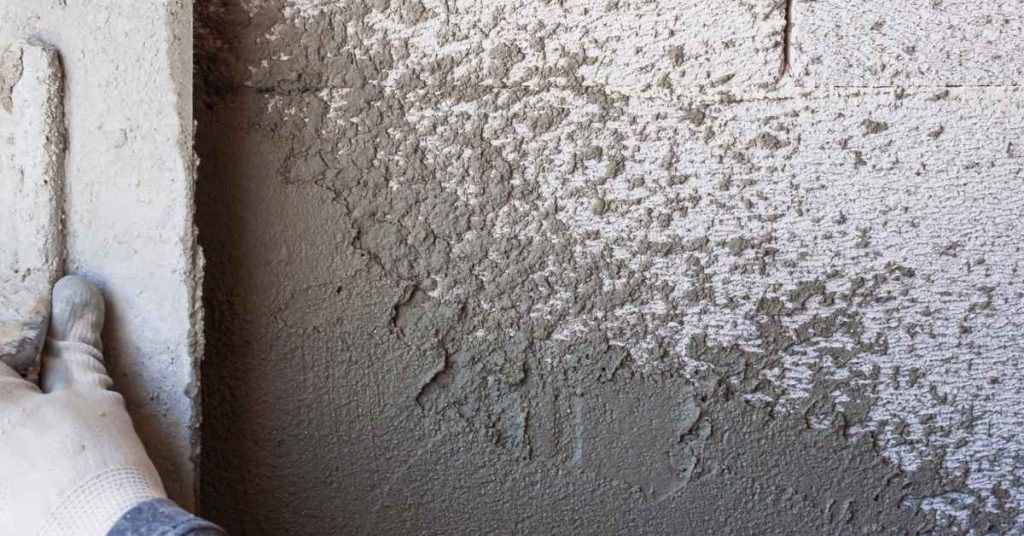
The first step in achieving deep, consistent keys is ensuring that the mortar penetrates the lath openings effectively. Use a hawk and trowel to throw the mortar onto the lath, applying even pressure with the flat side of the trowel.
Next, use the trowel-pressing technique to press the mortar into the lath openings. Apply firm, steady pressure as you move the trowel in a vertical or diagonal pattern to create initial keys. Be careful not to overwork the mix at this stage.
Finally, use the packing technique to ensure that the mortar is packed tightly into the lath openings. Use the edge of the trowel to scrape off any excess mortar and pack it firmly into place. This will help create a strong bond between the lath and the scratch coat.
Scratching/Raking, Ideal Timing, and Avoiding Overworking
Proper scratching or raking is crucial for forming clear keys without compromising the mix’s integrity. However, there are common mistakes to avoid during this process.
- Scratching too early or late: Scratch the mortar when it has started to set but is still soft enough to create deep keys. Check the manufacturer’s instructions for ideal timing.
- Scratching too shallowly: Ensure that you scratch deeply enough to expose fresh cement and create a strong bond with the next layer. Aim for keys that are at least 1/8 inch deep.
- Overworking the mix: Be mindful of how many times you re-temper the mortar. Overworking can make the mix brittle and crumbly, compromising its strength.
- Scratching with incorrect tools: Use a raking tool designed for your specific lath type to create consistent keys without damaging the lath or overworking the mix.
Monitor the set time closely, and scratch at the optimal window to form clear keys without compromising the mix’s integrity. If the mortar is setting too quickly, re-temper with an appropriate amount of water to extend the working time.
Common Problems, Diagnostics, and Repairs
Common problems with keying and scratch coats include poor keying, hairline cracks, delamination, dusting, and coats that are too thin or too thick. Each issue ties to lath condition, moisture, and mix consistency, and diagnostics focus on surface moisture, suction, thickness, lath residues, and uniform bite. Practical repairs include rekeying, cleaning and priming, adjusting the mix, back-rolling, targeted patches, and proper curing.
Why it matters for DIY is that bite determines bond and long-term durability, so addressing root causes before applying a new scratch coat saves time and reduces rework. A quick on-site check is a tack test; if it sticks, the surface is ready for the scratch coat. A common mistake is applying over oily or rusted lath; fix by cleaning and priming the lath before reapplying.
Poor keying causes and on-the-job fixes
Inadequate bite in your stucco scratch coat can lead to bond strength reduction, ultimately resulting in coat failure. To ensure proper keying, perform a quick trowel bite test: press the trowel into fresh mix, lift; uniform and consistent keying should be visible.
Proper investigation is crucial if keying is inconsistent or insufficient. Inspect mix consistency, lath cleanliness, packing technique, and timing of scratch/rake operation. Common causes include improper mix (too thin/watery), dirty lath, inadequate packing, or wrong timing.
For localized poor keying, remove the affected area and reapply the scratch coat. For severely compromised areas, consider mechanical fastening to enhance bond strength.
Cracking, delamination, and how to repair failures
Unaddressed cracks or delamination can compromise both the structural integrity and aesthetics of your stucco finish. Perform an adhesion test by tapping with a trowel handle; a hollow sound indicates delamination.
Assess severity: hairline cracks versus wide cracks, and the extent of delamination and its cause (moisture, substrate movement). For minor issues like hairline cracks or limited delamination, patch using an appropriate filler and technique suitable for crack width.
For severe delamination or wide cracks, remove failed material back to the lath, clean, prime, and reapply a new scratch coat. Ensure proper curing to prevent recurrence.
Safety, Curing, and Environmental Considerations
Safety and environmental factors strongly influence bite and cure of the scratch coat. Use appropriate PPE for mixing and application, and protect fresh mortar from rapid drying with temporary coverings or shading to maintain moisture.
Surface prep and lath keying, plus moisture conditioning, help preserve bond during cure. Monitor ambient temperature and humidity and perform quick checks on moisture, film formation, and wind exposure to prevent loss of bite and cracking. Stake: Skipping key checks during curing can lead to loss of bite, cracking, or poor finish.
Personal Protective Equipment and Safe Handling
Protecting yourself from cementitious materials and additives is crucial. Here’s what you need:
- Gloves: Protect hands from irritation and cuts. Choose durable, waterproof gloves to prevent cement penetration.
- Goggles: Shield eyes from dust and splashes. Ensure they fit well and provide full coverage.
- Respirator: Safeguard against inhaling harmful dust particles. Use a half-face or full-face respirator with appropriate filters.
- Hard Hat: Protect your head from falling objects, especially when working on scaffolds. Ensure it’s in good condition and fits properly.
- Coveralls or Long-sleeved Shirt and Pants: Shield skin from cementitious materials. Tuck in clothing to minimize exposure at the waistline.
- Safety Footwear: Protect feet from falling objects, punctures, and slips. Wear sturdy boots with good traction and toe protection.
Curing Practices and Climate Adjustments
Proper curing is crucial for optimal scratch coat key development. Manage different conditions as follows:
- Hot Conditions (above 85°F/29°C): Shield the surface from excessive heat using temporary shading or cooling measures, such as misting or reflective covers.
- Cold Conditions (below 40°F/4°C): Maintain consistent temperature during curing to prevent thermal shock. Use insulated covers or heating blankets if necessary, following manufacturer instructions and local safety guidelines.
- Humid Conditions: Retain moisture using strategies like covering the surface with plastic sheeting or applying a cure membrane. Aim for optimal humidity levels between 40-75%. Check product labels for specific recommendations.
When to Call a Professional and Cost/Lifespan Factors
Clear decision criteria for DIY vs professional: safety, structural concerns, and substrate condition including lath integrity, moisture damage, and existing cracks. Major cost drivers include materials, labor, tools, waste disposal, and possible need for permits or inspections, with DIY typically differing from contractor pricing. Common failure modes from improper keying or overworking the mix can reduce adhesion and lead to delamination, underscoring the need to assess capability before starting.
Project size, access, safety needs, and whether scaffolding or specialized equipment are required set practical thresholds for DIY versus hiring a pro; quick checks like testing lath security and mix consistency help decide. Lifespan and maintenance depend on climate and movement, with repair intervals guided by observed cracking, moisture signs, and protection of the scratch coat; expect that failures sooner if keying is weak. If DIYer has no experience with stucco application, substrate shows moisture damage or cracks, or the project requires scaffolding or specialized equipment, then consider hiring a professional; when hiring, ask about warranty, substrate prep, cure times, and cure temperature requirements.
Signs a job needs a pro and project complexity indicators
Before starting your stucco scratch coat keying project, assess the job’s complexity to determine if it’s suitable for DIY or requires professional help. Safety, structural integrity, and long-term performance are at stake.
Quickly check your comfort level with the scope of work, required tools, and potential risks. If any red flags are present, consult a professional for evaluation and permit considerations:
- Large areas: Extensive coverage may require specialized equipment like scaffolding or lifts.
- Structural movement: Existing cracks or signs of settlement could indicate underlying structural issues that need expert assessment.
- Persistent moisture issues: Chronic dampness can compromise lath integrity and may necessitate professional waterproofing solutions.
- Historical buildings: Older structures often have unique construction methods or materials that demand specialized knowledge.
If unsure, err on the side of caution and seek professional advice to avoid common mistakes and ensure a successful outcome.
Cost factors, warranties, and expected longevity
When deciding between DIY and hiring a contractor for your stucco scratch coat keying project, consider the following cost factors to make an informed decision that balances budget with long-term maintenance costs.
Compare DIY vs. contractor pricing, considering:
- Access: Difficult access may increase labor costs or require specialized equipment.
- Labor: Hiring a professional comes with labor costs but ensures quality workmanship.
- Materials: DIY often requires purchasing tools and materials upfront, while contractors may offer better pricing through bulk purchases.
- Repairs: Poor keying or overworking the mix can lead to costly repairs down the line.
Inquire about contractor warranties to ensure peace of mind. If a contractor’s quote is significantly lower or offers a comprehensive warranty, consider hiring them to guarantee quality workmanship and long-term performance. Verify that warranties cover both materials and labor, and understand the expected lifespan based on material choice and workmanship.
Conclusion
Proper keying of the scratch coat matters for long-term durability and a good-looking finish, and taking careful, measured steps protects both you and the structure. By focusing on safe prep, proper mix consistency, and deliberate application, you reduce the risk of cracks, delamination, or a weak bite on the lath.
For a practical wrap-up, proceed in this order: verify surface cleanliness and moisture level, confirm the scratch coat is at the intended consistency without overworking, apply in even passes to build a consistent key, check adherence by a small test area, and cure with protection from rapid drying or temperature extremes, all while following the manufacturer’s guidance and local rules. Do not skip safety checks, test in a small area first, and document any adjustments for future work.
Common mistakes to avoid include overworking the mix, which can seal the surface and reduce keying, under-mixing which leaves weakness, and applying when conditions are not within safe temperature or moisture ranges. Maintain a steady pace, wear appropriate PPE, and keep the work area clean and well-ventilated. If any signs of poor bonding, persistent curl, or unexpected cracking appear, pause and reassess rather than continuing, and refer back to the documented guidelines for diagnostics and repairs.
If the project demands exceed your comfort level or local requirements restrict the approach, consider calling a professional sooner rather than later. When in doubt, prioritize safety, verify cure times and environmental limits, and plan for a measured follow-up to ensure the system remains sound and lasts as intended. With careful attention now, you protect stability, appearance, and long-term value.
FAQ
What are the key preparation steps before parging?
Prepare the surface by cleaning away loose material and dust. Repair large cracks or defects in the substrate before applying parging. Dampen the wall and follow the manufacturer’s guidance on bonding primers or primers suitable for parging.
How should mortar be mixed for parging to achieve good adhesion without overworking it?
Mix to a workable, cohesive consistency that can be applied without dragging. Do not overmix, as excessive air or heat can affect bond and texture. Always follow the product label or manufacturer instructions for mixing guidance and any recommended additives.
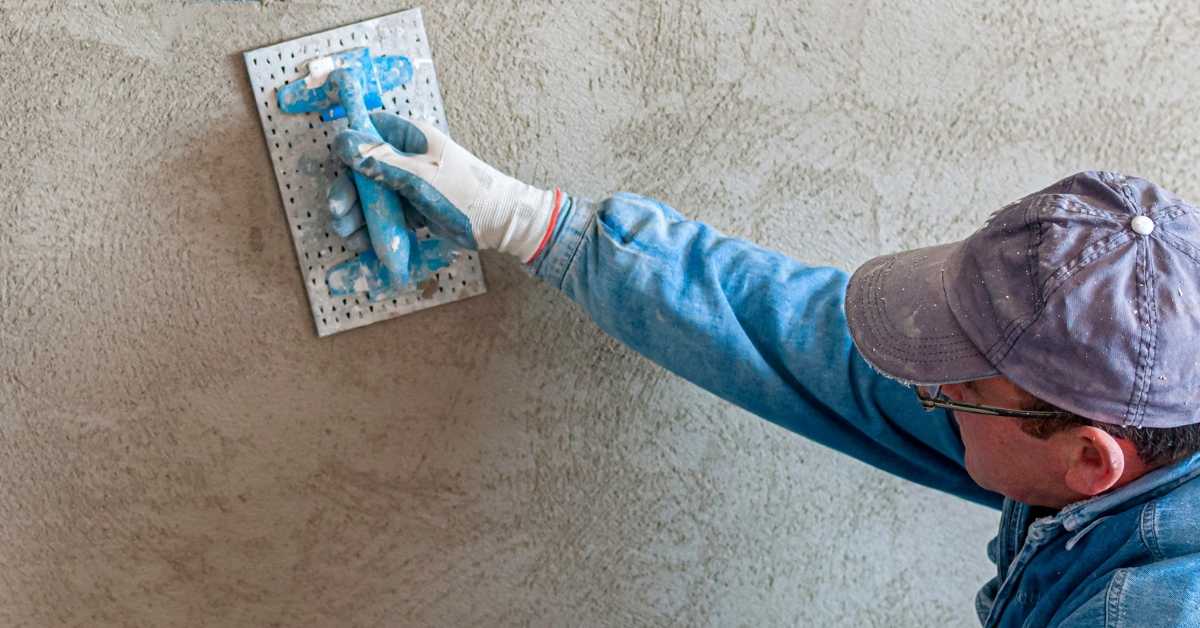
What tools are needed for applying parging and achieving texture?
Use a sturdy trowel or hawk-and-tloat setup for applying the parge mix. A finishing trowel or margin trowel helps strike and smooth. For texture, a brush, sponge, or stippling tool can create the desired finish, depending on the product and instructions.
What is the typical cure time and drying duration for parging?
Cure and drying times vary with product and environmental conditions. Check the product datasheet or label for guidance on cure time and any required curing methods. Plan for additional time if humidity or temperature is outside the recommended range.