
Introduction
Color matching stucco patches means blending the new patch with the existing wall so it looks seamless. Start by inspecting the surface, note the shade under natural light, and compare small test spots. Plan to mix from the same material and apply in thin layers to avoid halos.
Feather the edges and apply thin, even coats so the new patch gradually blends with the old. Let it cure and recheck in daylight; color can shift as it dries. If the color still stands out, make small adjustments on subsequent coats rather than rebuilding the area, and check any relevant local rules or instructions.
Key takeaways
- Inspect adjacent siding for texture and color to plan patching strategy.
- Use compatible stucco products and follow manufacturer instructions to avoid failures.
- Test color on hidden area and compare under natural and artificial light.
- Apply texture with appropriate trowel and allow proper curing before painting.
- Seal and topcoat after patching to help blend and prevent moisture intrusion.
- Safety note: wear eye protection, gloves, and keep ladders stable during work.
Table of Contents
- Introduction
- Key takeaways
- Understanding the Halo Effect on Stucco
- Assessing the Existing Stucco Before You Patch
- Tools and Materials Checklist
- Color Matching Methods Explained
- Texture and Finish Matching Techniques
- Application, Curing, and Environmental Best Practices
- Painting, Sealing, and Topcoat Strategies to Hide Repairs
- Troubleshooting Visible Halos and Long-Term Maintenance
- Conclusion
- FAQ
Understanding the Halo Effect on Stucco
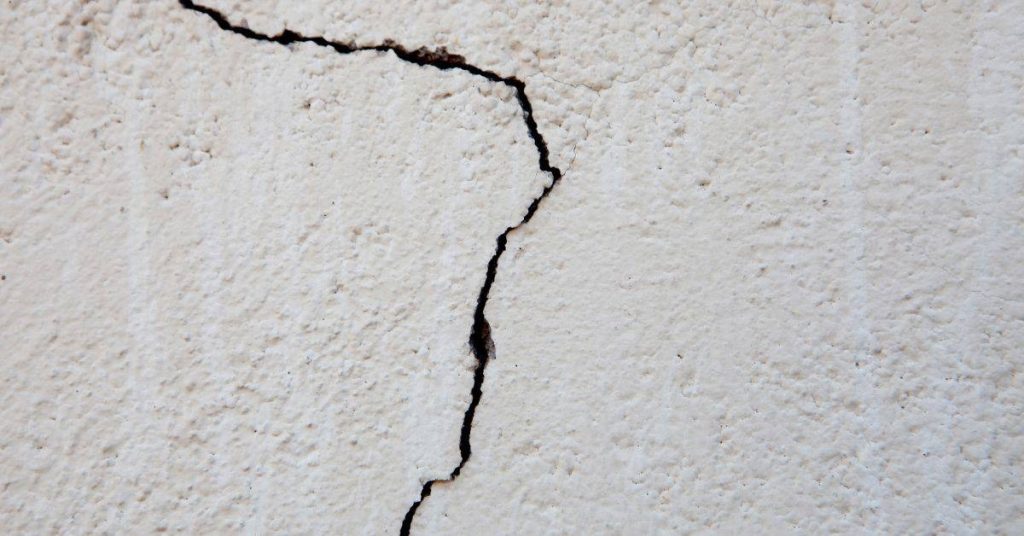
A halo shows up as a faint ring or circle around a repair. It can look like a lighter or darker edge that makes the patch obvious. The effect comes from how the new material dries against the old surface and from how the pigments mix when applied.
This section explains what to look for visually and why patches can stand out. It also covers common material issues that create halos, such as mismatched porosity or finish. By understanding the signs, you can plan a more seamless repair from the start.
Common physical causes of halos
The most obvious reason patches stand out is the difference in color. Stucco’s natural texture and finish can vary, making it tough to match perfectly.
Texture plays a big role too. Patches might feel smoother or rougher than the surrounding stucco, creating a visible ring.
Porosity – how well stucco absorbs water – also affects patch visibility. A patch that absorbs differently will reflect light differently, making it stand out.
How lighting, angle, and weather reveal repairs
Sunlight can highlight the edges of a patch, creating a visible halo. This is especially true in the late afternoon when the sun’s at a low angle.
Wet or damp conditions can make patches more obvious too. Stucco darkens when wet, and if the patch absorbs water differently, it’ll stand out even more.
Viewing angle matters as well. Patches might not be noticeable from one direction but stick out like a sore thumb from another.
Assessing the Existing Stucco Before You Patch
Begin with a close visual check of color and texture across the repair area. Note any gloss, flat spots, or rough patches that differ from the rest of the wall. Look for cracks or loose areas that signal substrate problems.
Also inspect porosity and any previous coatings that may affect adhesion. Consider how the substrate may affect color match and plan accordingly. This assessment will drive your patch prep and material choice.
Visual Inspection Checklist
The first step before patching is to inspect the existing stucco. Use this checklist to record key visual cues.
- Base color: Note down the exact shade of your stucco. It’s not just about matching ‘white’ or ‘beige’, but also considering any undertones like blue, yellow, or gray.
- Undertones: Check for any underlying colors that might affect the overall hue. Hold a white sheet or card next to the area to see it better.
- Texture pattern: Stucco can have various textures. Record the pattern, whether it’s smooth, pebbled, or something else.
- Areas of fading: Note down any spots where the color seems lighter. This could be due to sun exposure or previous repairs.
- Areas of staining: Check for any stains, especially around windows or near the ground. These might need extra attention when matching.
- Previous repairs: Look for any existing patches. They might not match perfectly and could affect your final result.
- Lighting effects: Observe how light hits the surface at different times of day. This can help you understand how lighting will reveal your repair.
- Angle-dependent visibility: Check if the repair is more noticeable from certain angles. This can help you plan where to position ladders or scaffolding for painting.
Quick rule: The more details you record, the better your match will be.
Testing Porosity and Moisture
Before applying any patch or coating, it’s crucial to understand how your stucco will absorb materials. Here are simple checks to perform.
Touch test: Gently touch the stucco. If it feels rough or gritty, it has good porosity and will absorb coatings well. Smooth stucco might be denser and require more primer or sealant.
Water bead test: Sprinkle some water onto the surface. If the water beads up and rolls off easily, your stucco is likely dense and non-porous. If it absorbs quickly, it’s porous and will need less primer.
Moisture concerns: Check for any signs of moisture issues like efflorescence (white powdery deposits) or damp spots. These could indicate underlying problems that need addressing before patching.
Tools and Materials Checklist
Gather a practical mix of trowels, hawks, and mixing containers. Include a spray bottle or damp sponge for feathering edges and a quality primer if needed. Have color aids or tinting tools on hand to test shades before you apply.
Read product labels for curing times, set times, and compatibility with your stucco finish. Verify whether you need a specific primer or sealer and any temperature or humidity requirements. This list keeps you from scrambling mid-job.
Essential hand and texture tools
Before you start mixing, it’s crucial to have the right tools for applying and blending your stucco patch. Here’s a checklist to ensure you’re well-equipped.
- Trowels ( various sizes): For applying and spreading the patch material. Skip this, and you’ll struggle with application.
- Floats: To smooth out the surface and create a seamless finish. Without it, your patch will look uneven.
- Texture brushes: To mimic the existing texture. Miss this, and your repair will stand out.
- Mixing buckets (multiple sizes): For preparing small and large batches of patch material.
- Masking supplies (tape, paper): To protect surrounding areas from patch material. Skip this, and you’ll have a mess to clean up.
- Scraper or putty knife: For removing old, damaged stucco. Don’t skip this; it’s crucial for a solid base.
- Safety gear (gloves, goggles): To protect yourself during the repair process. Safety first!
- Measuring tape: For accurate patch size and application. Without it, your patch may be too small or large.
Quick rule: Always check your tools before starting. A missing tool can halt progress and waste time.
Color-matching aids and consumables
Matching the color of your stucco patch is an art and a science. Here’s what you’ll need to get it right.
- Spectrophotometer: An advanced tool for precise color matching. If you can’t afford one, see next item.
- Color chips or samples: Hold them up to the existing stucco in different lights to find the closest match. Without this, you’re guessing.
- Universal tints: These can be added to your patch material to adjust color. Don’t skip measuring; too much can throw off the whole batch.
- Test pots: Mix small batches of patch with different tint amounts. This helps you dial in the perfect color before applying.
- Compatible primers/sealers: These prepare the surface and prevent moisture issues. Skip this, and your patch may not adhere properly or could develop halos later on.
- Color chart (if available): Some manufacturers provide these to help you match their specific stucco products. Use it if you have it.
- Natural light source: Check your color matches under natural light. Artificial lights can skew colors.
- Gloves and drop cloths: To protect yourself and your workspace during the testing process.
Quick rule: Always test your color match on a small, hidden area first. It’s better to find out you’re off before applying it to the whole patch.
Color Matching Methods Explained
Visual matching relies on comparing your patch to the surrounding surface in natural light. It’s quick but can be tricky if lighting changes. Keep test patches visible for a few minutes to judge color settling.
Tinting systems involve adding color to base mixes to approach the target shade. They offer control but require careful testing. Spectrophotometry is more precise and usually done by pros; it helps when large areas need exact color baths or complex blends.
Visual matching and on-site comparison
The most basic way to match your stucco’s color is by eye. Here’s how:
Side-by-side test: Place the existing stucco next to the patch. Compare them under different lighting conditions – morning, afternoon, and evening.
Create small test patches: Apply a few colors you think might match on small areas of the patch. Let them cure in various weather conditions before making your final decision.
Using digital color tools and tinting systems
For more accuracy, consider these digital tools:
- Handheld spectrophotometers: These devices measure color scientifically. They’re pricey but can be rented.
- Paint-store tinting: Bring a small sample of your stucco to the store. They’ll use it to create a custom match.
- Color apps: Some paint stores offer color-matching apps. Snap a pic, get a match.
- Light box: Some stores have light boxes that mimic natural light for better color matching.
- Computerized tinting systems: These use software to create custom matches based on color codes or samples.
Creating and testing custom tints
If you want to mix your own tint, follow these steps:
Mix small batches: Start with a small amount of base color. Add tiny amounts of other colors until you get close to the match.
Label ratios: Keep track of how much of each color you added. This way, if it’s not quite right, you can adjust and try again.
Test patches: Apply your custom tint to small areas on the patch. Let them cure in different weather conditions before committing to a full repair.

Texture and Finish Matching Techniques
Replicating aggregate size and application pattern is as important as the color. Observe the existing finish and mimic the way the stucco was applied—strokes, stippling, or splatter can all influence the look. Drying time also affects final texture as you work in layers.
Finish sheen matters too. If the surrounding surface has a matte or satin look, aim for a similar shine after curing. Small tweaks in technique can prevent a visible step or halo from forming.
Replicating stucco textures step-by-step
Learn how to match the texture of your existing stucco for a seamless repair.
- Inspect the existing texture. Note the type: spray, dash, float, or sand finish.
- Choose the right tool: trowel, hawk, or sprayer. Match the size and shape to the existing texture.
- Apply the first coat. Use a ‘dry’ application for better control over texture.
- Let it set slightly (5-10 minutes). This helps create the right consistency for texturing.
- Create the texture: use the tool’s edge to mimic the existing finish. Work quickly and consistently.
- Check your work. Compare the patch to the surrounding stucco at eye level and from different angles.
- If needed, adjust your technique or let it set longer before texturing again.
Feathering edges and blending transitions
Minimize visible repair rings by feathering patch edges and blending texture into the existing substrate.
Start with a ‘wet’ edge: Apply stucco to the very edge of your patch, letting it overlap slightly onto the existing stucco. This helps create a smooth transition.
Use a damp sponge or trowel to blend the edges. Gently wipe back and forth across the boundary, removing excess material and smoothing out any harsh lines.
Work in small sections: Apply stucco, feather the edges, then move on to the next section. This helps maintain a consistent blend throughout your patch.
Application, Curing, and Environmental Best Practices
Mixing should follow the product instructions and use the recommended ratios for consistency. Apply in workable batches to avoid cold joints or color drift. Plan for adequate working time based on the material and conditions.
Environmental factors like temperature, humidity, and wind can alter color and texture during curing. Protect the patch from rapid drying and sun exposure when possible. Check the label or manufacturer instructions for curing guidance and recommended cladding conditions.
Timing, Temperature, and Humidity Considerations
Stucco patching is sensitive to weather conditions. Here’s what you need to know:
Temperature: Apply stucco when temps are between 50°F – 80°F (10°C – 27°C). Too hot, and it cures too fast. Too cold, and it won’t cure at all.
Humidity: Avoid high humidity (>80%). It can cause patch to cure unevenly or not at all. Also, don’t apply in rain or damp conditions.
If weather’s not right, postpone work until it is. Rushing can lead to obvious repairs.
Layering, Thin Coats, and Staged Approaches
Applying stucco in multiple thin layers gives you better control over color and texture:
Start with a base coat. Apply thinly, let it cure slightly (follow product instructions). This helps even out absorption.
Next, apply color coats. Use your matched tint. Apply thinly, in multiple layers. Let each layer cure slightly before adding the next. This builds color gradually.
Finally, apply a finish coat. This gives your patch its final texture and sheen. Again, use thin coats and let them cure between applications.
Painting, Sealing, and Topcoat Strategies to Hide Repairs
Primer can help improve adhesion and color uniformity when you’re concerned about a mismatch. Consider tinted topcoats or masonry paints to achieve a closer blend with the surrounding area. Sealers can influence both color depth and sheen over time.
Choose products and application methods noted on labels to ensure compatibility with existing stucco. Confirm any required drying times and recoat windows before finishing. These steps help the repaired area disappear into the wall rather than draw attention.
Choosing Primers and Topcoats for Masonry
When it comes to patching stucco, choosing the right primer and topcoat is crucial. You’re aiming for a seamless repair that blends with the surrounding surface.
Primers: Look for primers designed for masonry surfaces. These will help your topcoat adhere better and provide a more even finish. Some are tinted to help with color matching, but be careful not to rely on them too much as they might not match perfectly.
Topcoats: Opt for 100% acrylic latex paints or elastomeric coatings designed for masonry. These maintain flexibility and can accommodate minor surface movement without cracking. They also provide good color stability over time.
When to Use Stains, Color Washes, or Full Repaint
Not every patch needs a full-blown repaint. Sometimes, a stain or color wash can do the trick. It depends on the size and severity of your repair.
Stains or Color Washes: These are great for small repairs where you just need to touch up the color. They penetrate the surface, providing a subtle, natural look. Use them when the texture and finish of the patch match the surrounding area perfectly.
Full Repaint: If your patch is large or the texture/finish doesn’t match perfectly, you’ll need to repaint the entire field. This ensures a consistent look across the whole surface. It’s more work but provides the best results for larger repairs.
Troubleshooting Visible Halos and Long-Term Maintenance
If a halo appears after curing, reassess edge feathering and moisture exposure, then rework the boundary with careful blending. A fresh test patch can help verify color and texture before proceeding broadly.
Maintain the repaired area by inspecting for color drift, cracking, or sheen changes over time. Regular cleaning and occasional re-sealing or topcoat refresh can help keep the match stable. When in doubt, consult product guidelines or instruction sheets for the specific materials you used.
Fixes for small, obvious repair rings
If you’ve noticed a small, obvious repair ring after patching your stucco, don’t worry. There are targeted remedies to help blend it in.
Feather-sanding: Lightly sand the edges of the patch to smooth out any harsh lines. Use fine-grit sandpaper and work carefully to avoid damaging the surrounding area.
Re-texturing: If your stucco has a unique texture, use a soft brush or comb to mimic that pattern on the patch. This helps it blend in with the rest of the surface.
Spot-tinting: Apply a small amount of tinted glaze or stain to the edges of the patch. Work it into the stucco using a soft cloth or brush, blending it outwards to hide the repair line.
When to refinish larger areas or hire a professional
Sometimes, a small patch just isn’t enough. Here are some guidelines on when to consider refinishing larger areas or hiring a pro.
Extent of damage: If the repair area is large (more than a few square feet) or there are multiple patches that don’t blend well, it might be time for a full-area refinish. This ensures a consistent look across your entire stucco surface.
Repeat failures: If you’ve tried patching before and the repairs keep failing or reappearing, it’s probably best to call in a professional. They have the experience and tools to diagnose and fix underlying issues.
Color complexity: Some colors are harder to match than others. If you’re struggling to get an accurate color match, consider hiring a pro with access to advanced color-matching technology.
Visual checkpoints for a successful match
Before declaring your repair complete, it’s crucial to inspect your work under various conditions. This helps ensure that your patch blends in seamlessly with the rest of your stucco.
- Multiple lighting conditions: Check your patch under natural light and artificial light at night. Different lighting can reveal color discrepancies you might miss otherwise.
- Wet/dry views: Wet down your stucco and observe the patch in both wet and dry states. Stucco can look different when it’s wet, so this step is important.
- Close-up and distance views: Inspect your work up close and from a distance. Up close, you might see small imperfections that aren’t visible from afar.
- Color consistency: Make sure the color of the patch matches the surrounding stucco in all lighting conditions and states (wet/dry).
- Texture match: Ensure the texture of the patch blends seamlessly with the rest of your stucco. Run your hands over the surface to feel for any differences.
- Edge blending: Check that the edges of the patch blend smoothly into the surrounding stucco. No harsh lines should be visible.
- Reflections: Look at reflections in windows or other shiny surfaces near your stucco. This can help you spot any discrepancies you might miss with a direct view.
- Time of day: Check your patch at different times of the day. The way light hits your stucco can change throughout the day, revealing color differences you didn’t notice before.
Quick rule: If in doubt, wait a few days and check again. Stucco can continue to cure and change slightly over time.
Conclusion
Get this right and your patch will blend in, last longer, and stay safe. The key is steady work, careful testing, and avoiding shortcuts that invite visible halos.
Follow this practical flow: assess the current surface and any halo risk, test color and texture on a hidden spot first, apply patch and finish in thin, even layers, allow thorough curing, then seal and topcoat in the right sequence. Work in good light, weather a safe distance from occupied areas, and document your tests so you know what to repeat or adjust in the final area.
Common mistakes to avoid are matching color without testing, skimping on texture and feather-in, and rushing curing or sealing. Don’t skip safety steps—protect eyes and lungs, keep the area ventilated, and never apply new patch material into damp or freezing conditions. If the patch covers a large area, or you notice cracks, rot, or structural issues, call a professional rather than guessing. When you stay methodical and patient, you’ll finish strong and minimize repairs for the long haul.
FAQ
How should I test a patch color under different lighting before I patch?
Color shifts with morning, afternoon, and artificial light. Compare a small test area in each lighting situation and pick a shade that looks closest across conditions. If unsure, check the patch product label or manufacturer guidance for color matching tips.
What’s the best way to feather edges so a repair doesn’t look like a ring?
Work the patch edges gradually so the color transition blends with the surrounding surface. Use a light, consistent pass and avoid hard cutting lines. Follow the product instructions for feathering depth and finish to minimize halos.
What should I do if the surrounding stucco has a different aging or texture?
Match the patch to the nearby area, not the exact same shade as the whole wall. If aging differs, extend the repaired area slightly to blend with the change in texture and color. Always defer to label or manufacturer guidance for texture matching tips.
When is it time to hire a pro for color matching?
If multiple patches are needed or the color still looks off after testing, bring in a pro. They can assess color, texture, and finish consistency across larger areas. Check local rules and manufacturer instructions for any specialized products you’re using.