

Introduction
Stucco patch blending is the process of making a new patch texture match the existing wall so it doesn’t flash in sunlight.
Keep the goal simple: blend edges, lay color or texture subtly, and avoid obvious patches. Work in small, incremental steps and compare under the sun as you go.
Check the patch material and finish method against what’s on the wall, and follow the manufacturer or local rules. Test a small area first, feather the edges, and let cure before judging the result. If a patch still stands out, adjust texture with the proper tools and rework the surface until it blends.
Key takeaways
- Assess sun exposure during patching to predict flash and texture contrast.
- Prep and prime the area thoroughly to improve blendable adhesion and finish.
- Practice texture matching on a dedicated test panel before applying.
- Use light circular stroking to blend new stucco into surrounding surfaces.
- Color adjust with compatible stains or finish coats as needed after curing.
- Wear eye protection and masks; handle lath, wire, and cement cautiously.
- Tackle blended edges gradually; avoid thick patches that flash in sun.
Table of Contents
- Introduction
- Key takeaways
- Why Stucco Patches Flash in Sunlight
- Diagnosing the Patch Before You Start
- Surface Preparation and Priming for Blendable Adhesion
- Texture-Matching Techniques — Replicating Common Finishes
- Color and Finish Blending to Reduce Flash
- Tools and Materials Checklist
- Step-by-Step Workflow for a Seamless Patch
- Visual Checkpoints, Troubleshooting, and When to Call a Pro
- Conclusion
- FAQ
Why Stucco Patches Flash in Sunlight
Under direct sunlight, patches can reveal differences in texture, sheen, and porosity that aren’t obvious in shade. These factors influence how light reflects off the surface, making repairs look out of place. Focus on the texture and surface absorption rather than color alone when diagnosing flash.
If a patch looks different in bright sun, it may be because the patch products, drying rates, or substrate porosity aren’t matching the surrounding material. Texture variation and moisture content can exaggerate the glare. Always consider the interaction of light with the surface you created.
How light and viewing angle reveal mismatches
When sunlight hits your stucco at an angle, it’s like a spotlight. It exaggerates every bump, dip, and seam.
The same goes for viewing angles. If you look at the patch from different spots, you might see it flash in the light. This is because your eyes are picking up on tiny differences that blend together when viewed straight-on.
Think of it like looking at a smooth wall from an angle. You can suddenly see every little imperfection. That’s what happens with stucco patches and sunlight.
Common causes of visible patches
Patches flash in sunlight for a few reasons. First off, if the aggregate size in your patch mix is different from the original stucco, it’s gonna show.
Application methods can also cause issues. If you applied the patch too thick or thin compared to the surrounding stucco, it’ll stand out under direct light.
Curing differences are another culprit. If the patch didn’t cure at the same rate as the original stucco, it might have a different sheen or porosity, making it visible in sunlight.
Lastly, incompatible finishes can cause patches to flash. If you used a different type of finish on your patch than what’s on the rest of your stucco, it’ll likely show up under direct light.
Diagnosing the Patch Before You Start
Begin with a close visual inspection of texture and edge feathering. Gently press to test adhesion at the patch border and listen for hollow sounds where the patch may be loose. Check the substrate for cracks, damp spots, or powdery dust that signals a prep issue.
Observe how the patch reads at different times of day or lighting angles to gauge how noticeable the flash is. Note any areas that appear to stand out due to texture or sheen. Use this quick routine to decide if additional prep is needed before proceeding.
Visual and Tactile Checks
The first step is to get a good look at your patch. You’re checking for texture depth, roughness, and sheen.
Texture Depth: Look at the patch from different angles. Notice how deep the grooves are compared to the surrounding stucco.
Roughness: Run your fingers over both the patch and the existing stucco. Feel for any differences in coarseness.
Sheen: Check if there’s a shine or gloss on the patch that isn’t present elsewhere. This could be due to different finishes or moisture content.
Assessing Substrate and Adhesion
Before you start texturing, check the condition of your substrate – that’s the surface underneath your stucco.
Loose Material: Gently tap on the patch. If it sounds hollow or feels loose, there might be a problem with adhesion. You’ll need to scrape off the loose material and start again.
Previous Coatings: Check for any old paint or coatings that could interfere with your new texture. Scrape these off if necessary.
Lath or Masonry Repair: If your patch is over lath or masonry, check for any damage. You might need to repair this before texturing.
Surface Preparation and Priming for Blendable Adhesion
Clean the area to remove dirt, loose material, and any peeling coating. Remove loose stucco and feather the edges so the new patch can blend smoothly. A thorough wipe with an appropriate cleaner helps the patch adhere evenly.
Choose a primer or bonding agent that suits the existing substrate and patch material. Look for products that promote uniform absorption and adhesion across the repaired area. Follow the manufacturer’s instructions for application and drying times.
Cleaning and feathering techniques
Before you start patching, you need to clean the area and prepare the edges. This ensures your new stucco blends smoothly with the old.
Cleaning: Use a wire brush or scraper to remove any loose material, dirt, or debris from the surface. Be careful not to damage the existing stucco.
Feathering: To create a smooth transition between new and old stucco, you’ll need to ‘feather’ the edges of your repair. This involves tapering the edge of the patch so it blends into the surrounding surface. Use a trowel or scraper to gradually reduce the thickness of the stucco at the perimeter of your patch.
Primer and bonding options
Using the right primer or bonding agent is crucial for a successful patch job. It promotes uniform absorption and adhesion, helping your new stucco blend seamlessly with the old.
When to use: Apply a primer or bonding agent when you’re working on porous surfaces like concrete or masonry, or when you want to improve the adhesion of your stucco patch. Always follow manufacturer instructions for compatibility and application.
Some common options include:
– Masonry primers: These are designed to prepare masonry surfaces for painting or plastering. They can also help improve the bond between new and old stucco.
– Bonding agents: These are specifically designed to improve adhesion between different materials. They’re often used in multi-step repair processes, like when patching stucco.
Texture-Matching Techniques — Replicating Common Finishes
For a smooth float or troweled finish, work the patch with steady, consistent motions and keep the edges feathered. Dash textures can be achieved by a controlled throwing motion or light stippling, depending on the existing surface. Knockdown textures require a brief texture imparting pass followed by a light smoothing pass.
Choose the technique that matches the surrounding finish and your patch size. Practice on a scrap board or inconspicuous area if possible. The goal is to mimic the texture depth and graduation into the adjacent wall.
Recreating aggregate and mix consistency
Matching the existing stucco’s texture starts with replicating its aggregate size and distribution. Don’t worry about exact proportions; focus on visual similarity.
First, identify the aggregate type: sand, pea gravel, or larger stones. Then, match it as closely as possible for your patch.
Next, consider the sand grading. Fine sand gives a smoother finish; coarser sand creates more texture. Visually inspect and mimic the existing grading.
Finally, ensure your mix has consistent consistency. Too wet or too dry will affect how it applies and cures, altering the final texture. Practice mixing small batches until you match the existing stucco’s consistency.
Application methods and tools for each texture
Each stucco finish requires specific application techniques and tools. Practice on scrap lumber or a test wall before tackling the patch.
- Smooth Float: Use a float trowel (around $15-$20) to spread and level the mix. Hold it flat, apply even pressure, and work quickly.
- Trowel Texture: After floating, use a trowel ($5-$10) to create grooves. Angle it 45 degrees, press lightly, and pull towards you.
- Dash Texture: Apply the mix with a hopper (around $30-$50 for rental), then use a dash brush ($10-$20) to create texture. Hold it at a 45-degree angle and press firmly.
- Knockdown Texture: First, apply with a float trowel. Then, use a knockdown tool (around $15-$25) to create the knockdown effect. Hold it at a 45-degree angle and press firmly.
- Other Textures: For more complex textures like skip trowel or comb, you’ll need specialized tools. Consider renting or buying combo kits (around $30-$60) that include multiple tools.
Feathering and micro-blend techniques
Blending the patch edge into surrounding stucco is crucial to avoid a visible seam. Here are some techniques to create a natural flow across the seam.
Feathering: At the patch’s edge, thin out the mix with water until it’s almost like paint. Apply this ‘feather’ onto the existing stucco, blending the two together. Work quickly before it dries.
Micro-blend: After applying the patch and letting it set for a few minutes (but not dry), use a sponge or soft-bristle brush to gently blend the edge. Dip it in water, then lightly dab or stroke the seam. This helps break up any harsh lines.
For best results, combine these techniques. Feather first, let it set briefly, then micro-blend. Practice on a test wall to get the feel for it before tackling the patch.
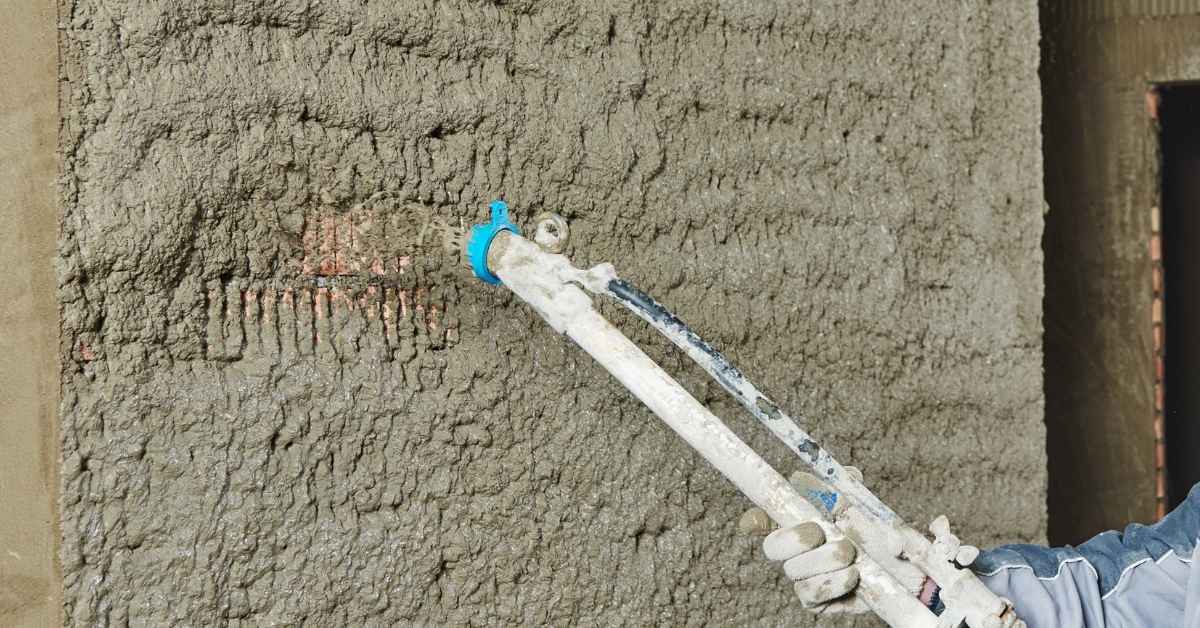
Color and Finish Blending to Reduce Flash
Color matching starts with matching the base tone to the nearby surface, but curing and moisture levels can alter appearance after application. Be mindful that the finish can look different as it dries and ages. Plan for subtle changes rather than perfect instant color parity.
Use blending techniques that minimize sheen and tonal differences, such as avoiding over-watering and maintaining uniform texture. Adjust any glaze or sheen control methods per the product data sheet and local guidelines. Verify results with the environment in mind before final curing.
Matching base color and anticipating cure changes
Freshly applied stucco can look different from the existing surface due to moisture content. Before you start patching, mix up a small test batch of your repair material and apply it in an inconspicuous area.
Let this trial patch cure under the same conditions as your main work area. This way, you’ll see how the color changes once it’s fully dried out. Make adjustments to your mix as needed.
Pro tip: Keep records of your mix ratios for future reference. Stucco can change color slightly with each batch due to variations in aggregates and pigments.
Managing surface sheen and finish uniformity
The final finish treatment – whether it’s brushing, sanding, or sealing – plays a big role in the overall sheen of your stucco. To minimize flash, you need to match this sheen as closely as possible.
First, observe the surrounding surface. Is it matte, semi-gloss, or high-gloss? Match this with your final finish treatment on the patch. If you’re unsure, take a photo and compare it to paint samples at your local hardware store.
Remember, sheen can also be affected by the angle of light. Check your work from different angles throughout the day to ensure consistent reflection.