
Introduction
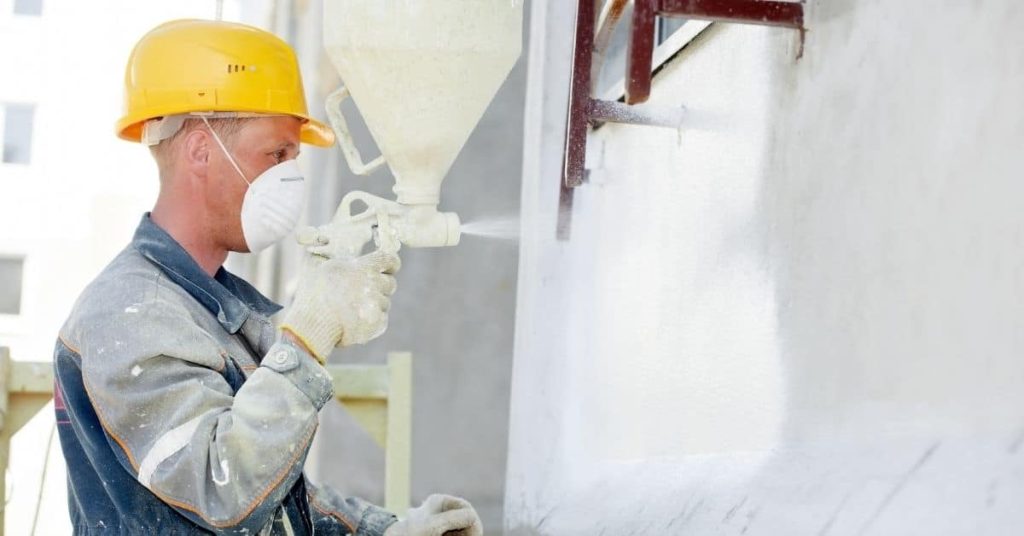
Stucco around hose bibs is the practice of enclosing the faucet with a protective sleeve and proper sealant so water stays out. The goal is a tight, weatherproof transition where the hose bib meets the stucco skin. This is a hands-on task, not a theory exercise.
Start with correct sleeves and a flush, clean hole in the stucco area, and follow the sleeve’s installation guidance from the manufacturer or local rules. Choose sealants that are compatible with both metal and stucco, and plan for a clean, continuous bead around the neck of the bib. Use careful detailing to minimize gaps and movement that can lead to cracks or leaks around the enclosure.
Key takeaways
- Properly install a dedicated plumbing sleeve flush with the stucco surface.
- Choose sealants compatible with stucco and hose bibs; follow manufacturer instructions.
- Create continuous sealant beads around sleeves to allow joint movement.
- Plan crack-bridging geometry: align stucco joints away from penetrations and sleeves.
- Weatherproof the enclosure after cure, and protect against rapid drying cracks.
- Shut off water, wear PPE, and inspect for leaks during initial testing.
Table of Contents
- Introduction
- Key takeaways
- Why Careful Detailing Around Hose Bibs Matters
- Tools and Materials Checklist
- Selecting and Sizing the Plumbing Sleeve
- Sealant Geometry and Joint Design Principles
- Step-by-Step Installation Process
- Crack Prevention Strategies for Stucco Around Penetrations
- Weather, Site Conditions, and Curing Considerations
- Inspection, Maintenance, Common Pitfalls, and Cost Planning
- Conclusion
- FAQ
Why Careful Detailing Around Hose Bibs Matters
Hose bibs can become moisture gateways if detailing isn’t tight. Poor detailing often shows up as cracks, moisture intrusion, and faster freeze/thaw distress around penetrations. Proper assembly helps both function and the visual line of the wall.
A good setup includes a sleeve or chase, flashing behind the bib, and a sealant geometry that accommodates movement without shrinking or cracking. Consider how traditional stucco and EIFS handle penetrations differently, and follow installation best practices for each system. Neat detailing supports long-term durability and reduces visible cracks from rain, irrigation, and wind-driven moisture.
Risks of improper installation
Improperly detailed hose bib penetrations can lead to a host of problems. Water intrusion is the most common issue, leading to leaks and rust on the pipe, and even delamination of your stucco finish.
Freeze/thaw cycles can exacerbate these issues. When water gets into tiny cracks or behind the stucco, it expands as it freezes, causing hairline cracks to widen and deepen.
Proper detailing is crucial to prevent these problems and ensure your hose bibs last as long as your home.
Performance goals for the detail
The primary goal of a well-detailed hose bib installation is to create a durable weather seal that keeps water out. This means using materials and techniques that can withstand years of exposure to the elements.
Secondly, the detail should allow for movement of the pipe. Pipes expand and contract with temperature changes, so the detail must accommodate this without causing cracks in the stucco.
Lastly, a properly detailed hose bib penetration should result in a crack-free stucco finish. This not only looks better but also helps prevent water intrusion and other moisture-related problems down the line.
Tools and Materials Checklist
Core tools like a cordless drill with a masonry bit, a caulk gun, and a level help keep sleeves plumb and sealant seated properly. A sharp utility knife and trowel let you cleanly trim and shape around the bib. Have a measuring tape on hand to verify clearances and layout before you seal.
Sleeve hardware should be corrosion resistant and compatible with flashing, with fasteners that won’t back out. Use a sleeve cap or escutcheon to cap the detail neatly. Sealants and backer materials control depth and squeeze, reducing future crack propagation and water intrusion.
Sleeve types and material options
Before you start installing your sleeves, use this checklist to ensure you’ve got the right materials for the job. This will help prevent costly mistakes down the line.
- Check sleeve material: Sleeves can be made of plastic/PVC, stainless steel, or galvanized metal. Each has its pros and cons.
- Verify corrosion resistance: For areas exposed to moisture or chemicals, ensure sleeves have adequate corrosion resistance. Check manufacturer’s data sheets for specific ratings.
- Assess rigidity: Stainless steel and galvanized metal sleeves offer more rigidity than plastic/PVC. If you need extra support, consider these options.
- Check compatibility with stucco: Ensure sleeves are compatible with your chosen stucco system. Some sleeves may require specific installation techniques or primers to prevent adhesion issues.
- Measure sleeve size: Measure the diameter and length of each sleeve to ensure they match your wall thickness and desired projection.
- Inspect for damage: Before installation, visually inspect sleeves for any cracks, dents, or other signs of damage. Replace any defective sleeves.
- Check sleeve type (recessed vs. surface-mounted): Recessed sleeves are installed within the wall, while surface-mounted sleeves sit flush with the exterior. Choose based on your design and installation requirements.
- Ensure proper anchoring: Regardless of material, sleeves must be securely anchored to the wall. Check that anchors or other securing methods are included in your order.
Quick rule: Always choose sleeve materials based on your specific application and local conditions. Don’t skimp on quality to save a few bucks – it could cost you more in the long run.
Sealants, backer rods, and compatibility
Before you start applying sealant, use this checklist to ensure you have the right materials for your stucco sleeves. This will save you from costly rework down the line.
- Check sealant compatibility: Ensure the sealant is compatible with both the stucco and sleeve material. Check the product label or manufacturer instructions to confirm.
- Verify sealant type: Use a flexible, paintable sealant for best results on stucco sleeves. Silicone-based sealants are often a good choice.
- Inspect sleeve material: Ensure the sleeve material is clean and free of debris before applying sealant. A quick visual check will do.
- Check backer rod size: If using a backer rod, ensure it’s the right size for your joint width. A common range is 1/4″ to 3/8″. Check local rules or manufacturer recommendations if unsure.
- Use backer rod or bond-breaker tape? For wide joints (over 1/2″), use a backer rod. For narrower joints, use bond-breaker tape. Both help prevent sealant from adhering to the substrate.
- Inspect backer rod before use: Ensure the backer rod is intact and free of damage. A quick visual check will suffice.
- Check sealant pot life: Before mixing, ensure the sealant’s pot life (time it remains usable after mixing) is suitable for your job size. Check the product label or manufacturer instructions to confirm.
- Inspect sealant before use: Ensure the sealant has a consistent texture and color. If it’s lumpy, discolored, or has separated, do not use it.
Quick rule: Always test a small, hidden area first to ensure compatibility and performance before applying sealant to the entire sleeve.
Essential tools and consumables
Before you start your concrete project, use this checklist to ensure you have all the necessary tools and supplies. This will help you work efficiently and avoid costly mistakes.
- Tape measure: Check it against a known length (like a yardstick) to ensure accuracy. A faulty tape can lead to incorrect measurements, resulting in poorly fitting forms or structures.
- Level: Verify its bubble is centered on both sides. An inaccurate level can cause sloped surfaces and uneven finishes.
- Shovel: Ensure it’s sturdy with a sharp edge for easy mixing and moving concrete. A dull or weak shovel can slow down work and cause back strain.
- Wheelbarrow: Check tires for proper inflation and the frame for stability. A wobbly wheelbarrow can spill concrete, leading to waste and rework.
- Concrete mixer (if applicable): Test it with a small batch of concrete to ensure it mixes evenly and consistently. An inconsistent mix can result in weak or patchy concrete.
- Hammer: Check for a solid head and handle. A loose or damaged hammer can cause injury or damage forms, leading to rework.
- Trowel (for finishing): Ensure it’s straight and undamaged. A bent or chipped trowel can leave marks on the concrete surface, ruining its finish.
- Broom (for brushing): Check bristles are intact and secure. A broom with missing or loose bristles won’t create a proper texture for gripping, leading to slippery surfaces.
- Concrete sealer: Verify it’s compatible with your chosen concrete mix and sleeve type (refer back to “Sealants, backer rods, and compatibility” section). Using incompatible products can cause discoloration or damage to the concrete.
Quick rule: Always check your tools before starting work. A few minutes of inspection can save hours of rework and prevent costly mistakes.
Selecting and Sizing the Plumbing Sleeve
Choose sleeve diameter based on the actual pipe size and expected movement, and verify compatibility with sealants and insulation. Always check manufacturer specs and local code when sizing sleeves. Do not guess on critical clearances or through-wall embedment.
Plan around stucco thickness and flange style so the flange seats properly without crowding the surface. Assess movement from temperature, wind, and settling, and pick a flexible sleeve material with an appropriate expansion gap. Confirm sleeve length and embedment with attention to moisture barriers and sealant bed.
Measuring the penetration and selecting ID/OD
The first step is measuring your pipe’s outside diameter (OD) and the wall thickness where it penetrates. This helps you pick a sleeve with an appropriate inside diameter (ID).
Here’s why this matters:
– Too small, and the pipe won’t fit or move freely.
– Too large, and there’s excessive movement, leading to gaps and potential leaks.
Sleeve length, flange, and termination options
The sleeve’s length must extend beyond the interior and exterior surfaces by enough to embed properly in the stucco. Typically, this is 2-3 times the stucco thickness.
For flanges:
– Surface-mounted flanges sit on top of the stucco.
– Recessed flanges are set into the stucco for a flush finish.
– Adjustable collars can accommodate varying stucco depths.
Sealant Geometry and Joint Design Principles
Durable seals rely on the right bond-to-unbond ratio, proper depth, and a backing or bond-breaker to control squeeze and adhesion. Backing material helps the sealant perform where movement is expected. Align depth to substrate and joint width for reliable performance.
Detail joint profiles and depths that accommodate movement and substrate irregularities. Tooling shapes and bead geometry influence encapsulation and edge performance, especially around penetrations. Follow substrate prep steps, masking, and sequence to avoid three-point adhesion issues.
Bead shape, tooling, and adhesion zones
The bead’s shape and tooling technique ensure full contact with the sleeve and stucco without bridging.
- Radius beads: Provide even encapsulation. Use a radius tool for 1/8″ – 1/4″ radius. Rental: $20/day.
- Concave profile: Promotes adhesion to sleeve and stucco. Use a concave tool. Inexpensive, around $15.
- Flat profile: Suitable for wide joints. Use a flat tool. Around $10.
- Surface finish: Smooth surface promotes adhesion. Sand or use a smooth tool.
- Avoid bridging: Ensure bead reaches both surfaces. Use a comb tool to press bead into joint. Around $5.
Backer rods and bond-breakers: where and why
Backer rods control sealant depth, prevent three-sided adhesion. Bond-breaker strips also control adhesion.
Use backer rods: When joint width exceeds 1/4″. Insert at joint’s base before applying sealant. Around $0.50/ft.
Bond-breaker strips prevent excessive adhesion to substrate. Use on horizontal surfaces, where water could collect. Around $2/linear ft.
When not to use: Avoid using backer rods or bond-breakers in narrow joints (<1/4″). They can cause sealant to bulge and fail.
Step-by-Step Installation Process
Begin with surface prep and moisture management, cleaning the area around the bib and removing loose material. Ensure a dry, sound substrate and plan for flashing at the bib flange. A clear plan reduces later touchups and failures.
Install the sleeve and confirm plumb and level, detailing how it interfaces with the substrate to prevent water intrusion. Apply sealant geometry and crack-bridging strategy with the chosen material, ensuring continuous joints that accommodate movement. Integrate stucco around the sleeve with base and scratch coats and define control joints to avoid pinholes. Weatherproofing and flashing should be detailed at the sleeve and drip edge with proper slope away from the wall. Finally, perform quality-control checks at each stage and document pass/fail criteria before moving on.
Step-by-Step Installation Process
The following steps guide you through the process of installing a hose bib sleeve and integrating it into your stucco wall, ensuring a watertight seal that prevents cracks and water intrusion.
- Surface Prep: Clean area around hose bib, remove loose stucco, inspect for cracks, ensure dry substrate. Plan flashing at bib flange.
- Sleeve Installation: Select appropriate sleeve, verify fit, install plumb and level. Interface with substrate to prevent water intrusion.
- Sealant Application: Use polyurethane or one-part silicone sealant. Apply bead size according to joint geometry. Place backer rod for continuous, watertight joints.
- Stucco Integration: Apply base coat, reinforce with mesh, and apply scratch coat around sleeve. Define control joints and backer material locations.
- Weatherproofing & Flashing: Specify flashing at sleeve, drip edge, and counter-flashing. Ensure proper slope away from wall and foundation.
- Quality Control: Check fit, level, sealant adhesion, crack width, moisture tests, cure time before proceeding to next step.
Prep: cleaning, rust prevention, and substrate readiness
Cleaning: Remove dirt, debris, and old sealants from the pipe and surrounding stucco using a wire brush or scraper.
Rust Prevention: Apply a rust-inhibiting primer to any exposed metal parts on the hose bib to prevent corrosion. This is especially important if your area experiences freeze-thaw cycles.
Substrate Readiness: Ensure the substrate around the hose bib is dry and sound. Use a moisture meter to check for any hidden dampness. If present, allow it to dry completely before proceeding with the installation.
Installing the sleeve and anchoring it
Positioning: Place the sleeve over the hose bib, ensuring it is plumb (vertical) and level. Use a torpedo level for accuracy.
Securing & Terminating: Secure the sleeve to the wall using appropriate fasteners provided with the sleeve kit. Ensure clearances to the lath and scratch coat are maintained to allow for proper stucco application.
Accommodating Movement: Use expansion sleeves or other movement accommodation methods as needed, especially in areas with extreme temperature changes or settling foundations.
Applying sealant, tooling, and finishing with visual checkpoints
When to Use: After applying the backer rod and before applying the final stucco coat.
- Backer Rod Placement: Check that backer rod is properly placed in the joint, creating a continuous, watertight barrier.
- Sealant Application: Apply sealant bead according to specified geometry. Ensure it adheres to both surfaces and fills the joint completely.
- Tooling: Tool the sealant bead using a damp sponge or tooling blade, ensuring a smooth, even finish.
- Visual Checkpoints: Inspect for any missed spots, air bubbles, or improperly applied sealant. Use a diagram to ensure correct geometry and bond.
- Cure Time: Allow the sealant to cure according to manufacturer’s instructions before applying final stucco coat.
Quick rule: Always follow manufacturer’s guidelines for specific products used in your project to ensure optimal performance and longevity.
Crack Prevention Strategies for Stucco Around Penetrations
Identify drivers of cracking such as thermal movement, moisture, and structural shifts, and connect these to how hose bib sleeves and sealant geometry perform. Joint placement and substrate control can mitigate these effects when done consistently. Consider how failures typically start and address them proactively.
Use system-level practices like appropriate joint layouts near penetrations, proper reinforcement, and solid substrate preparation. Sleeve and flashing choices should accommodate movement without telegraphing cracks into the wall finish. Select compatible sealants, primers, backer rod sizing, and edging to allow continuous movement without tearing.
Placement of control and movement joints
Control joints are your first line of defense against cracking. Place them about every 8-10 feet, running vertically or horizontally to direct any potential cracks along these lines.
Around hose bib sleeves, consider a small movement joint (about 1/4″ wide) to accommodate minor thermal shifts and prevent stress buildup at the penetration. This joint should be placed about 2-3 inches away from the sleeve on all sides.
Remember, these joints are not a sign of weakness; they’re designed to control where cracking can occur, preventing random cracks that could compromise your stucco’s appearance and integrity.
Reinforcement and lath detailing around the sleeve
Proper reinforcement helps distribute stress evenly, preventing cracking. For hose bib sleeves, use a flexible, galvanized metal lath or embedded fabric.
Cut the lath to fit snugly around the sleeve, with about 1-2 inches of overlap on either side. Make sure it’s securely tied into the surrounding field lath using tie wires or clips every 4-6 inches.
If you’re using mesh reinforcement, ensure it’s properly secured and overlaps the sleeve by at least 3 inches on all sides. Tie it into the surrounding field mesh as well.
This detailing helps distribute any movement or stress caused by thermal shifts, moisture changes, or structural settling, reducing the risk of cracking around the penetration.
Weather, Site Conditions, and Curing Considerations
Temperature and diurnal swings influence sleeve installation, sealant cure rate, and stucco set. Know the region’s typical ranges and plan work within those bands. If conditions are outside safe ranges, postpone until they are favorable.
Humidity and precipitation slow cure and can wash away or dilute sealants, so protect the zone and allow for proper drying. Consider wind, sun exposure, and drainage effects on curing moisture loss and sleeve alignment. Use a weather-driven timeline and have contingency windows to avoid premature curing or cracking.
Temperature and moisture effects on sealants and stucco
Cold, heat, and wet substrates can affect adhesion and cure time of your sealants and stucco. Follow product-specific guidance for optimal results.
Cold temperatures can slow down the curing process and reduce the effectiveness of some sealants and mortars. Aim to install when temps are above 50°F (10°C).
Heat can speed up cure times, potentially leading to premature curing or cracking. Avoid installing in direct sunlight or during hot spells.
Wet substrates can cause poor adhesion and slow down the curing process. Ensure your surfaces are dry before applying sealants or stucco.
Seasonal and local-climate installation tips
Adapt your installation techniques to suit different weather conditions:
Hot climates: Install early in the morning or late in the afternoon. Keep materials shaded and hydrated until use.
Cold climates: Thaw materials before use, and consider using heat blankets for sleeves and sealants to maintain optimal temperatures during installation.
High humidity: Shield the work area from rain, and allow extra drying time before applying sealants or stucco. Consider using desiccant bags to control moisture in closed areas.
Inspection, Maintenance, Common Pitfalls, and Cost Planning
Post-install, verify sleeve position, sealant integrity, and any cracking or gaps around interfaces. Look for signs of moisture intrusion and movement. Document changes for maintenance planning.
Establish routine resealing, debris removal, and checks for hairline cracks during seasonal cycles. Develop a troubleshooting path for poor drainage, failing sealants, or cracking at the sleeve interface. Keep a simple maintenance log and plan for contingencies without fixed prices to guide budgeting.
Visual checkpoints and maintenance schedule
Regularly inspect your hose bib detail to ensure its longevity. Use this checklist for a thorough inspection.
- Sealant condition: Check for any cracks, gaps, or peeling. If sealant is damaged, it needs replacing.
- Rust on fittings: Inspect the hose bib and sleeve for rust. Rust can cause leaks and weaken the structure.
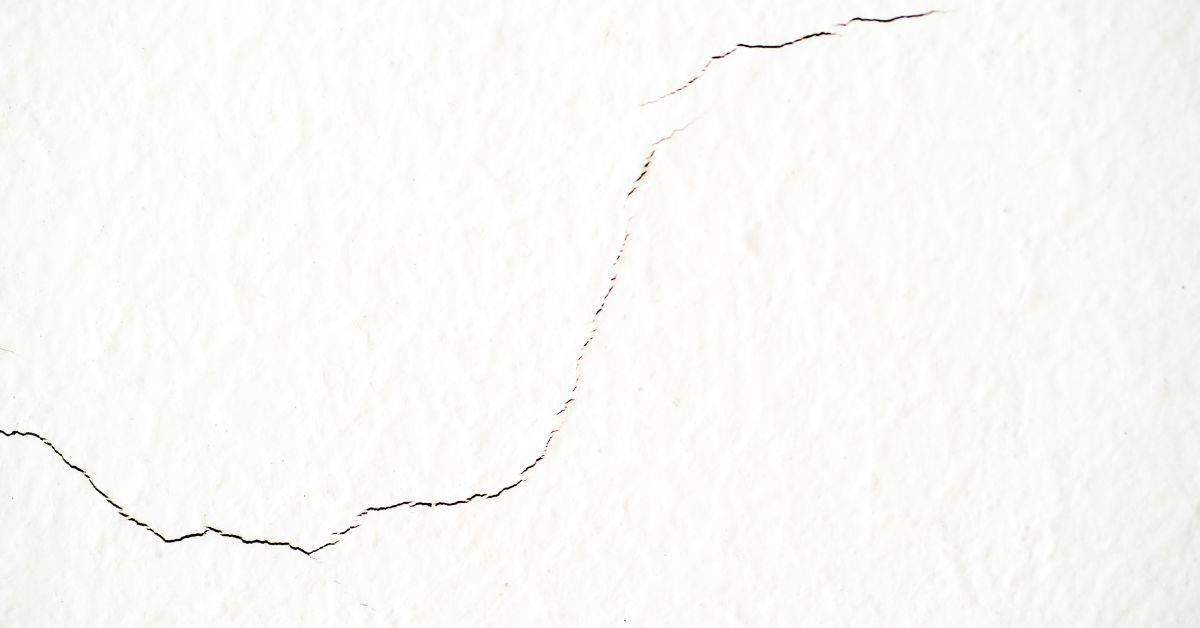
- Stucco cracks: Look for hairline cracks in the stucco around the hose bib. Cracks can let water in, causing damage.
- Moisture intrusion: Check for signs of moisture behind the façade or at the sleeve interface. Moisture can lead to mold and structural issues.
- Sleeve positioning: Ensure the sleeve is still properly aligned with the hose bib. Movement can cause gaps and leaks.
- Debris: Remove any dirt, dust, or debris that has accumulated around the detail. Debris can trap moisture, leading to damage.
- Seasonal resealing: Reseal the hose bib detail before winter to prevent freeze-thaw damage.
- Professional inspection: Schedule an annual professional inspection to catch any issues early.
Quick rule: Inspect your hose bib detail at least quarterly and after severe weather events.
Common mistakes and how to fix them
Identify and correct these common mistakes to maintain a durable hose bib detail.
- Oversized gap: If the gap between the stucco and sleeve is too large, water can enter. Fill gaps with backer rod or foam sealant.
- No backer rod: Without a backer rod, sealant can’t adhere properly. Install a backer rod to provide a surface for the sealant to bond to.
- Bonding to three surfaces: Bonding sealant to three surfaces (stucco, sleeve, and hose bib) weakens it. Use a bond-breaker to prevent this.
- Improper slope: If the stucco around the hose bib isn’t sloped away from the detail, water can pool and cause damage. Re-slope the stucco if necessary.
- Failing sealants: If sealant is cracked, peeling, or missing, replace it immediately to prevent water intrusion.
- Cracking at interface: Cracks at the stucco/sleeve interface can let water in. Repair cracks with elastomeric paint or caulk.
- Water infiltration: If you suspect water is getting behind the façade, investigate immediately. Water infiltration can cause serious damage.
Quick rule: Regularly inspect your detail for these common mistakes and fix them promptly to prevent bigger issues.
Cost categories and budgeting approach
Estimate your project cost by separating it into different budget tiers. This will help you stay on track financially.
- Basic materials: Include costs for stucco, sleeve, backer rod, bond-breaker, and sealant in your estimate.
- Mid-range: Consider additional costs like elastomeric paint, foam sealant, or specialized tools.
- Premium: Factor in high-end materials, professional labor, or complex repairs.
- Labor: Get quotes from local contractors for installation and repair work. Labor can vary significantly by region.
- Contingency: Always budget extra (around 10-20%) for unexpected costs that may arise during the project.
- Local suppliers: Check prices at local supply stores to get accurate material costs. Prices can vary by location.
Quick rule: Regularly review and update your budget as needed. Keep a record of all expenses for future reference.
Conclusion
Protecting hose bib penetrations with proper sleeves, sealant geometry, and crack prevention keeps water out, preserves the stucco, and stops costly fixes later. Stay disciplined about safety and test everything as you go so you don’t create hidden leaks or structural damage.
Check sleeves for correct size and clearance, verify clean, dry surfaces, align the sleeve with the wall plane, apply sealant with the intended geometry, install the bib and trim, let curing conditions meet the spec, and finish with a careful inspection for gaps or cracks before you paint or finish; do this in a steady sequence and don’t rush the cure times.
Common mistakes to avoid are skimping on sleeve sizing, skipping surface preparation, and using too much or too little sealant or improper joint geometry; always keep the area dry during work, test fit first, and follow the curing guidelines exactly so you don’t trap moisture or create stresses that lead to cracks. If in doubt, slow down and don’t force a fit—safety first and check, check again.
If conditions are tricky, or if the wall is already cracked, or the plumbing layout is hard to access, call in a professional rather than forcing a DIY fix. Stay steady, follow the steps, and you’ll have a durable, clean finish you can be proud of.
FAQ
How do I properly install a stucco sleeve around a hose bib?
Use a sleeve that fits the rough opening and sits flush with the finished stucco. Secure the sleeve so it won’t shift during stucco application, and seal any gaps where the sleeve meets the wall per manufacturer instructions or local rules.
Keep the exterior face of the sleeve aligned with or slightly behind the stucco surface. Check that the hose bib is accessible for maintenance and that the sleeve won’t crowd the leak path or air gaps.
What sealant materials work best around hose bib sleeves?
Choose sealants labeled for exterior stucco and penetration sealing. Look for products that stay flexible after curing and resist UV and water exposure. Always check the label for compatibility with stucco and metal or PVC sleeves.
Apply sealant around the sleeve edges where it meets the wall, but avoid excessive squeeze that can trap moisture. If in doubt, follow the sleeve manufacturer’s or stucco product’s instructions.
How can I prevent cracking around the hose bib area?
Keep the joint geometry simple and use a well-fit sleeve to reduce movement. Use an appropriate sealant to bridge the gap without too much tension on the stucco surface.
Prevent abrupt edge transitions and back-pocket cracking by detailing clean control joints away from the hose bib. Check corners and any changes in depth that could transfer stress into the stucco.
What waterproofing steps should I take after installing the sleeve and sealant?
Ensure a watertight seal where the sleeve penetrates the wall and around the hose bib itself. Use compatible sealants and flashings as recommended for stucco enclosures in wet areas.
Test for leaks from inside or outside before finishing with final stucco coats. If you see moisture seepage, address it before continuing with the next layer.
What should I inspect after installation to catch problems early?
Check that the sleeve is solidly anchored and that there are no gaps fighting the sealant. Look for cracks along the edges and confirm the sealant remains continuous and intact.
Inspect after curing: ensure the hose bib operates freely, and verify there’s no water intrusion into the wall cavity. If there are any concerns, revisit the sealant and sleeve fit before finishing.