
Introduction
Drainage planes are designed to move water out from behind stucco so you don’t trap it against the wall. When cracking repairs are done, you need to preserve that path for moisture to escape while sealing the crack. Check your current system and follow manufacturer guidance for any patch materials and installation steps.
If you see cracks, assess whether they are hairline or wider and note any signs of moisture behind the surface. Use patch materials that are compatible with stucco or EIFS and ensure the repair remains breathable to manage moisture. Verify local rules or guidance for drainage and ventilation to avoid creating new water traps in the wall assembly.
Key takeaways
- Preserve drainage planes during crack repair; avoid creating trapped water channels.
- Distinguish drainable stucco systems from barrier or traditional lath plaster when diagnosing.
- Follow a step‑by‑step workflow that maintains openness to drainage and sealing as needed.
- Use proper detailing to prevent water traps at penetrations, edges, and transitions.
- Compare modern vs. old EIFS approach; match cladding choice to moisture risk and cost.
- Maintenance plan includes regular inspection for cracks, leaks, and drainage performance.
- Safety: shut off power and avoid working on wet surfaces during inspections.
Table of Contents
- Introduction
- Key takeaways
- Why Drainage Matters When Repairing Stucco Cracks
- Diagnosing the Wall: Tell Drainable Systems from Barrier Systems and Traditional Stucco
- Step‑by‑step Crack Repair Workflow That Preserves or Restores Drainage
- Installation and Detailing Best Practices to Prevent Future Trapping of Water
- Cladding Choices and Implications for Moisture Management, Cost, and Insurance
- Maintenance, Monitoring, and Decision Guide: Repair Vs Retrofit Vs Replace
- Conclusion
- FAQ
Why Drainage Matters When Repairing Stucco Cracks
Repairs should preserve or restore the wall’s drainage plane, not seal moisture in. Proper drainage reduces the risk of rot, mold, and future failure of patches. This section defines the scope as crack repairs that maintain or improve drainage paths.
Water movement through stucco assemblies follows predictable routes, and drainage planes, weep screeds, and flashing guide that flow. Breathable patches are preferred over impermeable sealants because they allow vapor diffusion and water egress. Identify cracks that breach drainage, thin stucco that blocks weep paths, and flashing that traps moisture behind the plane.
How water actually moves through stucco assemblies
Water in stucco walls moves in three main ways: by capillary action, wind-driven rain, and vapour transport.
Capillary action is like a tiny straw that sucks water into the wall. Even hairline cracks can wick moisture deep behind the finish.
Wind-driven rain forces water into any opening it finds. Cracks, gaps in flashing, or missing weep holes let water in and trap it there.
Vapour transport is how moisture moves through porous materials like stucco. It’s why breathable patches are crucial – they let vapour out but keep liquid water at bay.
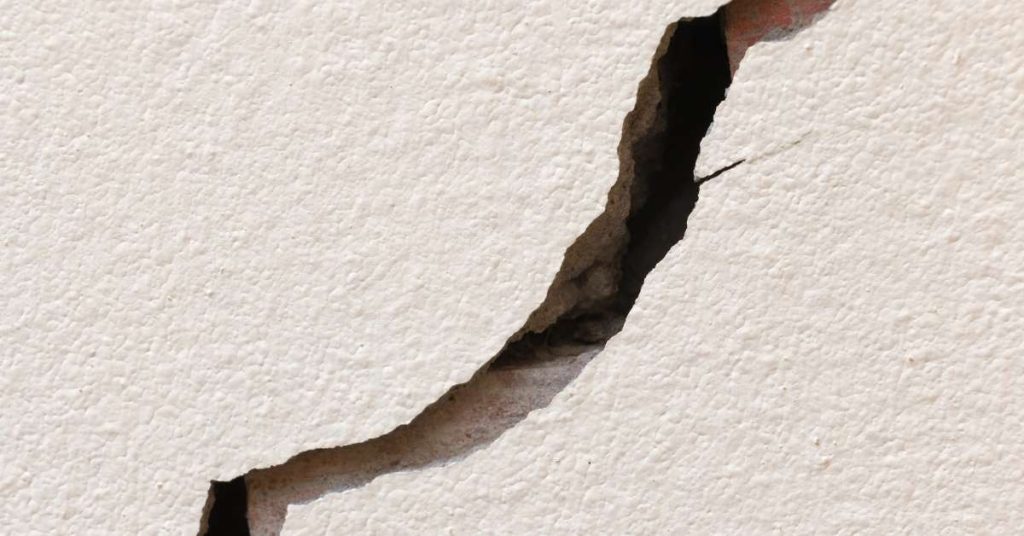
Types of cracks and the moisture risks each represents
Not all cracks are created equal when it comes to letting water behind your stucco finish.
Hairline cracks might seem harmless, but they can wick moisture deep into walls due to capillary action. They’re often caused by minor settling or shrinkage.
Shrinkage cracks happen as the wall dries out after construction. They’re usually wider and deeper than hairlines, posing a greater risk for water intrusion.
Settlement cracks occur when the foundation shifts, causing the wall to move. These can be large and let in significant amounts of water if not repaired properly.
Impact cracks are caused by physical damage – think tree branches or ladders leaning against the wall. They can be any size and should be addressed promptly to prevent water intrusion.
Common DIY mistakes that turn a repair into a water trap
Avoid these common pitfalls when repairing stucco cracks to ensure you’re not trapping moisture behind your finish.
- Improper flashings: Skimping on flashing or installing it incorrectly can lead to water being trapped behind the stucco, causing rot and mold.
- Over-troweling: Applying too much mortar can clog weep holes and prevent proper drainage. Less is more when it comes to patching.
- Sealing without drainage: Using impermeable sealants or caulks can trap moisture behind the finish, leading to rot and mold growth.
- Ignoring weep screeds: Failing to reinstall or maintain weep screeds after patching can cause water to pool at the bottom of the wall, leading to foundation issues and further damage.
Always prioritize preserving drainage channels and using breathable materials in your repairs to prevent moisture from getting trapped behind your stucco finish.
Diagnosing the Wall: Tell Drainable Systems from Barrier Systems and Traditional Stucco
This gives you a practical workflow to classify the wall assembly and tailor repairs accordingly. Start by identifying whether there is a drainage plane, barrier EIFS, or traditional three‑coat stucco. Use findings to drive your repair strategy.
Examine visible layers, flashing, weep screeds, joints, and control joints, and note signs of moisture intrusion. Document with clear photos for reference. Drainage-plane walls allow drainage-friendly repairs; EIFS requires its own repair approach, while traditional stucco may need re‑lath and moisture management adjustments.
Visual checkpoints and non‑destructive tests
Before you start any work, use this checklist to assess your wall’s condition. It’s best to do this on a dry day with good light.
- Windows and doors: Check for gaps or cracks around openings. Use a flashlight to see if there are any voids behind the stucco. If you find any, they could lead to water intrusion.
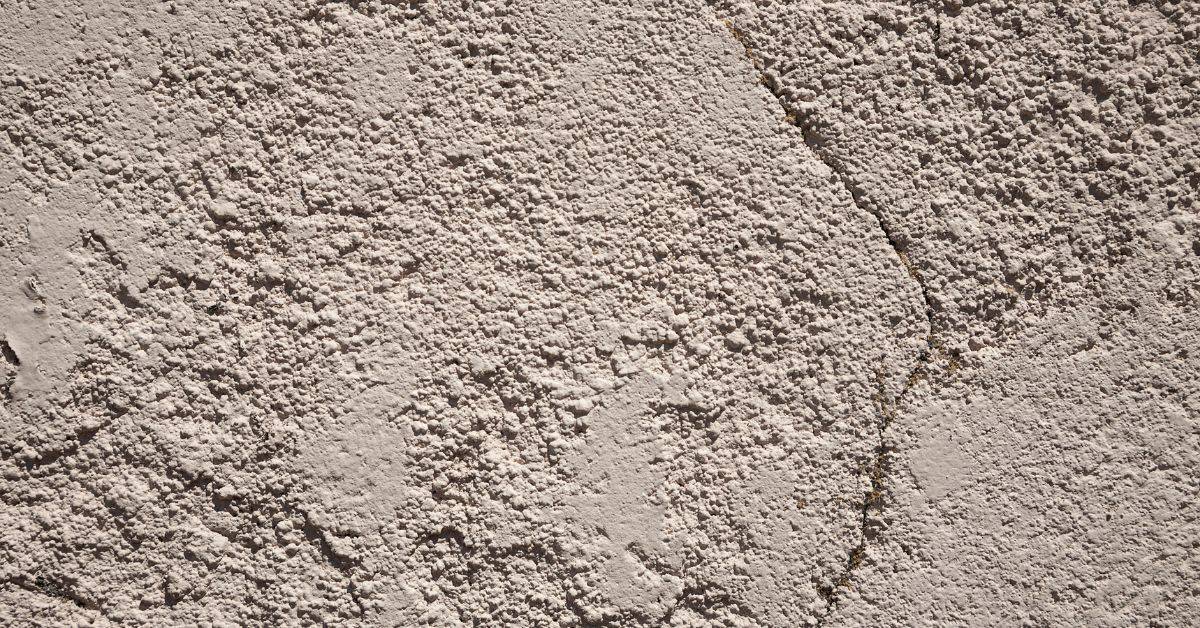
- Base of wall: Look for signs of moisture damage like efflorescence (white powdery deposits) or spalling (flaking). Check weep holes to ensure they’re not clogged and allowing water to build up.
- Penetrations: Inspect where pipes, wires, or other utilities pass through the wall. Ensure they’re properly sealed to prevent water entry.
- Finishes: Check if the stucco is cracking, peeling, or delaminating. This could indicate underlying moisture issues or poor installation.
- Sound test: Tap on the wall with a hammer or knuckle. A hollow sound might indicate voids or missing insulation behind the stucco.
- Probe holes: Drill small holes (around 1/4″) in hidden areas to check for moisture or signs of decay. Remember to fill and seal these holes afterwards.
- Mold and mildew: Look for any signs of mold or mildew growth, which can indicate chronic moisture problems.
- Wall movement: Gently push on the wall in different spots. If it feels spongy or moves more than a few millimeters, there might be underlying issues like rot or termite damage.
Quick rule: Always check for proper drainage at the base of the wall and around openings. Without good drainage, even the best stucco can fail over time.
Tools and materials checklist for assessment
Before you start any work on your walls, use this checklist to assess the type of system installed. This will help you determine if it’s a drainable, barrier, or traditional stucco system.
- Moisture meter: Check for moisture behind the wall. Insert probes into the wall at various points and check readings. High readings (above 15-20%) may indicate a problem.
- Inspection mirror: Look behind outlets, switches, and other openings to see if there’s a drainage plane or just a solid barrier.
- Flashlight: Inspect the weep holes at the bottom of the wall. If they’re clogged or missing, you might have a barrier system instead of a drainable one.
- Small drill: Drill small holes (1/8″ to 3/16″) into the wall in hidden areas. Check for any signs of water damage or delamination.
- Check weep screeds: Ensure there are weep screeds at the top of the foundation. If not, you might have a barrier system that could trap moisture.
- Inspect expansion joints: Check if they’re filled with caulk or foam. If so, they could be trapping moisture and causing damage.
- Check for efflorescence: White powdery deposits on the wall can indicate water is getting trapped behind the stucco.
- Look for signs of previous repairs: Multiple patches or areas where stucco has been replaced could indicate past moisture issues.
Quick rule: If you’re unsure about any part of your wall system, it’s always safer to assume it’s a barrier system until proven otherwise. This will help prevent costly mistakes and rework.
When to Escalate to Invasive Testing or a Professional Moisture Survey
You’ve done your visual checks and non-destructive tests. Now, what’s next? Here are some red flags that tell you it’s time to escalate:
Soft Sheathing: If you’re poking at the wall and it feels like a wet sponge, stop. That’s a sign of serious moisture intrusion. It’s time for invasive testing.
Multiple Failures: If you’ve had repeated issues with water damage or mold, don’t keep throwing good money after bad. Hire a professional to find the root cause.
Elevated Moisture Readings: If your non-destructive tests are showing high moisture levels (above 17% for wood-based materials), it’s time to call in an expert. They have specialized tools and training to pinpoint the problem accurately.
Step‑by‑step Crack Repair Workflow That Preserves or Restores Drainage
Outline how to spot active leaks and confirm a functional drainage plane before proceeding. Use tools like a moisture meter or infrared camera and set acceptance criteria for moving forward. Focus on keeping the drainage path open during repairs.
Follow an exterior-to-interior sequence: clean the surface, repair flashing, re‑establish ventilation gaps, then crack cleaning and filler selection compatible with stucco. Plan controlled curing and verify drainage after patches are in place. Use a concise pass/fail checklist to guide each stage.
Preparations: isolate moisture, dry, and plan drainage paths
Before you start patching, ensure the substrate is dry. Use a moisture meter to confirm.
Protect interior finishes from any residual moisture by covering them with plastic sheeting.
Check for an exit path for trapped moisture. Ensure weeps are clear and functioning. If not, clean or replace them.
Repair materials and techniques that maintain a drainage plane
Material choices impact your repair’s success. Opt for breathable, water-shedding materials.
- Mesh: Use flexible, corrosion-resistant mesh to reinforce patches. Avoid rigid meshes that can crack.
- Base coats: Apply breathable base coats to maintain the drainage plane. Avoid impermeable paints.
- Breathable patches: Use pre-mixed, breathable patching compounds designed for stucco. Avoid cement-based patches that can trap moisture.
- Backer materials: Use backer materials with similar permeability to the existing stucco. Avoid materials that can block drainage.
- Movement joints: Incorporate movement joints in your repair to accommodate expansion and contraction, preventing new cracks.
Flashing, sealant, and tie-in details to connect repairs to the drainage system
Integrate repaired areas with existing flashings using compatible materials. Ensure they overlap properly.
Seal around windows and doors with flexible, paintable sealants that won’t crack over time.
Connect repairs to weep/weep screeds. Ensure water can drain freely from behind the patch. Avoid creating new barriers.
Installation and Detailing Best Practices to Prevent Future Trapping of Water
Prioritize WRB continuity and transitions to maintain a continuous drainage plane behind the finish. Ensure the barrier works with the weather‑resistive system to shed water outward. These details matter for long‑term performance.
Detail flashing at penetrations, corners, and terminations to tie into the drainage plane. Explain control and expansion joints and account for movement. Identify drainage components like weep channels and vents, and verify field installation with a practical on‑site checklist.
WRB, Flashing, Weeps, and Control-Joint Integration
The water-resistive barrier (WRB), flashing, weeps, and control joints are your building’s defense against water intrusion. They work together like a well-oiled machine, but they need to be installed right to keep water out.
WRB is the first line of defense. It stops water from getting into your walls. Make sure it’s properly lapped and sealed at all seams and penetrations. Don’t skimp on tape or sealant – use enough to create a solid barrier.
Flashing, weeps, and control joints are the support team. Flashing redirects water around windows, doors, and other openings. Weeps let any trapped water escape from behind cladding. Control joints prevent cracking by giving the concrete a place to move. All three need to be integrated correctly:
- At windows and doors, flashing should extend up the wall at least 6″ above the top of the opening and lap under the WRB.
- Weeps should be installed at the bottom of walls, just above the foundation. Make sure they’re not blocked by insulation or other materials.
- Control joints should be cut every 10-20 feet along the length of your concrete slab, and every 3-6 feet across its width. Check local codes for exact spacing.
Where planes change – like at corners or where walls meet roofs – make sure all these elements are properly lapped and sealed to keep water from getting in. Don’t let them end abruptly; extend them up the wall or around the corner to maintain a continuous barrier.
Substrate preparation, mesh embedment, and basecoat best practices
Before you start slapping on that concrete, listen up. A solid substrate is your first line of defense against cracks and moisture issues.
First off, check base compaction. It should be rock-solid, no pun intended. If it’s not, get back out there with that plate tamper and fix it. You don’t want any soft spots causing trouble later on.
Now, let’s talk mesh. You need it for strength, but you also need to place it right. Not too close to the surface, or you’ll end up with a weak top layer. Not too deep either, or it won’t do its job. Aim for about 1/3 of the slab depth from the top.
Lastly, don’t skimp on that basecoat. It’s your moisture barrier, and it needs to be thick enough to do its job. Follow those manufacturer instructions, but as a general rule, you’re looking at around 1/4″ to 3/8″. Let it cure properly too. Patience, grasshopper.
Material specs and standards to check before repairing or replacing
The right materials ensure your concrete repair lasts, looks good, and doesn’t crack. Here’s what you need.
- Type N mortar: Used for most repairs. Look for ASTM C270 rating. It’s strong, flexible, and affordable.
- Concrete patching compound: For small repairs. Check it’s compatible with your existing concrete (same pH). Cheap options can cause staining.
- Fiber-reinforced polymer (FRP) rebar: For structural repairs. Look for ASTM D7238 rating. It’s stronger, lighter, and more flexible than steel.
- Epoxy or polyurethane grout: For filling control joints. Check it’s compatible with your concrete. Cheap options can crack over time.
- Concrete sealant: To protect repaired areas. Look for ASTM C1209 rating. It prevents water intrusion, but won’t stop cracks from forming.
- Expansion joint filler: For filling expansion joints. Check it’s flexible and can handle your area’s temperature changes. Cheap options can crack or crumble.
Using the wrong materials can cause cracking, staining, weak bonds, and even structural issues. Always check manufacturer instructions and local codes before buying.
Pro tip: Buy materials in small quantities to avoid waste. Store them properly (keep bags dry, off the ground) and mix only what you need.
Cladding Choices and Implications for Moisture Management, Cost, and Insurance
Describe how drainable EIFS, traditional stucco, and other claddings handle water and how that shapes repair choices. Tie these behaviors to repair implications and drying performance. This helps frame expectations for the project.
Compare moisture pathways and repair strategies, including substrate prep and sealant choices. Discuss lifecycle costs and how drainage-enabled systems can influence insurance considerations. Use a regional Indiana perspective to choose claddings that balance moisture management and ease of repairs.
Drainable EIFS vs traditional stucco vs alternate claddings — moisture pros and cons
Each cladding system has its own way of handling water, which impacts repair strategies. Here’s a quick comparison:
Pros
- Drainable EIFS: Built-in drainage plane prevents water buildup; easy to patch without disrupting drainage.
- Traditional Stucco: Capillary barrier limits water intrusion; plaster matrix allows for minor cracking without leakage.
- Alternate Claddings (rainscreen, insulated): Pressure-equalized design reduces moisture buildup; easy to replace damaged sections.
Cons
- Drainable EIFS: Requires continuous drainage plane for effectiveness; improper installation can lead to moisture issues.
- Traditional Stucco: Lacks built-in drainage, water can get trapped; cracking can allow water intrusion over time.
- Alternate Claddings: More complex installation requires skilled labor; higher upfront cost compared to other systems.
Choose based on your budget, local climate, and desired maintenance level. Drainable EIFS is great for continuous drainage, traditional stucco offers a classic look with some trade-offs, while alternate claddings provide modern moisture management but come at a higher cost.
Cost, lifecycle, and ROI questions to ask contractors
When discussing repairs with contractors, dig deeper into costs and long-term considerations:
Repair scope: Ask about the extent of damage and if intrusive remediation is needed. Warranties: Inquire about manufacturer and installer warranties to protect your investment.
Expected maintenance: Find out what ongoing care is required to keep moisture at bay. Water-management quality: Ask about their approach to preventing water buildup and how they’ll maintain drainage performance during repairs.
Insurance, inspections, and resale: documentation to protect value
Proper documentation ensures your home’s moisture management capabilities are well-represented for insurance claims and future sales:
- Drainage-friendly repairs: Document all repairs that maintain or enhance drainage performance.
- Contractor certifications: Keep records of certified contractors who performed the work.
- Inspection reports: Maintain copies of post-repair inspection reports confirming moisture issues are resolved.
- Maintenance records: Log all maintenance activities related to moisture management.
- Pre- and post-repair photos: Document the condition of your walls before and after repairs.
- Material specs: Keep records of materials used in repairs, ensuring they meet relevant standards.
- Warranty information: Maintain copies of warranties covering repair work.
- Moisture surveys: Document any professional moisture surveys conducted on your home.
Quick rule: Regularly update and organize these records to ensure they’re easily accessible when needed for insurance claims or resale negotiations.
Maintenance, Monitoring, and Decision Guide: Repair Vs Retrofit Vs Replace
Provide a clear decision framework to choose among repair, retrofit, or replacement based on moisture signs, framing condition, and climate factors. Keep criteria simple and actionable. This keeps homeowners on track without guesswork.
Offer a proactive maintenance plan with seasonal checks and a routine inspection cadence. Outline targeted retrofits to add drainage and how to monitor moisture over time. Include a homeowner‑friendly decision tree and quick actions for common scenarios.
Annual inspection checklist and visual checkpoints to catch problems early
Use this checklist annually, preferably during spring or fall, to spot issues before they become major headaches.
- Sealants: Check caulking and sealant around windows, doors, and penetrations. If cracked or missing, water can enter and cause damage.
- Flashings: Inspect metal flashings at roof-wall intersections, chimneys, and other transitions. Rust or missing pieces may lead to leaks.
- Base of wall: Examine the bottom few feet of your stucco. Moisture here could indicate a drainage issue.
- Finish condition: Look for cracks, stains, or efflorescence (white powdery deposits). These signs point to moisture intrusion.
- Weep screeds: Ensure these small openings at the bottom of your stucco are clean and unobstructed. Blockages prevent water from exiting.
- Plumbing leaks: Check for any signs of water damage around plumbing penetrations. Leaks here can cause significant issues.
- Gutters and downspouts: Make sure they’re functioning properly and directing water away from your home’s foundation. Otherwise, water may seep into your walls.
- Roof condition: Inspect your roof for missing or damaged shingles. Water can enter through these openings and travel down your walls.
Quick rule: If you find any issues, address them promptly to prevent further damage.
Routine repairs that preserve drainage vs quick fixes to avoid
Some repairs maintain your stucco’s ability to drain water, while others can trap moisture and cause more problems.
- Sealant renewal: Reapply caulking and sealants where needed. This helps keep water out but doesn’t trap any existing moisture.
- Small crack patches: Repair minor cracks with appropriate materials. These fixes maintain the drainage plane.
- Painting over cracks: Avoid this common mistake. Paint traps moisture, leading to further damage and potential mold growth.
- Impermeable fill: Don’t use non-breathable materials like cement or silicone for repairs. These can trap water vapor, causing issues over time.
Always choose repairs that allow your stucco to breathe and drain water effectively.
Additional resources, case studies, and recent posts
For deeper insights into successful drainage-preserving repairs, check out these resources:
Plaster/Lath Restoration Case Studies: Learn from professionals who’ve tackled similar issues in historic homes. Understanding their processes can help you make informed decisions.
EIFS-2.0 Reviews: Familiarize yourself with the latest standards and best practices for exterior insulation and finish systems. This knowledge can guide your own repairs and retrofits.
Company Project Writeups: Read about contractors’ experiences with various stucco repair projects. These real-life examples offer practical insights into what works and what doesn’t.
Conclusion
Drainage is not optional here. Fixing cracks without keeping a path for water to escape invites hidden damage and ugly failures later, so every repair must protect the wall’s ability to drain and dry.
First, assess the wall for drainable versus barrier systems, pick a repair approach that preserves drainage, prep the area properly, test a small patch or sample, use compatible sealants and flashing, and keep surface coatings breathable where required. Do the work in logical steps, from repairing the crack to detailing joints and edges, then check after rain to confirm water moves away and not into the wall.
Common mistakes to avoid include sealing or plastering cracks shut without reestablishing a drainage path, using impermeable coatings that trap moisture, and neglecting proper flashing, backer, or joint detailing. Always test on a small area first, wear eye and skin protection, and turn away if you see active leaks or rot—do not push through damage you can’t fix safely yourself.
If you’re unsure about wall type, drainage details, or long-term performance, call a professional rather than forcing a DIY fix. Stay deliberate, stay safe, and you’ll preserve both the look and the durability of the stucco over time.
FAQ
What crack types should I watch for, and how do they affect moisture risk in EIFS or stucco?
Hairline or spider cracks are common and often not structural. Wide, shifting, or diagonal cracks can signal movement and potential moisture entry. If a crack runs behind joints or penetrates coatings, check the label instructions and sealants before tinkering.
Is modern EIFS different from old EIFS when it comes to drainage and moisture management?
Yes. Newer systems emphasize drainage planes and proper detailing to direct water out. Older setups can trap moisture if the layers aren’t installed with a clear drainage path or are cracked and breached.
What installation mistakes trap water in stucco, and how can I spot them on site?
Common mistakes are missing or damaged drainage gaps, improper flashing at transitions, and sealant failures that let water behind the finish. Look for visible gaps, misaligned coatings, or peeling edges that indicate water has a path behind the stucco.
Does climate affect whether EIFS or traditional stucco is a better fit for my house?
Yes. Wet or freeze-thaw climates demand careful drainage, air gaps, and moisture protection. In drier climates, the emphasis shifts to proper detailing and maintenance to prevent any moisture from lingering.