
Introduction
Spot washers can stabilise small plaster areas over wood lath. This article explains a practical, hands‑on approach for assessing and addressing those loose patches. Keep the work simple and focused on local repairs rather than rebuilding whole walls.
Evaluate the wall condition first to decide if spot washers alone will hold or if additional patching is needed. If you can secure the plaster with washers, drill, set the washers, and pin the area to the lath as a small repair. Finish by filling cracks with a setting-type compound, and follow simple, careful techniques for spot repairs over wood lath.
Key takeaways
- Evaluate wall condition to determine spot washers versus a larger repair approach.
- Stabilize loose plaster over wood lath with targeted spot washers only.
- Crack fill with a setting-type compound following manufacturer instructions and safety data.
- Prepare containment and ventilation to minimize dust during crack filling and repairs.
- Plan repair sequence to blend edges and match texture for durability.
- Inspect final finish before painting to verify adhesion and long term stability.
Table of Contents
- Introduction
- Key takeaways
- When to Choose Spot Washers Vs a Larger Repair
- Evaluating Old Plaster over Wood Lath
- Tools and Materials Checklist
- Step-by-Step Process for Using Spot Washers Effectively
- Crackfilling and Choosing Setting-Type Compounds
- Preparing the Repair for Finishing, Painting, and Long-Term Durability
- Safety, Health, and Containment
- Planning, Costs, and Common Mistakes to Avoid
- Conclusion
- FAQ
When to Choose Spot Washers Vs a Larger Repair
Spot washers are a practical choice when damage is localized and the underlying lath remains solid. Assess delamination by noting how much plaster has separated from the surface and how far the loose areas extend. If the majority of the panel remains firmly anchored, spot repairs can stabilise the wall without a full replaster. Check for moisture or salt damage that could undermine the repair’s long-term effectiveness, and verify that the wall is dry before proceeding.
Make the decision on structural versus cosmetic grounds. If the plaster can be stabilized in place and aligned with surrounding contours, spot washers may be sufficient. If there is substantial delamination, lath deterioration, or persistent movement, plan for a larger patch or replastering. Consider cosmetic goals, texture compatibility, and paint adhesion when weighing outcomes, and consult product instructions or local guidelines to confirm suitability for spot repairs.
Signs Spot Washers Are Appropriate
Spot washers can effectively stabilize small areas of delamination. To determine if your situation calls for them, look for these signs:
Localized loose plaster: Gently tap or push the affected area to confirm localized detachment.
Intact surrounding plaster: Check that the rest of the wall is in good condition with no visible cracks or crumbling.
Absence of widespread water or structural damage: Inspect the entire wall for signs of moisture, rot, or extensive damage. If found, consider a larger repair.
Limits of Spot Repairs and When to Replaster
While spot washers are effective for small areas, they may not be sufficient in certain cases. Consider these thresholds:
Large areas (>10% of the panel): If delamination covers a significant portion of the wall, full replastering might be necessary.
Recurring failures: If spot repairs keep failing, it could indicate an underlying issue that needs addressing before attempting further repairs.
Signs of rot: Any indication of rotted wood lath or substrate should prompt a full repair to prevent further damage.
Benefits and Trade-Offs
Spot washers offer several advantages but also come with trade-offs. Weigh these factors when making your decision:
Cost, time, and less disruption: Spot repairs are generally quicker and cheaper than full replastering, causing less disturbance to your home.
Surface irregularities: Expect some visible differences between the repaired area and surrounding plaster, especially in texture and finish.
Durability: While spot washers can stabilize the area, they may not last as long as a full replastering job. Regular maintenance might be required to keep the repair in good condition.
Evaluating Old Plaster over Wood Lath
Begin with a systematic inspection to determine if stabilization is feasible through spot washers. Define the inspection’s purpose: whether plaster over wood lath can be saved and what underlying issues must be addressed. Record findings to guide the repair sequence and decision making.
Use a structured surface-check routine and assess lath and framing for integrity. Tap the surface to listen for hollow sounds, look for cracking patterns, bulging, moisture staining, and prior patches that indicate weak bonds. Evaluate the wood lath for rot or corrosion and check stud spacing and framing movement, especially around openings or corners. Plan for behind-plaster access and identify hidden damage that could influence the repair approach.
Visual checkpoints
Before starting any repair work, perform a thorough visual inspection of the plaster over wood lath. This checklist helps identify areas that need attention and guides your repair strategy.
- Cracks: Inspect for cracks, noting their pattern (linear, spiderweb, etc.) and width. Wide or numerous cracks may indicate structural issues.
- Bulging: Look for bulges or protrusions in the plaster. These can signal underlying problems with the lath or framing.
- Moisture staining: Check for stains, discoloration, or watermarks that could indicate moisture intrusion.
- Loose patches: Inspect for loose or peeling plaster patches, which may have weak bonds.
- Lath exposure: Look for exposed lath, which can compromise the plaster’s support.
- Previous repairs: Note any prior repair patches. They might hide underlying issues or indicate previous weak bonding.
- Corners and openings: Examine corners and around openings for signs of stress or damage.
- Ceiling-to-wall junctions: Check where walls meet the ceiling for any defects that could indicate structural movement.
Quick rule: If cracks are wide or numerous, or bulging is present, consider full plaster removal or extensive repair. If moisture staining is evident, investigate and address the moisture source before proceeding with repairs.
Tap, probe, and measurement tests
Perform simple tests to evaluate plaster adhesion, delamination, and lath condition. These tests help identify areas that need repair and guide your approach.
Gently tap walls with a hammer. Listen for hollow sounds, which indicate poor adhesion. Mark any suspect areas.
Probe marked areas with a screwdriver. If the plaster gives way easily, it’s delaminated. Measure the dimensions of delaminated areas to plan repairs.
Note: If tapping reveals widespread hollow sounds or delamination is extensive, reconsider spot washers and consider full plaster removal.
Documenting conditions and causes
Record your findings to plan repair sequences and address underlying issues effectively. Photograph defects from multiple angles, and note suspected causes and any related issues in adjacent rooms or services.
Take clear, well-lit photos of cracks, bulges, stains, loose patches, and exposed lath. Include measurements where possible to aid planning.
Note suspected causes such as moisture intrusion, impact damage, or vibration. Check adjacent rooms and services for related issues that may need addressing alongside plaster repairs.
Tip: Review your documentation before starting work to ensure all issues are addressed.
Tools and Materials Checklist
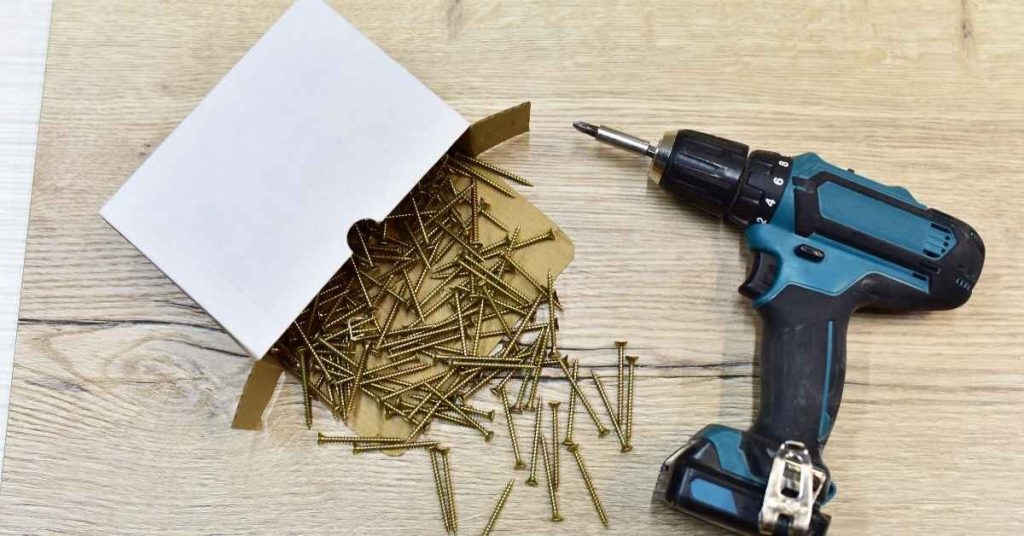
List core tools essential for spot-washer repairs and finishing. Include a pry bar, hammer, small sledge, screwdrivers, adjustable wrench, utility knife, and a cordless drill with bits suitable for wood lath or masonry as needed. Prioritize a clean setup for accurate washer placement and patching work.
Supplement with measuring, marking, and layout items and with spot-washer–specific materials. Gather plaster washers, corrosion-resistant screws, suitable anchors if required, bonding agents or plaster adhesive, patching plaster or ready-mixed joint compound, and a bonding coat. Have mesh or lath reinforcement as needed and tools for finishing such as trowels, hawk, and mixing containers ready for use.
Spot Washers and Fasteners
Use this checklist when selecting spot washers and screws for your repair.
- Plaster Washers: Choose corrosion-resistant, correct size/weight to match plaster thickness. Too small or too large can compromise repair.
- Screws: Select appropriate length to reach into wood lath without over-penetrating. Too short may not provide secure anchorage; too long could damage lath.
- Anchors (if required): Use when screw alone cannot provide sufficient hold in damaged or weak lath.
- Plaster Screw Types: Consider using countersunk, bugle head, or trim head screws for a cleaner finish.
Quick rule: Always check washer size and screw length to ensure secure anchoring without damaging lath or causing plaster cracks.
Compounds, Tapes, and Backing Materials
Choosing the right materials ensures a strong bond and smooth finish for your repair.
- Setting-Type Powder Compounds: Provide long-lasting strength; ideal for larger repairs. Follow setting time instructions on label.
- Premixed Joint Compound: Convenient for quick repairs but may not provide same longevity as powder compounds.
- Reinforcing Mesh/Tape: Use to strengthen large repairs or areas with high stress. Ensure compatibility with chosen compound.
- Plaster Patches: Match texture and color of surrounding wall for seamless repair. Pre-mixed patches may offer easier application but check drying time.
Pro tip: Always read labels/datasheets to ensure correct usage, coverage, and compatibility with other materials.
Safety and Finishing Tools
Equip yourself with the right tools for a safe and efficient repair job.
- PPE: Wear eye protection, gloves, and either a dust mask or respirator depending on job requirements.
- Dust Control: Use drop cloths, plastic sheeting, and a small vacuum or brush to minimize mess and clean up efficiently.
- Mixing Bucket: Choose one with sufficient capacity for your compound batch size. A 5-gallon bucket is standard but check specific needs.
- Trowels (various sizes): Use trowels to apply and smooth compound. Larger trowels for initial application, smaller ones for final smoothing.
- Sanding Tools: Sandpaper or sanding block with varying grits (e.g., 120-grit for initial pass, 220-grit for final smoothing) to achieve desired finish smoothness.
Jobsite tip: Rent or borrow tools when possible to save on costs. Always follow manufacturer instructions and safety guidelines.
Step-by-Step Process for Using Spot Washers Effectively
Start with a clear scope and conditions check. Identify all areas where plaster over wood lath is loose, map the affected footprint, and evaluate moisture exposure and wood integrity. Confirm PPE, dust management, and a defined work plan before beginning any material work.
Follow a disciplined sequence from prep to finish. Establish containment, remove obviously loose plaster, clean dust from the lath, and dampen the surface lightly to control dust. Mark exact hole centers, drill pilot holes, insert washers per instructions, and ensure the washer sits flush with the plaster face. Apply adhesive behind washers as needed, fill gaps with patch material, and skim edges to blend with surrounding plaster.
Step-by-Step Process
The following steps outline a reliable method for using spot washers effectively to stabilize small plaster areas over wood lath.
- Assess the area and prepare safety measures, including personal protective equipment (PPE) and dust management.
- Lay down drop cloths and containment barriers. Remove any obviously loose plaster and clean dust from the lath.
- Lightly dampen the surface to reduce dust, then establish a precise washer layout using straight edges or a template.
- Mark exact hole centers for each spot washer, drill clean pilot holes, insert washers with the correct backing material, and compress or secure per product instructions. Ensure washers sit flush and do not protrude beyond the plaster face.
- Apply an appropriate plaster adhesive or epoxy behind each washer as needed, add a small amount of patch material to fill gaps, and tap gently to seat the washer consistently while avoiding glassy or pinched spots.
- Skim with compatible plaster to blend edges, feather into surrounding plaster, allow full cure time, perform a stability test by gentle pressure, and plan a sealer/paint step after confirming no movement.
Surface preparation and access
Before installing spot washers, it’s crucial to prepare the surface for a clean, stable installation. Start by removing any loose plaster carefully using a scraper or putty knife.
If lath is hidden by plaster, cut back failing material using a utility knife or oscillating tool to access the lath. Ensure all debris is removed to minimize dust and prevent safety issues.
Pro tip: Re-clean the area if debris accumulat