Search Results for: tar paper and sand concrete

Worker applying plaster to a white wall wearing yellow helmet

Paper Tape vs Fiberglass Mesh in Plaster Repairs: Where Each One Fails First

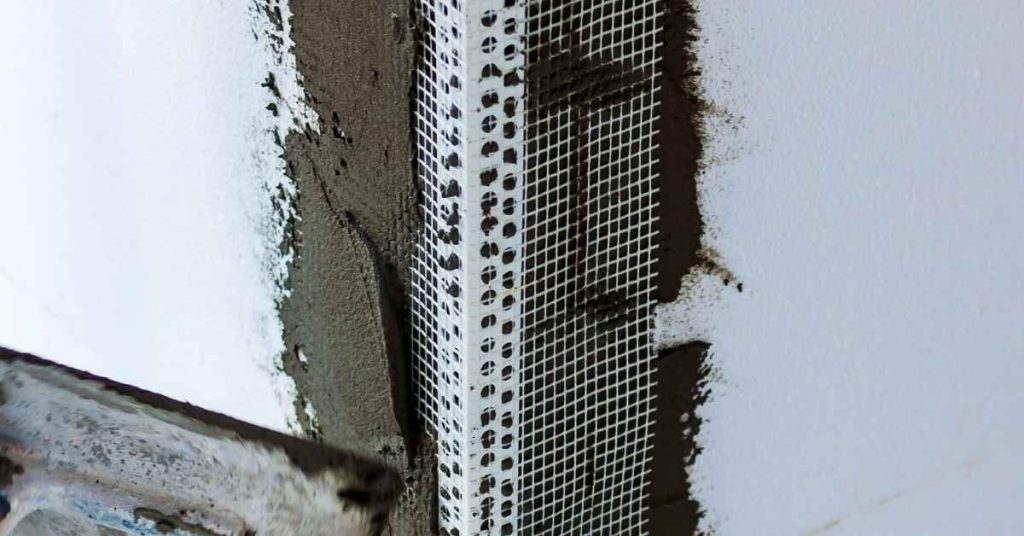
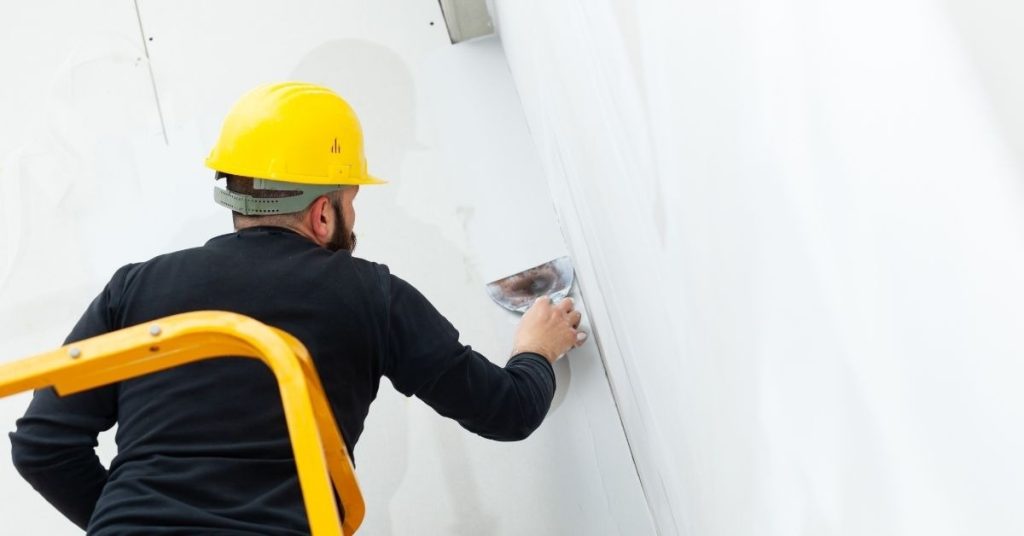
Introduction Paper tape is a traditional plaster repair method that tends to fail first at weak joints or moisture-prone areas. Fiberglass mesh is a modern patch option that can fail where the mud isn’t embedded well or runs behind the patch. Both have their own failure points depending on prep and technique. In repairs, focus […]

Paper Tape vs Fiberglass Mesh in Plaster Repairs: Where Each One Fails First Read More »

Hand in blue glove cleaning white wall with green sponge

Cleaning and Resealing Polished Plaster: Soap Scum, Dull Spots, and Refresh Coats

Introduction Cleaning and resealing polished plaster means removing soap scum and dull spots and applying a fresh protective coat. This is a hands-on DIY job that restores the surface without tearing it out. Expect a light scrubbing, careful rinse, and a new sealant layer following the manufacturer’s instructions. Before you start, check the product labels

Cleaning and Resealing Polished Plaster: Soap Scum, Dull Spots, and Refresh Coats Read More »

Hand applying plaster on wall with metal trowel

Clay Plaster Dent Repairs: Spot Blends, Burnish Timing, and Invisible Touch-Ups

Introduction Clay plaster dent repairs are about filling dents with clay plaster, blending the patch to the surrounding wall, and keeping the finish invisible. This is a hands-on, small-mesh job you can tackle with basic tools and careful timing. You’ll spot blend by feathering edges and adjusting texture until the repaired area matches the wall.

Clay Plaster Dent Repairs: Spot Blends, Burnish Timing, and Invisible Touch-Ups Read More »

Close-up of textured polished plaster wall surface

Sanding vs Burnishing Polished Plaster: Fixing Trowel Tracks Without Haze

Introduction Sanding and burnishing polished plaster is the process of smoothing and finishing the surface to remove trowel tracks and haze. This is done after the plaster has cured enough to work but while it’s still workable, using gentle abrasion and polish. The goal is a uniform, matte or soft sheen without gouges. Before you

Sanding vs Burnishing Polished Plaster: Fixing Trowel Tracks Without Haze Read More »

Close-up of gas-powered cutting saw blade in front of red truck

Cutting Brick Pavers Cleanly: Blades, Chipping Control, and Dust Safety

Introduction Cutting brick pavers cleanly means using the right blade and technique to produce straight, square cuts with minimal chipping. Choose a blade rated for masonry and masonry-specific cutting, and align your cut with the paver face for a clean edge. Take your time to steady the paver and clamp it, then make a shallow

Cutting Brick Pavers Cleanly: Blades, Chipping Control, and Dust Safety Read More »

close up of white textured hardwall plaster surface

Hairline Crazing in Hardwall Plaster: Surface Keying and Breathable Topcoats

Introduction Hairline crazing in hardwall plaster is fine cracks that form on the surface when the plaster dries and the finish isn’t keyed well enough for the next coat. It happens when the surface isn’t gripping the base layer, or small movements stress the top layers. The fix starts with proper surface keying and choosing

Hairline Crazing in Hardwall Plaster: Surface Keying and Breathable Topcoats Read More »

Putty knife with dried plaster on wooden surface

Leveling Wavy Lath Before Plastering: Shimming, Tension, and Straightedge Control

Introduction Leveling wavy lath before plastering means making the wall lath flat and true so the plaster can set evenly. Start by mapping high and low spots and use thin shims or temporary battens to bring the lath into line. Always refer to the lath type’s instructions and local rules to choose the right method.

Leveling Wavy Lath Before Plastering: Shimming, Tension, and Straightedge Control Read More »

Hand applying plaster to wall with trowel wearing glove

Fixing Plaster After Water Stains: Salts, Stain Blocking, and When to Cut Out

Introduction Water stains on plaster indicate moisture and mineral salts that have bled into the surface. Address the source and let the area dry before patching, and remove any loose or damaged plaster you can see. Choose a stain-blocking product and patch material based on the area, and always check the label for compatibility and

Fixing Plaster After Water Stains: Salts, Stain Blocking, and When to Cut Out Read More »

Close-up of blue painted stucco wall texture

Patch “Picture Framing” on Painted Stucco: Prime Zones and Feathered Coating Steps

Introduction Patch “Picture Framing” on painted stucco means touching up small areas so the patch blends with the surrounding paint while keeping the texture. This guide introduces how to spot the framing, choose basic tools, and apply a feathered coat with primer over patches. Keep it practical and straightforward, like a real hands-on repair. Before

Patch “Picture Framing” on Painted Stucco: Prime Zones and Feathered Coating Steps Read More »

Stucco wall with reinforcing mesh and metal bead at corner

Corner Cracks at Stucco Windows: Mesh Orientation and Bead Choices

Introduction Proper mesh orientation and bead selection help prevent corner cracks around stucco windows. The way the mesh is aligned and the type of bead you use influence how the stucco moves at the casement and sill transitions. Choose options based on manufacturer guidance and local methods, then apply consistently. Bead installation techniques matter, especially

Corner Cracks at Stucco Windows: Mesh Orientation and Bead Choices Read More »