
Introduction
Leveling wavy lath before plastering means making the wall lath flat and true so the plaster can set evenly. Start by mapping high and low spots and use thin shims or temporary battens to bring the lath into line. Always refer to the lath type’s instructions and local rules to choose the right method.
Then bring in a straightedge to check for flatness as you work and tighten the lath with light, temporary fasteners or supports to maintain tension. Keep the lath from bowing while you position it, and recheck frequently as you go. Take your time and adjust steadily to avoid surprises once plaster goes on.
Key takeaways
- Inspect lath for warp, flex, and corrosion before shimming and tensioning work.
- Use shim packs to correct high spots without overloading studs.
- Check straightedge contact along length; adjust tension for even bite.
- Install temporary battens and level lines before scratch coat prep.
- Substrate prep: clean dust, rewet, and key surface for plaster adhesion.
- Safety: wear eye protection and respirator; lath work can cause injury.
Table of Contents
- Introduction
- Key takeaways
- Why Leveling Lath Matters for a Durable, Flat Plaster Finish
- Tools and Materials Checklist
- Diagnosing the Causes and Patterns of Wavy Lath
- Shimming Techniques for Flattening Lath
- Tensioning Lath and Fastening Strategies
- Straightedge Control, Battens, and Setting Screeds
- Preparing Substrates Before the Scratch Coat
- Plastering Workflow to Preserve Level (Scratch, Brown, Finish)
- Conclusion
- FAQ
Why Leveling Lath Matters for a Durable, Flat Plaster Finish
A flat lath surface helps plaster adhere evenly and perform as intended. Irregularities can show up as waviness or cracking if the substrate moves. Distinguish between cosmetic waviness and structural issues that require a larger repair scope.
Assess acceptable surface irregularity by comparing to adjacent areas and following manufacturer instructions or local guidelines. Use the lath as the baseline for the plaster system, not just what looks flat at a glance.
Finish-quality impacts
Small lath irregularities can cause big problems down the line. Even slight waviness creates shadow lines, making your plaster look like a topographical map instead of a smooth finish.
Cracking is another issue. When plaster dries over uneven surfaces, it shrinks and pulls away from the lath. This leaves gaps that collect dust and moisture, leading to cracks.
Uneven skim coats are also a problem. If your lath isn’t flat, you’ll end up with some areas too thick or too thin. Thick spots take longer to dry and can crack. Thin spots don’t provide enough coverage and may show the lath through the plaster.
Early correction saves time. Fixing these issues before you start plastering is much easier than trying to repair them later.
Structural vs. cosmetic defects
Not all lath problems are created equal. Some can be fixed with shimming or tensioning, while others require more extensive work.
Cosmetic defects are surface issues like small bumps or dips. These can usually be repaired by shimming the lath back into place or using tension to pull it flat.
Structural defects, on the other hand, are serious problems that affect the integrity of your wall. These include large gaps between lath strips, warped or twisted lath, or lath attached to a bowed stud. If you find these issues, you’ll need to replace or repair the framing before proceeding.
Here’s how to tell the difference: cosmetic defects are usually small and localized. Structural defects are large, widespread, or affect the overall shape of your wall. If in doubt, consult a professional.
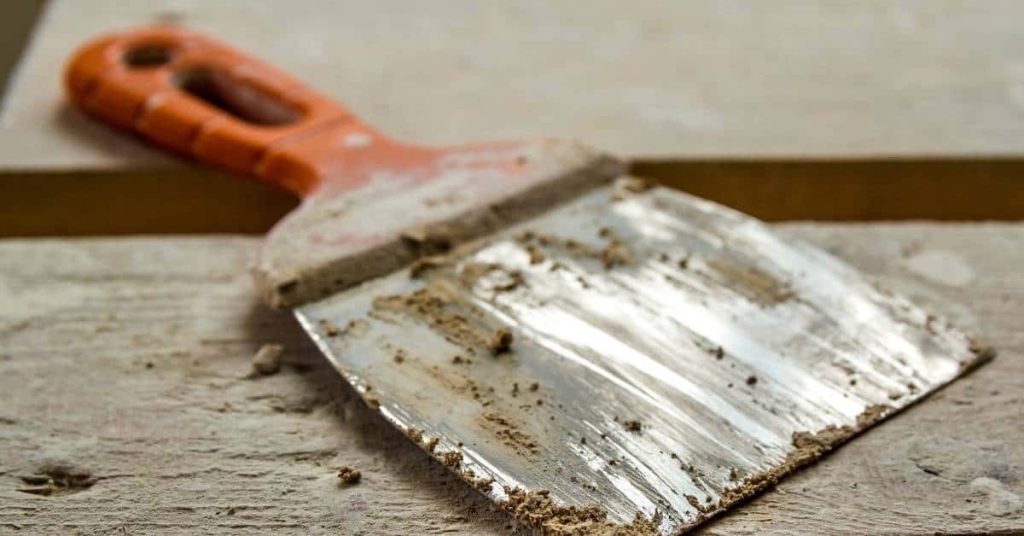
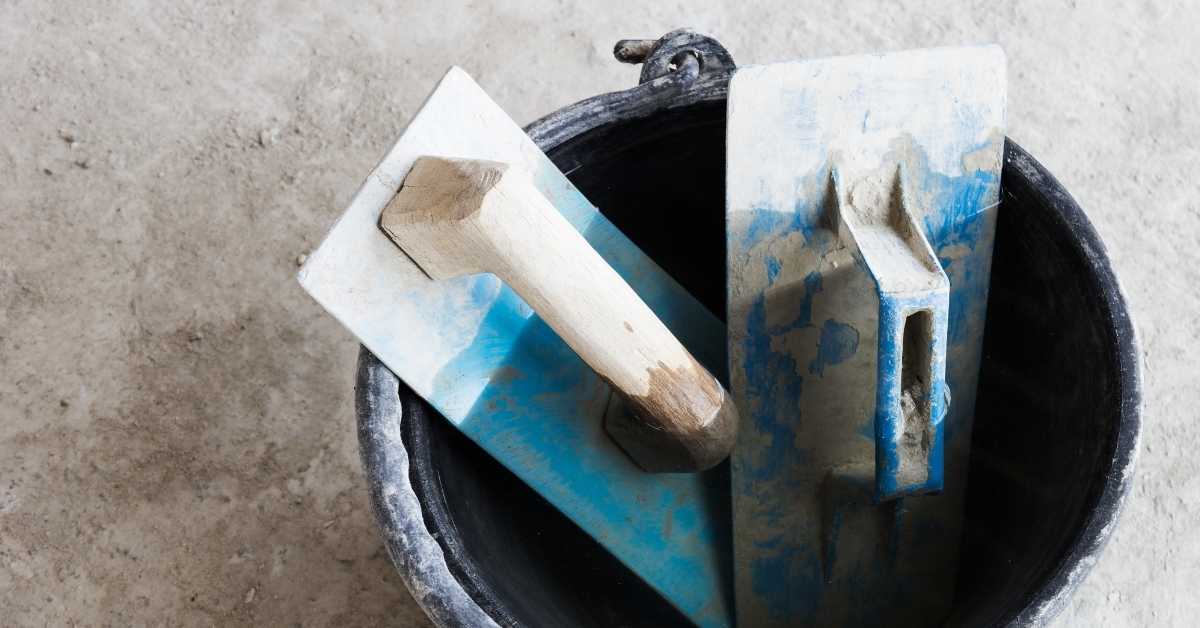
Tools and Materials Checklist
Gather a basic set of tools for leveling lath, plus fasteners, shims, and bonding supplies. Identify items that are optional or considered trade-level depending on scope. Always verify compatibility with the lath type and plaster system before purchase.
Check product labels, datasheets, and manufacturer recommendations to confirm suitable use. Keep a simple kit on site with spare shims, wedges, and a straightedge handy for quick checks.
Essential tools
Before you start leveling, make sure you have these tools on hand. They’ll help you work efficiently and accurately.
- Straightedge: 6′ or 8′ level for checking lath alignment. Without it, you won’t know if your lath is truly straight.
- Plumb bob or laser level: To ensure vertical lines and prevent wavy walls.
- Screwgun (cordless): For driving screws into lath quickly and easily. Manual screwdrivers are a pain.
- Tape measure: Measure distances to keep your lath evenly spaced.
- Pencil: Mark lines for cutting and positioning lath.
- Circular saw: Cut lath to size. A handsaw takes too long.
- Chalk line: Snap straight lines for accurate cuts and lath placement.
- Hammer: Tap down any raised nails or screws before plastering.
Quick rule: Don’t skimp on tools. Good tools make the job faster and better.
Shims, fasteners, and lath materials
Choose the right shims, fasteners, and lath for a solid base under your plaster.
- Wood or metal lath: Choose based on your wall type. Wood is cheaper but less durable; metal is stronger but more expensive.
- Shims (wood or plastic): Use to level lath. Wood shims are stronger, plastic ones are easier to cut.
- Galvanized nails or screws: Fasten lath to studs. Galvanized resists rust; choose based on your wall type.
- Adhesive (if using metal lath): Apply before plastering for better adhesion and reduced cracking.
Quick rule: Match materials to your wall type. The wrong combo can cause cracks or weak spots in your plaster.
PPE and site-prep supplies
Safety first! Here’s what you need to protect yourself and prepare the site.
- Work gloves: Protect your hands from cuts and splinters.
- Ear protection: Use when using power tools like saws or screwguns.
- Eye protection: Goggles or safety glasses to protect your eyes from debris.
- Dust mask: Wear when sanding or cutting to avoid inhaling dust.
- Temporary blocking: Support lath while you’re working, preventing warping.
- Adhesive tape: Mark lines and protect surfaces from damage.
- Cleaning supplies (rags, soap): Clean up spills or messes to keep the site safe.
Quick rule: Don’t start work without PPE. Safety first, then productivity.
Diagnosing the Causes and Patterns of Wavy Lath
Start with a systematic inspection to spot warped lath, loose fasteners, framing movement, or moisture damage. Look for consistent undulations versus isolated high spots. Note how each pattern might point to a specific fix or combination of fixes.
Check studs, joist spacing, and existing plaster attachments as part of the diagnosis. Record observations so you can plan targeted repairs rather than guesswork.
Localized vs. continuous waviness
When inspecting your lath, look for two types of wave patterns: localized and continuous.
Localized waves are isolated bumps or dips in the lath. These are often caused by individual nails or screws that have come loose, or minor framing issues at specific points.
Continuous waves, on the other hand, run along the length of the lath. This could indicate a problem with the joist spacing, warped lath, or structural movement in the framing.
Signs of fastening or framing failure
Check your lath for any signs of failing fasteners or framing issues. Here’s what to look for:
Loose nails or screws will cause the lath to sag or buckle at those points. You might see them sticking out or feel give when you press on the lath.
Popped fasteners are easy to spot – they’ve pulled through the lath and may be sticking out. This indicates a serious issue with the framing behind it.
Stud movement can cause waves in the lath. Tap on the studs with a hammer; if they feel soft or give way, there’s likely a problem with the framing that needs attention before you proceed.
Moisture and corrosion indicators
Moisture and rust can cause lath to warp or fasteners to fail. Here’s how to spot these issues:
Warped lath will have a wavy appearance, often with visible cupping or twisting. It may also feel soft or spongy to the touch.
Rust on nails or screws indicates moisture has been present. Look for red or orange discoloration around fasteners. If you see this, check nearby framing and insulation for signs of water damage.
If you find any of these issues, it’s important to address them before proceeding with plastering. Moisture problems won’t fix themselves and can lead to further damage down the line.
Shimming Techniques for Flattening Lath
Present a practical approach to selecting shim materials and placing them to create stable, even support. Focus on avoiding high spots or ridges that damage the plaster bond. Ensure shims do not overcompress or shift during work.
Use patterns that maintain level lines across studs or battens and adapt to existing lath edges. Always verify shim compatibility with the substrate and plaster system per product instructions.
Choosing the right shim material
The choice of shim material directly impacts your lath’s flatness and longevity. Here are your options:
- Plastic Shims: Lightweight, easy to cut, and cheap. They’re great for temporary support during construction but not durable enough for long-term use.
- Composite Shims: Stronger than plastic, they offer better durability. Look for those with high density and moisture resistance. They’re mid-range in price.
- Wooden Shims: Traditional choice, but avoid them due to their susceptibility to rot and warping. Only use if no other option is available.
- Metal Shims: Durable and long-lasting, they’re ideal for permanent support. However, they can rust over time and are more expensive than other options.
- Concrete Shims: Highly durable and strong, perfect for heavy loads. They’re pricey but offer excellent value in the long run.
Pro tip: When buying shims, check product labels for compatibility with your plaster system. Always store them properly to maintain their quality and longevity.
Shim placement and layering
When shimming your lath, you want to avoid any abrupt transitions. Here’s how:
First, check base compaction. If it’s not flat, no amount of shimming will help.
Now, place your shims between studs and lath, not on top of them. This spreads the support evenly.
Start with thin shims (<0.5mm-1mm) near the low spots. Build up gradually, using thicker shims (up to 3mm) as needed. This creates a smooth transition.
Preventing over-shimming and tapering edges
You’ve learned about shim materials and placement. Now, let’s ensure your lath is flat without overdoing it or creating odd transitions.
Over-shimming can lead to weak spots in your plaster. So, check base compaction first. If it’s solid, use thin shims (1/8″ – 1/4″) and layer them sparingly.
To avoid reverse bumps, don’t shim too thick in one spot then taper off quickly. Instead, feather your shims. Start with thin shims at the low point, gradually increasing thickness as you move up to create a smooth transition.
Remember, less is more here. It’s easier to add more shims if needed than it is to remove them. So, take your time and check your work often with a level or straight edge.
Tensioning Lath and Fastening Strategies
Cover methods to re-tension and secure lath, including temporary pulls and additional fasteners. Differentiate between wood and metal lath practices and adjust accordingly. Include guidance on when to use temporary anchors versus a more permanent fix.
When in doubt, check the applicable manufacturer guidance or local codes for structural ties and fastener spacing. Plan for a secure, durable attachment that respects the overall frame and lath plan.
Temporary tensioning methods
Before permanent fastening, temporarily draw lath tight using non-destructive methods. This helps flatten wavy lath and ensures a solid base for plaster.
For metal lath: Use temporary wire ties or clamps to pull sections taut. Stretch wires between screws, then twist tightly with pliers.
For wood lath: Drive temporary nails diagonally across wavy areas. This pulls the lath flat temporarily while you prepare for permanent fastening.
Refastening patterns and techniques
To eliminate movement without deforming lath, follow these refastening strategies. Start by checking local codes or manufacturer guidelines for recommended spacing.
General approach: Add screws or nails in a staggered pattern, offset from existing fasteners. This distributes stress evenly and prevents over-tightening.
For metal lath, use self-drilling screws with large heads to grip the wire mesh securely. For wood lath, use ring-shank nails or screws designed for lath applications.
Metal vs. wood lath considerations
Understand the differences in behavior and fastening methods between metal and wood lath to achieve the best results when leveling wavy surfaces.
Metal lath: More rigid, less prone to warping but can dent or deform under excessive tension. Fasten with self-drilling screws designed for metal lath, spacing according to manufacturer guidelines.
Wood lath: Softer and more flexible, allowing for easier adjustments but susceptible to warping or splitting if not properly supported. Use ring-shank nails or lath-specific screws, spacing appropriately based on local codes or manufacturer recommendations.
Straightedge Control, Battens, and Setting Screeds
Explain how to use long straightedges, screed battens, and wigs to establish consistent reference lines. Focus on transferring level from one area to another without introducing twist. Create temporary guides that survive the scratch coat stage.
Discuss methods to avoid drift during setup and maintain true references across walls or ceilings. Verify your references against a reliable level source before sealing in the scratch line.
Choosing straightedge length and stiffness
A rigid, straight edge is crucial for leveling wavy lath. Use a straight, true 2×4 or buy a purpose-made straightedge.
The longer the straightedge, the better it’ll reveal hollows and high spots. But too long can be unwieldy. Aim for 8 to 10 feet for most walls.
Check your straightedge by laying it on a known level surface. If it’s true, use it. If not, find another or fix this one.
Installing and locking screed battens
Screed battens set your plaster’s thickness. Place them along the wall, even with your target finish level.
Use a spirit level to ensure they’re plumb and level. Space them every 12 to 16 inches for support.
Secure battens with screws or nails, driving them through pilot holes to prevent splitting. Use washers if needed. Make sure they won’t move during plastering.
Checking for twist, bow, and crown
Before using battens or straightedges, check them for defects. Twist, bow, or crown can ruin your leveling.
To check for twist, lay the batten on a flat surface. If it rocks, it’s twisted. Straighten it if possible, or replace it.
To check for bow, hold the batten up to light. A bow will cast a shadow. Straighten or replace as needed.
For crown, lay the batten on two supports. If it’s not level, it has crown. Fix or replace.
Preparing Substrates Before the Scratch Coat
Detail cleaning steps, removing loose material, and addressing rust or corrosion. Prepare keys and bonding surfaces so the scratch coat adheres properly. Clarify when bonding agents or wetting are necessary according to product instructions.
Explain scenarios where bonding agents are unnecessary and emphasize following label directions. Ensure every surface is ready to receive the next coat with a solid mechanical or chemical bond.
Cleaning and Rust Prevention
Before applying the scratch coat, your lath needs a clean slate. Remove any debris, dust, or dirt with a stiff brush or broom.
Rust is your enemy here. If you’ve got corroded metal lath, treat it with a rust converter first. This turns rust into a paintable surface. If it’s badly rusted, isolate the affected area and replace it.
For wooden lath, ensure there are no signs of rot or damage. Treat any issues before proceeding.
Creating a Proper Key and Back-Blocking
The ‘key’ is what helps your plaster stick. Use a stiff brush to score the lath, creating grooves for the scratch coat to grip.
Back-blocking fills hollows in the wall. Mix up some joint compound or plaster, apply it thickly where needed, and let it set. This gives you a flat surface to work with.
Be careful not to over-apply. You don’t want excess material crumbling off later.
Once set, lightly sand any high spots to create a smooth base for your scratch coat.
Wetting, Bonding Agents, and Compatibility
Pre-wetting lath helps prevent the plaster from drawing too much water out of it initially. This can cause cracking later on. Soak your lath with a fine mist before applying the scratch coat.
Bonding agents create a chemical bond between the lath and the plaster. Use them when you’re unsure about adhesion, like when using new or different materials. Always check manufacturer guidance for compatibility.
Follow instructions to the letter. Too much bonding agent can cause delamination, too little won’t work at all.
Plastering Workflow to Preserve Level (Scratch, Brown, Finish)
Lay out an efficient sequence for applying scratch and brown coats that preserves screed lines and straightedge references. Plan work in manageable panels to maintain consistency. Coordinate timing considerations with the crew for smooth transitions.
Communicate layout and expectations clearly to the team so references stay intact during the finish work. Use the established references to guide the final plaster pass without drifting from the plan.
Using screeds during the scratch coat
The first step in our plastering workflow is applying the scratch coat. Here’s how to use your screeds to ensure a flat, level surface:
Strike the scratch coat directly onto the established screed lines. This locks in the flatness you’ve already set with your screeds and battens.
Tip: Work in manageable panels to keep the plaster from setting too quickly. Start at one end of the wall and work your way across.
Maintaining lines through the brown coat
Now that you’ve applied the scratch coat, it’s time for the brown coat. Here’s how to keep your walls true to the screeds:
Before applying the brown coat, check your straightedges against the screed lines. Make any necessary adjustments or touch-ups.
Apply the brown coat in thin layers, working from top to bottom. Use your straightedge to strike off excess plaster and maintain a smooth, level surface.
Finishing touches and final flattening
With the brown coat applied, it’s time for the final finishing touches. Here’s how to remove minor irregularities without exposing lath:
Use a straightedge to check for any high or low spots. Sand down any high areas with a fine-grit sandpaper.
For light skimming, apply a thin layer of plaster over the brown coat using your straightedge to strike off excess material and maintain a smooth surface. Allow this final layer to dry completely before sanding lightly to remove any remaining imperfections.
Conclusion
Getting the lath truly level is the difference between a durable, flat plaster finish and a repeat of the same problems down the line. Do it right, and you set the project up for safety, fewer callbacks, and a cleaner look that lasts.
Make it happen by checking the lath with a straightedge, shimming high spots, tensioning and fastening solidly, laying in battens and screeds, and preparing the substrate before the scratch coat. Move in a practical order, verify as you go, and keep the workflow of the scratch, brown, and finish coats in hand so the level stays true through each stage. Always test a small area first to confirm your adjustments before committing to the whole wall.
Avoid common mistakes: don’t over-tighten fasteners or rely on a single spot to declare level, don’t skip diagnosing the underlying causes of waviness, and never plaster over a suspect surface without stabilizing it. Safety first means eye protection, dust control, and working at a steady pace—if something won’t stay true after several tries, stop and recheck your method rather than forcing it. If you’re unsure about stubborn waviness, or the wall shows signs of movement or significant structure issues, it’s wise to call a professional rather than risk costly mistakes.
When to bring in help is clear: if lath movement continues after shimming and tensioning, if you’re unsure about battens, screeds, or substrate prep, or you’re facing a large area. Otherwise, use the steps here as your guide, stay deliberate, and finish with a level, straight, and solid base for plastering—a job you can be proud of and that will stand the test of time.
FAQ
What should I look for before shimming or tensioning to fix wavy lath?
Check for obvious bends, gaps, and loose lath. Mark high and low spots with a straightedge, then plan shims or re-fastening where the lath floats or sags. If you see corrosion or damaged lath, replace that section rather than patch it.
Can I rely on bags of shims to flatten the wall, or do I need other methods?
Shims are useful for small adjustments, but they must be secure and evenly supported. Don’t stack shims in one spot or create hard points. For significant warping, you may need to re-secure or replace lath sections and use proper fasteners per manufacturer guidance.
What’s the simplest way to test for a flat plane after shimming and tensioning?
Run a straightedge across the surface in multiple directions and check for high and low spots. If you see more than a light deviation, recheck fasteners, tension, and any batten setup before you proceed. Always verify with a fresh pass after any adjustment.
What should I do if the lath still isn’t flat after all adjustments?
Stop and reassess the substrate. Look at plaster-key surfaces, ensure batten spacing is correct, and confirm there are no hidden fastener gaps. If in doubt, consult the plaster manufacturer’s instructions or local guidance before proceeding.