Search Results for: markers

Precast concrete beams covered with snow outdoors

Fiber Reinforced Concrete for Small Projects: Poly vs Glass vs Steel Fibers Compared

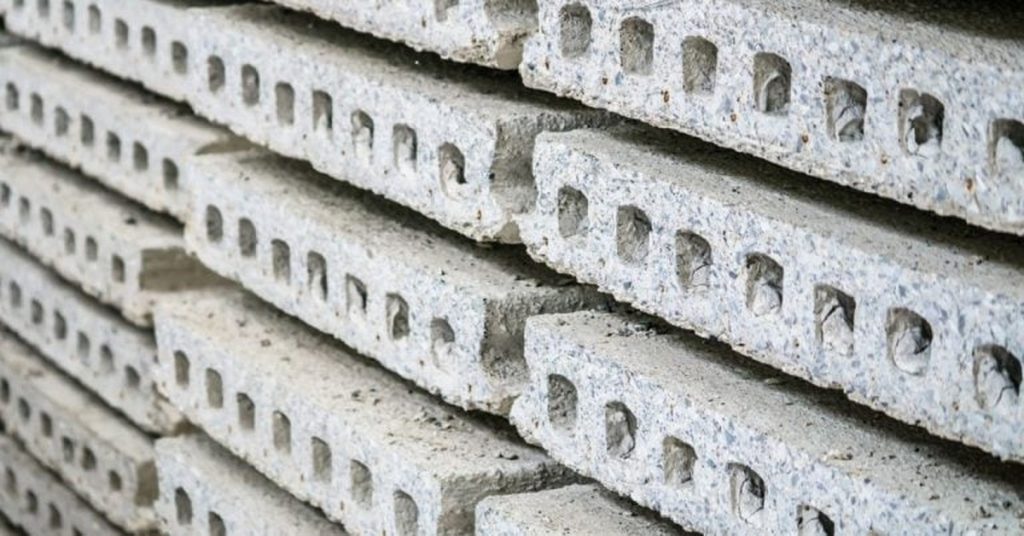
Introduction Fiber reinforced concrete for small projects is concrete mixed with short fibers—polypropylene, glass, or steel—added to improve crack control and toughness; think of them as a distributed reinforcement choice rather than a substitute for rebar when needed. For a DIYer, the choice depends on the job: polypropylene is economical and helps plastic shrinkage, glass […]

Fiber Reinforced Concrete for Small Projects: Poly vs Glass vs Steel Fibers Compared Read More »

cutting concrete board with small knife and yellow level

Concrete Joint Layout Around Columns and Corners: Cutting Random Cracks Off at the Pass

Introduction Concrete joint layout around columns and corners is the planned pattern of control joints and cuts that guide where concrete cracks, keeping them neat and out of the way of structural elements. In plain jobsite terms, it means thinking through where joints go before you pour so columns and corners aren’t left with random,

Concrete Joint Layout Around Columns and Corners: Cutting Random Cracks Off at the Pass Read More »

Concrete driveway with brick border and green grass lawn

How to Create a Two-Tone Concrete Border: A Step-by-Step Timeline

Introduction Creating a two-tone concrete border involves careful planning and precise execution. Understanding the timeline is crucial for ensuring a successful outcome. This guide walks you through each step, from preparation to sealing, with an emphasis on how long each task takes, helping you plan your project efficiently. For the full guide, see How to

How to Create a Two-Tone Concrete Border: A Step-by-Step Timeline Read More »

Concrete surface with visible spalling and surface damage

Concrete Scaling From De-Icers: A Step-by-Step Timeline for Diagnosis and Repair

Introduction Discovering concrete scaling from de-icers can be disheartening, but with a systematic approach, you can restore your surfaces in no time. This step-by-step timeline guide walks you through diagnosing salt damage and repairing your concrete efficiently. Understanding the duration of each stage helps you plan your project effectively and ensures you don’t miss any

Concrete Scaling From De-Icers: A Step-by-Step Timeline for Diagnosis and Repair Read More »

Stacked hollow core concrete slabs close up

Vapor Barriers Under Slabs: Timeline & Duration for Installation and Patching

Introduction The installation of a vapor barrier under your concrete slab is a critical step that requires careful planning. Understanding the timeline and duration of each stage can help you manage expectations, allocate resources effectively, and ensure a successful outcome. In this guide, we’ll break down the process into clear, time-specific steps, helping you estimate

Vapor Barriers Under Slabs: Timeline & Duration for Installation and Patching Read More »

Worker measuring drywall with tape measure on wall

Drywall Fasteners Over Steel Studs: Screw Types, Spacing, and Stripping Avoidance

Introduction Drywall fasteners over steel studs are screws used to attach drywall to metal framing. They’re the fasteners you drive with a screwdriver or drill to secure gypsum to metal studs. Follow the screw manufacturer instructions and local rules for type and installation, and check the packaging label for compatibility with steel studs. To avoid

Drywall Fasteners Over Steel Studs: Screw Types, Spacing, and Stripping Avoidance Read More »

Crack running along wall and ceiling corner

Plaster Crack Monitoring: Simple Marking and Timing So You Don’t Patch Moving Cracks

Introduction Plaster crack monitoring is watching cracks to see if they move over time before deciding to patch. Mark the crack and check it again after a short period to see if the gap changed. Keep the marks simple and document any movement by noting the crack’s location and new markings, then compare to prior

Plaster Crack Monitoring: Simple Marking and Timing So You Don’t Patch Moving Cracks Read More »

Person using tool to install wooden click-lock flooring plank

Replacing a Single Damaged Plank in Click-Lock Flooring: Two Methods Without Replacing the Whole Row

Introduction Replacing a single damaged plank in click-lock flooring means swapping one bad board without pulling out the entire row. It’s a practical, hands-on fix you can do without tearing out a whole run. You’ll want to check that the replacement plank matches the profile and thickness before you start. One method is to loosen

Replacing a Single Damaged Plank in Click-Lock Flooring: Two Methods Without Replacing the Whole Row Read More »