
Introduction
Sealing grout helps protect the grout from water and stains by creating a barrier on the surface. It’s most useful in moisture-prone areas, but it isn’t a guarantee against every spill or stain. If you’re unsure, check the sealer’s instructions to see what it covers and how long it lasts.
Sealants come in different types, and choosing one depends on where the grout is in contact with water and wear. To apply, you typically clean and dry the grout, apply following the product’s directions, and let it cure before use. Re-sealing frequency varies; look at the label or manufacturer guidance and adjust based on wear and cleaning habits.
Key takeaways
- Sealing grout reduces staining in wet zones, but not a fix-all; plan maintenance.
- Choose the right sealer type for cementitious grout; check label for compatibility.
- Apply with clean, dry grout, using recommended tools and follow manufacturer instructions.
- Reapply as grout ages or when grout shows new stains; timing varies.
- Use protective gear and ventilation; avoid sealer fumes in enclosed spaces.
- Sealed grout can help with cleaning ease but costs and labor.
Table of Contents
- Introduction
- Key takeaways
- Why Seal Grout? Benefits and Realistic Expectations
- Types of Grout Sealers and How They Differ
- When Sealing Helps Most — Ideal Scenarios
- When Sealing Provides Little Value or Is Unnecessary
- Step-by-Step Application: Tools, Prep, and Techniques
- Maintenance, Reapplication Frequency, and Timing
- Common Problems, Mistakes, and Troubleshooting
- Comparing Sealed Vs Unsealed Grout — Performance and Costs
- Conclusion
- FAQ
Why Seal Grout? Benefits and Realistic Expectations
Sealing grout adds a layer of protection against stains, spills, and moisture. It helps keep grout looking cleaner longer with less scrubbing in between cleanings. The main idea is to slow down staining and water intrusion while preserving color and texture.
But sealers are not miracle workers. They won’t fix structural cracks or restore badly deteriorated grout, and they wear at different rates based on use and location. You’ll find options range from penetrating to film-forming types, chosen by porosity and where the grout lives (floor, shower, indoors, outdoors).
Primary benefits
Sealing grout is like giving it a protective coat. It’s your first line of defense against everyday wear and tear.
Stain Resistance: Sealers fill in the microscopic pores in grout, preventing dirt, grime, and stains from penetrating. This is especially useful in high-traffic areas like kitchens and showers where spills happen often.
Easier Cleaning: With a sealer on, you can wipe away dirt with just water or mild cleaner. No more scrubbing your grout lines raw!
Moisture Management: Sealers help keep moisture out, preventing mold and mildew growth. This is crucial in damp areas like bathrooms and laundry rooms.
What sealing won’t fix
Sealers are great, but they’re not magic wands. They can’t fix every grout issue.
Damaged Grout: If your grout is cracked, crumbling, or missing chunks, sealing won’t help. You’ll need to repair or regrout those areas first.
Improperly Cured Grout: Freshly laid grout needs time to cure (harden) before sealing. Sealing too soon can trap moisture and cause more harm than good.
Structural Issues: Sealers won’t fix structural cracks or other major problems. If you’ve got big issues, you’ll need professional help.

Types of Grout Sealers and How They Differ
The three main categories are penetrating sealers, topical sealers, and hybrids. Penetrating formulas soak in and protect from within, while topical sealers form a surface film. Hybrids blend both approaches for a mix of protection and appearance change.
Expect differences in durability, water and stain resistance, breathability, and how they affect the grout’s look. Some will darken or gloss the grout slightly, while others keep a more natural matte appearance. Match the choice to indoor versus outdoor use, traffic, and grout type, then follow the substrate and curing guidelines on the label.
Penetrating vs Topical Sealers
Sealers fall into two main categories: penetrating and topical. Each works differently, so let’s dive in.
Penetrating Sealers (Silane/Siloxane): These work below the surface. They’re absorbed by the grout, filling microscopic pores. Pros? No film on top, so no risk of peeling or discoloration. Cons? Can’t be seen, so you won’t know if it’s working. Also, not great for topical stains.
Topical Sealers (Acrylic/Urethane): These create a protective film on top. Pros? Easy to see, touch, and reapply. Cons? Film can peel or discolor over time. Not ideal for wet areas as water may get trapped underneath.
Specialty Sealers and Additives
Sometimes, you need more than just a basic sealer. That’s where specialty products come in.
Stain-Resistant Enhancers: These are added to the grout mix or applied as a sealer. They help prevent stains from setting in. Worth it if you’ve got kids or pets.
Mildew-Resistant Formulas: Ideal for bathrooms and other damp areas. They inhibit mildew growth. A must if you’re prone to mold.
Color Enhancers: These add a bit of color to your grout, making it look more uniform. Worth considering if you want a consistent look throughout your space.
When Sealing Helps Most — Ideal Scenarios
Ideal scenarios include porous grout in high-traffic or moisture-prone areas, where easier cleaning is a real benefit. Exterior grout or showers tend to benefit from repellency and reduced water marks. Areas near oil or food splatter can show cleaner grout with proper sealing.
Understand how porosity, grout type, and sealer form influence performance in each case. Use criteria like stain presence, mold risk, and how easily grout cleans to decide if sealing adds value beyond routine maintenance.
New grout and recently installed tiles
Sealing new grout is crucial in the first few weeks after installation. Here’s why:
Protects against early-life stains: New grout is porous, making it susceptible to stains from dirt, spills, or cleaning products.
Timing is key: Seal once the grout has fully cured, usually after 72 hours. This ensures the sealer penetrates deep into the grout and doesn’t just sit on top.
How to tell if it’s time? Perform a simple water test: Sprinkle water onto the grout. If it darkens and absorbs, wait a few more days before sealing.
High-risk zones and materials
Certain environments and grout types require sealing to prevent issues like staining, cracking, or mold growth.
- Exterior surfaces: Exposed to weathering, temperature changes, and moisture. Use epoxy grout, seal with an impregnating sealer, and reapply every 2-3 years.
- High-traffic areas (kitchens, entryways): Prone to dirt, scuffs, and stains. Opt for unsanded, cementitious grout and seal with a film-forming sealer for easy cleaning.
- Shower walls & floors: Constant moisture exposure can lead to mold growth. Use unsanded, epoxy grout, seal with an impregnating sealer, and reapply every 1-2 years.
- Grout near oil/food splatter (kitchen backsplashes): Susceptible to staining. Opt for epoxy grout, seal with a film-forming sealer, and clean spills promptly.
- Areas exposed to chemicals (labs, workshops): Can cause discoloration or damage. Use epoxy grout, seal with an impregnating sealer, and ensure proper ventilation during application.
When Sealing Provides Little Value or Is Unnecessary
Sealing is less valuable where epoxy grout already provides a non-porous surface or in very low-traffic spaces. If grout is going to be regrouted or repaired soon, sealing may not be worth the effort or cost. In dense porcelain or highly sealed substrates, the benefit can be minimal.
Evaluate grout condition first: if it’s crumbly, cracked, or poorly adhered, address those issues before considering a sealer. In some cases, routine cleaning without sealing may be sufficient.
Alternatives to sealing
If your grout doesn’t need sealing, consider these alternatives:
Regrouting: If your grout is crumbly or poorly adhered, it’s best to replace it. This ensures a solid base for your tiles.
Switching to epoxy grout: Epoxy grout is naturally non-porous and durable. It might be worth considering if you’re planning a new installation.
Improved cleaning regimens: Even non-porous grout can benefit from routine cleaning. A good scrub every few months should suffice, without the need for sealing.
Cost vs benefit considerations
Before you seal, weigh these factors:
Product cost: Sealers vary in price. Consider if the upfront cost is worth it for your situation.
Labor cost: If you’re hiring a professional, their labor adds to the total cost. Is sealing worth the extra expense?
Expected lifespan and performance: How long will the sealer last? Will it significantly reduce maintenance in your specific environment? Consider these before making a decision.
Step-by-Step Application: Tools, Prep, and Techniques
Clean thoroughly and verify the grout is dry before applying any sealer. Avoid trapping moisture during the process by ensuring a complete dry-down after cleaning.
Mask adjacent surfaces as needed and protect edges. Choose the right sealer for porosity and follow the label’s temperature and ventilation guidance to avoid issues.
Step-by-Step Process
The following is a clear, numbered sequence of practical steps for applying grout sealer. It starts with preparation and safety checks, then moves on to the main work, and finishes with cleanup or final checks.
- Clean and dry the grout surface: Use a cleaner suitable for your grout type to remove dirt, stains, and haze. Ensure it’s completely dry before sealing (at least 72 hours).
- Mask off areas: Protect adjacent surfaces using painter’s tape and plastic sheets. Seal edges with a thin bead of sealer to prevent bleeding.
- Choose your sealer: Select a compatible sealer based on grout type, temperature, and humidity conditions. Follow the manufacturer’s instructions for application and number of coats.
- Apply the sealer: Use a brush, applicator bottle, or roller to apply the sealer evenly across the grout lines. Work in small sections (2-3 ft at a time) to avoid streaking or pooling.
- Cure and inspect: Allow the sealer to cure according to the manufacturer’s instructions. Inspect your work for any missed spots or areas that need touch-up.
Tools and materials checklist
Use this checklist before starting your grout sealing project to ensure you have everything needed.
- Grout cleaner: Removes dirt, stains, and haze. Skipping this can lead to poor sealer adhesion.
- Scrub brush: Helps agitate the cleaner into the grout lines for thorough cleaning.
- Applicator bottle/brush: For even application of sealer. A brush is useful for edges and tight spaces, while a bottle is better for larger areas.
- Microfiber cloths: Helps remove excess sealer and clean up spills.
- Gloves: Protects hands from chemicals in the cleaner and sealer.
- Respirator (if needed): Some sealers have strong fumes. A respirator ensures safe breathing during application.
- Painter’s tape: Protects adjacent surfaces from sealer overspray or bleeding.
- Plastic sheets: Covers large areas to protect them from sealer.
Quick rule: Always check and double-check your materials before starting. Missing something can lead to poor results or wasted time.
Proper application technique
The method of applying grout sealer depends on the type of sealer and the size of the area. Here are some general guidelines:
For penetrating sealers, use a brush or applicator bottle to apply a thin, even coat. Work in small sections, allowing the sealer to dwell for the recommended time (usually 15-30 minutes) before removing excess with a damp cloth. Allow it to cure according to the manufacturer’s instructions.
For film-forming sealers, use a roller or brush to apply a thin, even coat. Work in small sections, allowing the sealer to dwell for the recommended time (usually 5-10 minutes) before removing excess with a damp cloth. Allow it to cure according to the manufacturer’s instructions.
Regardless of sealer type, always follow the manufacturer’s guidelines for the number of coats and drying times between coats. Ensure proper ventilation during application and curing to avoid inhaling fumes.
Maintenance, Reapplication Frequency, and Timing
Re sealing intervals vary by sealer type and how the space is used. Penetrating sealers generally require longer intervals than film-forming products, with timing influenced by traffic and moisture exposure. Use guidelines from the product label to set a plan.
Look for signs like increased staining or water absorption as cues to reseal. Seasonal timing and proper curing conditions help ensure the best results for ongoing protection.
Simple tests to check seal effectiveness
To ensure your grout sealer is still doing its job, perform these simple tests:
Water Bead Test: Sprinkle a few drops of water on the grout. If they bead up and don’t absorb, your sealer’s working fine.
Dye Test: Apply a small amount of food coloring or dye to a hidden area. If it doesn’t penetrate, your sealer’s protecting against stains too.
Recommended reapplication intervals
Resealing frequency depends on the type of sealer and traffic:
Penetrating Sealers (1-3 years): These soak into grout. Reapply every 1 to 3 years, depending on foot traffic.
Film-Forming Sealers (6 months – 2 years): These sit on top of grout. Reapply every 6 months to 2 years, based on usage and wear.
Accelerating Factors: High foot traffic, moisture, and cleaning products can speed up sealer breakdown, requiring more frequent reapplication.
Common Problems, Mistakes, and Troubleshooting
Common mistakes include sealing dirty grout, applying sealer over haze, sealing before grout cures, or applying thick coats that trap moisture. These missteps lead to uneven results or a cloudy film.
When problems appear, use diagnostics to identify causes and remedies. Reread product instructions and run small tests before reworking larger areas to avoid repeating errors.
Fixing application issues
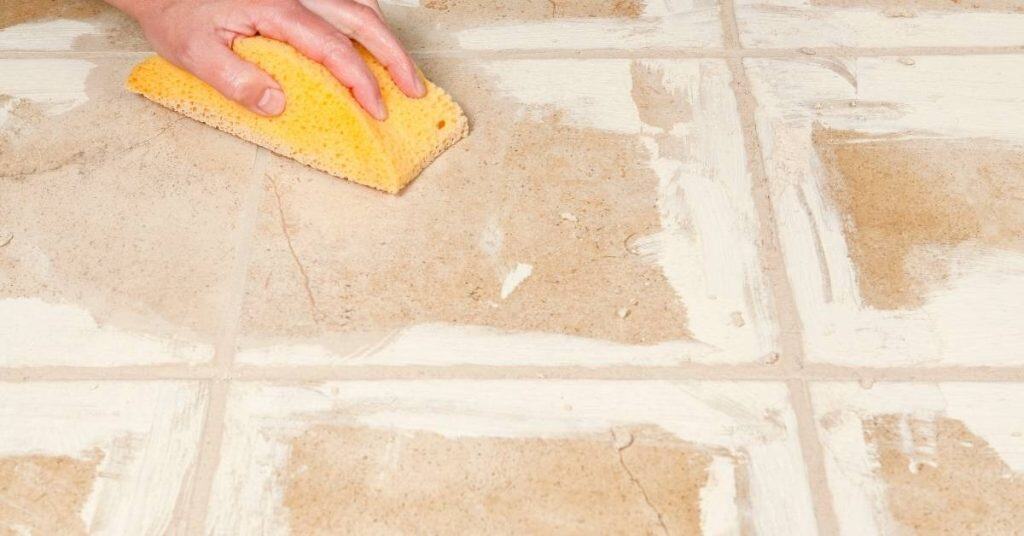
If you’ve applied too much sealer, don’t panic. Use a damp cloth to wipe off excess while it’s still wet. For residue or haze, use a grout buffer with light pressure and circular motions.
Important: If the sealer has cured, you’ll need to strip it before reapplying. Use a stripper solution and follow manufacturer’s instructions. If in doubt, consult a pro.
For migratory staining or uneven sheen, lightly sand the area with fine-grit sandpaper, wipe clean, and reapply sealer. For orange-peel texture, lightly sand, clean, and apply a thin, even second coat.
Health and safety precautions
Ventilation is key when sealing grout. Open windows and use fans to keep the area well-ventilated. Wear gloves, eye protection, and a respirator for solvent-based sealers.
Safety first: Never smoke or use open flames near solvents. Dispose of rags and containers safely according to local regulations.
Always follow manufacturer’s safety guidelines on the product label. If you’re unsure about any aspect, consult a professional before proceeding.
Comparing Sealed Vs Unsealed Grout — Performance and Costs
Sealed grout behaves differently in daily use, especially in how it cleans and resists stains. Unsealed grout tends to require more frequent scrubbing and can show moisture marks sooner. Expect visible and practical differences in upkeep over time.
Use a simple framework to weigh upfront costs against long term maintenance. Consider room conditions, porosity, and traffic to decide if sealing makes sense for your space.
Long-term cost considerations
Sealing grout isn’t just about upfront costs. It’s also about what you save over time.
Upfront: Sealer purchase and application can add $0.50 to $2 per square foot, but prep work like cleaning and repairing cracks is the same for both sealed and unsealed grout.
Long-term: Sealed grout resists stains better, so you’ll spend less time and money on cleaning. It also lasts longer before needing replacement, saving you regrouting costs every few years. Estimate your savings by comparing your local sealer prices with the cost of specialized cleaners and regrouting.
For example, if you have 100 sq ft of tile, sealing might add $50-$200 upfront. But if it extends grout life from 3 to 7 years, saves $20 in cleaning products annually, and prevents one regrouting at $300, your net savings could be $650-$1,450 over seven years.
Visual and tactile differences
Sealed grout looks and feels different from unsealed. It’s not night and day, but it’s noticeable.
Appearance: Sealer enhances grout color, making it look richer and more vibrant. It also gives a slight sheen, like a gloss finish on paint. Unsealed grout looks duller and can appear patchy or inconsistent in color.
Tactile: Sealed grout feels smoother and slightly harder than unsealed. The sealer forms a thin film on the surface, making it feel less porous. Unsealed grout has a rougher, more absorbent texture.
Think of it like this: sealed grout looks and feels more polished, while unsealed grout is matte and slightly rough to the touch.
Conclusion
Sealing grout when it fits the situation protects durability and keeps surfaces looking clean, but it won t fix everything. Do it right, and you guard against waste, water damage, and costly fixes down the line.
To finish strong, check in this order: assess whether the grout is porous enough for a sealer by testing a small hidden area, clean and dry the grout thoroughly, choose the correct sealer type for the cement or epoxy grout you have, apply evenly with the right tool, let it cure as directed, and keep the area dry during curing. Protect adjacent surfaces, plan for reapplication timing, and verify results after 24 to 48 hours.
Common mistakes to avoid include over-sealing or sealing on damp grout, using the wrong sealer for your grout type, and skipping a test patch or proper curing time. Safety first means wearing gloves, ensuring good ventilation, and keeping chemicals away from children or pets. Don’t rush the cure, and don t apply more than the product recommends in one pass.
If you’re dealing with extensive damage, cracked grout, persistent mold beyond routine cleaning, or uncertain absorption patterns, call a professional. For smaller, well-prepared projects, you can confidently follow the steps above and keep your grout looking good without overhauling the whole setup. Stay practical, stay safe, and you’ll nail the job without overspending.
FAQ
What real benefits can I expect from sealing grout?
Sealing grout helps repel water and stains, making it easier to wipe spills and dirt away. It won’t fix cracks or repair damage, so address any issues before sealing. Check the product label for what it claims to protect against.
What types of grout sealers are available and how do I choose?
There are penetrating (film-forming) sealers and topical sealers. Penetrating sealers soak in for water and oil resistance; topical sealers form a surface film. Read the label to match your tile type, grout porosity, and where the area is (wet environments need different formulations).
How should I apply grout sealer for best results?
Clean and dry the grout thoroughly before applying. Use a brush, roller, or applicator for even coverage and wipe off excess before it skins over. Ventilate the area and follow the manufacturer’s instructions on drying times and reapplication windows.
How often should I reseal grout and how do I know when it’s time?
Reapply according to the product’s guidelines, which vary by sealer type and area use. A simple test is to observe how liquids behave on the grout—if they soak in quickly or darken the grout, it may be time to reseal. Always check the label and local guidance for your situation.