

Introduction
Sealing cracks before painting concrete means filling and sealing gaps so the finished surface looks uniform and the cracks don’t telegraph through the topcoat. It’s a practical, hands-on step you can tackle with basic fillers and simple tools. Always check the product label for curing time and application temperature before you start.
Choose a filler that matches the crack and follows the manufacturer’s instructions for use and cure. Fill, smooth, and remove any loose material, then let it dry before sanding lightly and continuing with painting. If you’re unsure about what to use, check the label, the supplier’s guidelines, and any local rules that apply to your project.
Key takeaways
- Assess crack class to choose fillers that stay flat under topcoat.
- Prepare surfaces thoroughly; dust, oils, and loose material cause telegraphing.
- Wear eye protection and respirator when sanding or grinding flaky surfaces.
- Test repair in a hidden area before full coating to confirm behavior.
- Use compatible fillers and primers; mismatch leads to finish delamination.
- Final topcoat should flow smoothly; avoid thick buildups that telegraph.
- Document cure and touch-up windows with manufacturer guidance for best results.
Table of Contents
- Introduction
- Key takeaways
- Why Cracks Telegraph Through Topcoats
- Classifying Cracks and What Each Class Requires
- Filler Families That Resist Telegraphing: Pros and Cons
- Matching Filler Properties to Your Topcoat
- Surface Preparation: the Step That Prevents Many Failures
- Application Techniques That Minimize Telegraphing
- Testing, Verification, and Visual Checkpoints Before Full Topcoat
- Common Mistakes, Troubleshooting, and Maintenance
- Conclusion
- FAQ
Why Cracks Telegraph Through Topcoats
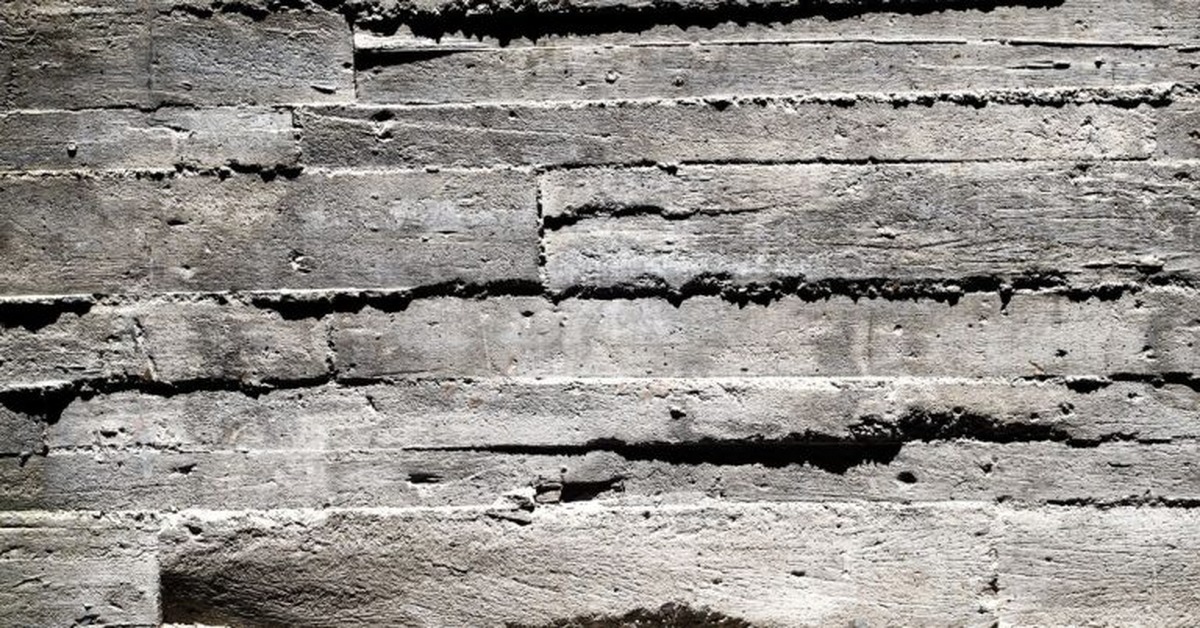
Cracks in the substrate can create a path for movement that paints cannot hide. When the concrete shifts, the filler may not move with it, showing a line or depression beneath the topcoat. Some failures appear immediately after painting, while others emerge after climate and use stress the surface.
Fillers and the substrate interact through expansion, contraction, and moisture changes. If the filler locks in place while the concrete continues to move, telegraphing becomes visible. Understanding this helps you choose materials and prepare the surface to minimize the effect.
Common physical and chemical causes
Cracks telegraph through topcoats due to various reasons. Let’s dive into the most common ones.
Substrate movement: Concrete expands and contracts with temperature changes. If not properly filled, these movements cause cracks to show through paint.
Differential hardness: Different parts of the concrete may have varying degrees of hardness. Softer areas can compress under pressure, leading to visible lines in the topcoat.
Shrinkage: Concrete shrinks as it dries and cures. This shrinkage can cause cracks to widen or new ones to form, telegraphing through paint.
Moisture: Moisture movement within concrete can lead to efflorescence – a white, powdery substance that forms on the surface. This disrupts the topcoat and causes it to telegraph.
How telegraphing presents and its timeline
Telegraphing can present itself in several ways, and when it appears depends on various factors.
Visual signs: The most common signs of telegraphing are shadowing (where the crack casts a slight shadow), hairline lines that mimic the crack’s pattern, or even cracking of the topcoat itself. These can be visible immediately after painting if the filler wasn’t sufficient or didn’t cure properly.
However, some issues may not show up until later. Thermal and humidity cycling can cause cracks to widen or new ones to form over time, leading to telegraphing that develops gradually.
Regular inspections of your concrete surfaces, especially during temperature extremes, can help you catch any potential telegraphing before it becomes a major issue.
Classifying Cracks and What Each Class Requires
Start with a practical scheme: hairline, small, medium, and large cracks. Width and depth guide the treatment approach. Expected movement also influences whether a filler should be flexible or rigid.
Use this classification to match the filler type, application method, and recoat schedule to the crack behavior. Check the product label or manufacturer instructions for movement compatibility before proceeding.
Safe size ranges and movement expectations
Cracks come in all shapes and sizes. Here’s a general guide to help you understand what you’re dealing with:
Hairline cracks (less than 1/8 inch): These are usually minor, but can still let moisture in.
Small cracks (1/8 to 3/16 inch): Wider, but still manageable. Check manufacturer thresholds for your chosen filler.
For medium and large cracks, consider getting a structural assessment before proceeding. Always check the limits of your chosen filler with the manufacturer.
Structural vs non-structural cracks
Not all cracks are created equal. Some are just unsightly, others could be signs of serious issues:
Non-structural cracks (hairline to small): These are usually cosmetic and can be filled with the right product.
However, medium and large cracks, or any crack that’s wider than 1/4 inch, could indicate structural problems. If you notice:
– Cracks at corners of windows or doors
– Diagonal cracks in walls
– Cracks on the upper part of walls
– Cracks that are consistently wider than 1/4 inch
Consult a structural engineer immediately.
Filler Families That Resist Telegraphing: Pros and Cons
Different filler families resist telegraphing in different ways. Elastomeric sealants, flexible polyurethanes and polysulfides, epoxy and cementitious patches, and acrylic/latex repairs each handle movement, shrinkage, adhesion, and finish differently.
This matters because the right filler reduces cracking and telegraphing over time on your project. Look at the label or datasheet for surface compatibility, movement tolerance, and finish behavior, and beware simple solutions that don’t match the job.
Flexible Elastomeric Fillers
Elastomeric sealants are your go-to when flexibility is key. They can stretch and compress, making them less likely to telegraph cracks under topcoats.
Use these for active or dynamic cracks that move with the concrete. Think hairline cracks caused by settling or temperature changes.
Pro tip: Prioritize flexibility over hardness when dealing with moving cracks. It’s better to have a flexible filler that won’t telegraph than a hard one that might crack again.
Rigid Patching Compounds (Epoxy, Cementitious)
Rigids like epoxy and cementitious patches are great for filling wide, deep cracks. They’re strong and durable.
But here’s the catch: they don’t move with the concrete. So, if there’s any further movement, it can cause stress and telegraphing under topcoats.
Use them wisely: For non-moving or dormant cracks. And always prep the surface well to maximize adhesion.
Polymer-Modified Mortars and Acrylics
These are middle-ground options, combining some flexibility with good strength. They’re often used for medium-sized cracks.
They can handle a bit of movement, but not as much as elastomerics. And while they’re better than rigids at preventing telegraphing, they’re not as good as dedicated sealants.
Best suited: For cracks that aren’t too active or wide. But remember, long-term movement might still cause issues under topcoats.
Matching Filler Properties to Your Topcoat
Elastomeric coatings require fillers that can move with the coating without pulling away. Masonry paints have different flexibility needs than epoxy floor finishes. Mismatches in elasticity or cure chemistry can reveal telegraphing through the topcoat.
Review the topcoat’s instructions and the filler’s data to ensure compatibility. If in doubt, verify via product data sheets or manufacturer guidance before application.
Elasticity, Shore hardness, and elongation
The filler’s flexibility must match your topcoat. Too stiff, it’ll crack under stress. Too soft, it won’t hold its shape.
Check datasheets for elongation – how much the filler can stretch before breaking. It should be close to your topcoat’s elongation.
Also look at Shore hardness. A harder filler might not bond well with a softer coating, causing it to peel off over time.
Chemical compatibility and priming needs
Some fillers need primers or adhesion promoters for reliable bonding. Check if yours does, especially with porous surfaces like concrete.
A barrier/primer can prevent staining or reaction between the filler and topcoat. Use it when recommended to avoid telegraphing.
For example, epoxy fillers often need a primer on concrete to ensure proper adhesion and prevent delamination.
Environmental factors: temperature, humidity, and VOCs
Cure conditions matter. Too cold or humid, your filler might not set right. Too hot, it could cure too fast, causing stress.
Check manufacturer guidance for ideal temperature and humidity ranges during application and curing.
Also consider VOC limits. Some fillers have high VOCs, which might not be allowed in certain areas or could cause health issues with prolonged exposure.
Surface Preparation: the Step That Prevents Many Failures
Start with thorough cleaning to remove grease, dust, and mold release agents. Degrease where you see oil or heavy marking that could hinder adhesion. Remove loose concrete so the filler bonds to a solid substrate.
Proper preparation creates a clean, stable base that resists telegraphing. Always confirm preparation requirements on the product label or instructions specific to your filler and topcoat combination.
Cleaning, blasting, and degassing
Before you start filling cracks, you’ve got to clean the area. Contaminants like grease, oil, or dirt can stop your filler from sticking.
Degreasing: Use a degreaser suitable for concrete. Spray it on, let it sit, then scrub and rinse. Don’t use household detergents – they leave residues that hinder adhesion.
Mechanical preparation: For tough grime or loose material, use a wire brush or grit blasting. Be careful not to damage the concrete surface. Always wear appropriate PPE when blasting.
Routing, widening, and backing materials
Sometimes, you need to open a crack wider for better filler penetration. But be careful – too wide can lead to issues.
- Routing: Use a concrete saw or router bit to widen cracks. Go slow, keep it level, and don’t go too deep.
- Depth-to-width ratio: Aim for 1:2 (depth to width). Too steep can cause stress fractures at the surface.
- Backer rods: Insert these into wider cracks before filling. They help maintain a consistent depth and prevent overfilling.
- Material choice: Use flexible fillers for wide, deep cracks to accommodate movement. Rigid fillers are fine for narrow, shallow ones.
- Wrong material: Using rigid filler in wide cracks can cause cracking or staining due to movement.
Moisture and pH testing before repair
Concrete’s a porous material. Too much moisture can ruin your repair job. Test for it, and check the pH too.
Moisture test: Use a simple moisture meter. If it reads high (above 4%), dry the area before filling. High moisture can cause efflorescence or weak bonding.
pH test: Concrete’s ideal pH is around 12.5. Too low (acidic) can react with your filler, causing discoloration or weakening. Test with a pH meter or litmus paper. If it’s too low, consider a primer to raise the pH.
Application Techniques That Minimize Telegraphing
Follow the filler’s mixing instructions carefully and mix only what you can use in a working time. Use multi-pass fills to build up a stable, level profile rather than trying to fill deep in one shot. Keep a consistent feathered edge to avoid ridges under paint.
Profile the surface so the topcoat lands evenly. Finish with a light, even surface and allow appropriate cure per the product guide. If you’re unsure, consult the manufacturer’s instructions for technique details.
Depth control, multi-layer fills, and tooling
The key to a successful fill is controlling the depth. Too deep, it can sag or shrink. Too shallow, it won’t hold.
- Use backer rods: These foam strips help maintain fill depth and prevent shrinkage. A pack of 10 costs around $20 at your local hardware store.
- Control fill depth: Aim for a maximum depth of 1/4 inch per layer. Any deeper, use multiple layers with backer rods in between.
- Tooling: Use a trowel or squeegee to spread the filler evenly and remove trapped air. A basic trowel costs about $10.
- Avoid overfilling: Too much filler can cause it to sag, creating an uneven surface.
- Let it set before tooling: Wait for the filler to start setting up before you tool. This helps prevent pushing out too much filler and creating a mess.
Feathering, sanding, and creating a paintable profile
The goal is to make the repair blend seamlessly with the surrounding concrete. This is achieved through feathering or profiling.
Feathering: Use a trowel or squeegee to spread the filler outwards from the crack, creating a smooth transition into the existing surface. Be careful not to overthin the filler at the edges.
Sanding: Once the filler is fully cured, use a sanding block with 120-grit sandpaper to lightly sand the repair and surrounding area. This helps create a smooth, paintable surface. A pack of sandpaper costs about $5.
Creating a paintable profile: The final step is to ensure the repair is level with the surrounding concrete. Use a straight edge or level to check for any high spots that need to be sanded down.
Cure times, recoat windows, and test timing
Following the cure time guidance is crucial. Painting too soon can lead to peeling or flaking.
Cure times: Most fillers need 24-72 hours to fully cure. Check your specific product’s instructions. Keep the area dry and free from traffic during this time.
Recoat windows: Even after curing, some fillers may not be ready for painting immediately. Check your product’s recoat window. This is typically 24-72 hours after the final cure.
Test timing: Before you start painting the entire area, do a test patch in an inconspicuous spot. Let it cure and recoat as per the manufacturer’s instructions. Then, apply your topcoat to ensure there are no telegraphing issues or other problems before proceeding with the rest of the job.
Testing, Verification, and Visual Checkpoints Before Full Topcoat
Before committing to a full coat, run small patch tests on representative areas. Look for signs of telegraphing after a cure period and during any environmental cycling you anticipate. Use simple visual checks and light touch tests to assess finish integrity.
Document results and compare against the topcoat requirements. If conditions or materials raise red flags, re-check labels, data sheets, or instructions for alternate methods or products.
Patch test method and inspection schedule
Before applying the full topcoat, conduct a small-area patch test to ensure your filler won’t telegraph through. Here’s how:
- Prepare area: Clean, degas, and prime a small, hidden section.
- Apply filler: Use the same technique as you’ll use for the full repair.
- Observe curing: Check for any issues during cure time.
- Inspect after cure: Look for any telegraphing, cracks, or other defects.
- Monitor over time: Keep an eye on the patch for at least a week to ensure no late failures.
- Test topcoat application: Apply a test coat of your intended paint to see if it telegraphs through.
- Check after drying: Inspect the area again to confirm no telegraphing.
- Document results: Record findings for future reference.
Quick rule: If your patch test fails, don’t risk the full repair. Re-evaluate your materials and techniques.
Visual checkpoints and photographic records
Conduct regular visual inspections to catch any issues early. Here’s what to look for:
- Shadowing: Dark or light areas that indicate telegraphing.
- Brittle edges: Cracks or crumbling at the filler’s edge, indicating poor adhesion.
- Microcracks: Fine cracks in the filler or topcoat, often caused by substrate movement.
- Discoloration: Changes in color that could indicate moisture intrusion or chemical reaction.
- Surface irregularities: Unevenness or waviness that might telegraph through the topcoat.
- Crack opening: Any widening of cracks, indicating ongoing substrate movement.
- Document conditions: Take photos to record initial conditions and progress.
- Record results: Keep notes on what you’ve observed and any actions taken.
Quick rule: Regular visual checks help catch problems early, saving time and money in the long run.
When to involve a specialist
Some issues are beyond the scope of DIY. Here’s when to call in a professional:
- Continued opening: If cracks keep widening despite repairs, there may be underlying structural issues.
- Repeat failures: If your repairs consistently fail, it might indicate a problem with your materials or techniques.
- Suspected instability: If you suspect the substrate is unstable or damaged, consult a structural specialist.
- Unexplained defects: If you can’t identify the cause of defects in your repairs, seek expert advice.
- Complex coatings issues: If you’re experiencing problems with your topcoat that you can’t resolve, consult a coatings specialist.
- Unsure about safety: If you feel unsure about any aspect of the repair process, err on the side of caution and call in a pro.
Quick rule: Don’t hesitate to involve a specialist if you’re unsure. It’s better to be safe than sorry.
Common Mistakes, Troubleshooting, and Maintenance
Avoid skipping surface prep or skipping cure time, both of which invite telegraphing. Overly thin or overly stiff fillers can fail to move with the substrate. Inconsistent mixing and poor feathering often show up as visible lines after painting.
When telegraphing occurs, identify whether the issue is substrate movement, filler choice, or topcoat compatibility. Plan long-term maintenance around movement and moisture exposure, and verify maintenance guidance from product literature or local rules as needed.
Why repairs fail later and how to fix them
Repairs can fail due to poor adhesion, shrinkage, or incompatible chemistry. Here’s how to address each:
Poor Adhesion: Ensure the surface is clean and dry before applying filler. Use a primer to improve bonding.
Shrinkage: Use non-shrinking fillers like epoxy or polyurethane. Apply in thin layers to prevent excessive shrinkage.
Incompatible Chemistry: Match the filler’s chemistry with your concrete’s pH and moisture levels. Test before applying.
Repairing telegraphed areas after paint failure
When paint fails, it often telegraphs underlying issues. Here’s how to fix it:
Remove the failed finish using a scraper or wire brush. Re-assess the substrate for any new cracks or damage.
Choose a new filler that matches your concrete’s chemistry and the job at hand. Follow application techniques mentioned earlier to minimize telegraphing.
Reapply coatings, following cure times and recoat windows as previously explained.
Routine inspection and preventive maintenance
When to use this checklist: Inspect your concrete every 6-12 months, or after any major weather event.
- Check for new cracks: Even hairline cracks can telegraph. Seal them promptly.
- Inspect filler repairs: Ensure they’re still intact and not showing signs of failure.
- Look for moisture issues: Excessive moisture can cause efflorescence, which telegraphs through paint.
- Check pH levels: Concrete should be between 6-9. Test if you suspect changes.
- Inspect coatings: Check for peeling, flaking, or other signs of failure.
- Clean and prep surfaces: Remove dirt, debris, or mold to prevent telegraphing through new paint.
- Check expansion joints: Ensure they’re functioning properly to prevent cracking.
- Inspect drainage: Proper drainage prevents water from pooling and causing damage.
Quick rule: Address any issues found promptly. Small problems left unchecked can become large, expensive repairs.
Conclusion
Sealing cracks properly keeps water out, prevents telegraphing, and makes the final paint look straight and durable. Do it right this time and you save time, money, and headaches on future maintenance.
Identify the crack class, pick a filler that matches the topcoat and movement, prep the surface thoroughly, apply and cure as directed, then test and visually verify before you topcoat. Work in a safe, well-ventilated space, let each step cure, and check your work with a before-and-after mindset instead of guessing.
Common mistakes are rushing the prep or cure, using the wrong filler for the crack, and skipping testing before topcoating. Always wear PPE, ventilate, clean spills quickly, and avoid applying a topcoat over damp filler or a damaged substrate. If a crack keeps moving, leaks persist, or you feel unsure about the crack’s cause, pause and call a professional—getting it right protects the surface and your investment.
FAQ
How do I tell if a crack is a candidate for filler before painting?
If the crack is stable and not widening, filler is usually appropriate. For active or moving cracks, address movement first and follow up with the right filler once it’s stable.
What should I look for on filler labels to avoid telegraphing?
Read the label to see it’s compatible with concrete and with your topcoat. Look for guidance on shrinkage, bonding, and suitable surface prep, and follow manufacturer instructions exactly.
How thick can a filler layer be before painting?
Check the product instructions for maximum build per application. If you need more, follow the recommended multi-pass approach and let each layer cure per the label before applying the next.
How do I test cure before applying the topcoat?
Use the on-site visual and tack-free checks described by the filler’s instructions. If in doubt, don’t apply the topcoat until the filler is fully cured as directed.