
Introduction
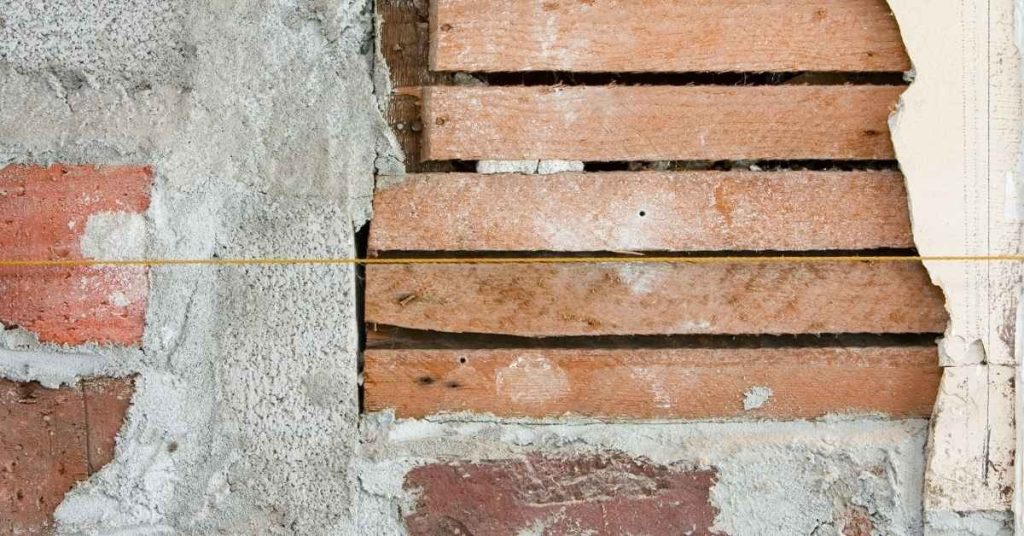
Rusting stucco lath in a patch means the metal lath under the plaster has corroded and loosened, reducing support for the patch.
That corrosion can cause the patch to crack or fall away if not addressed. Start by pulling back loose plaster and securing any loose lath pieces, then replace or tie back missing lengths so the patch has solid backing. Use lime-based plaster or compatible repair material and follow the product instructions, checking labels and local rules for approved mixes and binders. When you attach new lath, drill pilot holes and drive fasteners through clean, dry surfaces to help grip and reduce rust spread.
Key takeaways
- Inspect rusted lath edges and loose pieces before cutting back.
- Check manufacturer and local codes for lime-based plaster compatibility with repairs.
- Drill pilot holes to attach new lath securely without splitting.
- Replace missing lath lengths carefully to maintain plaster support; wear PPE.
- Use proper patch cutback limits and clean, rust-free edges for prep.
- Securely fasten with compatible hardware and test stability after each step.
Table of Contents
- Introduction
- Key takeaways
- Why Rusting Stucco Lath in a Patch Matters
- Assessing Damage and Deciding How Far to Cut Back
- Tools and Materials Checklist
- Safety, Testing, and Prep Before You Cut or Fasten
- Safe Cutback Techniques for Rusted Stucco Lath
- Better Refastening Methods and Patterns
- Rebuilding the Patch: Replacing Lath and Applying Plaster
- Common Mistakes, Troubleshooting, and Long-Term Prevention
- Conclusion
- FAQ
Why Rusting Stucco Lath in a Patch Matters
Rusting stucco lath is the corroded metal framework under a patch. It isn’t just surface corrosion; it signals damage that can compromise the bond between patch material and the underlying lath. Moisture intrusion, aging, and drainage issues are common culprits to note in the field.
Corrosion under the surface weakens adhesion because rust expands and forms voids that push away patch material from the lath. That weakened bond is a setup for debonding, cracking, and later delamination. Early assessment highlights structural and finish risks so you can plan a repair that lasts, not just looks right for a season.
What causes rust and how it shows up
Rusting stucco lath is caused by moisture intrusion, poor drainage, aging, or incompatible metals. Here’s what to look for:
Moisture Intrusion: Water can seep through cracks in the stucco or around windows and doors, causing the metal lath behind it to rust.
Poor Drainage: If water isn’t draining properly from your home’s foundation, it can sit against the walls and cause the lath to rust over time.
Visible Signs: Look for staining on the stucco, flaking metal, or bubbling/plaster separation. These are all signs that there may be rusting lath behind the surface.
How lath condition affects patch longevity
The condition of your stucco lath plays a crucial role in the longevity of any patches you make. Here’s why:
Bonding Surface: Rusty or damaged lath provides a poor bonding surface for new plaster or stucco, reducing the patch’s adhesion and making it more likely to delaminate over time.
Fastener Holding: Compromised lath can’t hold fasteners as well, leading to popped nails or screws that further weaken the patch.
Plaster Keys: The mechanical keys formed by the plaster or stucco interlocking with the lath are weakened when the lath is rusty or damaged. This reduces the overall strength of the patch and makes it more susceptible to failure under stress.
Assessing Damage and Deciding How Far to Cut Back
Start with a clear damage read: look for rusted or hollow lath, test edges versus center, and watch for moisture indicators that affect substrate integrity. Mold, dampness, and soft spots are clues to deeper work ahead. Document what you find before you cut.
Principles favor conservative cutback: remove only to reach sound, non-rusted substrate and preserve as much original plaster and lath as possible. Use a simple decision framework to set limits, including moisture readings and soundness tests. Always check local codes and manufacturer guidance before cutting or refastening.
Visual and hands-on inspection checklist
Before you start cutting, follow this checklist to assess the damage thoroughly.
- Identify rusted or hollow lath: Tap on the stucco with a hammer. Listen for a dull sound indicating hollowness or rust.
- Check edges and center: Rust often starts at edges, so test both edges and the center of affected areas.
- Look for moisture intrusion signs: Check for water stains, mold, or mildew around windows, doors, or other potential entry points.
- Probe for loose lath: Use a flathead screwdriver to probe the stucco. If it goes in easily, the lath may be loose or rusted.
- Check for through-corrosion: Look for rust stains on the interior wall surface, indicating severe corrosion on the exterior.
- Note surrounding moisture sources: Keep track of any nearby plumbing leaks, roof issues, or other potential water entry points.
- Test substrate integrity: Gently gouge the stucco with a trowel. If it crumbles easily, the substrate may be compromised.
- Document findings: Take photos and note measurements, depths of cutback, and conditions found for future reference.
Quick rule: Skipping these checks might lead to underestimating damage or causing further harm during repair.
Principles for safe cutback limits
The key principle here is to remove only until you reach sound, non-corroded lath or substrate. This ensures your patch has a solid base and reduces the risk of future issues.
Feather into solid plaster: When cutting back, make sure to feather the edges into solid plaster. This helps distribute stress evenly and prevents new cracks from forming at the patch’s edge.
If you’re unsure about the extent of damage or have concerns about preserving historic materials, consult a structural engineer or historic-preservation specialist before proceeding. They can provide tailored advice for your specific situation.
Tools and Materials Checklist
Define the scope so you know whether you’re patching around intact sections or replacing lath entirely. Plan for assessment, cutback, refastening, and plastering as a sequence you can follow step by step. Keep the work aligned with project scale.
Tools and safety come first: have hand and power tools ready, along with corrosion-resistant fasteners and protective gear. The materials list should cover corrosion-resistant lath, patching plaster or stucco, bonding agents, primers, and suitable fasteners. Tailor options to small repairs or larger patches.
Essential tools for cutting and fastening
Before you start, ensure you have the right tools to safely cut back rusted lath and refasten new pieces. Here’s a checklist:
- Snips or utility knives: For cutting old lath and removing damaged plaster.
- Screwdrivers/drills: To remove and drive corrosion-resistant fasteners.
- Shears or scrapers: To help remove loose plaster and rusted lath.
- Vacuum/dust control: To keep your workspace clean and safe from debris.
- Small pry tools: For carefully removing old fasteners and lath pieces.
- Tape measure: To ensure accurate cutting and placement of new lath.
- Level or straight edge: To check alignment during refastening.
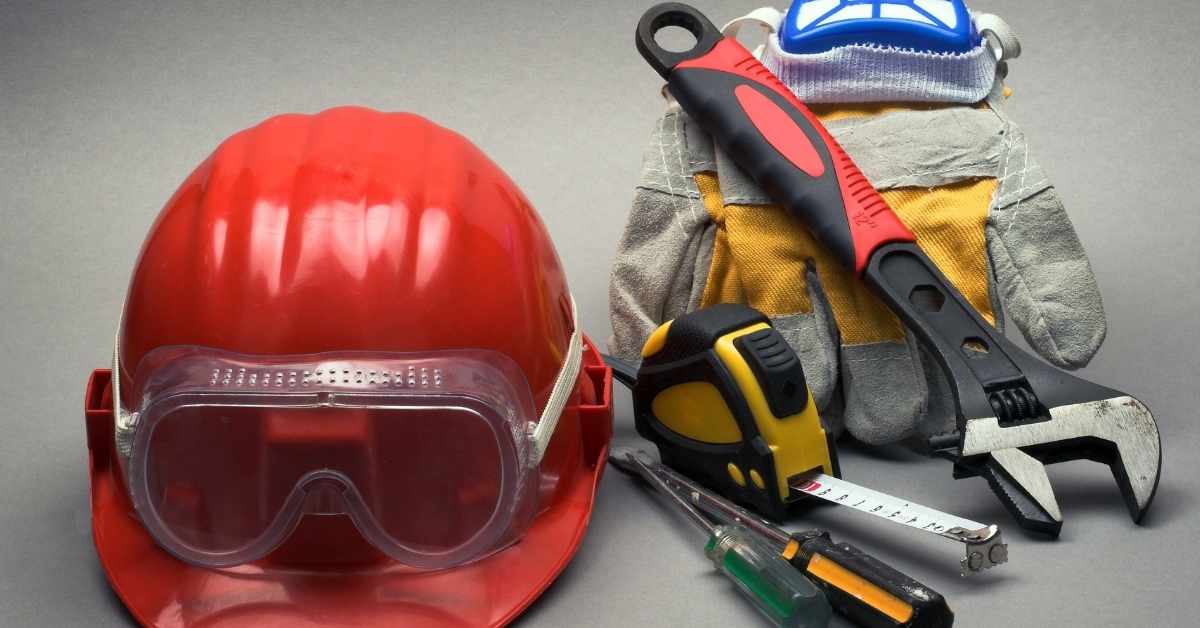
- Safety glasses: Protect your eyes from debris during cutting and removal.
Quick rule: Always prioritize safety. Wear gloves, long sleeves, and a dust mask when working with rusted materials to prevent injury and exposure to harmful particles.
Recommended materials and consumables
Using the right materials ensures your patch lasts. Here’s a checklist:
- Corrosion-resistant fasteners: Stainless steel or galvanized screws/nails to prevent further rusting.
- Replacement lath or backing: Galvanized metal lath, fiberglass mesh, or other compatible materials for patching.
- Rust treatment products: To prepare the surface before refastening and plastering. Follow manufacturer’s instructions.
- Bonding agents: To ensure new plaster adheres to old, use a compatible product with your existing plaster.
- Appropriate plaster compounds: Match the texture and color of your existing plaster for seamless repair. Consider using a patching plaster for smaller repairs.
- Primer or sealer: To protect exposed lath and improve adhesion of new plaster.
- Caulk or joint compound: For filling small gaps and creating smooth joints between old and new plaster.
Quick rule: Always check product compatibility with your existing materials to avoid damaging the patch or surrounding areas.
Safety, Testing, and Prep Before You Cut or Fasten
PPE and containment are non-negotiable: gloves, goggles, and a respirator where dust is a concern, plus plastic barriers or a negative-air setup to limit dust spread. Establish cleanup protocols to protect you and others on site. Treat any suspect debris as potentially hazardous until proven otherwise.
Testing for lead and asbestos is essential before disturbing plaster or lath. Use certified test kits or hire a pro when results will drive the chosen method. Drying, cleaning, and isolating moisture sources keep the surface ready for patching and fastening when work resumes.
Health and containment precautions
Safety’s your top priority when dealing with old walls. Here’s what you need:
Personal Protective Equipment (PPE): Gloves, goggles, and a respirator rated for lead/asbestos are must-haves.
Contain dust using plastic sheeting to seal off work areas. A negative air machine can help too, sucking dust away from the work zone.
Pause for testing: Before you start cutting or handling damaged lath/stucco, test for lead paint and asbestos. Use certified test kits or hire professionals. Results guide your next steps – encapsulation or removal.
Surface preparation steps
Before you start patching, prep the surface right:
Remove loose debris with a stiff brush. Clean rust and corrosion products using a wire brush or scraper.
Dry the area thoroughly. Moisture’s your enemy here – it can cause new rust and weaken your patch.
Apply appropriate rust-inhibiting treatments or primers, if recommended by product instructions. This helps prevent new rust from forming under your patch.
Safe Cutback Techniques for Rusted Stucco Lath
Safe cutback means removing damaged lath and plaster edges without undermining the surrounding sound backing. Keep the cut within the bounds of the compromised area and verify backing remains solid as you work. Plan to preserve as much intact material as possible.
Pre-checks include inspecting the backing for hidden moisture or corrosion and confirming edges can be reattached. Use safer cutting tools and protective gear, and select fasteners and patching materials compatible with the reduced backing. Steps should keep edges square and avoid ragged cuts.
Controlled removal methods
When dealing with rusted stucco lath, it’s crucial to remove only the damaged parts without causing further damage. Here are some controlled removal methods:
Support adjacent plaster: Before you start cutting, support the surrounding plaster using temporary shoring or furring strips. This prevents the plaster from cracking or crumbling during removal.
Cut in small sections: Use an oscillating multi-tool with a carbide blade to cut the lath into small sections, about 4-6 inches at a time. This helps maintain control and minimizes vibration, reducing the risk of damaging surrounding material.
Never lever or pry the lath off as this can cause new cracks in both the lath and plaster. Instead, use a flathead screwdriver to gently pry up each section after cutting.
When to replace entire lath sections
Sometimes, repairing the rusted lath isn’t enough. Here are clear criteria for when you should replace entire lath sections:
Extent of corrosion: If more than 50% of a lath section is corroded, it’s better to replace it entirely. This ensures that your patch will have sufficient support and longevity.
Loss of material cross-section: Rusted lath can lose significant thickness due to corrosion. If the remaining cross-section is less than half its original thickness, replacement is recommended.
Loss of mechanical connection: Check if the rusted lath is still securely fastened to the framing. If it’s loose or wobbly, replace it. Also, if there are signs of corrosion on the nails or screws holding the lath in place, consider replacing the entire section.
Better Refastening Methods and Patterns
Begin with a lath and substrate check to ensure remaining material can support a new fastener pattern. Identify gaps or bridging needs and choose backers and fasteners that pair with the lath and substrate. The goal is a secure load path for the patch system.
Choose corrosion-resistant fasteners and appropriate backers, such as mesh, lattice, or blocking that suit the underlying surface. Plan patterns that provide even support and gradual progression from center to edges to restore keying for plaster or stucco. Include moisture management considerations in the plan.
Choosing fasteners and anchors
Selecting the right fasteners is crucial to prevent rusting issues from recurring. Stainless steel or hot-dip galvanized screws or nails are your best bets. They resist corrosion and won’t cause galvanic reactions with your lath.
Stainless steel is ideal for coastal areas or where de-icing salts are used, as it’s highly resistant to saltwater corrosion. Hot-dip galvanized fasteners offer good protection but may not last as long in severe conditions.
Ensure your fasteners match the lath material – steel, fiberglass, or wood. For example, use stainless-steel screws with steel lath to avoid dissimilar metal contact.
Refastening patterns and techniques
The way you refasten the lath is as important as what you fasten it with. You want a secure, even support that recreates continuous keying for your plaster or stucco.
Use backer strips, like fiberglass mesh or lattice-type lath, to bridge gaps and provide additional support. Stagger your fasteners in a grid pattern, starting from the patch center and working outwards. This ensures consistent density and prevents splitting or flexing.
For long voids, use overlapping splices. Extend fasteners through the lath to reach solid substrate, maintaining proper embedment depths to prevent future pull-out. Remember, your goal is to create a solid, uniform base for your plaster or stucco.
Rebuilding the Patch: Replacing Lath and Applying Plaster
Document the existing lath/plaster edge and confirm whether the lath is metal or wood to select a compatible replacement backer. Plan the splice details to tie new lath to the old for a solid connection without weakening the surrounding plaster. The goal is a coherent, continuous patch interface.
Outline the layering: install backer, key, then apply the scratch coat that bonds to both old and new surfaces, followed by the brown/base coat. Match mix design and curing practices to the original finish and anticipated movement, and plan for gradual curing to minimize cracks.
Splicing and securing replacement lath
First, assess the existing lath. If it’s metal, use a compatible galvanized or stainless steel mesh; for wood, match the species if possible.
Overlap new lath onto old by at least 6 inches to create a solid bond. For metal lath, use pop rivets or self-drilling screws. Wood lath should be nailed with 8d common nails, spaced no more than 4 inches apart.
Secure replacement lath to framing or temporary backing using appropriate fasteners. This ensures your patch remains stable and doesn’t shift during plastering.
Plastering over repaired lath
Start by applying a scratch coat. Mix it with sand and hydrated lime for better adhesion to both old and new surfaces. Spread it evenly, embedding the lath fibers.
Let it cure for 24 hours before applying the brown or base coat. This layer should have more cement than the scratch coat for strength. Use a trowel to apply it in thin layers, feathering the edges to blend with surrounding surfaces.
Cure your patch properly: keep it damp and covered for at least 7 days, avoiding direct sun or wind. This gradual curing reduces cracking due to rapid drying.
Common Mistakes, Troubleshooting, and Long-Term Prevention
Common mistakes include undercutting, using incompatible patch materials, ignoring moisture sources, and neglecting flashing. These missteps lead to recurring issues or patch failure. Start with a clear corrective plan when errors are found.
Troubleshooting focuses on moisture intrusion, flashing integrity, lath corrosion extent, and substrate stability. Corrective actions involve proper backer prep, targeted cutback to solid lath, rust treatment or replacement, and appropriate patch materials. Establish long-term prevention through moisture control, updated flashing, better drainage, and compatible materials with corrosion-resistant fasteners.
Troubleshooting common failures
If your patch starts showing signs of failure, don’t wait. Diagnose the cause and fix it promptly.
Continued rusting: If you see new rust stains or hear a hollow sound when tapping the lath, cut back further to solid lath. Treat or replace the rusted pieces.
Adhesion loss: If plaster starts falling off, the patch may not have bonded properly. Remove the loose material, prep the surface again, and reapply compatible patch material.
Cracking: Inspect for hairline cracks around the patch. These can indicate movement or shrinkage. Fill with a flexible sealant and monitor for further cracking.
Preventive maintenance and monitoring
Regular upkeep is key to preventing rusting stucco lath issues. Here’s how:
Moisture control: Ensure water can’t get trapped behind the stucco. Check for and fix any clogged weep holes or gaps in flashing.
Protective coatings: Apply a compatible primer or sealant to new lath before plastering. This helps prevent moisture absorption and rusting.
Periodic checks: Inspect your stucco annually, especially after heavy rain or snow. Look for signs of moisture intrusion, cracking, or rust staining. Catch early corrosion to avoid costly repairs.
Conclusion
Handle the patch with care. The work you do now affects safety, durability, and how the wall looks for years to come.
First, run a simple, real-world check: assess how far the rust has gone, gather the tools and safety gear you actually need, test a small area to confirm you can cut back without uncovering more damage, and then cut back only to solid backing before you refasten and rebuild. Move in a steady sequence: measure, remove only what’s compromised, dry-fit new lath, then apply plaster in a controlled, even pass so you don’t trap moisture or create voids. Keep the area clean and check for moisture sources as you go, so you don’t repeat the rust problem.
Common mistakes to avoid are cutting too deep and weakening the structure, skipping the test patch and guessing what’s behind the wall, and skimping on safety gear or proper fastening patterns. Remember the basics: safety first, test first, and use proper backing when you reattach. If you notice extensive rot, easy access to structural lath, or a patch that won’t hold fasteners, step back and reassess rather than pushing on.
If the damage feels beyond a clear repair path, or you’re unsure about the underlying frame or moisture condition, it’s smart to call a professional. When you stay disciplined about testing, cutback limits, and methodical rebuilding, you’ll finish with a solid patch that lasts and looks good. Stay focused, stay safe, and keep the pace steady until you see a clean, durable result.
FAQ
What should I do about loose lath pieces before patching?
Pull back loose sections and reattach them with corrosion-resistant nails or screws as you can reach. If the lath is badly corroded, replace the missing length with fresh material and secure it solidly to surrounding studs or backing.
Can I use lime-based plaster for repairs, and how do I prepare the surface?
Yes, lime-based plaster can be a good match for historic patches. Wet the substrate and scrape away dust so the plaster has something to grab. Check the manufacturer’s guidance on bonding agents and curing times for your mix.
What if parts of the lath are missing and I need to replace whole lengths?
Replace missing lengths with sections that fit snugly between remaining lath. Fasten new pieces along the edges to surrounding lath with proper spacing so there are no gaps that will trap plaster air or cause cracking. Follow your material’s instructions for fastener type and drive depth.
Should I drill pilot holes to attach new lath, and how should I do it safely?
Drill pilot holes where the new lath will sit to avoid splitting studs or hitting utilities. Use a drill bit size recommended by the lath and plaster product and drive fasteners straight to secure the new piece. Keep holes clean and align them with existing patterns as much as possible.