

Introduction
Soft stucco indicates exterior plaster that feels soft or hollow, signaling potential erosion or lath failure. You’ll see blistering, crumbling edges, or patches where the wall sounds hollow when tapped. This intro helps you spot trouble before you rip into major repairs.
Probe tests involve gently tapping or lifting at suspect spots to feel for softness, voids, or loose backing behind the stucco. Compare softened areas with solid sections to separate erosion from lath failure and understand what your next steps should be. If you find hollow sounds or loose material, stop and check the underlying lath and moisture history, and look to local guidance on how to proceed.
Key takeaways
- Probe tests help distinguish erosion from hidden lath failure before repairs.
- Inspect texture changes and hollow sounds cautiously with proper PPE during probing.
- Soft stucco differs from traditional stucco by substrate bond and deterioration patterns.
- Common signs include shrinkage, cracking, and sagging voids indicating potential erosion.
- Document findings with photos and notes; shut power off and consult codes.
- Plan remediation by diagnosing lath vs. substrate failure before repair.
Table of Contents
- Introduction
- Key takeaways
- What Is Soft Stucco and Why Accurate Diagnosis Matters
- Symptoms of Soft Stucco Erosion to Watch for
- Tools and Materials Checklist for Probe Testing
- Step-by-Step Probe Test Procedure
- Identifying Signs Specific to Lath or Substrate Failure
- Types of Damage Commonly Seen with Soft Stucco
- Remedial Solutions Based on Diagnosis
- Costs, Legal Considerations, and Maintenance Planning
- Conclusion
- FAQ
What Is Soft Stucco and Why Accurate Diagnosis Matters
Soft stucco is a bendable, less rigid coating that feels doughy or crumbly when pressed. It often sits thinner than traditional hard coatings and can look different from sound stucco when damaged. Distinguishing erosion from lath failure changes the repair scope, costs, and how long the fix will last.
Use diagnostic criteria to tell erosion from lath issues: texture, delamination patterns, hollow sounds, moisture indicators, and grainy surfaces. Probe-test steps should be safe and controlled, with clear zones to test and what to record. Keep a simple toolkit handy and know what readings count as red flags for deeper work.
Defining soft stucco vs cement stucco
Soft stucco, also known as ‘gypsum’ or ‘plaster’ stucco, is made from gypsum, sand, and water. It’s softer than traditional hard coatings like cement-based stucco.
Cement stucco, on the other hand, is harder due to its cement base. It’s more resistant to erosion but can crack and delaminate.
Softness in soft stucco makes it susceptible to erosion over time, while lath failure can occur in both types if not properly installed or maintained.
Consequences of misdiagnosis
Misdiagnosing soft stucco issues can lead to inadequate repairs. If erosion is mistaken for lath failure, you might replace laths when you should be addressing erosion.
Incorrect diagnosis can cause recurring damage and higher long-term costs. Inadequate repairs may lead to further deterioration, requiring more frequent and expensive fixes.
Misdiagnosis can also void warranties if the problem persists or worsens due to improper repair.
Symptoms of Soft Stucco Erosion to Watch for
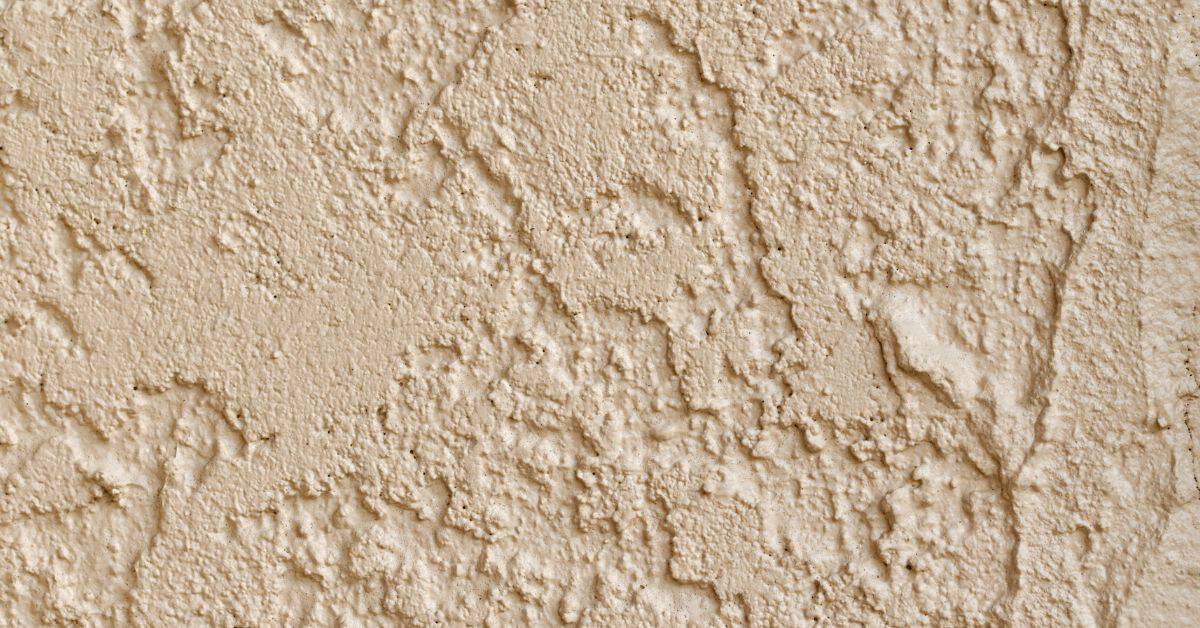
Visual indicators include a powdery or chalky surface, loss of original texture or color, shallow pits, and small cracks or dust when brushing lightly. Irregular patches that look worn compared with intact areas are important clues. Look for a matte finish that seems uniformly worn rather than cracked patterns typical of structural failure.
Tactile cues come from running a glove over the surface to feel softness or crumbling under pressure. Edges near affected areas may flake away easily while surrounding areas remain firm. Moisture cues like staining, darkening, or efflorescence also help separate erosion from deeper problems.
Visual signs: texture, pitting, and color changes
The first step in diagnosing soft stucco erosion is to observe the surface visually. Look for these telltale signs:
Texture Loss: Softening of the stucco surface leads to a powdery, chalky, or friable texture. You might notice that the original rough, pebbly texture has smoothed out.
Pitting and Crinkles: Shallow pits and small crinkles can appear on the surface. Gently brush the area with your hand; if it leaves a fine dust or powder, erosion is likely at play.
Color Changes: Stucco that’s eroding may lose its original color, turning dull or grayish. Irregular patches might look worn compared to intact areas.
Tactile and moisture indicators
In addition to visual cues, there are tactile and moisture-related signs that can help confirm erosion:
Softness and Crumble: Run a light finger or wear a glove when feeling the surface. If it feels soft, spongy, or crumbles under slight pressure, you’re likely dealing with erosion.
Flaking Edges: The edges of affected areas may flake away easily when gently touched. Meanwhile, surrounding intact stucco remains firm and solid.
Moisture Cues: Look for water stains, darkening, efflorescence (white crystalline residue), mold or mildew growth, and persistent dampness. These signs suggest moisture-driven erosion.
When erosion mimics other problems
Erosion can sometimes masquerade as other issues, leading to false conclusions. Here’s how to avoid confusion:
Mold and Mildew: While moisture promotes both mold growth and stucco erosion, they’re not the same problem. Eroding stucco provides a surface for mold to grow on, but treating the mold won’t fix the underlying erosion.
Efflorescence: This white crystalline residue is a sign of excess moisture, which can cause both efflorescence and stucco erosion. However, addressing efflorescence alone won’t solve the erosion issue.
Paint Failure: Peeling or cracking paint doesn’t necessarily indicate stucco erosion underneath. Always check for the signs of erosion listed above before assuming the worst.
Tools and Materials Checklist for Probe Testing
Essential handheld probing tools include a hammer, small pry tool, awl or probe rod, tape measure, and a marking pencil to map test zones. A simple moisture meter and a basic borescope add useful depth checks. Have a magnetic stud finder on hand to locate lath and fasteners.
Safety gear matters: gloves, eye protection, a dust mask, and secure ladder or fall protection. Containment supplies like plastic sheeting and drop cloths help keep dust down during testing and minor repairs.”
Probing and hand tools
Use this checklist to assess your stucco’s adherence and substrate condition.
- Hammer: Tap gently to check for hollow or weak spots. Skipping this can lead you to miss areas with lath failure.
- Cold chisel or sturdy screwdriver: Probe into cracks or holes to find the extent of damage. Neglecting this step might underestimate repair needs.
- Small pry bar or putty knife: Gently lift edges to check for delamination. Ignoring this can miss signs of erosion.
- Awl or probe rod: Poke into suspect areas to find voids or soft spots. Overlooking these can lead to misdiagnosis.
- Tape measure: Mark and record measurements for accurate mapping of test zones.
- Labeled marking pencil: Map out test zones and mark locations for easy reference during repairs.
- Small chisel or utility knife: Carefully cut into suspect areas to expose underlying layers. Skipping this can hide the true cause of erosion.
- Magnet: Check for metal lath or fasteners before probing to avoid damaging them.
Quick rule: Always probe gently and methodically to avoid causing further damage.
Measurement and moisture equipment
Use this checklist to accurately measure and detect moisture in your stucco.
- Versatile moisture meter (pin and pinless): Measure moisture content in stucco and lath. Skipping this can lead to incorrect diagnosis.
- Infrared camera or thermometer: Detect temperature/moisture hotspots for targeted probing. Neglecting this can overlook areas of concern.
- Small borescope: Inspect surface-to-void without causing further damage. Overlooking voids can lead to recurring problems.
- Magnetic stud/anchor finder: Locate lath and fasteners before probing to avoid damaging them.
- Depth gauge: Measure the thickness of stucco and lath for accurate repair planning. Ignoring this can result in improper repairs.
- Tape measure: Record precise measurements for mapping test zones and ordering materials.
- Level: Ensure safe and accurate probing by keeping your tools level.
Quick rule: Regularly calibrate your moisture meter to ensure accurate readings.
PPE and access equipment
Use this checklist to ensure safe and thorough inspection of your stucco.
- Gloves: Protect hands from cuts, scrapes, and chemicals. Skipping gloves can lead to injuries.
- Safety glasses: Shield eyes from debris and hazards. Neglecting eye protection can result in serious injury.
- Dust mask or respirator: Guard against inhaling harmful dust particles. Failing to protect your lungs can cause health issues.
- Fall protection or secure ladder setup: Ensure safe access to high areas. Ignoring safety measures can lead to falls and injuries.
- Containment supplies (plastic sheeting, drop cloths): Minimize dust and contain debris for easy cleanup. Neglecting containment can cause unnecessary mess and potential hazards.
- Work-light or headlamp: Illuminate dark areas for thorough inspection. Overlooking poorly lit spots can miss signs of erosion.
- Brush and solvent: Clean surfaces before probing to ensure accurate readings. Dirt and grime can interfere with moisture detection.
Quick rule: Always prioritize safety over speed when inspecting your stucco.
Step-by-Step Probe Test Procedure
Before testing, set up test zones, confirm access routes, and review safety plans. Document who tests what area and when to keep results repeatable. Weather considerations should be noted so readings aren’t skewed by temperature or moisture.
Choose appropriate tools and establish consistent entry angles and depth markers. Use a standardized probing pattern to reduce variability between testers. End with a clear summary of findings and next steps.
Step-by-Step Process
The following is a clear, numbered sequence of practical steps for the probe test procedure. It starts with preparation and safety checks, then performs the main work, and finishes with final checks.
- Pre-test site readiness: Establish test zones, secure permissions, account for weather effects, implement PPE and dust control plans, and set a clear documentation protocol.
- Gather tools: Collect appropriate tools like masonry awl, steel probe, hammer drill with masonry bit, and measurement equipment.
- Mark up the site: Use chalk or paint to mark out test zones and access routes. Take pre-test photos for reference.
- Perform probes: Follow a systematic probing technique using a grid, transects, or concentric rings pattern. Vary force and angle as needed.
- Document results: Record depth readings, hammer or probe resistance, surface condition, moisture state, color/texture changes, tester initials, timestamps, and versioned logs.
- Conduct risk assessments: Regularly assess safety conditions, control dust, guard against falls, and isolate vibration impacts.
- Corroborate findings: Compare results with adjacent areas to confirm the presence of erosion or lath failure.
- Summarize results: Prepare a concise summary of probe test results and actionable next steps.
Preparation and Safety Briefing
Before starting any probe tests, ensure the site is safe and ready for testing. This involves several key steps to protect both you and your property.
Establish Test Zones and Access Routes: Clearly mark out where you’ll be performing tests and how you’ll access those areas. This helps prevent damage to unaffected surfaces and ensures safety during the test.
Take Pre-Test Photos of the marked zones from different angles. These will serve as a reference point for comparison after testing. Also, ensure you have all necessary permissions to conduct tests on the property.
Account for weather and temperature effects on concrete. Test in moderate temperatures and avoid rain or extreme heat if possible. Implement a PPE plan to protect yourself from dust and other hazards. Set a clear documentation protocol that defines who tests where and when to ensure repeatability.
Performing Probes and Recording Results
Probe testing involves carefully inserting probes into the stucco surface at specific intervals and depths, then recording the results. Here’s how to do it effectively.
Start by Identifying Test Points. Use a consistent pattern like a grid, transects, or concentric rings to minimize variability between testers. Mark these points on your site map for reference.
When performing probes, Vary Force and Angle as needed. This helps identify different types of failures. Record depth readings using a measuring tape or ruler. Note the resistance encountered – whether it’s easy, hard, or impossible to push in the probe.
Also, record surface condition, moisture state, color/texture changes, and any other notable observations. Use labeled photos and annotated sketches to supplement your written notes. Include tester initials, timestamps, and versioned logs for defensible records.
Interpreting Probe Depth and Resistance Data
Probe penetration depth and tactile resistance provide valuable insights into the condition of your stucco surface. Here’s how to interpret these data.
Erosion: If probes penetrate easily and deeply with little resistance, it suggests surface erosion. The concrete may be crumbling or missing entirely at those points.
Lath Failure: If probes meet significant resistance at shallow depths, it indicates lath failure. This means the wire mesh supporting your stucco is likely damaged or missing, causing the surface to weaken.
Compare results with your pre-test photos and site map to pinpoint exact locations of erosion or lath failure. Keep in mind that probe tests only provide localized information. If you suspect widespread issues, consider additional testing methods.
Identifying Signs Specific to Lath or Substrate Failure
Inspect for loose or detached metal lath, rust streaks, bent strips, missing fasteners, and nail pops that point to lath failure. Note irregular patches that hint at prior lath repairs or substitutions. These clues help separate surface erosion from underlying frame issues.
Assess fasteners and attachment patterns by looking for spacing irregularities, pry marks, and pulled fasteners. Examine the backing substrate for degradation or delamination behind the stucco and check for voids or crumbling edges near suspect areas. Non-destructive tests map sound differences across patches.
Physical signs of lath detachment
Bulging or swelling in your stucco is a clear sign that the metal lath behind it has detached from the substrate. This happens when the adhesive bond between the lath and the backing fails, often due to moisture intrusion or age.
Wide delamination – where large sections of stucco peel away from the wall – also indicates lath separation. Tap on these areas; if they sound hollow or move under your touch, it’s a strong sign that the lath has come loose.
Movement when tapped is another telltale sign. If you notice any give or play in the stucco when you tap it gently with a hammer or even your knuckles, it could mean the lath behind it has detached and is no longer securely fastened to the wall.
Fastener and corrosion indicators
Rust stains on your stucco are a red flag for metal lath or fastener failure. Rust needs moisture to form, so if you’re seeing it, water is getting in somewhere.
Popped nails or screws indicate that the fasteners holding the lath in place have failed. This could be due to corrosion, overdriven nails, or simply old age. If left untreated, these can lead to further lath detachment and stucco damage.
Collapsed edges around openings like windows and doors can also signal fastener failure. If the stucco is sagging or pulling away from these areas, it’s a sign that the fasteners holding the lath in place have failed.
Ancillary inspections (cavity, flashings, windows)
Targeted checks at penetrations and edges can help confirm whether lath or substrate issues are causing your stucco problems. Here’s a checklist to guide you:
- Window and door openings: Check for cracks around these areas. If the stucco is pulling away from the frame, it could indicate lath detachment.
- Flashings: Inspect flashings at windows, doors, and roof intersections. If they’re damaged or missing, water can get in and cause lath failure.
- Cavity walls: Tap on the stucco to listen for hollow sounds. This could indicate that the lath has detached from the backing substrate.
- Parapets: Check for signs of erosion or delamination at these vulnerable edges.
- Expansion joints: Ensure they’re intact and functioning properly. If not, water can get in and cause lath failure.
- Control joints: Inspect these for cracks or gaps. If they’re not working as intended, it could indicate underlying lath issues.
- Wall intersections: Check for signs of delamination at corners and where walls meet each other or other structures.
- Roof-to-wall intersections: Inspect for proper flashing and caulking to prevent water intrusion.
Quick rule: Don’t skip these checks. Issues at penetrations and edges can often cause widespread problems if left untreated.
Types of Damage Commonly Seen with Soft Stucco
Damage patterns include surface erosion, delamination, cracking, and moisture-related deterioration. Each pattern has typical signs and probable causes such as weather exposure, improper installation, or water intrusion. Recognizing the pattern helps guide the diagnostic approach.
Moisture management indicators like staining, efflorescence, and musty odors help distinguish moisture-driven issues from structural failures. Safe probing and moisture assessment inform whether further invasive checks are necessary and what repairs to pursue.
Surface erosion and loss of aggregate
The most common sign of soft stucco is surface erosion. This happens when the finish layer wears away, exposing the underlying base coat. It’s usually caused by weather exposure and improper mix or curing.
You’ll see it as a thin, friable (easily crumbled) finish with aggregate particles missing. The surface feels rough to touch and may have a powdery residue.
Probing here will show resistance at first, then suddenly give way as you hit the base coat. If erosion is severe, you might expose lath or substrate.
Erosion is progressive, so act early to prevent further damage and costly repairs.
Delamination, blistering, and cracking
Delamination occurs when the stucco layers separate from each other or from the lath. Blisters form as trapped moisture expands behind the finish. Cracking follows as stress builds up.
Look for raised, wavy areas (blisters), cracks that seem to ‘pop’ open, and sections that feel soft or hollow when tapped. These signs point to bond failure and trapped moisture.
Probing will reveal reduced resistance and a sudden give as you hit the void behind the blister. If cracking is present, probe gently to avoid further damage.
Delamination can lead to full detachment if not addressed. It’s crucial to identify and fix moisture sources before repair.
Corrosion, staining, and rust-induced breakdown
Corroded metal lath or embedded metal can cause localized failure. Rust expands as it forms, pushing the stucco away from the lath. This leads to staining (efflorescence) and eventually, breakdown.
You’ll see rust-colored stains, efflorescence (white, powdery deposits), and cracks around fasteners. There might be a musty odor if moisture is present.
Probing here can be tricky due to the risk of pushing rust flakes into the system. Use gentle pressure and expect reduced resistance where corrosion has weakened the lath.
Corrosion accelerates failure, so address it promptly. Check for water intrusion sources and ensure proper drainage.
Remedial Solutions Based on Diagnosis
Use diagnostic outcomes to decide between minor surface remediation, localized patching, or full lath replacement and re-stucco. A clear decision framework helps homeowners understand scope and cost implications. Keep notes on what constitutes a repairable surface versus a need for structural work.
Map remedies to the diagnosis with a simple reference path: patching for erosion, targeted lath repairs for frame issues, or complete re-stucco when necessary. Include safety steps, required tools, and practical timelines for each scenario.
Surface repairs and consolidants
If probe tests reveal only surface erosion, minor repairs and consolidation can restore your stucco’s appearance. Here’s when to use each:
Thin-skin repairs: For small areas with light erosion, apply a thin layer of fresh stucco mixed with bonding agent over the affected zone.
Consolidants: For more extensive surface loss, use consolidants. These penetrate deep into the substrate, binding loose particles and strengthening the surface. Apply according to manufacturer’s instructions.
Re-coating: If erosion is widespread but not severe, a full re-coat might be sufficient. Remove loose material, apply a bonding agent, then re-stucco the entire area.
Lath replacement and re-stucco procedures
When probe tests indicate lath failure, more extensive repairs are needed. Here’s how:
Remove failed areas: Cut out damaged stucco and any rotted or loose lath. Ensure you’ve exposed sound framing members.
Replace lath/WRB: Install new, corrosion-resistant lath (like galvanized steel or aluminum) over a water-resistive barrier (WRB). Secure it with appropriate fasteners.
Apply base and finish coats: Apply a base coat of stucco, allowing it to cure as per manufacturer’s instructions. Then apply the final finish coat, ensuring it matches the surrounding texture.
When to engage a specialist
While DIY repairs can save money, some issues require professional intervention:
Extensive delamination: If large areas are peeling or falling off, it’s wise to involve a pro. They can assess the extent of damage and ensure safe repair.
Structural rot: Any signs of rotting framing members or structural components should be evaluated by a licensed contractor or engineer.
Complex flashings: Flashing repairs around windows, doors, and other openings can be tricky. If you’re unsure, consult a professional to prevent water intrusion.
Costs, Legal Considerations, and Maintenance Planning
Identify cost drivers such as probe tools, moisture meters, and potential removal of damaged material, which influence overall budgeting. Legal and warranty considerations include building codes, permit needs, and contractor qualifications. Documenting disclosures to associations or managers is also important.
Keep a maintenance framework that emphasizes moisture management, seasonal checks, and routine testing. Outline drainage improvements and protective finishes as part of a long-term plan, and outline when to involve professionals.
Cost factors and how to get accurate estimates
The cost of soft stucco diagnosis and remediation varies greatly depending on several factors. First, the extent of damage plays a significant role—minor repairs will be cheaper than extensive ones.
Accessibility is another factor. If the affected area is hard to reach, labor costs may increase. The type and quality of materials used also impact the price.
To get accurate estimates, obtain multiple local quotes. Ensure each quote includes a detailed written scope of work. This helps you compare apples to apples and make an informed decision.
Beware of quotes that are significantly lower than others. They might indicate substandard materials or labor practices.
Warranties, building codes, and disclosure obligations
Before starting any work, check existing warranties. If the stucco is still under warranty, the manufacturer might cover some or all of the repair costs.
Familiarize yourself with local building codes and repair standards. These can impact what materials are used and how the work is done. Permits may be required for certain repairs.
If you’re part of a homeowner association (HOA) or have a property manager, understand your disclosure obligations. Some HOAs require notification before starting any exterior work, and some repairs might need approval.
Always document any communication with these parties to protect yourself legally.
Long-term maintenance and monitoring plan
A well-maintained stucco system can last for decades. To extend its life, inspect your stucco annually, preferably in the spring or fall when temperatures are mild.
Look for signs of moisture intrusion, cracking, or other damage. Use a simple probe test to check for lath detachment. Address any issues promptly to prevent them from worsening.
Implement simple preventive measures, such as ensuring proper drainage, maintaining flashing, and applying protective coatings where necessary. Regularly clean your stucco to remove dirt and debris that can trap moisture.
Document the condition of your stucco each time you inspect it. This helps track any changes over time and serves as a record if future issues arise.
Conclusion
You’ve got a clear path to determine if soft stucco is eroding or failing at the lath. Keep safety at the front, test small areas first, and protect the structure from further damage as you go.
To move forward, check that the area is structurally safe, select a representative spot for a probe test, use the recommended tools and materials, follow the step-by-step procedure, compare signs to lath or substrate failure patterns, and base any remedial step on what the diagnosis shows. Start with a small, controlled probe in a hidden or low-visibility area, document moisture and moisture-related signs, then expand testing only if the first spot proves stable, and always keep a plan for repair and maintenance so erosion does not spread.
Common mistakes to avoid include pressing too hard with probes, digging into edges where damage could hide, and skipping the safety checks before testing. Always wear appropriate PPE, work slowly, and test in a dry, calm window of weather. Do not force repairs or remove material beyond what the diagnosis supports, and keep notes on every test so you can track changes over time.
If you uncover widespread delamination, unfamiliar signs, or a test area shows repeated failure, call a professional and get a written assessment before tearing out or heavily reconstructing. When in doubt, step back, reassess, and plan a measured path to repair. Stay practical, stay safe, and you’ll protect the home, curb costs, and keep the job moving forward.
FAQ
What are the telltale signs that I’m dealing with soft stucco erosion rather than solid, traditional stucco?
Soft stucco will feel hollow or moldable behind the surface when you press it. Look for cracking that runs deep and width that changes with temperature, not just hairline surface cracks. If the surface dents or sounds hollow with a tap, that’s a red flag.
How do I perform safe probe tests to check for lath or substrate failure?
Use a proper probe tool and a controlled tapping method to listen for a dull thud or hollow sound behind the face coat. Probe in suspected areas with care—don’t pry hard or poke through in one spot. If the tool penetrates with little resistance, note the location and avoid widening the area until you’ve consulted the manufacturer’s instructions.
What makes soft stucco different from traditional stucco, and why does that matter for testing?
Soft stucco often has a weaker bond to the lath or lacks proper drainage, making it prone to erosion under weather and moisture. The surface may crack and crumble easier, and behind the coat you may find compromised lath. Always compare probing results with visible moisture or staining patterns for a complete read.
What common causes should I check when diagnosing soft stucco erosion?
Look for moisture intrusion, old or damaged lath, improper lath attachment, and failed flashings. Improper mixing or curing can also lead to a weaker face coat. If you find widespread delamination, treat it as a sign to pause and verify substrate integrity.