

Introduction
Rust bleed-back on concrete is when iron from rebar or tools leaches out and creates stains after sealing. It happens when moisture carries dissolved iron to the surface and the sealer traps it in. This article shows a practical, hands-on approach to stopping that bleed-back before you seal.
Take time to prep the area, test a small spot, and choose the right cleaner and method per the product label. If you see iron turning back or staining, address moisture and iron sources, scrub with a safe cleaner, and let surfaces dry fully before sealing. Always follow manufacturer instructions and local rules for ventilation and curing.
Key takeaways
- Inspect substrate for active bleed-back before sealing; oxidation can reoccur after proper treatment.
- Distinguish surface rust from heavy bleed-back by weathering patterns and saturation tests.
- Use manufacturer-recommended cleaners and neutralizers; test on inconspicuous concrete first.
- Allow treated area to dry fully; wear gloves and eye protection during handling.
- Choose compatible sealers that specify metal-oxide stain compatibility and vapor permeability.
- Perform a quality check by re-inspecting for further staining after initial sealcoat.
Table of Contents
- Introduction
- Key takeaways
- What Causes Rust Stains and Bleed-Back on Concrete
- How to Distinguish Surface Rust from Active Bleed-Back
- Tools and Materials Checklist
- Step-by-Step Cleaning and Neutralizing Methods
- Neutralization, Drying, and Preventing Re-Oxidation
- Choosing Sealers and Material Compatibility with Previous Treatments
- Sealing Workflow, Timing, and Quality Checkpoints
- Troubleshooting Common Problems and Long-Term Maintenance
- Conclusion
- FAQ
What Causes Rust Stains and Bleed-Back on Concrete
Rust stains come from metal that exists in or around the concrete. Embedded rebar, fasteners, and other metal items can oxidize and release iron into the surrounding material. Surface contaminants and iron-rich groundwater can also contribute iron that moves through the concrete over time.
When iron is soluble, it can migrate with moisture and reappear as stains even after cleaning. This movement is what people call bleed-back, and it can repeat after sealing if the source remains active. For accurate guidance, check product labels, manufacturer instructions, and local rules related to metal-containing soils and cleaners.
Sources of embedded and surface iron
Concrete can pick up iron from various sources, both within its structure and on its surface.
Embedded iron comes mainly from rebar corrosion. Rebar, used to reinforce concrete, can rust over time. This expands the metal, causing cracks in the concrete that allow more moisture and oxygen to reach the rebar, accelerating the corrosion process.
Surface iron contaminants include metal fixtures like nails or screws driven into the concrete, wheel weights from vehicles, and landscaping products containing iron compounds.
How moisture and pH enable iron migration
Water movement plays a significant role in rust stain formation. When water seeps into concrete, it can dissolve the iron compounds present, either from embedded rebar or surface contaminants.
The alkalinity of concrete also contributes to this process. Concrete has a high pH level, which makes it basic rather than acidic. This alkaline environment increases the solubility of iron compounds, allowing them to move more easily through the concrete.
This is why rust stains can reappear after cleaning. Even if you remove the visible stain, soluble iron compounds may still be present within the concrete. Given the right conditions – moisture and alkalinity – these compounds will migrate back to the surface, causing the stain to reappear.
How to Distinguish Surface Rust from Active Bleed-Back
Start with a visual check: surface rust tends to be on the top layer and may scrub away with effort, whereas bleed-back often reappears after cleaning and sealing. Perform a damp scrub test in a small area to see if color remains or returns quickly. Look for dark, migratory patches that spread from joints or where metal existed.
Use simple tests to confirm: a water rinse may darken active bleed-back and show renewed staining as moisture moves iron. A quick wipe with a neutral cleaner and recheck after drying helps determine if staining is ongoing. For any doubt, verify with product instructions and local guidance on bleed-back management before sealing.
Step-by-Step Process
Follow this clear, numbered sequence to distinguish surface rust from active bleed-back on your concrete.
- Prepare and safety check: Wear gloves, goggles, and old clothes. Ensure the area is dry and free of debris.
- Inspect visually: Look for orange or red stains. Surface rust will be flat, while bleed-back may have crystalline bloom.
- Perform water spot test: Sprinkle water on the stain. If it darkens or spreads, bleed-back is active.
- Test pH level (optional): Use a pH testing kit. Bleed-back occurs in alkaline conditions (pH > 7).
- Clean up and document: Remove any test materials. Photograph and mark edges of stains for future reference.
Simple on-site tests to detect active bleed-back
Conduct these easy, non-invasive tests to reveal ongoing iron migration and confirm the need for treatment.
Water spot test: Sprinkle water on the stain. If it darkens or spreads within a few minutes, active bleed-back is present.
Salt patch test: Apply a thick layer of salt mixed with water. If the stain reappears after 24 hours, bleed-back is active.
Poultice observation: Apply a poultice (like damp clay or mud) to the stain. If it turns red within a few days, iron migration is occurring.
Visual checkpoints and documentation tips
Use this checklist before, during, and after treatment to track recurrence and guide your approach.
- Edge definition: Clearly mark the edges of stains with chalk or tape for accurate treatment application.
- Color depth: Note the intensity of the stain. Darker stains may require more aggressive treatment.
- Crystalline bloom: Observe any crystalline structures on the surface, indicating active bleed-back.
- Surrounding area: Check for similar stains nearby that may also need treatment.
- Weather conditions: Note temperature and humidity levels, as these can affect stain recurrence.
Quick rule: Regularly review and update your documentation to ensure effective long-term management of rust stains on your concrete.
Tools and Materials Checklist
Assemble safety gear: gloves, eye protection, and a dust mask. Have clean buckets, stiff brushes, and plastic scrapers ready for physical removal. Include cleaners, chelating agents, poultices, and neutralizers as the core supplies.
Also gather PPE and containment options, plus options for different stain severities. Note that some items vary by product and stain level, so verify labels, SDS sheets, and manufacturer directions before use. Keep a log of what you choose to use for future reference and sealer compatibility checks.
Preferred cleaners and chemical agents
Before you start, check these cleaners and chemicals to ensure you’ve got the right tools for the job.
- Acidic rust removers: Ideal for heavy stains. Check pH – it should be below 7.
- Chelating agents (like citric acid): Great for light to moderate stains. Confirm they’re safe on your sealer.
- Alkaline detergents: Suitable for general cleaning before sealing. Ensure they won’t damage the sealant.
- Neutralizers (like baking soda): Use after acidic cleaners to restore pH balance.
- Rust converter: Stops rust from spreading but doesn’t remove it. Confirm compatibility with your sealer.
- Phosphate-free cleaners: Preferable for environmental reasons and won’t harm concrete.
Quick rule: Always test cleaners on a small, hidden area first.
Poultice and mechanical tools
These tools help you tackle rust stains effectively.
- Absorbent poultices: Use for light to moderate stains. Check they’re non-toxic and easy to apply/remove.
- Binders (like latex or epoxy): Mix with absorbents for heavier stains. Ensure they won’t damage the concrete surface.
- Pressure washer: Use for general cleaning before sealing. Check PSI – 1200-3000 is usually safe.
- Scrapers: Help remove loose rust and dirt. Ensure they’re sturdy but won’t damage the concrete.
- Grinders (with diamond blades): Use for heavy stains. Check blade type – cup wheels are typically best.
Quick rule: Always wear appropriate PPE when using mechanical tools.
Step-by-Step Cleaning and Neutralizing Methods
Begin with a thorough wash to remove loose material and surface dirt. Move to a chelating cleaner if iron is present and flush well. Test a small area first and follow label instructions for dilution and contact time.
Proceed with a poultice if stains persist, then consider mechanical removal if needed. Finish with a neutralization step to balance residue from cleaners. Always test between steps and follow safety recommendations on product labels and local rules.
Step-by-Step Cleaning Process
This sequence helps you clean and neutralize rust stains on concrete effectively, ensuring a smooth surface for sealing.
- Preparation: Wear safety gear – gloves, goggles, and old clothes. Tape off surrounding areas to protect from splashes.
- Wet the area: Mist the stained concrete with water to keep dust down and prevent stains from setting further.
- Apply cleaner: Use a stiff-bristled brush or pump sprayer to apply your chosen cleaner (see Tools and Materials Checklist).
- Scrub: Work the cleaner into the stain, using circular motions. Let it dwell for the time recommended by the manufacturer.
- Rinse: Thoroughly rinse the area with clean water. Inspect for any remaining stains. If satisfied, let it dry before sealing. If not, repeat or move to the next step.
Gentle washing and chelate treatment
Chelating cleaners are mild yet effective at removing rust stains. Here’s how to use them safely.
Apply the cleaner liberally, following the manufacturer’s instructions. Use a sprayer or brush for even coverage.
Watch the dwell time: Too short, and it won’t work; too long, and it may damage the concrete. Rinse thoroughly after the recommended time.
Evaluate effectiveness: After rinsing, let the area dry. If stains are still visible, repeat or move to a stronger method like poultices.
Poultices for deep or recurring stains
Poultices draw out rust and are great for stubborn, deep-seated stains. Here’s how to use them.
Mix the poultice according to package instructions. Apply a thick layer over the stain using a trowel or putty knife. Let it dwell for the recommended time (usually 24-72 hours).
Remove and evaluate: Scrape off the poultice, rinse the area, and let it dry. If stains are gone, proceed to sealing. If not, repeat or move to mechanical methods.
When to use mechanical methods
Mechanical methods like grinding or blasting can remove tough stains but carry risks. Use them judiciously.
Grinding: Use a concrete grinder with diamond blades. Work slowly, keeping the blade flat on the surface. Protect surrounding areas with tape and plastic sheets.
Abrasive blasting: This is aggressive and should be used sparingly. It can damage the surface if not done carefully. Always wear appropriate PPE (personal protective equipment).
Neutralization, Drying, and Preventing Re-Oxidation
After acidic cleaners, neutralize surfaces according to instructions and rinse thoroughly. Ensure the iron remains in an insoluble form before sealing by following recommended neutralizers and drying times. Use drying methods that fit the space and environmental conditions.
Isolate the concrete as needed to control moisture during drying and sealing. Plan for gradual drying and avoid sealing while damp, which can trap moisture. Verify recommended dry times and environmental limits on product data sheets and manufacturer guidance.
Neutralizing residues safely
After cleaning, it’s crucial to remove any residue that could affect your sealer. Here’s how:
Rinse thoroughly. Use clean water and a soft brush or cloth to rinse the entire area. Make sure no cleaner residue remains.
Check pH levels. Use pH test strips (available at hardware stores) to ensure your concrete is neutral (around 7). If it’s too acidic or alkaline, re-rinse and check again.
Ensuring adequate drying and vapor control
Concrete needs to be dry before sealing. Here’s how to ensure that:
Check moisture levels. Use a moisture meter (available for rent at tool rental stores) to test the concrete. Safe ranges vary, but generally, it should read below 15-20%. If unsure, consult your sealer’s instructions.
Wait at least 72 hours before sealing, even if moisture levels are low. This gives any remaining moisture time to evaporate. Consider using a vapor barrier primer if moisture is an issue.
Choosing Sealers and Material Compatibility with Previous Treatments
Compare penetrating sealers versus film-forming options in terms of vapor permeability and stain-blocking. Consider how each type interacts with previously cleaned or neutralized surfaces and iron residues. Always verify compatibility with the cleaners you used and the concrete condition.
Check for guidance on how sealers respond to residual cleaners, poultices, or neutralizers. If in doubt, consult the product label, technical data sheet, or a local expert to confirm suitability for your specific stains and substrate. Do not rely on general claims alone.
Which sealer types minimize bleed-back risk
When it comes to preventing bleed-back, you’ve got two main sealer types to consider: penetrating and film-forming.
Penetrating sealers soak into the concrete, making them breathable. This means they let moisture escape, reducing the risk of trapped water causing bleed-back. They’re great for new or green concrete that might still be drying out.
On the other hand, film-forming sealers sit on top of the surface, creating a barrier. While they can hide existing stains and provide good protection against future ones, they don’t allow moisture to escape. This can lead to trapped water causing more bleed-back over time. Use them once your concrete is fully cured.
Checking product data and warranties
Before you buy, make sure the sealer you’re eyeing is right for your job. Here’s what to check:
Technical Data Sheets: Look for info on VOC content (volatile organic compounds – lower is better), permeability (breathability), and recommended substrates (what types of surfaces it works best with).
Also, check the warranty. A good sealer should come with a solid guarantee. If you’re unsure about anything, don’t hesitate to contact the manufacturer for guidance.
Sealing Workflow, Timing, and Quality Checkpoints
Create a pre-seal checklist that covers cleaning: wash, neutralize, dry, and test spots. Plan the sequence from final cleaning to sealer application and note environmental conditions. Use test spots to confirm adhesion and appearance before full coverage.
Establish quality checkpoints during the process, such as dryness criteria and consistency of finish. Allow recommended windows between steps as indicated by the sealer label and local guidance. Always refer to product instructions for timing and conditions.
Final surface prep and adhesion checks
Before you start sealing, use this checklist to ensure your concrete is ready.
- Inspect for dust: Wipe the surface with a damp cloth. If it’s clean, you’re good. Dust can ruin adhesion.
- Check moisture levels: Use a moisture meter. Concrete should be below 4% MC. Too much moisture causes delamination.
- Test for pH: Neutralize any remaining alkalinity with a chelating agent to prevent sealer degradation.
- Perform adhesion test: Apply a small patch of sealer, let it cure, then scratch. If it peels off easily, re-clean and try again.
- Look for efflorescence: White powdery deposits can compromise sealant performance. Remove with a wire brush and water.
- Check temperature: Apply sealer when temps are between 50-90°F (10-32°C). Too cold or hot affects curing.
- Ensure proper ventilation: Open windows, use fans. Good airflow prevents solvent buildup and poor curing.
- Inspect for cracks: Seal larger cracks first with a flexible filler. Small ones can be sealed over.
Quick rule: If in doubt, wait. Rushing through this stage leads to failed seal jobs.
Application best practices and curing considerations
Follow these steps for a successful sealer application and proper cure.
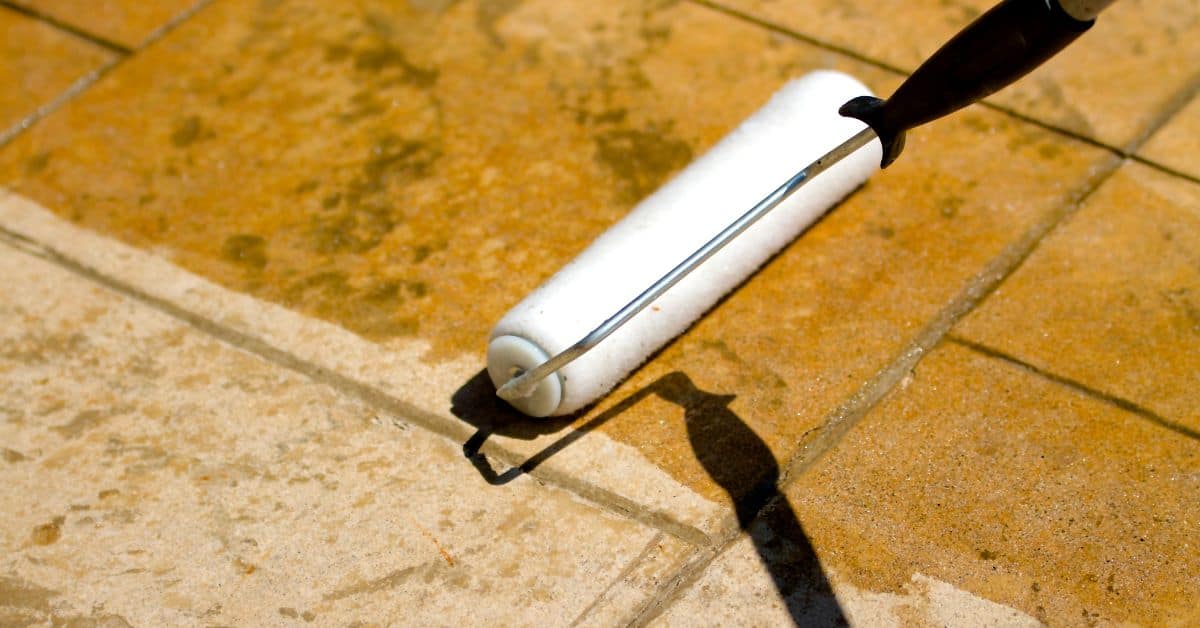
- Apply first coat: Use a paint sprayer or roller. Keep a wet edge to avoid lap marks.
- Allow drying time: Follow manufacturer’s guidelines. Rushing can cause poor curing.
- Apply second coat: Apply perpendicular to the first for better coverage and protection.
- Monitor humidity: Keep relative humidity below 70% during cure. Too much causes condensation and poor adhesion.
- Protect from rain: Keep surface dry for at least 24 hours after sealing to prevent wash-off.
- Avoid foot traffic: Keep people off the sealed area until fully cured (usually 72 hours).
- Keep pets away: Pets can scratch or otherwise damage the curing sealer.
- Inspect for bubbles: If present, lightly roll over them with a paint roller to remove. Let cure before touching.
Quick rule: Patience is key during application and curing. Rushing leads to poor results.
Troubleshooting Common Problems and Long-Term Maintenance
If bleed-back returns after sealing, diagnose whether the source is ongoing metal oxidation, groundwater movement, or incomplete cleaning. Identify failure points by rechecking stain origin and revisiting the cleaning steps. Build a plan to address the root cause before re-sealing.
Develop a maintenance routine to prevent recurrence, including periodic cleaning and inspection of vulnerable joints. Keep an eye on moisture levels and sealant condition over time. For persistent issues, verify product compatibility and seek guidance from labels, data sheets, or local codes before proceeding.
What to do if rust reappears after sealing
If you’ve sealed your concrete and rust stains come back, don’t panic. First, figure out why.
Check for moisture: Rust needs water to form. If your slab’s wet, that’s problem one. Use a moisture meter to confirm.
Look for hidden iron sources: Maybe you missed some metal debris during prep. Or perhaps nearby metal objects are leaching into the concrete. Inspect thoroughly.
If it’s a sealer failure, re-clean and reseal. Follow your initial process, but this time, ensure you’ve chosen a sealer that minimizes bleed-back risk. Refer back to our earlier section on choosing sealers for help.
Routine inspection and prevention
Preventing rust stains is easier than treating them. Here’s a simple checklist to keep your concrete clean and stain-free.
- Inspect every 6 months: Spring and fall are ideal times for a quick check-up.
- Remove metal objects: Keep debris away from the surface. Regularly sweep or blow off any metal particles.
- Control drainage: Water should flow away from your concrete, not pool on it. Ensure proper grading and consider installing drains if necessary.
- Check nearby metal structures: Rust can travel through concrete. Keep an eye on adjacent metal objects or rebar.
- Monitor sealant condition: Cracks or peeling indicate it’s time for touch-ups or a full reseal.
- Inspect joints and cracks: These are common entry points for moisture and debris. Fill and seal as needed.
- Clean spills promptly: Acidic substances, like battery acid or fertilizer, can react with concrete to cause rust stains.
- Keep de-icing salt use to a minimum: While it won’t cause rust directly, excessive use can lead to cracking and moisture intrusion.
Quick rule: Regular checks and quick action on any issues will keep your concrete looking great and prevent costly repairs down the line.
Conclusion
Done right, stopping bleed-back and sealing your concrete protects looks, durability, and safety. You’ll head off re-oxidation, limit staining, and avoid costly rework by sticking to tested steps and clean, deliberate work.
Start by checking the area in a small, inconspicuous spot to confirm whether you’re dealing with surface rust or active bleed-back, then follow a logical flow: prepare and protect, neutralize or clean as needed, dry thoroughly, and then choose a sealer that is compatible with what’s already on the surface, all while wearing proper PPE and working in good ventilation; test, then proceed in measured stages and document what you see at each stage.
Common mistakes to avoid include skipping the small-area test, using the wrong cleaner or sealer for the job, and rushing through drying or flushing steps; always keep safety rules in mind—wear eye protection and gloves, ventilate or use a respirator if dust or fumes are present, and avoid over-wetting concrete or trapping moisture under a new coating; if anything seems uncertain or you encounter persistent bleed-back after cleaning, call a professional before you push ahead.
FAQ
What should I do if rust bleed-back keeps returning after cleaning?
Check the rust source and make sure it’s fully removed from the substrate before sealing. If it reappears, inspect for active rust at the metal causing the bleed and address it per the manufacturer’s instructions or local guidance before sealing.
Can I seal over rust-stained concrete without removing the stain first?
No. Sealing over active rust or fresh bleed-back can trap moisture and worsen staining. Use the recommended cleaner and neutralizer steps, then test a small area before proceeding with full sealing.
How do I know when the concrete is ready for sealing?
-Wait until the surface is dry to the touch and free of odor or tackiness. Follow the product labels for cure or dry times, and re-check with the manufacturer instructions if you’re unsure.
What should I check on the sealer to ensure compatibility with rust treatments?
Read the sealer label for compatibility with rust inhibitors or previous cleaners. If in doubt, contact the sealer maker or consult the product instructions before applying over treated concrete.