

Introduction
DIY roofing can save money when the job is simple and you have the right safety, tools, and time—yet professionals often come out ahead on more complex projects.
You’ll learn how material costs, labor, and project scope affect the bottom line, and how to judge whether a DIY approach makes sense for a given roof.
The guide walks through practical steps, common pitfalls, and quick rules of thumb to help you decide when to DIY and when to hire a pro.
Key takeaways
- Compare common roofing materials’ price ranges, install difficulty, and durability implications.
- DIY can save on labor but risks improper installation and warranty voids.
- Exact costs depend on roof size, steepness, location, permits, and disposal.
- Pro quotes often include guaranteed workmanship and insurance coverage you may need.
- Hybrid approach minimizes risk: partial DIY, professional finish for critical sections.
- Plan for safety, permits, and disposal upfront to avoid unexpected costs.
Table of Contents
- Introduction
- Key takeaways
- Quick overview: Why roofing costs vary and why this comparison matters
- Material-by-material price comparison (typical ranges and pros/cons)
- Direct cost breakdown: DIY expenses vs. professional quotes
- When DIY saves money — realistic scenarios and required skill set
- When hiring a pro is cheaper (and safer) in the long run
- Safety, liability, permits, and insurance considerations
- Planning a cost-effective approach: hybrid strategies and decision checklist
- Real-life examples and quick decision flowchart
- Conclusion
- FAQ
Quick overview: Why roofing costs vary and why this comparison matters
You’ll see prices swing based on material type, roof size and shape, local labor markets, and permit or inspection needs. The complexity of the roof drives labor time and safety risks, which matters for DIY decisions. This overview helps you spot where DIY saves money and where a pro is worth it.
Look for quick checks you can use: identify material options, assess roof pitch and add-ons, and consider safety constraints. Mentioned factors can shift both upfront cost and long-term maintenance. Always verify specs on the product label or manufacturer data sheet before you plan any work.
Key cost drivers
The price of a roofing project isn’t set in stone. It’s driven by several variables:
Materials: Premium materials like metal or tile cost more than basic shingles.
Waste and overbuy: Less waste means less money spent on replacements.
Tools and equipment: You might need to rent or buy tools, adding to your costs. Access and height can also increase labor hours and safety measures.
How to use this article
This article is designed to guide you through the DIY vs pro decision-making process. Here’s how to navigate it:
Quick estimate: Start by getting a rough idea of costs with our simple breakdown.
DIY planning: If you’re up for the task, dive into our detailed planning section to ensure you’ve covered all bases.
Hiring checklist: If DIY isn’t for you, use our hiring guide to find a pro and understand what to expect from them.
When to call a pro: Even if you’re keen on DIY, know when it’s time to step back and let the pros take over. Safety first!

Material-by-material price comparison (typical ranges and pros/cons)
We’ll outline common roof materials and how installation complexity and substrate affect costs. Local factors like labor rates and climate can cause wide variation. Check with your supplier or installer for current ranges in your area.
For each material, note durability, maintenance, energy impact, and long-term value relative to upfront expense. When in doubt, confirm exact pricing, removal needs, and underlayment requirements from the contractor or supplier before choosing.
Asphalt shingles
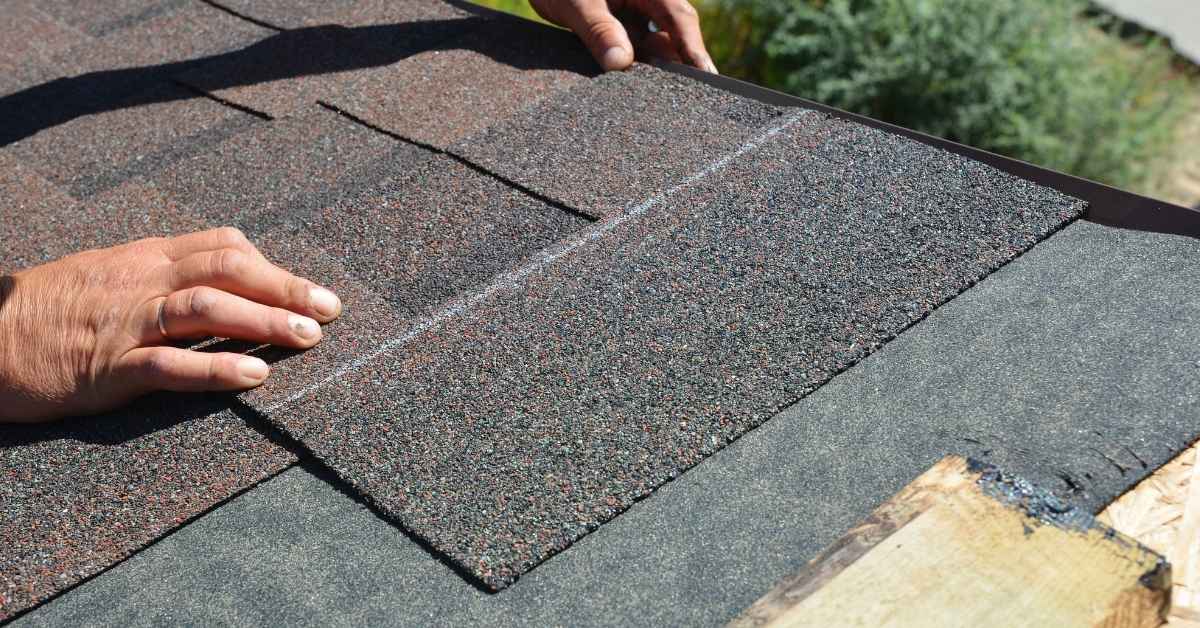
Asphalt shingles are the most common and affordable roofing material. They typically range from $1 to $4 per square foot installed, including removal of old roofing if needed.
Lifespan: 20-30 years with proper installation and maintenance. DIY-friendly but incorrect nailing or flashing can lead to leaks and costly repairs.
Cost drivers include labor rates, material availability, and required underlayment. Steeper roofs may add complexity and cost.
Metal, tile, and specialty materials
These materials offer durability but come at a higher price point due to complex installation requirements.
- Metal panels: $6-$12 per square foot. Require professional installation for proper seaming and flashing.
- Clay/concrete tile: $8-$20 per square foot. Heavy and fragile, need structural support and expert installation.
- Wood shakes: $6-$15 per square foot. Require regular maintenance to prevent rot and insect damage.
- Synthetic materials: $7-$12 per square foot. Mimic the look of natural materials but offer better durability and lower maintenance.
- Cracking or staining: Ensure proper installation and use compatible materials to avoid cracking, staining, or weak bonds.
Spray-on coatings and roof restoration products
These options can extend the life of your existing roof at a lower cost than replacement. DIY kits are available but professional application ensures better results.
Cost: $1-$4 per square foot, plus labor if hiring a contractor. Can be a cost-effective alternative to replacement for roofs in good structural condition.
Restoration is ideal for minor damage or wear and tear. However, it’s not suitable for major issues like leaks or structural problems.
Direct cost breakdown: DIY expenses vs. professional quotes
Prepare a side-by-side list of cost categories: materials, tools, safety gear, scaffolding or lift, disposal, permits, inspections, and labor. This helps you see where savings or add-ons appear in each path. If a line item is unclear, ask for a written breakdown from the supplier or contractor.
Materials quantities and types affect both routes, especially when choosing premium options. Look for a sample calculation based on your roof size and verify it with the installer or supplier before proceeding.
One-time and recurring costs for DIY
When you tackle a roofing project yourself, there are upfront purchases and follow-up costs to consider. Here’s what to budget for:
Materials: These are your one-time expenses. You’ll need shingles, underlayment, fasteners, flashing, and other supplies. Prices vary by material type and quality.
Tools: Some tools you might need to buy outright, like a roofing nailer or brackets. Others can be rented, such as ladders or safety harnesses. Consider depreciation and reuse value when deciding whether to purchase or rent.
Recurring costs: Roofs require maintenance over time. Budget for repairs, recoating, or re-roofing every 15-30 years, depending on your material choice.
What a pro quote typically includes (and what to watch for)
A professional’s quote is a detailed breakdown of services and costs. Here’s what to expect:
Materials: Pros usually include material costs in their quotes, with a markup to cover overhead and profit.
Labor: This is the bulk of your pro’s cost. It covers installation, cleanup, and any necessary repairs.
Safety, access, and site setup: Pros factor in safety gear, scaffolding or lifts, and site preparation. They may also include waste disposal charges and permit fees.
Warranties: Some pros offer warranties on their workmanship. This can add value to your quote but be sure to understand what’s covered and for how long.
When comparing quotes, look for apples-to-apples comparisons. Make sure each bid includes the same scope of work, materials, and warranties.
When DIY saves money — realistic scenarios and required skill set
Identify DIY-friendly scenarios such as small repairs or simple coatings on a low-slope roof. Define the size and complexity limits where DIY makes sense. Keep a clear boundary around material type and roof condition.
List the minimum skills and time commitment needed, with a focus on safety and basic flashing concepts. If you’re unsure about any step, pause and verify with a pro or local building authority before continuing.
Skills and tools checklist for a budget-saving DIY
Before you start any roofing project, make sure you have the right skills and tools. Use this checklist to ensure you’re prepared.
- Nailing shingles: Know how to use a hammer or nail gun safely. Incorrect nailing can cause leaks.
- Flashing installation: Understand how to install flashing around vents, chimneys, and skylights to prevent water intrusion.
- Shingle layout: Know how to lay out shingles properly to ensure a neat, even appearance. Improper layout can lead to wasted materials.
- Sealing valleys: Understand how to seal the intersection of two roof planes (valleys) to prevent leaks.
- Ladder safety: Know how to set up and use a ladder safely. Falls are a major risk on roofs.
- Fall protection: If your roof is steep, consider installing temporary fall protection systems.
- Rent or buy tools: You may need to rent or purchase tools like nail guns, ladders, and safety harnesses. Using the wrong tool can cause damage or injury.
- Check materials: Ensure you have enough materials for your project. Running out mid-project can be costly.
Quick rule: If you’re unsure about any skill or tool, it’s better to call a pro. Safety and proper installation are key to saving money in the long run.
Example cost-savings scenarios
Here are some examples of where DIY can save you money. Remember, these are rough estimates and actual savings may vary.
Scenario 1: Patching a small leak
If your roof has a small leak, you might be able to save by patching it yourself. Materials cost around $50-$100. Labor for a pro could run $200-$400. Savings: $150-$350.
Scenario 2: Replacing a section of shingles
If you have a few damaged or missing shingles, replacing them yourself can save money. Materials cost around $100-$200. Labor for a pro could run $300-$500. Savings: $200-$400.
Scenario 3: Repainting a low-slope roof
If your low-slope roof is looking tired, repainting can give it new life. Materials cost around $150-$300. Labor for a pro could run $400-$700. Savings: $250-$500.
When hiring a pro is cheaper (and safer) in the long run
Look for situations where professional work prevents bigger future costs, such as complex geometry or multi-layer removals. Consider high-risk tasks that require permits or certified trades. In these cases, upfront labor costs may be offset by fewer problems down the line.
Think about safety, warranty, and code compliance as part of the value. Ask for a written warranty and verify what it covers with the manufacturer or code official if needed.