

Introduction
Roofing certifications are credentials that show a roof job meets local standards and safety rules. They can fail or be pursued if issues show up in workmanship, materials, or documentation. This article covers common causes, how field tests are performed, and practical fixes you can tackle.
As a DIYer, start by reading the job’s labels and any manufacturer instructions on the roofing products you plan to use. Check local rules and ask the retailer or installer for what documentation is required, then verify your work against those guidelines. If something seems off, focus on fixable steps like resealing joints, replacing damaged shingles, or redoing flashing, and know when to call a pro.
Key takeaways
- Understand what roofing certifications cover and how they influence warranties and compliance.
- Identify common certification failures: installation mistakes, damaged components, improper materials.
- Learn field versus lab tests: what inspectors observe and acceptable verification.
- Follow step-by-step diagnostics on the roof with safety gear and fall protection.
- Apply fixes and remediation per manufacturer instructions, then re-test before deeming compliant.
- Keep documentation, schedule re-inspections, and coordinate with inspectors and manufacturers.
Table of Contents
- Introduction
- Key takeaways
- What Roofing Certifications Are and Why They Matter
- Common Causes of Failing Certification Requirements
- How Certification Testing Works — Field and Lab Tests
- Step-by-Step Diagnostics: How to Assess Certification Issues on a Roof
- Fixes and Remediation to Restore or Obtain Certification
- Documentation, Re-Inspection, and Maintaining Certified Status
- Tools, Materials Checklist and Material Specs Explained
- Hiring the Right Professionals and Coordinating with Manufacturers/Inspectors
- Conclusion
- FAQ
What Roofing Certifications Are and Why They Matter
Roofing certifications come in several flavors. They can be issued by manufacturers, by manufacturers as part of a program for installers, or by overarching product and system standards bodies. Each type has its own scope and purpose.
Understanding who grants a certification helps you see why it exists and what it covers. Certifications matter for warranty eligibility, insurance requirements, and resale value, as well as for safety compliance on the jobsite. Differences between types can affect who must meet them and when they apply.
Types of certifications explained
Roofing certifications come in several types, each serving a specific purpose. Let’s break them down:
Manufacturer Certifications: These ensure the product meets the manufacturer’s quality standards. For instance, GAF’s Golden Pledge warranty requires installation by certified contractors.
Contractor/Licensing Certifications: These verify a contractor’s knowledge and skill. Examples include CertainTeed’s SELECT ShingleMaster program or local licensing requirements.
Product Standards (e.g., ASTM/UL): These certify products meet specific performance criteria, like UL 90 Class A fire resistance rating.
Energy/Green Certifications: These validate a product’s energy efficiency or environmental friendliness, such as ENERGY STAR or LEED certification.
How certifications affect warranties and insurance
Certifications play a crucial role in warranties and insurance coverage:
Warranties: Many manufacturers require certified installation for their extended warranties. For example, CertainTeed’s SureStart warranty needs SELECT ShingleMaster contractors.
Insurance Requirements: Insurers may mandate specific certifications or standards to provide coverage. Non-compliance could void policies. For instance, some insurers require Class A fire resistance for certain areas.
Always check with your manufacturer and insurer to understand their certification requirements to avoid voiding warranties or coverage.
Common Causes of Failing Certification Requirements
The usual culprits are improper installation, using the wrong materials, or missing maintenance that keeps a system performing as intended. Installers may skip steps or use substitutions that void a certification. These issues show up quickly or as problems develop over time.
Structural issues, inadequate ventilation, and noncompliance with local codes also derail certification. Always verify material compatibility and installation methods against the cert guide, product data sheet, or manufacturer instructions. If in doubt, check with the certifying body or local building authority.
Installation and workmanship errors
Proper installation is crucial for certification. Avoid these common mistakes:
- Improper Fastener Placement: Nails or screws too close to the edge, not following manufacturer’s specs.
- Flashing Errors: Incorrect placement, gaps, or missing pieces around vents and chimneys.
- Ventilation Mistakes: Inadequate intake or exhaust vents leading to moisture buildup.
- Lack of Drip Edge: Water can back up under shingles without a drip edge.
Regular inspections during installation help catch these issues early.
Material selection and compatibility problems
Using the right materials is key to certification success. Watch out for:
- Uncertified Products: Using unrated or non-certified materials voids warranties.
- Incompatible Components: Mixing different brands’ products without checking compatibility can cause issues.
- Counterfeit/Low-Grade Materials: Fake or low-quality products won’t perform as expected, leading to failures.
- Incorrect Fasteners: Using the wrong nails or screws for your roof type can cause leaks and other problems.
- Poorly Mixed Asphalt Cement: Improper mixing leads to weak seals and increased risk of failure.
Always check product ratings, compatibility, and use genuine materials.
Environmental and structural factors
Roof Slope: Too flat or too steep slopes can cause water to pool or flow off too quickly, leading to leaks.
Substrate Condition: Poorly prepared decks, rotted plywood, or other substrate issues can cause certification failures.
Moisture and Extreme Weather Exposure: Prolonged exposure to moisture, extreme heat, cold, or heavy winds can degrade materials over time, leading to failures.
Regular inspections and maintenance help mitigate these environmental factors.
How Certification Testing Works — Field and Lab Tests
Tests fall into two broad buckets: lab tests and field inspections. Lab tests check performance under controlled conditions for things like wind uplift, fire resistance, and impact. Lab results are used to certify products or systems before they reach the field.
Field tests and inspections monitor real-world performance and installation quality. They confirm that what was installed matches the approved plan and remains within spec over time. Always refer to the official test plan or manufacturer instructions for what to expect.
Lab tests manufacturers use
Manufacturers conduct lab tests to ensure their roofing products meet certification standards. Here are three common ones:
Wind Uplift Resistance: This test checks how well a roof can withstand high winds. Passing scores vary, but generally, a product should resist winds up to 90 mph or more.
Fire Resistance: This test determines if a roof can resist fire spread. Results are rated Class A (best) to Class C (worst).
Impact Resistance: This test drops a steel ball onto the roof from varying heights to see if it cracks or punctures. Passing results usually mean no damage at impact heights of 20 feet or more.
On-site inspections and documentation checks
During certification audits, inspectors verify that your roofing project meets the required standards. Use this checklist to prepare:
- Installation Records: Keep detailed records of who installed the roof and when.
- Material Certifications: Ensure all materials used are certified and have valid labels.
- Photographic Evidence: Take before, during, and after photos to document the installation process.
- Measurement Evidence: Keep records of measurements taken on-site to confirm compliance with standards.
- Workmanship Checks: Inspectors will check for proper nailing, sealing, and overall work quality.
- Compliance with Building Codes: Ensure the roof meets local building codes and regulations.
- Safety Measures: Check that safety measures were followed during installation.
- Final Inspection Report: Prepare a report summarizing all checks and findings.
Quick rule: Always keep organized records. Missing or incomplete documentation can lead to failed inspections and delayed certifications.
Step-by-Step Diagnostics: How to Assess Certification Issues on a Roof
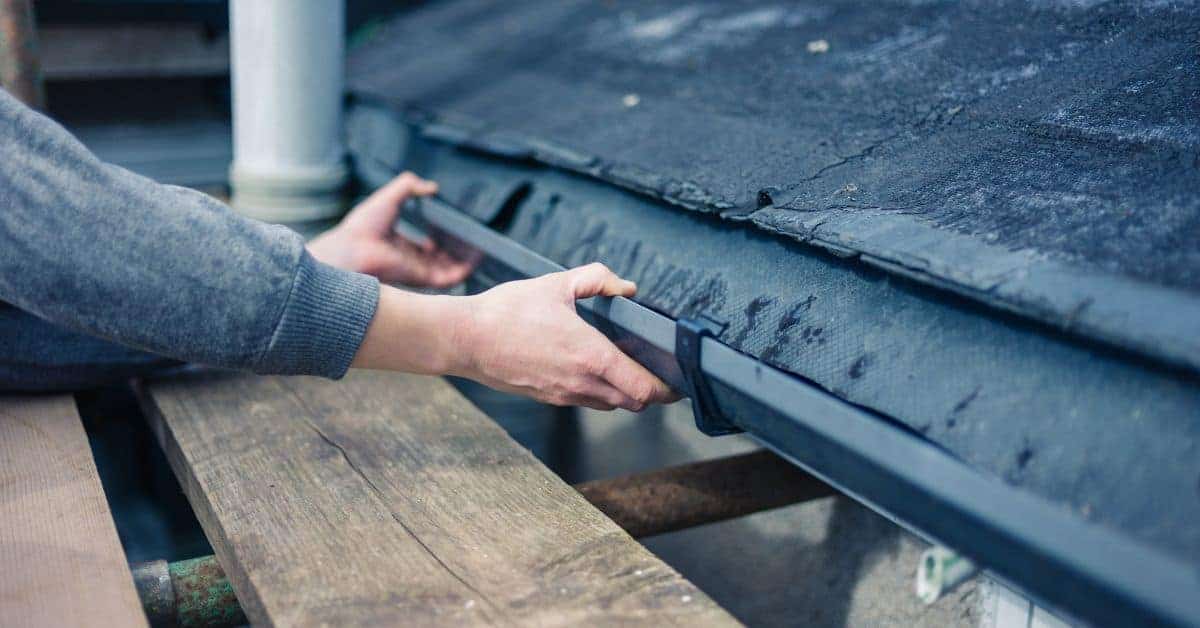
Start with a visual walkaround, noting any mismatches between components and what the spec calls for. Check fasteners, flashing, underlayment, and membrane layup for obvious deviations. Photograph suspect areas for later review.
Move to a safety-first inspection, using a ladder and harness if needed. Compare installed products to the approved drawings or data sheets labeled on the materials. When something doesn’t align, mark it and consult the certifying document or a pro for guidance.
Step-by-Step Process
This step-by-step guide helps you assess certification issues on your roof safely and effectively.
- Preparation: Gather safety gear – harness, helmet, gloves. Check weather forecast. Safety first; clear skies ensure a secure climb.
- Safety checks: Inspect ladder for stability. Secure it at the top. Use a safety hook if available. Secure footing prevents accidents.
- Inspection begins: Start at the peak, work your way down. Check both sides of the roof. Systematic approach ensures nothing’s missed.
- Check for visible issues: Look for missing shingles, gaps in flashing, nail pops. Visible problems often indicate underlying certification failures.
- Document findings: Take photos, note observations. Keep a record of your inspection. Pictures help track progress and aid professionals if needed.
- Perform quick tests (if applicable): Check for ponding water, inspect fasteners’ pattern. Quick tests help narrow down causes without invasive methods.
- Cleanup: Remove any debris from the roof and gutters. Debris removal prevents further damage or accidents.
- Final checks: Recheck your findings, ensure nothing was overlooked. Double-checking ensures accuracy in your assessment.
Visual checkpoints and quick tests
Use this checklist when performing a visual inspection to quickly identify potential certification issues.
- Missing or damaged shingles: Check for gaps, curling, or broken tabs. Missing shingles expose underlayment, risking leaks.
- Flashing gaps: Inspect around vents, chimneys, and skylights. Gaps allow water intrusion, leading to certification failures.
- Fastener pattern: Ensure nails are evenly spaced, not overdriven or missing. Improper nailing can cause shingles to blow off in high winds.
- Ponding water: Check for standing water after a rain. Ponding indicates poor drainage, which may void certifications.
- Nail pops: Look for nail heads pushing through shingles. Nail pops indicate movement under the roof, potentially due to improper installation.
- Blisters or delamination: Inspect for bubbling or peeling of shingle layers. These signs indicate manufacturing defects or improper installation.
- Gutter condition: Check gutters for proper alignment, no leaks, and secure attachment. Proper gutter function is crucial for roof certification.
- Moss or algae growth: Inspect for excessive organic growth. Excessive growth can retain moisture, leading to certification failures.
- Sagging or uneven decking: Look for dips or waves in the roof surface. Uneven decking may indicate structural issues or improper installation.
Quick rule: If you find any of these issues, document them and consider hiring a professional to assess further if needed.
When to perform measurements and intrusive testing
Measurements and intrusive tests should be performed when visual checks aren’t sufficient or when specific issues arise. Here’s when to consider them:
Attic ventilation measurement: If you notice excessive moisture in the attic, measure the net free vent area (NFVA) to ensure it meets building codes and manufacturer requirements. Proper ventilation prevents moisture buildup, which can lead to certification failures.
Moisture content testing: If you suspect a leak or water intrusion, perform moisture content tests on the roof decking. This may require hiring a professional with specialized equipment. Excessive moisture can indicate leaks and potential structural issues.
Deck flatness measurement: If you notice sagging or unevenness in the roof surface, measure the flatness of the roof decking. This may involve using a straight edge and level. Improperly installed or damaged decking can lead to certification failures.
Core samples: In cases of suspected manufacturing defects or improper installation, core samples may be taken from shingles to analyze their composition and structure. This should always be done by a certified professional. Core samples help identify if the problem lies with the materials or the installation.
Certified inspectors: If your inspection reveals complex issues, or you’re unsure about any findings, hire a certified inspector to perform invasive diagnostics. Professionals have specialized knowledge and equipment to accurately assess certification issues.
Fixes and Remediation to Restore or Obtain Certification
Small problems can often be corrected with targeted repairs or replacements. This includes resealing joints, replacing cracked flashing, or upgrading a component that doesn’t meet spec. Keep records of what you replaced and why.
For more complex gaps, you may need a system upgrade or an alternative approved by the certifier. Always follow manufacturer instructions and local code requirements. If in doubt, pause work and contact the certifying body for approved remediation paths.
Repair vs. replacement decisions
When facing certification failures, the first step is deciding between repairs and full reroofing. Here’s how to make that call:
Extent of damage: If it’s isolated—like a few missing shingles or leaks around vents—repairs might do the trick.
Age: Older roofs are more likely to have widespread issues. If yours is nearing end-of-life, replacement could be wiser.
Cost: Weigh repair costs against full reroofing. Sometimes, repairs add up over time, making replacement cheaper in the long run.
Certification requirements: Some failures might need a complete system upgrade to pass certification. Check with your certifier before deciding.
Upgrades to meet certification standards
To bring your roof up to snuff, consider these common upgrades:
Underlayment: Upgrade to a better quality or heavier duty underlayment for improved protection.
Flashings: Ensure proper flashings around vents, chimneys, and skylights. Replace worn-out ones with approved materials.
Ventilation: Correct any ventilation issues to meet certification standards. This might involve adding or replacing vents.
Fastening patterns: Upgrade nail patterns to match current certification requirements. You may need to add more nails per shingle.
Accessories: Use approved components like drip edges, starter strips, and ridge caps. Some upgrades might require re-testing or approvals, so check with your certifier first.
Documentation, Re-Inspection, and Maintaining Certified Status
Document all repairs with dates, part numbers, and installer notes. Save receipts and any test results or inspection reports. This paperwork helps when you apply for re-inspection or warranty claims.
Submit for re-inspection per the certifier’s process and keep a maintenance log for ongoing compliance. Regular checks of wear, seals, and fastener integrity help preserve certification over time. When plans change, confirm with the certifier before continuing.
What documentation inspectors and manufacturers require
Before you start any repairs or upgrades, gather these documents. They’ll speed up the re-certification process.
- Installation reports: These show how your roof was installed originally. If missing, contact your installer or manufacturer.
- Material invoices: Keep records of what materials were used and when they were purchased.
- Photos: Before-and-after photos help inspectors see the changes made.
- Engineering letters: If you’ve made structural changes, you’ll need letters from an engineer approving them.
- Certification documents: Keep your original certification paperwork. It proves your roof met standards initially.
- Warranty info: Know what’s covered and for how long. This can help with re-certification costs.
- Building permits: If you’ve made significant changes, you might need to show proof of permits.
- As-built drawings: These show the actual layout of your roof. They’re useful if there are discrepancies between plans and reality.
Quick rule: Keep all documents organized in one place for easy access during inspections.
Maintenance schedule to protect certification
A regular maintenance routine helps prevent issues that could void your certification. Here’s a suggested checklist and intervals.
- Inspect after storms: Check for damage after heavy winds, rain, or snow. Fix any issues promptly.
- Annual checks: Once a year, do a thorough inspection of your roof. Look for signs of wear, leaks, or other problems.
- Clean gutters: Clogged gutters can cause water to back up and damage your roof. Clean them out at least twice a year.
- Trim trees: Branches rubbing on your roof can scratch the surface and cause leaks. Trim trees regularly to keep branches away from your roof.
- Check flashings: Flashings around vents, chimneys, and skylights can crack or rust over time. Inspect them annually and repair as needed.
- Inspect insulation: Proper insulation helps maintain your roof’s temperature and prevents damage from extreme heat or cold.
- Check for pests: Squirrels, birds, and insects can cause damage to your roof. Inspect for signs of pests annually.
- Regularly inspect membranes: If your roof has a membrane, check it regularly for cracks, tears, or other damage.
Quick rule: Regular maintenance is cheaper and easier than fixing major problems that could arise from neglect.
Tools, Materials Checklist and Material Specs Explained
Build a simple on-site checklist with the tools you actually use for roofing work. Include measuring tapes, levels, ladders, sealants, and fasteners that match the approved system. Label or reference the exact product data sheets during the job.
Learn to read the material specs and standards on the label or data sheet. Compare this to the cert guide or manufacturer instructions before installation. If something is unclear, verify with the supplier or the certifying body.
Essential tools and safety gear
Before you start inspecting or making repairs, ensure you have the right tools and safety gear. This checklist covers basic essentials for safe and efficient work.
- Hard hat: Protects against falling debris during inspections and repairs.
- Safety glasses: Shields eyes from dust, debris, and harmful UV rays.
- Work gloves: Prevents cuts and protects hands from heat.
- Harness: Essential for safe roof access and work at heights.
- Tape measure: Accurate measurements ensure correct material ordering and installation.
- Chalk line: Helps mark out straight lines for nailing patterns and cuts.
- Claw hammer or pry bar: Useful for removing old nails, shingles, or underlayment.
- Moisture meter: Detects moisture buildup in roof structures to prevent rot and mold.
- Nail gun or hammer: For securing new materials during repairs or upgrades.
- Ladder stabilizer: Ensures safe ladder positioning on uneven surfaces.
Quick rule: Always prioritize safety gear before starting any roof work.
How to read material specs and certification marks
Understanding product specifications and certifications is crucial for ensuring your roof meets standards. Here’s a checklist of key aspects to consider.
- Product name/number: Matches the spec sheet and packaging, ensuring you’re using the correct material.
- Manufacturer: Verify they are certified to produce compliant materials.
- Certification marks (e.g., ASTM, UL, FM): Confirm these match required standards for your roof type.
- Wind resistance rating: Ensure it meets or exceeds local building codes and certification requirements.
- Fire resistance classification: Check it aligns with needed protection levels.
- Warranty information: Verify coverage terms, duration, and conditions for certified materials.
- Installation instructions: Follow these to maintain certification compliance during installation or repair.
- Material composition: Check it matches required components for certification (e.g., asphalt, metal, tile).
Quick rule: Always cross-reference product specs with your roof’s certification requirements before purchasing and installing materials.
Hiring the Right Professionals and Coordinating with Manufacturers/Inspectors
Choose contractors and inspectors who list relevant certifications and experience on similar systems. Ask about who holds which credentials, and request recent prior work samples. Verify their certifications with the issuing body if possible.
Coordinate approvals, deliveries, and on-site testing with the manufacturer or certifier early in the project. Follow up on required inspections and keep written notes of decisions and test results. If you’re unsure about a qualification, check the manufacturer instructions or local rules before proceeding.
Questions to vet contractors and inspectors
When hiring professionals for your roofing project, it’s crucial to ensure they’re certified and experienced. Here are some questions to ask:
Certification Experience: Ask about their certifications from organizations like the Roofing Contractors Association or the National Roofing Contractors Association.
Examples of Certified Projects: Inquire about similar projects they’ve worked on and if those roofs have obtained necessary certifications.
Insurance and Warranty Handling: Ensure they’re insured and understand how warranties work, especially those tied to certifications.
Working with manufacturers and third-party certifiers
To ensure your roof meets certification standards, you’ll need to coordinate with manufacturers and third-party inspectors. Here’s how:
Manufacturer Approvals: Contact the manufacturer to understand their approval process for materials and installation methods.
They may require specific tools, materials, or techniques to maintain certification. Follow their guidelines closely.
Third-Party Testing/Inspections: Schedule inspections with certified third-party organizations during different phases of your project.
This includes initial setup, mid-project checks, and final inspections. They’ll ensure your roof meets all necessary standards for certification.
Conditional Certifications: If your project is phased, you may need to obtain conditional certifications along the way.
These ensure that each phase meets interim standards, leading to full certification upon completion.
Conclusion
Focus on safety, durability, and a clean look. Certifications matter because they prove the roof will perform and last, and that any repairs won’t trigger leaks or warranty problems down the line.
Systematic next steps: verify which tests apply, assess field conditions and material specs, assemble and review the required documentation, run the diagnostic checks on a small, safe area first, perform fixes in the correct order, re-test and re-document everything, then schedule the inspection and keep all records current for ongoing maintenance.
Common mistakes to avoid are trying shortcuts that skip required tests or documentation, using the wrong materials or altered parts, and neglecting to test on a small area before a full repair. Always follow the manufacturer and inspector guidelines, wear proper fall protection, and keep a clear chain of custody for all materials and notes.
If you hit a wall or the numbers don’t add up, don’t push forward. Call a pro when critical tests or complex fixes are involved, or when the documentation looks weak. Stay disciplined, take it one step at a time, and you’ll finish with a roof that’s safe, solid, and ready for the next inspection.
FAQ
What should I check on a roofing certification label or certificate?
Look for the manufacturer name, product model, and the intended use. Check that the label or certificate matches the roof type and application you’re doing. If anything isn’t clear, read the manufacturer instructions and follow local rules for verification.
What are common signs that a certification might be failing or at risk?
Inconsistent labeling, unclear test results, or a certificate that doesn’t list the exact roof components you’re using are red flags. If the documents don’t align with what you’ve installed, stop and verify with the supplier. Always double-check against the product label and instructions.
What steps can I take before calling in a pro to address certification issues?
Double-check all components against the manufacturer instructions and labels. Compare the installed materials to what the certification covers and correct any mismatches if possible. If you’re unsure, pause work and seek guidance from the product manufacturer or a qualified inspector.
How should I document and track tests or inspections to maintain certified status?
Keep digital and physical copies of all labels, certificates, and inspection reports. Record dates, test types, and the exact roof areas covered. Store them where multiple crew members can access them and refer to local rules for retention periods.