
Introduction
Repainting after mold remediation means waiting until the surface is fully dry, priming any repaired or stained areas, and finishing with a mildew-resistant topcoat chosen for the substrate. Do the drying check yourself and follow product label instructions for primer and paint compatibility. Treat it like a site repair: clean, dry, prime, then topcoat.
Work with practical steps and don’t rush the schedule—moisture or salts left behind will ruin the new paint. If you’re unsure about drying targets, primer type, or topcoat suitability, check the manufacturer’s instructions and local building guidance before painting. Keep ventilation and safety in mind while you prep and apply products.
Key takeaways
- Verify complete moisture disappearance before repainting and document readings for records.
- Use moisture meters or infrared tools with manufacturer guidance for acceptance criteria.
- Prepare substrates by cleaning, repairs, and neutralizing odors from remediation.
- Choose primers compatible with post-remediation conditions and substrate chemistry.
- Select mildew-resistant finishes labeled for damp environments and cleaning cycles.
- Safety: ventilate and control humidity during painting to prevent curing defects.
Table of Contents
- Introduction
- Key takeaways
- When Repainting Is Safe — Drying Targets and Verification
- Moisture Measurement Methods and Acceptance Criteria
- Substrate-Specific Drying and Prep Considerations
- Surface Preparation After Remediation
- Choosing Primers for Post-Remediation Projects
- Selecting Mildew-Resistant Topcoats and Finishes
- Application Best Practices and Environmental Controls
- Maintenance, Monitoring, and Troubleshooting After Repainting
- Conclusion
- FAQ
When Repainting Is Safe — Drying Targets and Verification
Deciding when to repaint after mold remediation hinges on documented dryness and the limits set by the paint manufacturer and the remediation report. Use the remediation report as your baseline and verify surface and in-assembly conditions with tools or tests that the product data sheet recognizes.
Check that any moisture-related notes in the remediation documentation are addressed before coating, and confirm paint manufacturer limits on substrate moisture in the label or technical bulletin. If you find discrepancies between the report and on-site readings, follow the more conservative requirement or get guidance from the remediation contractor or paint technical support.
Why drying matters after mold remediation
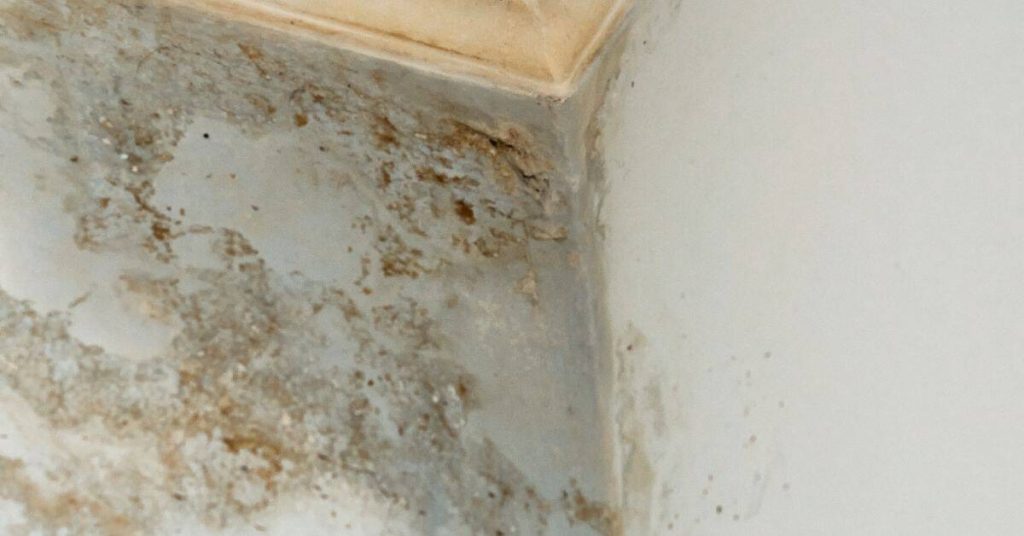
After mold remediation, it’s crucial to ensure surfaces are thoroughly dry before repainting. Residual moisture can wreak havoc on your paint job and encourage recurrent mold growth.
Moisture left behind can cause peeling, bubbling, or discoloration of your new paint. It also provides a perfect environment for mold spores to thrive, leading to another infestation.
Visible dryness isn’t enough. You need to measure moisture levels to ensure they’re within acceptable ranges. Both the remediation contractor and paint manufacturer have guidelines on this.
Remember: Moisture feeds mold. If you don’t dry out surfaces properly, your hard work will be for nothing.
How to verify dryness (what to measure and who signs off)
To confirm surfaces are dry enough for painting, use moisture meters or hygrometers. These tools provide accurate readings of moisture levels in materials.
Here’s how to proceed:
– Check the remediation contractor’s report for their drying targets.
– Consult the paint manufacturer’s guidelines for acceptable moisture levels before painting.
– Measure moisture levels using your chosen tool and compare results with both sets of guidelines.
If readings are within acceptable ranges, you’re good to go. If not, continue drying until they are. In some cases, a third-party inspector might be needed to sign off on the dryness.
Note: Always double-check with your remediation contractor and paint manufacturer’s guidelines. They know their products best.
Moisture Measurement Methods and Acceptance Criteria
Different meters and tests suit different jobs: pin meters measure near-surface moisture where pins contact, pinless meters scan a broader near-surface area, and relative-humidity probe tests read in-assembly moisture by measuring equilibrium conditions inside a sealed chamber or borehole. Each method has limits and calibration needs, so consult the meter manual and the paint manufacturer’s accepted testing methods.
Hygrometers used for ambient monitoring help assess drying conditions but don’t replace substrate-specific tests; acceptance criteria should come from the remediation report and the coating manufacturer’s guidance. When in doubt, document multiple test types and locations and ask product technical support which readings they accept for warranty purposes.
Surface versus in-depth measurements
When measuring moisture, it’s crucial to understand that some tools read surface moisture while others assess internal moisture. Using the wrong tool can lead to false negatives.
Spot meters and pinless meters are surface readers. They’re quick and easy to use but might not detect deeper moisture issues. Use them for initial checks or when you suspect a surface problem.
RH/probe tests and hygrometers, on the other hand, measure internal moisture. They’re more invasive but can provide accurate readings deep within materials. Use these when you need to verify dryness after remediation or in hard-to-reach areas.
Interpreting results and establishing acceptance criteria
Once you’ve taken moisture readings, it’s essential to interpret the results correctly. Don’t guess; use established thresholds.
First, check with your remediation contractor or product data sheets for manufacturer-specified acceptance targets. These are usually expressed as a percentage of relative humidity (RH) or moisture content by weight (MC).
If no specific numbers are provided, a common target is 16% MC or 70% RH for wood-based materials. However, this can vary depending on the material and situation.
Always document your targets and keep records of readings to ensure you’re within acceptable limits before repainting.
Substrate-Specific Drying and Prep Considerations
Drying behavior varies: drywall can trap moisture in joint compounds, wood absorbs and releases moisture slowly, masonry can hold salts, metal requires corrosion checks, and tile assemblies may hide moisture behind grout. For each substrate, verify dryness using suitable tests and inspect for salt deposits, staining, or structural softening as indicated by the remediation notes.
Address substrate damage before painting—replace or repair degraded drywall, stabilize or dry wood, remove efflorescence from masonry, and treat or clean metal corrosion per product guidance. If you’re unsure about hidden contamination or salt, follow the remediation recommendations or check the manufacturer instructions for compatible primers and treatments.
Porous materials (drywall, wood, plaster)
Material choice plays a big role in how well your paint job turns out. Porous materials like drywall, wood, and plaster absorb moisture, which can lead to issues if not properly addressed.
- Drywall: Retains moisture, may need replacement of affected sheets. Look for green board with mold-resistant facing. Avoid painting until it’s bone-dry.
- Wood: Holds onto moisture, can warp or crack if not dried properly. Use exterior-grade plywood or OSB rated for your climate. Allow to dry fully before painting.
- Plaster: Absorbs water, may need replacement of damaged areas. Look for Class A fire-rated plaster with mold inhibitors. Ensure it’s completely dry before priming and painting.
Dense or non-porous surfaces (metal, tile, glazed brick)
Non-porous surfaces like metal, tile, and glazed brick dry faster but can have salt or residue issues that affect paint adhesion. Proper cleaning and preparation are crucial.
Metal: Can develop a white powdery residue (rust) if not properly prepared. Clean with a wire brush, remove rust, then prime with a metal-specific primer to seal and promote adhesion.
Tile: May have salt deposits or efflorescence that need to be removed before painting. Use an etching solution to clean the surface and improve paint bond. Avoid painting until all residue is gone.
Glazed Brick: Can have a slick surface that doesn’t hold paint well. Etch with a brick acid solution, rinse thoroughly, and allow to dry completely before painting.
Surface Preparation After Remediation
Start with cleaning biological residue using the cleaning method specified in the remediation plan and rinse thoroughly; next, remove loose paint, dust, and compromised material down to a sound substrate. Repair holes, soft areas, and adhesive failures so the surface is structurally sound and flat for primer adhesion.
Allow cleaned surfaces to dry to the levels the coating manufacturer requires and perform a final inspection with the agreed moisture test methods. If residue, salts, or discoloration remain, follow manufacturer or remediation instructions for additional cleaning, neutralizing, or replacing the substrate before priming.
Cleaning methods that are safe post-remediation
After mold remediation, it’s crucial to clean the area thoroughly before repainting. Use a mild detergent or an antimicrobial product approved for painted surfaces. Never use bleach as it can damage porous materials and create harmful fumes.
Rinse the surface well with clean water to remove all residue. Ensure you allow the surface to dry completely before applying any primer. Rushing this step can lead to trapped moisture, encouraging mold growth under your new paint.
Repairing and replacing compromised materials
Before repainting, you must address any damaged or compromised materials. The right material choices will ensure a long-lasting, effective paint job.
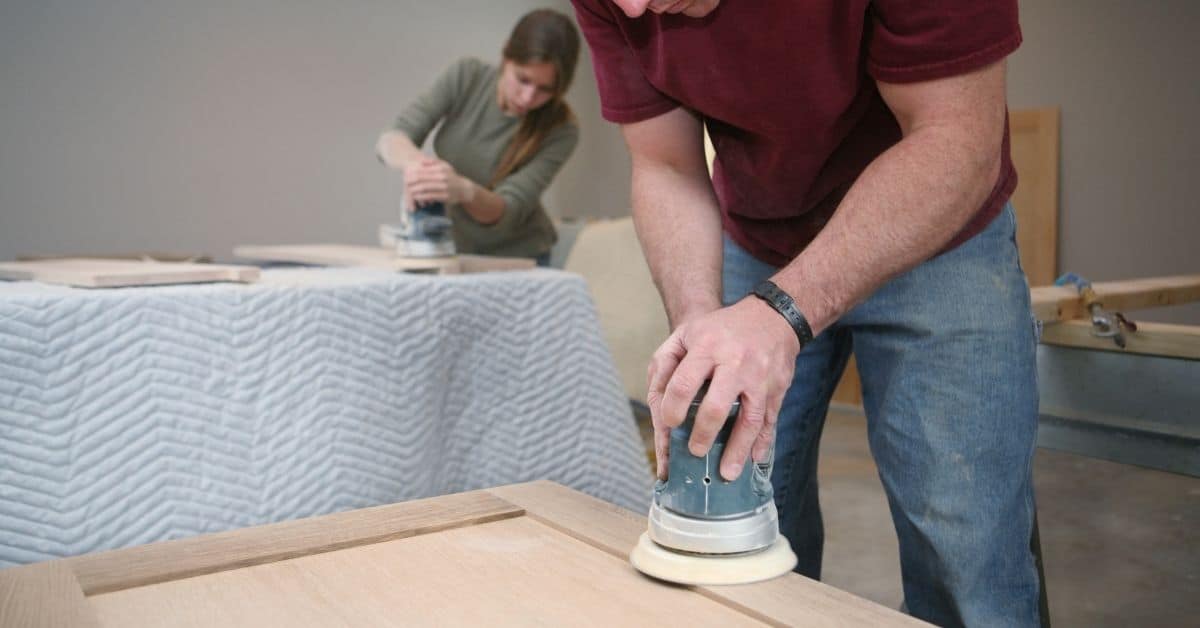
- Drywall with mold stains: Lightly sand the area to remove any remaining mold and apply a stain-blocking primer before painting.
- Wet or damaged drywall: Replace it with new drywall. Look for moisture-resistant options if the area is prone to dampness. Avoid using regular drywall in these areas as it can swell and crack.
- Wood with rot: Replace the affected pieces with pressure-treated lumber or composite materials rated for outdoor use. Ensure all cuts are clean and smooth to prevent water from collecting.
- Insulation with mold: Remove and replace with new insulation. Consider using closed-cell foam insulation in areas prone to moisture as it provides a better barrier against water intrusion.
- Cracked or damaged surfaces: Repair using appropriate materials like joint compound for drywall, wood filler for wood, or mortar for masonry. Ensure the repair is sound and clean before priming.
Choosing Primers for Post-Remediation Projects
Primers post-remediation can block stains, improve adhesion, seal residual contaminants, and act as a barrier against salts or tannins; pick a primer whose functions match the remediation conditions and substrate. Review the primer product data sheet to confirm it is recommended for stain blocking, adhesion to your substrate, and compatibility with the finish paint.
Consider primer chemistry relative to substrate and residual conditions—use alkali-resistant products for masonry with salts, solvent- or acrylic-based primers as recommended for wood or drywall, and corrosion-inhibitive primers for metal when indicated. If unsure which chemistry to choose, consult the manufacturer technical data or remediation contractor for compatibility and warranty implications.
Stain-blocking and odor-sealing primers
After mold remediation, stains and odors can linger. Stain-blocking primers step in here. They’re designed to seal these issues before you apply your topcoat.
Check with manufacturers. Not all stain-blockers are created equal. Some are rated for post-mold staining or odor lock-in, others aren’t. Always confirm.
These primers work by forming a barrier that prevents stains and odors from bleeding through to your topcoat. They also improve adhesion, ensuring your paint sticks.
Mold- and mildew-resistant primer options
Some primers are marketed as ‘mold-resistant’ or ‘mildew-resistant’. But what does that mean?
Look for specific technologies. These could be antimicrobials, fungicides, or other additives designed to inhibit mold and mildew growth. Common ones include zinc pyrithione or triazoles.
Claims are important, but so is technical data. Always check product datasheets for specific performance details. Independent testing results can also provide reassurance.
Selecting Mildew-Resistant Topcoats and Finishes
Mildew-resistant topcoats vary by technology: some finishes include mildewcides, others use inorganic pigments or film technologies that resist microbial growth, and high-performance washable paints offer better cleanability where moisture risk remains. Match the finish choice to the expected moisture exposure and occupant sensitivity, and read product labels and technical sheets for claims, safe-use instructions, and limitations.
Consider low-VOC or non-sensitizing formulations if occupants have health concerns, and select a finish with the level of washability and resistance required for the location. When manufacturer claims or health effects matter, rely on the product data sheet and, if needed, contact technical support to confirm suitability for post-remediation situations.
Finish selection, washability, and cleanability
When selecting a topcoat after mold remediation, consider the finish sheen. Glossier finishes are easier to clean than flat or matte ones. This is crucial in moisture-prone areas where stains can occur.
High-washability paints are designed to withstand frequent cleaning without losing their sheen or integrity. They’re a smart choice for bathrooms, kitchens, and other damp spaces.
Remember, even the best paint won’t protect against mold if it’s not applied correctly. Always follow manufacturer instructions and use proper surface preparation techniques.
VOCs, health, and occupant safety considerations
Mildew-resistant paints often contain biocides to prevent mold growth. While effective, some people may be sensitive to these chemicals. Always check the product’s data sheet for potential health impacts.
Low-VOC (volatile organic compounds) and low-odor paints are a good alternative if you’re concerned about occupant health. They emit fewer harmful fumes and are less likely to trigger allergies or respiratory issues.
Important: Even low-VOC paints should be used with proper ventilation. Always follow safety guidelines when painting, especially around children, elderly, or those with compromised immune systems.
Application Best Practices and Environmental Controls
Control temperature, relative humidity, and ventilation during application and cure to meet the paint manufacturer’s specified conditions; improper environment can prevent proper film formation and void performance claims. Use heaters, dehumidifiers, or ventilation as needed, and monitor ambient and substrate conditions with appropriate instruments.
Follow the listed cure times and recoat windows on the product data sheet before exposing the area to moisture or returning occupants to service. If your site conditions fall outside the manufacturer’s recommendations, document them and consult technical support for approved workarounds or extended drying times.
Controlling the Environment During Application
Mold loves moisture, so keeping humidity and airflow under control is crucial when repainting after mold remediation. Here’s how:
Humidity: Keep it below 50% during application and cure. Use a hygrometer to monitor. If it’s too high, wait for better conditions or use dehumidifiers.
Airflow: Maintain good ventilation. Open windows, use fans, or set up temporary ventilation systems. But be careful not to create drafts that could disturb the paint before it dries.
If humidity is too high or conditions aren’t right, postpone painting. It’s better to wait than risk a failed job and potential mold regrowth.
Coating Build, Number of Coats, and Recoat Windows
The right film build and recoat timing ensure your paint job lasts. Here’s how to get it right:
Film Build: Follow the manufacturer’s recommendations for coverage rates. Too thin, and you won’t get good protection; too thick, and you’ll have drips and poor adhesion.
Most jobs require 2-3 coats. The first seals and primes, the next one or two build up the final finish.
Recoat Windows: Don’t rush it. Recoating too soon can lead to poor adhesion and peeling. Follow the manufacturer’s guidance on recoat windows, usually 16-24 hours for most paints. But check your specific product’s technical data sheet – some may need longer.
Maintenance, Monitoring, and Troubleshooting After Repainting
Create a maintenance plan that includes periodic visual inspections, humidity monitoring in high-risk areas, and procedures for prompt cleaning of dirt or mold spots using manufacturer-approved cleaners. Establish thresholds for when to investigate further—such as recurring staining, softening paint, or new musty odors—and record any changes in environmental conditions.
If coatings fail, document substrate moisture and surface condition, clean the area per the remediation and product instructions, and determine whether spot repairs, re-priming, or full replacement is required. When failure causes are unclear, consult the paint manufacturer’s technical service and the remediation contractor before reapplying coatings.
Visual checkpoints and periodic inspection tips
Use this checklist after repainting to catch any issues early.
- Discoloration: Check for any changes in color. Yellow or brown spots could indicate moisture.
- Soft spots: Gently press on painted surfaces. Softness might mean hidden damage.
- Efflorescence: Look for white, crystalline deposits. They signal moisture moving through walls.
- Peeling paint: Check for any lifting or peeling. It could be a sign of underlying problems.
- Musty odor: Sniff around. A musty smell might mean mold is growing.
- Water stains: Look for dark spots or rings. They can indicate water intrusion.
- Cracking paint: Check for cracks, especially around windows and doors. They could let in moisture.
- Warping or buckling: Feel for any warped or buckled surfaces. It might mean moisture damage.
Quick rule: Inspect painted areas regularly, especially after rain or temperature changes.
When to re-remediate or call professionals
Some issues can’t be fixed with just a paint job. Here’s when to take action:
Active moisture: If you find water stains, efflorescence, or soft spots that keep reappearing, there might be an active moisture problem that needs professional attention.
Mold growth: If you see or smell mold, it’s time to call a professional. Mold can cause health issues and structural damage.
Persistent problems: If you’ve repainted multiple times but keep seeing the same issues, it might be time to re-remediate or consult a professional. Keep records of all remediation and painting work for future reference.
Conclusion
Finishing after mold work hinges on meeting the drying targets, using the right primer, and choosing a mildew-resistant topcoat. Do it right and you protect the space from reoccurrence, avoid damage, and keep the surface looking solid.
Checklist: confirm moisture targets are reached with the method you used, verify acceptance criteria before painting, prepare the substrate per its needs, select a compatible primer for post-remediation conditions, apply a mildew-resistant topcoat in clean, well-ventilated conditions, and follow the recommended environmental controls and cure times while checking in small areas first and documenting results for maintenance checks.
Common mistakes to avoid are skipping verification or rushing the test results, applying coatings before the surface is truly ready, and ignoring ventilation or temperature guidelines. Safety rules: never paint over wet or damp surfaces, always follow the product labels for recoat windows and cure times, and wear appropriate protection while applying coatings and working in enclosed spaces.
If moisture readings stay high, if there are hidden mold signs, or if the substrate shows ongoing damage, call a professional rather than forcing a DIY fix. When you pace the work, verify each step, and stick to the targets, you’ll finish with a durable, good-looking result that lasts. Stay deliberate, stay safe, and proceed with confidence.
FAQ
How do I know the walls are dry enough before repainting after mold remediation?
Check for a consistent dry feel to the touch and no damp spots. If you used a moisture meter, follow the meter’s guide without guessing. When in doubt, re-check after a few days of dry weather or proper ventilation.
What should I consider when choosing a primer after mold remediation?
Use a primer designed for damaged or previously wet substrates and compatible with your topcoat. Read the label for stain coverage, mildewcide content, and surface suitability. If you aren’t sure, ask the manufacturer or check the product data sheet.
How can I verify that mildew and odors are truly gone before painting?
Inspect for visible residue and odor in the area after cleaning and drying. If you still smell mildew or see surface spotting, don’t paint yet—address it first and re-clean. Use only approved cleaners and follow local safety guidance on ventilation.
What should I watch for to know the topcoat choice will hold up after remediation?
Choose a topcoat labeled for mildew resistance and compatible with the primer you used. Check label instructions for surface prep, humidity limits, and recoat windows. If unsure, verify with the product instructions or the manufacturer before buying.