
Introduction
Rebuilding concrete edges means restoring a clean, tight edge by using forms and pins to join new concrete to the old. You’ll set up a form against the existing edge and pin the new pour so you don’t leave a weak seam. Keep the work practical and steady, checking alignment as you go.
To avoid a weak cold line, compact and finish the edge with care, then remove forms after initial set. If you’re unsure about pin sizing, how to seal joints, or curing, check the product label, manufacturer instructions, and any local rules. Work at a steady pace to keep the edge consistent.
Key takeaways
- Ensure formwork supports clean edges and aligns with existing concrete for monolithic feel.
- Pin and tie into existing concrete with proper spacing to prevent movement.
- Surface prep uses compatible bonding agents and remove laitance before pours.
- Use form release and vibration to achieve continuous, indistinct cold-line when poured.
- Follow curing, protection steps, and PPE to prevent injuries and skin contact.
- Inspect joints after cure for any misalignment, gaps, or potential weak spots.
Table of Contents
- Introduction
- Key takeaways
- Project Overview and Scope Assessment
- Tools and Materials Checklist
- Formwork Design and Setup for Clean, Stable Edges
- Pinning and Tying into Existing Concrete
- Surface Preparation and Bonding to Prevent a Weak Cold Line
- Pouring Technique and Vibration to Ensure Monolithic Behavior
- Curing, Protection, and Finishing Details That Strengthen the Joint
- Inspection, Testing, and Troubleshooting Weak Cold Lines
- Conclusion
- FAQ
Project Overview and Scope Assessment
Set clear goals for the rebuild, focusing on achieving a solid edge that behaves like the adjacent concrete. Define what success looks like in terms of edge finish, alignment, and load transfer without creating a weak cold line. Decide early whether a simple patch will do or if full edge rebuilding is needed based on visible damage and load demands.
When in doubt, verify specifications with the project documents, product labels, or manufacturer instructions. Consider local rules that influence edge repairs and what constitutes a proper surface for bonding new concrete to old. Document the criteria that separate minor fixes from full reconstruction and keep a plan handy for the crew.
Assessing damage and locating the cold line
Start by inspecting your concrete edge for cracks, spalls, and existing cold joints. These are weak points where water can seep in, causing further damage.
Use a flashlight to check for hidden cracks behind plants or furniture. Mark each defect with a piece of chalk or tape.
Cold lines—the old edges you’ll tie into—should be clear and well-defined. If they’re crumbling, you may need to replace more than just the edge.
Repair vs. replacement decision factors
Consider these factors when deciding whether to repair or replace your concrete edge:
Structural integrity: If the damage is extensive, with large cracks or crumbling, it’s best to replace the entire element.
Durability and exposure: Edges exposed to heavy traffic, freeze-thaw cycles, or de-icing salts may need full replacement. Light use areas might only require repair.
Aesthetics: If the damage is minor but unsightly, a repair could be sufficient. However, if the edge has always looked shabby, consider replacement for better curb appeal.
Tools and Materials Checklist
Prepare a practical list of hand tools, temporary form materials, fasteners, pins, bond enhancers, and safety gear. Include options for tight budgets without sacrificing form stability or bond quality. Have spare pins and dowels, adhesives, and release agents readily available to avoid delays.
Prioritize quality items that affect bond and form stability, and always read labels and instructions before use. If you need budget alternatives, note acceptable substitutions and verify them against manufacturer guidance. Keep a tidy, organized kit so the edge stays straight and secure during setup and pour.
Forming materials and reusable options
Choose your forming materials based on the finish you want, whether you need to reuse them, and site conditions.
- Rigid boards (plywood): Ideal for flat surfaces. Check for warp or cracks. Skip this if forms won’t stay put.
- Metal forms: Great for straight edges. Inspect for rust or damage. Not reusable on tight budgets.
- Flexible options (formwork sheets): Use for curves. Ensure they’re in good condition. Reusable but can be pricey.
- 2x4s and stakes: Cheap, versatile. Check lumber quality. Time-consuming to set up.
- Insulation foam boards: Lightweight, easy to cut. Not as durable as other options. Can’t reuse for large projects.
- Concrete form release agent: Apply before pouring. Helps forms slide off easily. Skip this and you’ll struggle removing forms.
Quick rule: Always check your forming materials before starting. A weak form leads to a weak edge.
Pins, dowels, anchors, and corrosion protection
Select the right connectors and protect them from rust for a strong bond.
- Galvanized pins/dowels: Check they’re zinc-coated. This protects against rust. Skip this and expect corrosion.
- Stainless steel anchors: Use where salt or moisture is high. Confirm they’re 304/316 grade. Lower grades corrode faster.
- Epoxy-coated rebar: Use in aggressive environments. Check coating integrity. Poor coating leads to rust.
- Corrosion-inhibiting admixtures: Add to concrete mix. Follow manufacturer’s guidelines. Skip this and risk early deterioration.
- Concrete sealers: Apply after pouring. Protects against moisture intrusion. Skip this and expect freeze-thaw damage.
Quick rule: Always check product data sheets for corrosion protection. A rusty pin is a weak link.
Formwork Design and Setup for Clean, Stable Edges
Plan form geometry that follows the desired edge line and provides solid bracing against pour pressure. Set up forms so they resist movement and maintain alignment during finishing and compaction. Sequence tasks so clean contact along the edge is achieved before concrete arrives.
Prevent movement that creates gaps or offsets at the cold line by checking fasteners, bracing, and form release compatibility. Verify that form panels sit plumb and that joints are tight, with attention to vertical and horizontal alignment for a true edge. Use temporary supports that won’t shift when the concrete starts to flow.
Aligning forms and controlling tolerance
Start by setting your forms plumb and level. Use a laser level or water level for accuracy.
Control joint alignment to prevent offsets at the cold line. Align form edges with existing lines or use a straight edge to ensure consistency.
Use shims or temporary blocks to maintain consistent edge profiles. This helps create a smooth, even finish on your concrete edge.
Bracing, support, and pour staging
Proper bracing is crucial to prevent form failure. Use 2x4s or other suitable lumber for bracing, spacing them every 2-3 feet.
Tie-back methods help distribute pressure evenly. Secure forms to existing structures or use tie-back anchors to pull forms tight.
Pour in stages to avoid differential pressure that can open joints. Start at the lowest point and work up, allowing concrete to flow downhill. This helps prevent voids and ensures a strong cold line.
Pinning and Tying into Existing Concrete
Detail how to transfer load across the interface using pins, dowels, keyed shapes, and shear connectors while minimizing stress concentrators and corrosion risks. Plan anchor placement to avoid weakening rebar patterns and to maintain surface integrity. Prepare holes and choose adhesives that suit the concrete conditions and expected loads.
Prepare anchor holes cleanly and follow adhesive manufacturer instructions for curing and bonding. Use appropriate tools to keep holes straight and aligned with the edge line. Ensure the connection supports the new mass without creating lateral movement or notch effects at the joint.
Selecting Pin Type and Embedment Method
Choosing the right pins is crucial for a strong bond. Here’s what you need to know:
Mechanical Anchors: These are easy to install but may not provide the same strength as epoxy-set dowels or stainless/sacrificial pins.
Epoxy-Set Dowels: These offer better strength and durability. Follow manufacturer instructions for embedment depth (usually 12″ for every 4″ of concrete thickness) and spacing (typically 6″ to 12″ apart).
Stainless/Sacrificial Pins: Ideal for high-strength applications, these pins corrode over time. Sacrificial pins are cheaper but need replacing.
Pattern, Spacing, and Stagger Strategies
Proper pin placement prevents stress concentration:
Use a staggered pattern to distribute shear evenly. Avoid straight lines or close proximity to edges.
Space pins according to the manufacturer’s guidelines (usually 6″ to 12″ apart). Consult an engineer for unusual loads or complex patterns.
Rule of Thumb: Place pins every 4″ to 6″ along the cold joint, staggering them like bricks in a wall.
Surface Preparation and Bonding to Prevent a Weak Cold Line
Describe thorough surface prep methods—cleaning, roughening, removing laitance, and saturating concrete as required—to promote mechanical and chemical bond. Focus on creating a sound, receptive surface for the new concrete. Avoid leaving contaminants or smooth, non-porous zones that hinder adhesion.
Highlight common prep mistakes that lead to delamination, such as over-wetting, under-roughening, or inadequate cleaning. Verify that the old surface is dry enough and properly primed if using bonding agents. Check product labels for recommended prep steps and drying times.
Cleaning, profiling, and moisture condition
Start by removing any loose concrete, dirt, or debris from the surface. Use a stiff-bristle brush for light cleaning.
For tougher jobs, consider sandblasting to profile the surface and remove laitance – that weak top layer of cement paste. Be careful not to over-sandblast; you want a slightly rough, but not pitted, surface.
Moisture is your enemy here. Concrete sets best when it’s dry. Use a moisture meter to check the slab’s relative humidity (RH). If RH is above 75%, consider using a dehumidifier or wait for drier weather before proceeding.
Bonding agents, primers, and compatibility
A bonding agent or primer promotes adhesion between old and new concrete. Use it when the existing surface is sound but lacks a good profile.
Some bonding agents are cement-based, others are chemical. Always check compatibility with your overlay material. Follow manufacturer guidelines for application, recoat time, and cure time.
Beware of using latex paint or other non-concrete-specific primers. They can prevent proper bonding and lead to delamination later on.
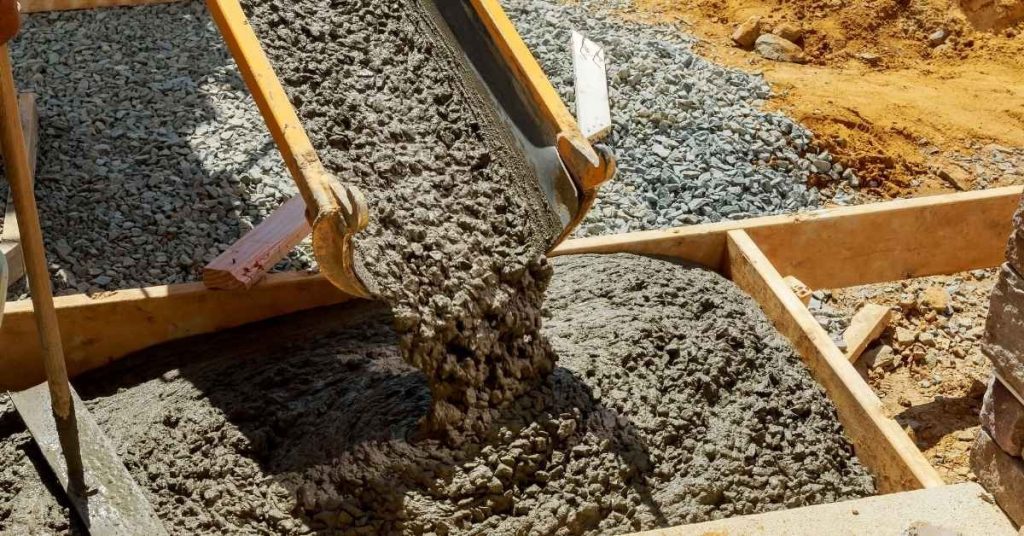
Pouring Technique and Vibration to Ensure Monolithic Behavior
Provide best practices for placing and consolidating concrete along rebuilt edges to avoid voids, segregation, and cold laps. Plan pouring sequence to maintain continuity with the existing mass and minimize cold joints. Use controlled placement to keep a smooth edge line during the pour.
Cover vibration strategy and alternatives to achieve compaction without displacing the edge. If you use a vibrator, follow manufacturer guidance and avoid overworking the surface. Consider hand-finishing techniques where needed to preserve edge geometry.
Pour sequencing and continuity tactics
When pouring concrete along rebuilt edges, maintaining a continuous pour is crucial to avoid cold lines. Cold laps occur where new concrete meets old, creating a weak point.
Pour toward the joint. Start your pour at the farthest point from the existing edge and work towards it. This helps ensure a smooth transition between the old and new concrete.
If you’re rebuilding long edges, consider staging small sections. Pour one section at a time, overlapping each pour slightly to maintain continuity. Use flowable mixes to help fill any gaps without creating cold laps.
Vibration, consolidation, and surface finishing
Proper vibration and consolidation are key to eliminating voids and segregation in your pour. This ensures a strong bond with the existing concrete.
Use internal or external vibrators. For small forms, use an immersion vibrator. For larger slabs, use surface vibrators. Vibrate until the concrete is fully consolidated and any air bubbles have escaped.
For small forms, you might need to consolidate by hand using a poker vibrator or a similar tool. Be gentle to avoid disturbing the bond zone.
When finishing, use methods that don’t disturb the bond zone. For example, use a float instead of an edger near the edge form. This helps maintain a strong bond between the old and new concrete.
Curing, Protection, and Finishing Details That Strengthen the Joint
Explain curing options, edge protection, and finishing choices that reduce shrinkage cracks and protect the cold line during early strength gain. Plan for temporary protection against temperature and moisture changes as required by conditions. Coordinate curing methods with the chosen concrete mix and form setup.
Include temporary weather protection and practical steps to keep the edge from drying too quickly or absorbing moisture unevenly. Verify compatibility of curing blankets, sealers, or membranes with the bond and finish you intend. Check local guidelines for curing duration and protection recommendations.
Curing methods and timing considerations
Proper curing is crucial to prevent your concrete from drying out too quickly, which can lead to cracks. Here are three common methods:
Membrane Curing: Apply a plastic sheet or membrane over the concrete to retain moisture. Follow product instructions for application and removal timing.
Wet Curing: Keep the surface constantly wet using sprinklers, sprays, or ponding water. This method requires careful management to prevent over-wetting, which can also cause issues.
Curing Compounds: Apply a liquid or paste that forms a protective layer on the concrete’s surface. Follow product instructions for application and removal timing, and ensure they comply with local codes.
Edge finishing and chamfers to reduce stress concentration
Sharp edges on concrete are prone to chipping and cracking. Here’s how to finish your edges to improve durability:
Fillets: Add a small, rounded fillet at the edge where the vertical and horizontal surfaces meet. This helps distribute stress evenly and prevents concentration at the corner.
Rounded Edges: Instead of sharp 90-degree corners, create a slight radius or curve on your edges to reduce stress points.
Chamfers: Bevel the edge slightly to create an angled surface that distributes stress more evenly. This is particularly useful for thicker concrete slabs.
Inspection, Testing, and Troubleshooting Weak Cold Lines
List visual checkpoints, simple non-destructive tests, and signs that indicate a compromised cold joint. Look for misalignment, surface roughness, or gaps that suggest bonding issues. Prepare a plan for corrective actions based on the severity observed on site.
Provide step-by-step options from minor remediation to more substantial fixes, and indicate when to involve a structural engineer. Ensure you verify with applicable codes or guidelines before pursuing corrective work and document findings for future reference.
Visual and simple NDT checks
Before you start any troubleshooting, grab your flashlight, a small crowbar or pry bar, and a hammer. This checklist helps you spot weak cold lines early.
- Cracking: Look for hairline cracks or wider gaps. They can indicate bond failure.
- Separation: Gently probe along the joint with your crowbar. Any movement signals a weak spot.
- Staining: Discoloration, especially around the edges, might hint at moisture ingress or poor curing.
- Hammer sounding: Tap along the joint with a hammer. A dull sound could mean delamination.
- Pull test: Use your crowbar to try and pull away a small piece of concrete. If it comes off easily, the bond is weak.
- Check corners: Corners are stress points. Look for signs of deterioration here first.
- Inspect rebar ends: Exposed or rusted rebar ends can compromise the joint’s strength.
- Feel for cold joints: Run your hands along the joint. A sudden change in temperature might indicate a weak spot.
Quick rule: If you find any of these issues, don’t ignore them. Address them promptly to prevent further damage.
Repair strategies for common failure modes
When you’ve identified a weak cold line, follow this checklist to fix it right the first time.
- Delamination: If the concrete is peeling off, remove the loose material, clean, and reapply bonding agent before patching.
- Hairline cracks: Seal with an appropriate crack filler or epoxy. Widen deeper cracks and fill with new concrete.
- Partial bond loss: Remove the non-bonded area, clean, and reapply bonding agent before patching.
- Moisture ingress: Identify and fix the source of water entry. Then, remove damaged concrete, clean, and apply a moisture barrier before patching.
- Rusting rebar: Remove any rust, apply a rust inhibitor, then wrap the rebar with a protective coating before patching.
- Structural cracks: These need immediate attention. Consult a structural engineer for advice on repair methods.
- Widespread deterioration: If more than 20% of the joint is affected, consider removing and re-pouring the entire section.
Quick rule: When in doubt about the extent or cause of damage, don’t hesitate to call a structural engineer. It’s better to be safe than sorry.
Conclusion
Getting solid, durable concrete edges comes down to tying the new work into the old correctly, and staying focused on safety and finish. When you do the prep, formwork, pinning, pouring, curing, and inspection the right way, you get a joint that looks good and behaves like one piece.
Check the plan in practical steps: confirm the scope fits your space, set up stiff, true forms for clean edges, install pins to anchor into the existing concrete, prep the surface and establish a good bond, pour with steady technique and proper vibration to avoid voids, then cure and protect until the joint reaches strength, finishing as you go and verifying with a simple inspection and test touch before calling it complete.
Common mistakes to avoid include skipping or rushing surface preparation and bonding, using loose or poorly braced forms, under- or over-tamping the pour, and neglecting proper curing and protection. Safety rules are simple: never work with wet or overheated concrete near skin or eyes, protect the form edges and rebar/pins from displacement, and test a small area first before committing to the full joint.
If the area is large, exposed, or you’re tying into notched or heavily stressed sections, consider a pro for final inspection or a targeted pinning and bonding plan. When you stick to these steps, you’ll finish with a solid joint that holds its shape and resists the dreaded weak cold line. Stay deliberate, stay safe, and push forward with confidence.
FAQ
How can I tell if my edge form setup will resist cracking at the joint?
Make sure the form edges are clean and tight against the concrete without gaps. Confirm pins or ties are used as instructed to hold the edge shape, and refer to the product label for any bonding or sealing steps.
What mistakes create a weak cold line and how can I avoid them?
Avoid skipping surface prep, contamination, or failed bonding between pours. Don’t overwork the surface or disturb it after lift-off, and follow the bonding agent and form release directions exactly as labeled.
How should I finish and cure to prevent weak edges?
Keep the surface moist or use a proper curing method as recommended by the product you’re using. Protect the edge from rapid drying, direct sun, or heavy traffic until the cure is well along, and check the label for any specific curing times or coverage notes.
How long before I remove forms and how do I inspect for a tight joint?
Follow the form manufacturer’s removal guidance and inspect the joint for proper alignment and seal. Look for visible gaps or honeycombing, and verify there’s no leakage or loose edges before resuming loads on the new edge.