
Introduction
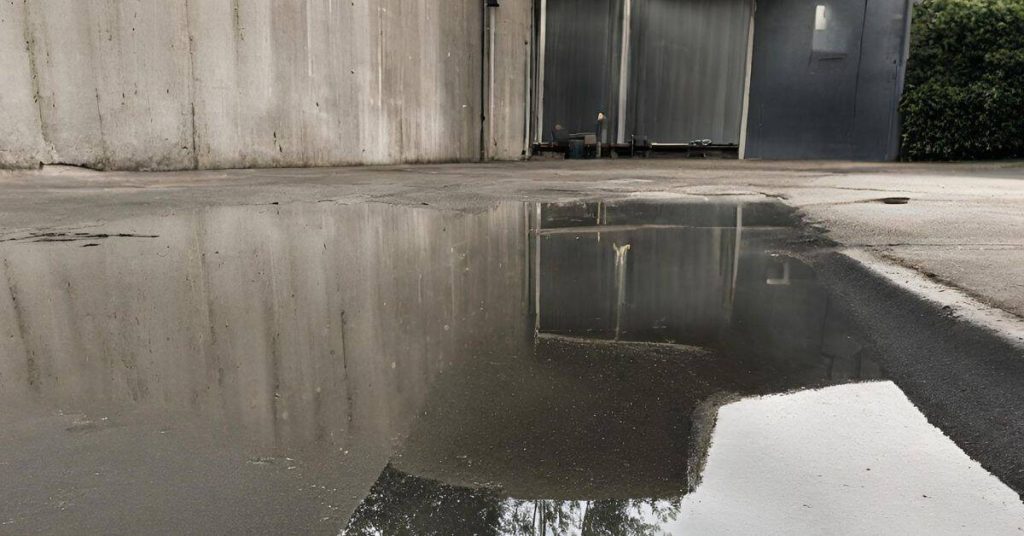
Water stains around concrete slabs indicate moisture movement from beneath or around the slab rather than a surface spill. This article helps you spot early signs and assess the basic drainage setup before any digging. Use plain checks and safe steps to decide what to fix first.
Common signs include damp patches, mineral buildup, or mold around the slab. Causes include poor surface drainage, high groundwater, or grading that directs water toward the concrete. Simple diagnostics like watching water flow after rain and inspecting drainage paths help you plan preventive steps.
Key Takeaways
- Identify staining patterns near slabs and edges to hint at drainage issues.
- Differentiate between plumbed leaks, surface drainage, and groundwater through simple tests.
- Plan non-invasive checks before digging, including tracing moisture sources and grading.
- Gather basic tools and labels for utility locating and contractor selection.
- Assess environmental impact and permits early; choose repair options with caution.
- Safety: stop work if active leaks appear; contact professionals for confirmation.
Table of Contents
- Introduction
- Key Takeaways
- Why Water Stains Around Slabs Matter — Quick Diagnostic Mindset
- Visual Checkpoints: Reading Patterns, Edges, and Stain Context
- Simple Non-Invasive Field Tests You Can Do Today
- Tools and Materials Checklist for DIY Diagnostics
- Interpreting Results — Drainage Problem Vs. Plumbing Leak Vs. Groundwater
- Pre-Dig Planning: Permits, Locating Utilities, and Contractor Selection
- Cost Considerations, Repair Choices, and Environmental Impact
- Action Plan Before You Start Digging and Common DIY Mistakes to Avoid
- Conclusion
- FAQ
Why Water Stains Around Slabs Matter — Quick Diagnostic Mindset
Start with non-invasive checks and document conditions like season and recent weather. Prioritize safety and avoid rushing into digs. Record the sequence of events that accompany staining to build a clear picture over time.
Identify common stain sources around the slab, including interior plumbing leaks, exterior irrigation lines, roof condensation, capillary rise from moist soil, and drainage issues at the edge. Keep notes on where stains begin and how they spread. Use sketches or photos to map boundaries and expected flow paths without disturbing the site.
How Stains Form and What They Can Indicate
Water stains around concrete slabs are indicators of moisture intrusion. Understanding how these stains form helps identify potential issues without invasive checks.
Observe stain patterns over time to understand if they’re recurring or seasonal. Inspect stain color, shape, size, and location to determine likely sources. For instance, dark, large stains near exterior walls may suggest roof/condensation issues.
If stains are new or worsening, prioritize immediate investigation as this could indicate a growing problem. However, avoid assuming all stains indicate serious issues; some may be harmless but all warrant inspection.
When to Pause and Investigate Vs. When to Dig Immediately
Timely decision-making prevents further damage and ensures safety. Evaluate if the issue is urgent based on visible symptoms and potential consequences.
Assess structural integrity (e.g., cracks, leaning), active flooding, and immediate safety hazards (e.g., unstable soil). If structural failure or active flooding is evident, proceed with immediate excavation, following safety protocols.
If no urgent signs but stains are present, perform pre-dig diagnostics to minimize disruption and understand the root cause. Do not delay investigation if stains are new or worsening; timely action prevents further damage.
Visual Checkpoints: Reading Patterns, Edges, and Stain Context
Look for stain shapes and directions: linear, curved, or circular patterns can hint at water flow. Note whether patterns radiate from an edge or corner for clues about source points. Compare gaps and joints to the overall layout of the area.
Assess timing and dryness cues by observing dusty versus damp surfaces and by considering recent weather. Contextualize with nearby drainage features like gutters and grading that influence water movement toward or away from the slab. Document edge relationships and test for seepage along cracks rather than uniform staining.
Stain Shapes and Spread — What Common Patterns Suggest
Use this checklist during your initial walkthrough to understand water flow direction by observing stain shape and spread with the naked eye.
- Linear stains: Check for plumbing leaks or grading issues along the line of stain.
- Curved stains: Look for sources like clogged drains or poor grading that cause water to pool and spread.
- Circular stains: Investigate potential sources at the center, such as leaks from above or cracks in the slab.
- Mottled stains: Check for multiple minor sources contributing to the stain pattern.
- Radiating patterns: If stains radiate from an edge or corner, water flow likely originates from that direction.
Quick rule: Misinterpreting stain patterns may lead to incorrect source identification and ineffective repairs. Always consider multiple factors when diagnosing water issues around concrete slabs.
Color, Texture, and Seasonal Behavior Clues
Use this checklist to distinguish water sources by analyzing stain color, texture, and seasonality during your initial inspection.
- Brown or yellow stains: Probable soil or mineral content in water, suggesting an external source. Check gutters, downspouts, and grading.
- Green algae or mold: Potential standing water issue. Investigate nearby sources like clogged gutters or poor grading.
- Efflorescence (white, powdery deposits): Check for transient stains that appear only after rain or thaw, indicating a temporary water source.
- Persistent stains: Look for consistent sources like leaking pipes or cracks in the slab.
- Texture changes: Note any rough, pitted, or crumbly areas on the stain that could indicate ongoing damage from moisture.
Quick rule: Overlooking seasonal behavior may result in misdiagnosis. Always consider how stains change over time to better understand their source.
Simple Non-Invasive Field Tests You Can Do Today
Intro
Non-invasive tests allow homeowners to assess moisture movement without excavation. Visual timing, controlled water application at suspected edges, dye tracer tests, and surface moisture checks are low-risk field steps you can initiate today, ensuring careful documentation of observations.
This method is crucial as it provides a practical understanding of how water moves across and near the slab, guiding subsequent actions such as grading adjustments or drainage improvements. Observing patterns over 24 to 72 hours, noting changes post-rain or household use, helps differentiate active moisture movement from static dampness, reducing unnecessary excavation.
Controlled Water Application and Timing Tests
To assess water movement in your concrete slab, perform a simple controlled water application test. Use a watering can or spray bottle to apply small amounts of water at suspected edge or joint areas.
Observe the water’s behavior over time. Note if it infiltrates quickly, pools on the surface, or runs off. Check for changes in the stain pattern within 24 to 72 hours to identify active moisture movement.
Repeat this test at different times of day and after various weather conditions to gain insights into your slab’s drainage patterns.
Dye and Surface Moisture Tests
Apply food-grade dye or UV-safe tracer along pavement joints, weep holes, or nearby grading to visualize potential water pathways. Apply sparingly and observe its movement over time.
Check surface moisture levels using a simple moisture meter or calcium chloride test methods suitable for slabs. Observe any changes in cling, dampness, or sheen on the concrete.
Compare results from both dye tracing and moisture checks to understand water movement around your slab comprehensively.
Observation Log and Weather Correlation
Maintain a brief log of stain changes in relation to weather patterns, irrigation use, and home plumbing activity. Record the date, weather conditions, any water usage or plumbing events, and corresponding stain observations.
Over time, this log will help you identify patterns and correlations between external factors and your slab’s drainage issues. For example, you might notice that stains appear after heavy rain or when a particular faucet is used.
Use these insights to inform practical next steps, such as adjusting grading, improving drainage, or consulting a professional if needed.
Tools and Materials Checklist for DIY Diagnostics
Key tools and safety gear for DIY diagnostics include a pinless moisture meter or basic moisture indicator, a long tape measure, a bright flashlight, a small mirror, and a camera or smartphone to document patterns. Add markers or chalk for outlining, plus gloves, safety goggles, a dust mask, knee pads, and sturdy shoes for comfortable, non-slip footing. A straightedge or level helps assess slab slope, while a simple checklist of stain patterns, adjacent drainage features, and runoff paths keeps observations organized, along with a basic exterior water test near the edges and a record of readings over time. For non-invasive, quick detection, consider a thermographic or infrared camera attachment to spot cooler areas behind the slab and distinguish active leaks from static stains. Documentation steps—dated photos, a simple map of stain locations, and a log of readings and test results—create a clear plan for next steps or escalation if plumbing or drainage issues appear likely.
Skilled use of these tools starts with a dry baseline before any water is introduced, which helps avoid false positives and unnecessary digging. Observing stain patterns—linear versus circular—offers initial clues about possible water flow paths and drainage behavior around the slab. An experienced installer also checks slab slope and surrounding drainage features to form a complete picture of how water moves in the area. If the slab shows signs of active leaks with moisture readings rising above baseline after an exterior test, plan for a deeper assessment with advanced detection like infrared imaging to confirm problem zones. A common mistake is not establishing a dry baseline; measure moisture levels around the perimeter first, then proceed with controlled testing to ensure reliable results.
Non-Invasive Diagnostic Tools to Consider
To accurately diagnose water issues around concrete slabs without invasive methods, gather these essential non-invasive tools.
- Pinless Moisture Meter or Basic Moisture Indicator: Measures moisture content in materials without damaging them. Key Spec: Accuracy within 1-2%. Tip: Calibrate before use and check readings regularly.
- Long Tape Measure: Accurately measures distances for precise recording of stain locations. Key Spec: At least 25 feet long. Tip: Use a measuring tape with clear markings.
- Bright Flashlight: Illuminates dark areas to inspect moisture and stains. Key Spec: LED for durability and brightness. Tip: Ensure it’s fully charged or has extra batteries.
- Small Mirror: Allows inspection of hard-to-reach areas. Key Spec: Small enough to fit in tight spaces. Tip: Use a mirror with an adjustable handle for better control.
- Camera or Smartphone: Documents stain patterns and locations. Key Spec: High-resolution camera. Tip: Take photos from multiple angles to capture details.
- Markers or Chalk: Outlines stains and records measurements. Key Spec: Water-resistant for outdoor use. Tip: Use different colors to denote different readings.
- Thermographic or Infrared Camera/Phone Attachment (Optional): Detects cooler/moist areas behind the slab. Key Spec: High resolution and sensitivity. Tip: Rent or borrow if needed; ensure proper calibration before use.
Basic DIY Tools and Personal Protective Equipment
Safety and efficiency during diagnostics rely on having the right tools and PPE. Here’s what you need:
- Gloves: Protects hands from moisture, chemicals, and sharp edges. Key Spec: Durable and flexible material. Tip: Use gloves that fit well for better grip.
- Safety Goggles: Shields eyes from debris and water splashes. Key Spec: ANSI Z87.1 certified. Tip: Ensure a comfortable, secure fit.
- Dust Mask: Filters out airborne particles. Key Spec: NIOSH-certified for the specific hazard. Tip: Use with safety glasses or goggles for full protection.
- Knee Pads: Provides cushioning and protection when working on hard surfaces. Key Spec: Adjustable for a secure fit. Tip: Use knee pads with good grip to prevent slipping.
- Stable Shoes: Ensures traction and comfort during inspection. Key Spec: Non-slip soles, comfortable cushioning. Tip: Wear shoes that cover your ankles for added protection.
Material Specs and Standards to Understand
Understanding material specifications helps interpret diagnostic results accurately. Key materials to consider include:
- Concrete Finish: Affects water absorption and evaporation rates. Spec/Rating to Look For: Smooth, dense finishes like troweled or sealed surfaces. Tip: Rough textures can absorb more water.
- Joint Sealant Condition: Prevents water intrusion through cracks. Spec/Rating to Look For: Intact, flexible sealants. Practical Tip: Check for signs of deterioration or gaps.
- Drainage Products (e.g., Gutters, Downspouts): Direct water away from the slab. Spec/Rating to Look For: Properly installed, functioning systems. Avoid: Clogged or damaged components that may cause water backup.
- Waterproofing Membranes (if applicable): Protects the slab from moisture intrusion. Spec/Rating to Look For: High-quality, continuous membranes. Tip: Check for punctures or delamination.
Interpreting Results — Drainage Problem Vs. Plumbing Leak Vs. Groundwater
Use visual cues to map likely causes, such as drainage grading versus persistent leaks, color and spread of stains, and any mineral deposits or odors. Note whether moisture timing aligns with weather or fixtures. Keep descriptions simple and observable for later review.
Follow a practical decision flow: prioritize drainage fixes if caused by poor grading, investigate plumbing or irrigation if fixtures align with stains, and consider groundwater if staining worsens after rain. Create a concise yes/no path to guide actions. Document observations to share with a professional as needed.
Signs Pointing to Surface Runoff or Grading Issues
Inspect your property for signs of poor drainage due to surface runoff. Check for sheet flow paths, where water flows across the ground instead of draining away. Clogged gutters and downspouts can also contribute to surface runoff, so ensure they are clear and functioning properly.
Examine the landscape grading around your concrete slabs. If the soil or landscaping slopes towards the slab, it may be directing water towards it rather than allowing it to drain away. Perform a simple bucket test by filling a bucket with water and observing how it drains. This can help you understand the rate and direction of surface runoff.
If signs of poor grading and surface runoff are present, prioritize modifications to improve surface drainage. Ensure proper grading, clear gutters and downspouts, and redirect water away from the slab using appropriate drainage solutions like catch basins or French drains.
Signs Pointing to Buried Plumbing or Irrigation Leaks
Look for persistent wet patches around your concrete slabs that are independent of rainfall. These could indicate a leak in the buried plumbing or irrigation lines beneath. Sudden saturation near plumbing runs, such as under sinks or behind toilets, can also be a red flag for leaks.
Plumbing-sourced odors can also indicate a leak. If you notice an unusual smell around your concrete slabs, it may be due to a hidden leak allowing sewer gases to escape. To identify active leaks, shut off fixtures one at a time and observe if the wet patch persists or changes.
If staining aligns with fixtures or pipes, suspect plumbing leaks and consider calling a professional plumber for further inspection using non-invasive methods like acoustic leak detection. Promptly repair identified leaks to prevent further damage and water waste.
Signs of High Groundwater or Poor Subbase Draining
Moisture patches that worsen after rain but not after fixture use may indicate high groundwater levels or poor subbase drainage. Check for standing water around the slab after heavy rainfall, as this can also be a sign of high groundwater.
To assess soil absorption rate and subbase drainage, perform a percolation test by digging a small hole in the ground and filling it with water. Observe how quickly the water drains into the soil. If the water takes a long time to drain or does not drain at all, this may indicate poor subbase drainage.
If patching worsens after rain but not after fixture use, consider groundwater intrusion as a possible cause. To address this issue, improve subbase drainage by installing a moisture barrier or considering exterior waterproofing solutions. Consult with a professional if you are unsure about the best course of action for your specific situation.
Pre-Dig Planning: Permits, Locating Utilities, and Contractor Selection
Check whether drainage work requires permits or approvals and understand typical timelines in your area. Verify any occupancy or setback rules that could affect planning. Gather local guidance before committing to a course of action.
Plan utility locates through the 811 process and note what markings and documentation to expect. Assess site conditions, soil characteristics, and environmental constraints that may influence excavation. Vet contractors for diagnostics experience, licenses, insurance, references, and warranty terms relevant to drainage and concrete work.
What to Ask and Verify with Contractors
When selecting a contractor for concrete diagnostics and repairs, it’s crucial to ensure they have the necessary experience and credentials. Start by asking about their experience in concrete diagnostics, licenses, insurance, and certifications.
Verify references and check online reviews or ratings to gauge their performance and professionalism. If a contractor’s experience is limited, consider looking for another option.
Re-evaluate your selection criteria if initial choices prove unsatisfactory. A competent contractor will provide peace of mind and ensure quality workmanship.
Utility Location and Permit Basics
Before any soil disturbance, contact local utility locate services and permitting authorities to avoid hazards, fines, and delays. This step is crucial for protecting yourself and your property from potential damage.
Ensure you have the correct contact information for both services. In the United States, schedule a free utility locate service by calling 811 before digging. Check with local permitting authorities for required permits and review timelines.
If utilities are not marked or permits are missing, delay work until marks are made and permits are obtained. If issues arise during the process, revisit your initial planning to address them accordingly.
Cost Considerations, Repair Choices, and Environmental Impact
Identify factors that influence diagnostic and repair costs, including complexity of patterns, slab age, access, proximity to utilities, and required diagnostics. Clarify what constitutes a full diagnostic report and what is considered an acceptable contingency. Avoid assumptions about prices and confirm scope in writing.
Explore strategies to safely reduce scope and expenses, such as staged work or less invasive options first. Emphasize environmentally responsible practices to minimize runoff and waste. Document decisions and maintain quotes to support transparent budgeting.
Typical Diagnostic Paths and Corresponding Interventions
Begin by understanding the sequence of diagnostics and repairs. Prioritize initial observations, then refine based on findings.
If stains indicate surface runoff or grading issues, investigate and address exterior grading and drainage first. If signs point to buried plumbing or irrigation leaks, locate and repair leaks before reassessing slab drainage.
Re-evaluate diagnostics if interventions don’t resolve stains; consider additional tests or professional consultation.
Environmentally Responsible Remediation Steps
Minimizing environmental impact reduces long-term costs and risks. Implement controls at the start of work to prevent contamination spread.
If contaminated soils are present, isolate, contain, and dispose of according to local regulations. If water runoff is a concern, install sediment barriers, erosion controls, and divert water as needed.
Address any spills promptly using spill kits; prevent leaks by maintaining equipment and systems. Ensure compliance with local regulations and manufacturer guidelines for disposal and recycling.
Action Plan Before You Start Digging and Common DIY Mistakes to Avoid
Identify common DIY pitfalls like over-digging, hitting utilities, ignoring shallow water tables, and misinterpreting stains from HVAC, irrigation, or plumbing. Use these reminders to slow the process and verify conditions carefully. Maintain a clear record of observations to inform professional input when needed.
Set safety and tool guidelines, including using a utility location service and choosing appropriate digging gear. Use decision triggers to know when to pause and call a pro, particularly if stains persist after drainage fixes or water appears from below the slab. Keep the plan flexible and well documented.
Pre-Dig Checklist — Day-by-Day Actions
Before you start digging around concrete slabs to address water stains, follow this prioritized checklist to ensure safety and accuracy in your pre-dig activities.
- Visual inspection: Check for visible signs of damage or leaks on the surface and around the slab.
- Simple tests: Perform basic tests like checking water pressure, inspecting drains, and observing HVAC units to identify any immediate issues.
- Log data: Keep a record of your observations, test results, and any notable weather conditions to track patterns over time.
- Run non-invasive scans: Use tools like moisture meters or thermal imaging cameras to detect hidden water sources without causing damage.
- Get utility locates: Contact your local utility location service to mark underground lines before you start digging to avoid damaging them.
- Decide on contractor involvement: Based on your findings, determine if you need professional help or if the issue can be resolved with DIY repairs.
Quick rule: Always prioritize safety and accuracy by following this checklist before starting any digging activities.
Common Mistakes and How to Avoid Them
To minimize risks and improve diagnostic accuracy, be aware of these common mistakes and learn how to avoid them when dealing with water stains around concrete slabs.
- Ignoring seasonal patterns: Why: Seasonal changes can affect water stains. How to avoid: Keep track of weather conditions and observe how they impact the stains over time.
- Misinterpreting transient stains: Why: Some stains may be temporary and not indicative of a serious issue. How to avoid: Monitor stains over time and perform tests to confirm their cause before taking action.
- Skipping utility locates: Why: Damaging underground utilities can lead to costly repairs and safety hazards. How to avoid: Always contact your local utility location service before digging.
- Relying solely on hearsay: Why: Rumors or assumptions can lead you astray in diagnosing the problem. How to avoid: Trust test results and observations over secondhand information.
By understanding these common mistakes and taking steps to avoid them, you’ll improve your diagnostic approach and save time and money in the long run.
Conclusion
Diagnosing water staining around concrete slabs before digging protects your foundation, your property, and your budget. A careful, safety‑first approach helps you avoid costly mistakes and lasting damage.
Proceed with a calm, stepwise check: scan the stain patterns and edges for direction and spread, note where pooling occurs, perform a simple, non‑invasive test in a small area to confirm drainage behavior, verify that utilities are located and permits or contractor help are considered when required, and set a practical plan and budget before any trenching or excavation. If any test point suggests a drainage problem rather than a plumbing leak or groundwater, work from the outside toward the house in a measured way, and document everything for reference.
Two common mistakes to avoid are rushing to dig on a hunch without confirming the source and ignoring safety rules around utilities. Never dig near visible utilities or suspected lines, and always start tests in a small, controlled patch rather than a large area. Protect yourself with appropriate PPE, keep the work area stable and dry when testing, and double‑check local rules and permits before any major work. If the results are unclear, or if the potential repair involves digging near utilities or structural elements, call a professional for a planned assessment and quote—cost awareness matters, but so does safety and proper drainage.
If it makes sense to bring in help, do so sooner when utility locating, permit requirements, or structural implications are involved, or when the observed conditions suggest a complex drainage or groundwater issue. With clear planning, safe testing, and deliberate execution, you can move forward confidently and minimize risk while protecting your slab and landscape.
FAQ
What Are Common Signs of Water Leakage Around a Concrete Slab?
Look for damp or wet concrete, efflorescence on the surface, dark staining that persists after drying, and musty odors. Cracking or spalling near joints can also indicate ongoing moisture intrusion. Repeating damp areas after rain or irrigation are a red flag.
What Typically Causes Water Stains Under and Around Concrete Structures?
Stains often come from infiltration of rainwater, irrigation runoff, or leaking plumbing nearby. Poor drainage or improper slope around the slab can allow water to pool and seep. Groundwater movement and condensation can also leave persistent marks.
What Simple Diagnostic Methods Can I Use to Detect Leaks?
Inspect visible pipes for leaks and check fixtures for dampness. Observe whether stains appear after rainfall or irrigation, and perform a basic visual inspection of joints and cracks. A moisture meter or a simple dye test can help identify hidden leaks—check manufacturer instructions for safe use.
What Preventive Measures Can Reduce Future Water Damage Around Slabs?
Improve drainage away from the slab and ensure exterior grading slopes away from the foundation. Seal exposed concrete joints and sealant cracks as appropriate. Maintain gutters and downspouts so water is directed away from the structure.