
Table of Contents
- Introduction
- Understanding Plastic Shrinkage Cracking
- Conditions Leading to Plastic Shrinkage Cracks
- Best Practices for Preventing Plastic Shrinkage Cracks
- Impact and Consequences of Plastic Shrinkage Cracks
- Curing Techniques for Concrete
- Coordination Among Construction Teams
- Cost Analysis of Misting and Evaporation Retarders
- Safety Guidelines for Using Evaporation Retarders
- Conclusion
- FAQ
Introduction
Plastic shrinkage cracks can be effectively minimized by using misting techniques and evaporation retarders to control the rate of moisture loss from the concrete surface. In this article, we explore how these methods work, their benefits, and best practices for implementation to ensure durable and crack-free concrete surfaces.
Understanding Plastic Shrinkage Cracking
Plastic shrinkage cracks are a specific type of concrete crack that occur when the surface of freshly poured concrete loses moisture too quickly. These cracks are distinct from other types of concrete cracks because they form while the concrete is still in its plastic state, often appearing as irregular, shallow lines on the surface.
Understanding the conditions that lead to plastic shrinkage cracking is crucial for preventing them. Factors like high temperatures, low humidity, and strong winds can accelerate moisture evaporation, increasing the risk of these cracks. If left unaddressed, plastic shrinkage cracks can compromise both the structural integrity and aesthetic appearance of concrete surfaces, making early intervention essential for long-term durability.
The Science Behind Plastic Shrinkage
Plastic shrinkage cracks happen when water evaporates from the concrete surface faster than it can be replaced by the mix. This rapid evaporation creates tension, and if the concrete hasn’t gained enough strength, cracks form. To avoid this, keep an eye on weather conditions. Hot, dry, and windy days are the worst for concrete pouring. If you must pour on such days, use windbreaks or sunshades to slow evaporation.
Another factor is the concrete’s tensile strength. Freshly poured concrete is weak and can’t handle much stress. That’s why it’s crucial to keep the surface moist during the initial curing phase. Use wet burlap or plastic sheeting to cover the area. This helps the concrete gain strength before it dries out too much.
Lastly, don’t forget about the mix itself. A mix that’s too dry can lead to more shrinkage. Make sure your water-to-cement ratio is correct. If you’re unsure, consult with a professional or refer back to the earlier section on mix design. Remember, prevention is better than repair when it comes to plastic shrinkage cracks.
Common Patterns and Indicators
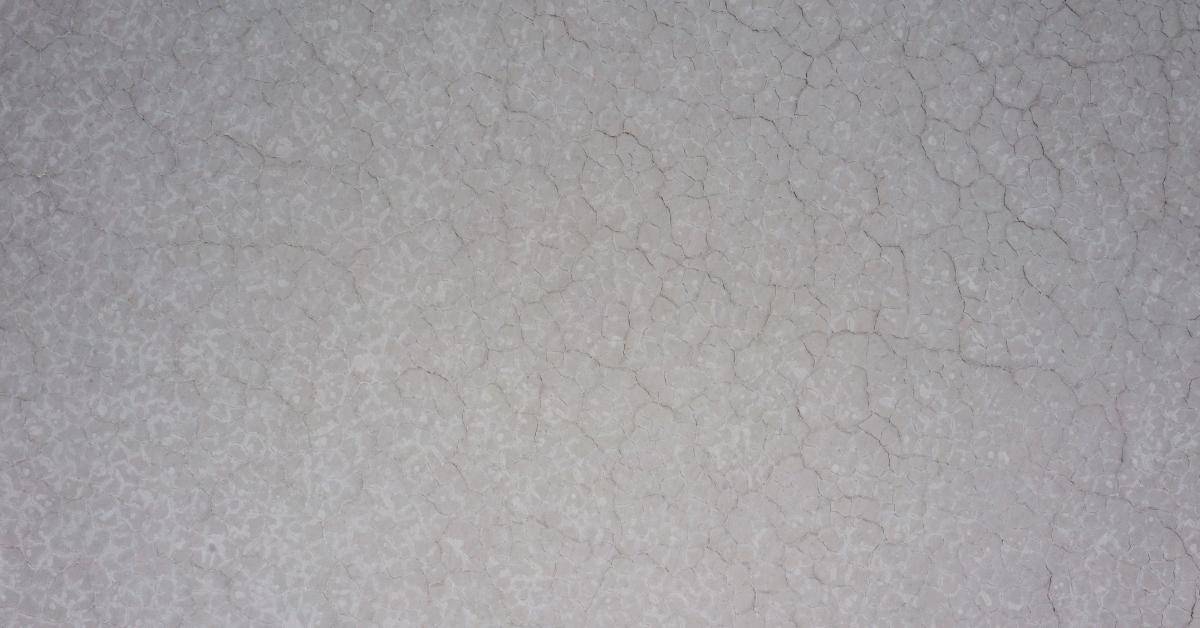
Plastic shrinkage cracks often show up as irregular, shallow cracks on the surface of freshly poured concrete. They usually form in a random pattern, resembling a spider web or map. These cracks are typically less than 2 mm wide but can extend several feet across the surface. Pay attention to these patterns, especially in large slabs or areas exposed to rapid drying conditions.
One key indicator of plastic shrinkage cracking is the timing of their appearance. These cracks develop within the first few hours after pouring, as the concrete begins to set but before it gains significant strength. If you spot these cracks early, you might still have a chance to address them. Look for cracks running parallel to each other, often spaced a few inches apart. This pattern suggests that the surface is drying out too quickly.
To prevent these cracks, check base compaction and ensure the subgrade is adequately moist before pouring. Also, consider using windbreaks or sunshades to reduce evaporation rates. If you notice these cracks forming, lightly misting the surface can help slow down the drying process. Remember, once the concrete has set, these cracks are much harder to deal with, so act quickly if you see them forming.
Conditions Leading to Plastic Shrinkage Cracks
Plastic shrinkage cracks in concrete are primarily influenced by environmental conditions such as high temperatures, strong winds, and low humidity levels. These factors accelerate the evaporation rate of surface moisture, leading to cracks as the concrete begins to dry too quickly. Additionally, the mix design, including the water-cement ratio and the size of aggregates, plays a crucial role in minimizing the risk of shrinkage.
Understanding these conditions is vital for anyone working with concrete, as it helps prevent structural weaknesses. By adjusting the timing of concrete placement and finishing, and by optimizing the mix design, you can significantly reduce the likelihood of cracks. This knowledge is especially important in scenarios where environmental conditions are unpredictable, ensuring a more durable and long-lasting concrete structure.
The Role of Weather Conditions
Weather plays a big part in plastic shrinkage cracks. When it’s hot, the concrete surface loses moisture fast. This quick drying can cause cracks. If you’re pouring concrete on a hot day, try to start early in the morning or later in the afternoon when it’s cooler.
Humidity is another factor. Low humidity means dry air, which pulls moisture from the concrete. This can lead to cracks. On dry days, use a curing compound to keep the moisture in the concrete. It acts like a shield, slowing down the evaporation.
Wind is a sneaky culprit. Even on a cool day, a strong breeze can dry out the surface too quickly. If it’s windy, set up windbreaks around your pour area. This simple step can save you from a lot of headaches later.
Material Properties and Their Influence
The right mix of materials in your concrete can make a big difference in avoiding shrinkage cracks. It’s not just about the weather; what’s in your mix matters too. Here’s what you need to consider:
- Water-Cement Ratio: Keep it low to reduce shrinkage. Too much water weakens the mix.
- Aggregate Size: Larger aggregates help minimize shrinkage. Avoid too many fine particles.
- Admixtures: Use shrinkage-reducing admixtures to control cracking. They can be a game-changer.
- Cement Type: Choose a type with lower heat of hydration. This helps reduce early-age cracking.
- Fibers: Adding fibers can help control crack widths. They act like tiny reinforcements.
Pro tip: Always check the specific requirements of your project and adjust the mix accordingly. A little planning goes a long way in ensuring durability and strength.
Best Practices for Preventing Plastic Shrinkage Cracks
Preventing plastic shrinkage cracks in concrete is crucial for ensuring structural integrity and longevity. Key strategies include controlling evaporation rates during the initial curing phase and utilizing misting techniques to maintain surface moisture.
Environmental factors like temperature, humidity, and wind speed significantly influence the risk of shrinkage. Applying evaporation retarders and timing protective measures correctly can help reduce moisture loss. Monitoring weather forecasts and planning pours accordingly can further minimize risks, ensuring a successful construction project.
Effective Use of Misting Techniques
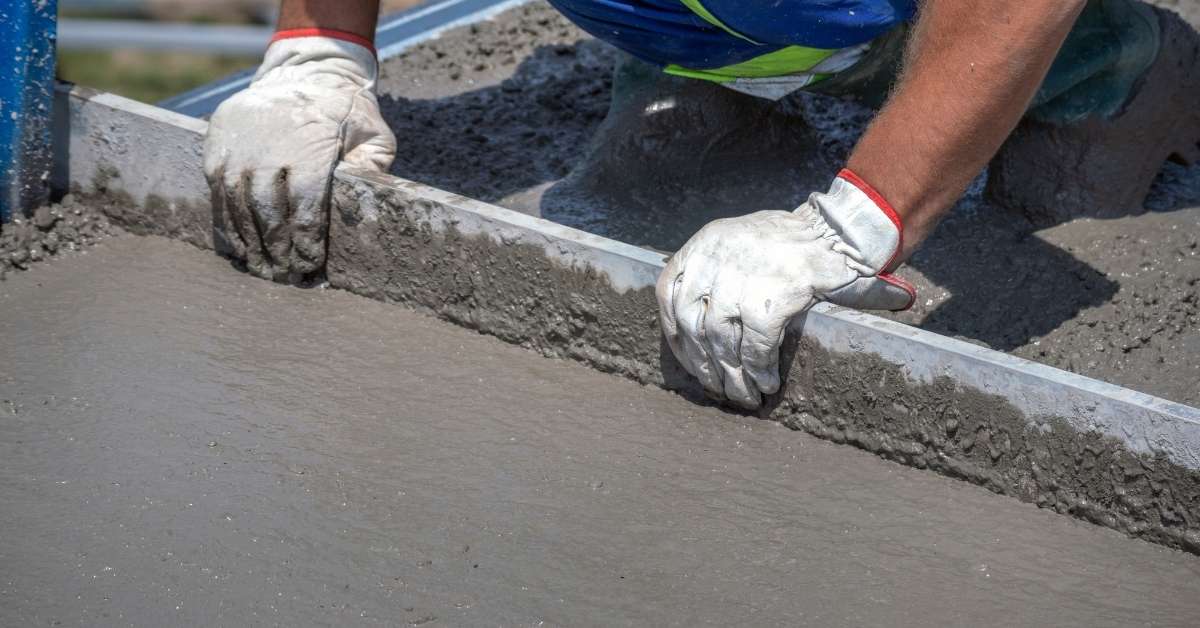
To prevent plastic shrinkage cracks, start by using misting to keep the surface moist. Set up a fine mist spray that covers the entire area evenly. Avoid creating puddles; too much water can weaken the mix. The goal is to keep the surface damp, not soaked.
Timing is crucial. Begin misting as soon as the concrete is placed and finished. Continue until the concrete has set enough to resist evaporation. If you wait too long, the surface will dry out and crack. Keep an eye on the weather; on hot or windy days, you might need to mist more frequently.
Check the equipment regularly. Ensure the misting nozzles are not clogged and are providing a consistent spray. A faulty nozzle can lead to uneven moisture distribution, which is a recipe for cracking. If you notice dry patches, adjust the misting setup immediately.
Application of Evaporation Retarders
Evaporation retarders are a crucial tool in your arsenal to combat plastic shrinkage cracks. They work by forming a thin film over the surface of the concrete, slowing down the rate of moisture loss. This gives the concrete more time to set properly without drying out too quickly. You should apply them immediately after screeding and bull-floating, while the surface is still fresh and wet. This timing ensures the retarder can effectively reduce evaporation before the concrete starts to set.
For maximum effectiveness, keep an eye on weather conditions. High temperatures, low humidity, and strong winds are your enemies here. In these conditions, evaporation rates can skyrocket, making the use of retarders even more critical. If you notice these weather signs, don’t hesitate—apply the retarder right away. Remember, it’s easier to prevent cracks than to fix them later.
Don’t rely solely on evaporation retarders. They should be part of a larger strategy that includes techniques like misting, which we discussed earlier. Retarders are not a magic bullet; they work best when combined with other methods to keep moisture in your concrete. Always check base compaction and ensure proper curing practices to achieve the best results.
Impact and Consequences of Plastic Shrinkage Cracks
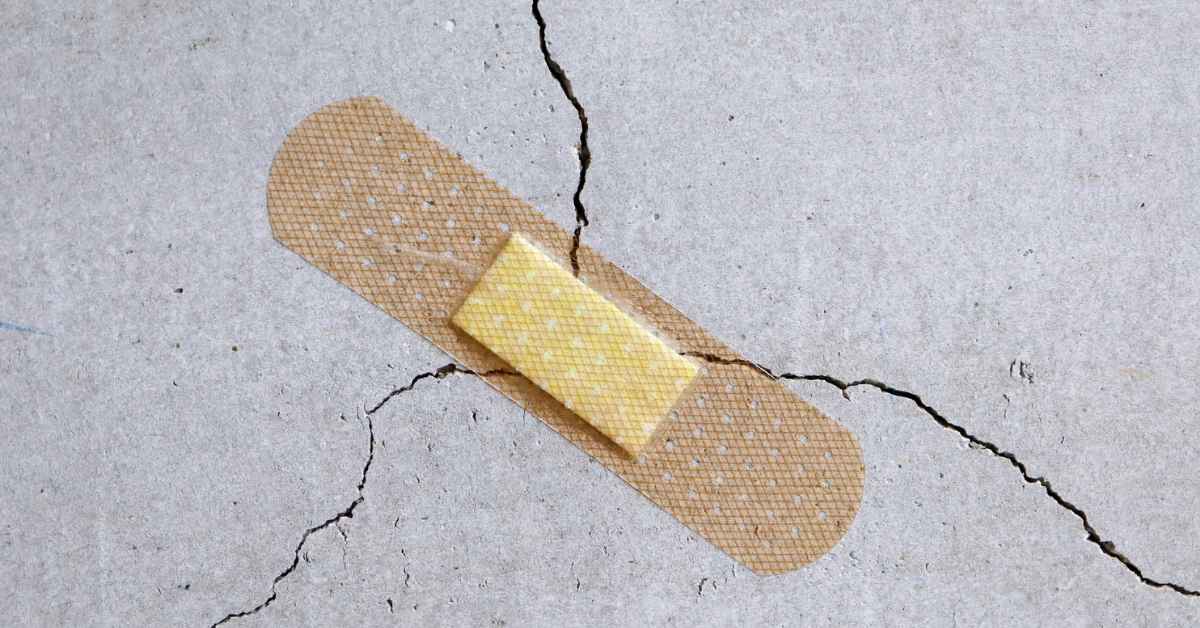
Plastic shrinkage cracks are a common issue that arise during the early stages of concrete curing. These cracks can compromise the surface aesthetics of concrete structures and create pathways for water ingress, leading to immediate structural concerns. Over time, the presence of these cracks can significantly impact the structural integrity of concrete, resulting in increased maintenance costs and a reduced lifespan for the affected structures.
Understanding the long-term effects of plastic shrinkage cracks is crucial for maintaining the safety and stability of concrete structures, especially in load-bearing or high-traffic areas. These cracks can exacerbate deterioration through mechanisms like freeze-thaw cycles or corrosion of embedded steel reinforcements. Addressing plastic shrinkage cracks early can prevent costly repairs and ensure the longevity and reliability of concrete installations.
Structural Integrity and Durability
Plastic shrinkage cracks might seem small, but they can pack a punch when it comes to your concrete’s strength. These cracks can act like open doors for water and chemicals, which can lead to corrosion of the steel reinforcement. Over time, this can seriously weaken the structure. To keep your concrete strong, always check base compaction before pouring. A well-compacted base helps prevent uneven settling and cracking.
Durability takes a hit when cracks let in moisture. This can cause freeze-thaw cycles to wreak havoc, especially in colder climates. The repeated expansion and contraction can widen cracks, making the concrete brittle. To avoid this, ensure proper curing techniques are followed. Cover the concrete with a damp cloth or plastic sheet to retain moisture and strengthen the surface.
Don’t cut corners on the mix design either. A poor mix can lead to excessive shrinkage and cracking. Use the right water-cement ratio and consider adding fibers to the mix for extra reinforcement. Remember, a little extra care during preparation can save you a lot of headaches down the line.
Aesthetic and Maintenance Concerns
Plastic shrinkage cracks can be an eyesore. They disrupt the smooth finish of your concrete surface and catch the eye for all the wrong reasons. These cracks can make a new patio or driveway look old and neglected. If you’re aiming for a clean, polished look, these imperfections are a real setback.
Beyond looks, cracks can lead to maintenance headaches. Water and debris can settle into these gaps, causing further damage over time. This means more frequent cleaning and potential repairs. If left unchecked, these cracks can expand, making the surface uneven and potentially hazardous.
To keep your concrete looking its best, stay proactive. Regularly inspect your surfaces for early signs of cracking. If you spot any, address them quickly to prevent bigger issues. A little maintenance now can save you from a lot of trouble down the line.
Curing Techniques for Concrete
Curing is a crucial process in concrete construction that helps prevent plastic shrinkage cracks. Effective curing methods, such as water curing through ponding and continuous sprinkling, ensure that the concrete retains adequate moisture during its setting phase. Additionally, applying curing compounds creates a moisture-retaining film on the concrete surface, further reducing the risk of cracks.
Understanding and implementing proper curing techniques can significantly enhance the durability and strength of concrete structures. For those working in hot weather conditions, using evaporation retarders and paying attention to timing and environmental factors can make a substantial difference in the outcome. These practices are essential for anyone looking to achieve a long-lasting, crack-free concrete finish on their projects.
Membrane Curing Compounds
Membrane curing compounds are a practical choice for curing concrete, especially when you want to avoid the hassle of continuous water application. These compounds form a thin, impermeable layer on the concrete surface, which helps to retain moisture and allows the concrete to cure properly. This is crucial for achieving the desired strength and durability in your concrete projects.
When using membrane curing compounds, timing is everything. Apply the compound as soon as the surface water has evaporated and the concrete can support foot traffic without damage. If you wait too long, the concrete might lose too much moisture, which can lead to cracks. On the flip side, applying it too early can trap excess water, affecting the finish.
Choose a quality product that suits your specific project needs. Some compounds are better for certain climates or types of concrete. Always read the manufacturer’s instructions carefully. If you skimp on this step, you might end up with a subpar finish or compromised structural integrity. Remember, a good membrane curing compound can make a big difference in the long-term performance of your concrete.
Alternative Curing Methods
When it comes to curing concrete, there are other methods beyond membrane curing compounds. One popular technique is wet curing. This involves keeping the surface of the concrete continuously moist. You can achieve this by covering the concrete with water-retaining materials like burlap or cotton mats. It’s effective because it prevents moisture loss, which is crucial for the concrete to gain strength.
Another method is using plastic sheeting. This acts as a barrier to trap moisture. It’s straightforward and can be a good option if you’re working in a dry or windy environment. Just make sure the plastic is secured tightly to avoid air gaps. If not done right, it can lead to uneven curing.
Some folks try sprinkling water on the surface. While it might seem easy, it’s not the best choice. It can lead to surface erosion if overdone. Stick to methods that maintain consistent moisture levels for the best results. Remember, the goal is to keep the concrete damp, not soaked.
Coordination Among Construction Teams
Coordination among construction teams is crucial to prevent plastic shrinkage cracks in concrete. Each team member, from site managers to laborers, plays a specific role in ensuring the integrity of the structure. Effective communication and clearly defined responsibilities help in implementing strategies like misting and evaporation retarders.
Pre-construction meetings are essential for aligning on timing and techniques, reducing the risk of cracks. When teams synchronize concrete pouring and curing processes, the chances of successful outcomes increase significantly. Past projects have shown that well-coordinated efforts lead to durable, crack-free concrete, underscoring the benefits of teamwork on the jobsite.
Roles and Responsibilities
Contractors are the backbone of any construction project. They need to ensure that the site is prepared correctly and that all teams are aligned. A key task is to check base compaction before any concrete is poured. This helps prevent moisture issues later. Contractors also coordinate with other teams to ensure everyone follows the agreed timeline and moisture management plan.
Finishers play a crucial role in the final stages of concrete work. They must be vigilant about curing times and conditions. Proper curing prevents cracks and ensures durability. Finishers should regularly monitor the moisture levels and adjust curing methods as needed, especially in changing weather conditions.
Suppliers are responsible for delivering materials that meet the project’s specifications. They should provide materials that are suitable for the local climate and conditions. Suppliers must communicate any changes in material availability that could impact moisture management. Keeping an open line of communication with contractors ensures that the project stays on track and materials are used effectively.
Cost Analysis of Misting and Evaporation Retarders
Misting systems and evaporation retarders are essential tools in construction to prevent plastic shrinkage cracks. Understanding the costs involved with these methods is crucial for efficient budget planning. This section provides a detailed analysis of the initial setup costs, maintenance expenses, and potential savings associated with misting systems, as well as the price range and application costs of various evaporation retarders.
For DIY enthusiasts and jobsite managers, knowing the cost-effectiveness of misting systems versus evaporation retarders can lead to significant savings. Factors such as project size, climate conditions, and material quality play a vital role in influencing these costs. By analyzing these variables, you can make informed decisions that optimize both budget and project outcomes.
Initial Investment vs. Long-Term Savings
When you’re weighing the initial investment of misting systems or evaporation retarders, it’s tempting to focus on the upfront costs. Misting systems might seem pricey, but they can be a lifesaver in preventing cracks. Evaporation retarders are usually cheaper, but they might not offer the same level of protection in hot, windy conditions. Consider what you need for your specific project.
Think about the long-term savings. Cracks in concrete can lead to costly repairs down the line. By investing in effective moisture control now, you can avoid those expenses later. It’s like buying insurance for your concrete. Spend a bit more today to save a lot tomorrow.
Don’t just look at the price tag. Check how well each option fits your project’s needs. If you skimp on the initial investment, you might pay for it with repairs. Make sure you’re choosing a solution that balances cost with effectiveness. A little extra spent now can mean a lot less hassle in the future.
Budgeting for Concrete Projects
When planning your concrete project, set a clear budget from the start. First, determine how much you can spend on materials, labor, and additional tools. Remember, misting and evaporation retarders are crucial to maintaining concrete quality, so allocate funds for these. Skimping here can lead to costly repairs down the line.
Research the market prices for misting systems and evaporation retarders. Prices can vary, so compare several suppliers. Look for bulk purchase discounts if your project is large. This can significantly reduce costs without sacrificing quality.
Factor in the long-term savings of using quality retarders. While the initial investment might seem high, they prevent cracking and surface defects, saving you money on repairs. Be wary of opting for cheaper alternatives that might compromise the durability of your concrete.
Finally, keep a buffer in your budget for unexpected expenses. Construction projects often face surprises, and having a financial cushion can prevent delays. By planning carefully, you can ensure your project stays on track and within budget.
Safety Guidelines for Using Evaporation Retarders
When applying evaporation retarders, adhering to safety guidelines is crucial to ensure a safe working environment. This includes wearing appropriate personal protective equipment (PPE) such as gloves, goggles, and masks, ensuring proper ventilation to avoid inhaling fumes, and following safe storage and handling procedures to prevent spills and accidents.
Understanding these safety measures not only protects your health but also minimizes environmental impact and ensures compliance with safety regulations. By being prepared for emergencies and knowing how to dispose of unused retarders responsibly, you contribute to a safer jobsite and a more sustainable practice.
Protective Measures and Equipment
When applying evaporation retarders, safety is your top priority. Equip yourself with the right protective gear to prevent accidents and ensure a smooth application process.
- Safety Goggles: Protects your eyes from chemical splashes. Always wear them when handling retarders.
- Gloves: Use chemical-resistant gloves to shield your hands from irritation and burns.
- Respirator Mask: Essential for avoiding inhalation of harmful fumes. Choose a mask rated for chemical protection.
- Protective Clothing: Wear long sleeves and pants made from materials that resist chemical penetration.
- Boots: Non-slip, chemical-resistant boots keep your feet safe from spills and provide good traction.
Pro tip: Always check your gear for any damage before starting. A small tear can compromise your safety.
Handling and Storage Instructions
Always wear protective gear when handling evaporation retarders. This includes gloves and goggles. These chemicals can be harsh on your skin and eyes. If you’ve already read about protective measures, you know the drill. Keep your workspace well-ventilated to avoid inhaling fumes.
Store evaporation retarders in a cool, dry place. They should be kept in their original containers with the lids tightly sealed. This prevents contamination and maintains their effectiveness. Never store them near heat sources or in direct sunlight, as this can degrade their quality.
Check the expiration date before use. Using expired products can compromise your project’s results. If the retarder has changed color or consistency, it’s time to dispose of it safely. Don’t risk it; using compromised products can lead to poor concrete curing.
Conclusion
Plastic shrinkage cracks can sneak up on you if you’re not careful. They happen fast, especially when the weather is hot and dry. But with the right approach, you can keep them at bay. Misting and using evaporation retarders are your best friends here. They help keep the surface moist and prevent those pesky cracks from forming.
Don’t underestimate the power of teamwork on site. Everyone needs to be on the same page to make sure the concrete cures properly. A little planning goes a long way. And remember, cutting corners can lead to expensive repairs down the line. It’s always cheaper to do it right the first time.
Safety is non-negotiable. When using evaporation retarders, follow all safety guidelines to protect yourself and your crew. These products are effective, but they need to be handled with care. Keep your site safe and your concrete crack-free by sticking to the best practices we’ve discussed.
FAQ
What are plastic shrinkage cracks?
Plastic shrinkage cracks are small cracks that appear on the surface of concrete as it dries. They usually happen when the surface loses moisture too quickly. You’ll often see them in hot, windy, or dry conditions.
How does misting help prevent these cracks?
Misting adds a light layer of water to the concrete surface, slowing down the drying process. This helps keep the surface moist and reduces the chance of cracks. Just be careful not to overdo it, or you’ll end up with puddles.
What are evaporation retarders?
Evaporation retarders are chemicals you spray on concrete to slow down water loss. They form a thin film on the surface, keeping moisture in. They’re handy when misting isn’t enough, especially in tough weather conditions.
Can I skip using misting or retarders?
Skipping these steps can lead to ugly cracks that weaken your concrete. If you want a strong, long-lasting surface, don’t cut corners. Proper curing methods are a must for quality results.
Is it hard to apply these methods?
No, misting and using retarders are pretty straightforward. Misting requires a simple spray bottle or hose attachment. Retarders come with instructions, so just follow them, and you’ll be fine.