
Introduction
Plastic rebar chairs are non-metal, lightweight supports that keep rebar off the form and away from the wet concrete.
Unlike wire chairs, they won’t rust and stain the concrete, which helps with a cleaner pour. Check that the chairs are rated for the cover you need and compatible with your rebar size before using.
Wire chairs can rust and punch through if the coating fails, so many DIYers prefer plastic where moisture is heavy. Make sure to follow manufacturer guidelines and local rules for spacing and seating height, and inspect for cracks or deformities before pouring. Choose based on your site conditions and what you can easily source locally.
Key takeaways
- Choose plastic chairs to minimize rust staining and reduce punch-through risk.
- Inspect wire chairs for burrs, bent legs, and coating damage before use.
- Secure chairs firmly in upright orientation to maintain consistent concrete cover.
- Plan for field tests: verify chair spacing and alignment with rebar grid.
- Consider life-cycle costs including replacement frequency and labor if rust occurs.
- Safety: never reuse damaged chairs; stop work if rust staining appears.
Table of Contents
- Introduction
- Key takeaways
- Why Rust Staining and Punch-Through Matter in Concrete Jobs
- Materials Compared: Plastic Rebar Chairs Vs Wire Chairs
- How Each Chair Causes or Prevents Rust Staining
- Punch-Through Mechanisms and Mitigation Strategies
- Installation Best Practices and Visual Checkpoints
- Tools, Materials Checklist, and Simple Field Tests
- Cost, Durability, and Life-Cycle Considerations
- Decision Guide and Recommendations by Project Type
- Conclusion
- FAQ
Why Rust Staining and Punch-Through Matter in Concrete Jobs
Rust staining and punch-through can affect both appearance and performance on a job site. Aesthetic concerns include visible streaks that may lead to finish rejection and touch-up work. Structural and durability implications can translate into localized repair costs and liability if the problem is not addressed.
Preventing these issues helps reduce rework and accountability questions later in the project. Understanding how chair choice influences staining and punch-through helps field teams plan safer, cleaner pours. Real-world examples show why early decisions matter for long-term outcomes.
What is rust staining?
Rust staining happens when iron oxide from reinforcing steel bleeds through the concrete surface. This occurs due to the oxidation of iron, a process that starts as soon as rebar is exposed to oxygen and moisture.
Visually, it appears as orange or brown stains on your concrete. Chemically, you might notice a higher pH level around these areas, indicating the presence of rust.
Prevention involves using proper concrete cover depth and preventing water from penetrating the concrete to reach the rebar.
What is punch-through failure?
Punch-through, also known as chair penetration, occurs when wire chairs or other supports used for spacing rebar during concrete pouring become embedded in the concrete instead of remaining at the desired level.
This can create voids in the concrete, weakening its structure. It can also expose rebar, leading to rusting and staining. Punch-through is more common with wire chairs due to their flexibility.
Prevention involves using rigid plastic chairs that maintain their shape under pressure and proper consolidation techniques.
Project risk and liability implications
Rust staining and punch-through can lead to significant project risks. Aesthetically, they can cause architectural finish rejection, leading to costly rework.
Structurally, they can weaken the concrete, potentially causing cracks or even collapse. This could result in expensive localized repairs or even total replacement of affected sections.
Moreover, these issues can impact project schedules, as repairs often require additional time and resources. They may also have code or warranty implications, potentially leading to legal liabilities.
Materials Compared: Plastic Rebar Chairs Vs Wire Chairs
Plastic rebar chairs come in various molded forms, while wire chairs rely on metal components joined or bent for support. Manufacturing variants can affect edge sharpness, seating stability, and how they interact with concrete mixes. Material choice also ties to corrosion risk and basic structural behavior under load.
When selecting, consider strength, chemical stability, and how each option behaves in your environment. Look for guidance from manufacturers and local codes to balance performance with practicality. Always verify the intended use with the product data sheet or label before committing to a specific type.
Types of plastic chairs and additives
Plastic rebar chairs come in various types, with polypropylene being the most common. It’s strong, durable, and resistant to chemicals found in concrete.
To enhance UV resistance, manufacturers add stabilizers like carbon black or titanium dioxide. These help prevent chair degradation from sunlight exposure during construction and service life.
Some chairs also have flame-retardant additives for safety reasons, but these aren’t typically needed on residential jobsites.
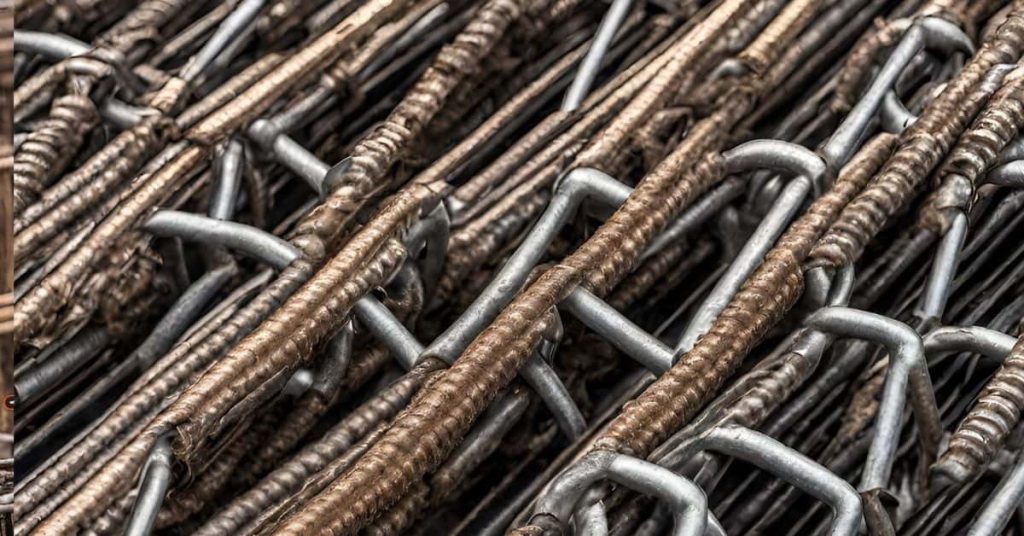
Wire chairs: steel types and protective coatings
Wire chairs are made from plain steel. While strong, they’re prone to corrosion without protection.
Galvanized wire chairs have a zinc coating that provides initial corrosion resistance. However, once the zinc layer is consumed, rusting can begin.
Epoxy-coated chairs offer better long-term protection. The thick, durable epoxy layer seals out moisture and prevents rust. Stainless steel chairs are also an option but are usually reserved for high-end or specialty projects due to their cost.
Load-bearing and creep behavior
Plastic chairs can bear significant loads, but they’re not as strong as steel. They’ll deform slightly under heavy loads, which is why it’s important to use the right size chair for your rebar spacing.
Steel wire chairs are stronger and stiffer than plastic. They won’t deform as much under load, making them suitable for heavier concrete pours or when precise rebar spacing is critical.
Creep behavior refers to long-term deformation under sustained loads. Plastic chairs may creep more than steel, but this isn’t usually an issue in residential construction where loads are relatively low and consistent.
How Each Chair Causes or Prevents Rust Staining
Metal chairs can contribute to rust staining when moisture and chlorides reach the steel or galvanized surfaces. Leaching can occur through capillary action as concrete hydrates and cures around the chair. Plastic chairs typically do not have this pathway, reducing stain risk in many cases.
Edge cases exist where coatings fail or plastics degrade under certain exposures or chemical environments. Environmental conditions, placement, and curing practices all influence staining risk. Always review product instructions and suitability for your specific project conditions.
Galvanized vs bare steel staining potential
Galvanization protects steel from rust, but it’s not foolproof. Chlorides in concrete or nearby soil can penetrate the zinc layer and cause rust to form underneath. Prolonged moisture exposure speeds up this process.
Physical damage to the galvanizing, like scratches or dents during installation, also leaves steel vulnerable to rusting. Bare steel chairs have no protection and will start rusting as soon as they’re exposed to moisture.
Takeaway: While galvanization helps prevent staining, it’s not a guarantee. Keep chairs clean and undamaged during installation to minimize risks.
Plastic degradation and staining risks
Plastic chairs are resistant to rust, but they’re not immune to issues that could affect concrete appearance. In rare cases, additives in the plastic can migrate into the concrete, causing discoloration or other visual defects.
Contamination during manufacturing or on-site can also lead to problems. For instance, if plastic chairs are exposed to certain chemicals before installation, they might transfer those chemicals into the concrete, leading to staining.
Takeaway: While plastics reduce rust risks, they’re not entirely problem-free. Keep them clean and undamaged, and avoid exposing them to potential contaminants.
Interaction with admixtures and finish types
Concrete mix water chemistry can influence staining. For instance, if the water contains high levels of chlorides or sulfates, it could increase the risk of rust staining, even with plastic chairs.
Surface treatments like sealers or stains can also play a role. If they’re not compatible with the chair material, they might cause discoloration or other visual issues. For example, some sealers can react with plastic, causing it to turn yellow over time.
Takeaway: Understand your concrete mix and chosen finish. Consult with a professional if you’re unsure about compatibility to avoid unexpected staining or other problems.
Punch-Through Mechanisms and Mitigation Strategies
Punch-through happens when footing area and load concentrate forces through the chair into the concrete, creating a through-embedment issue. Vibration and improper seating can exacerbate movement and wear. Understanding these mechanisms helps you choose and place chairs to minimize risk.
Mitigation relies on geometry, proper footing, and sound in-pour procedures. Practical steps include selecting chairs with appropriate seating surfaces and aligning them with rebar grids during setup. Use manufacturer or project guidelines to confirm the recommended approach for your conditions.
Chair geometry, footing size, and stability
Choosing the right chair starts with understanding their base. Larger bases provide more stability, reducing the risk of penetration.
Multi-legged designs also help distribute weight evenly, preventing sinking. Think of it like a table – four legs are steadier than three.
Wider saddles cradle rebar better, keeping it in place and minimizing movement during concrete pouring.
Remember, the chair’s job is to keep rebar off the footing, preventing rust staining. So, choose chairs that can do their job well under your specific conditions.
Vibration and consolidation best practices
Proper vibration is key to consolidating concrete around chairs. But too much, or poorly placed vibrators, can shift chairs and cause problems.
Place vibrators near the bottom of forms, not at the top where they can dislodge chairs.
Run them for just long enough to remove air pockets – over-vibration can also cause issues. A good rule of thumb is until you see no more air bubbles rising.
Time your vibration right too. Do it just before the concrete starts to set, when it’s still fluid but starting to thicken a bit.
Using supplemental supports and spacers
Sometimes, you need extra help keeping chairs in place. That’s where supplemental supports come in.
Precast blocks can be used under chairs to raise them higher off the footing, preventing rust staining from any remaining moisture.
Mesh chairs or plastic-topped wire chairs provide additional support for rebar, reducing the risk of punch-through. They’re great for areas with heavy loading or where extra stability is needed.
Just remember, these supports should be used in addition to, not instead of, proper chair selection and placement. They’re tools to help you get the job done right.

Installation Best Practices and Visual Checkpoints
Start with a clear plan for chair spacing, alignment, and support height before the pour begins. Place chairs so that rebar remains adequately supported throughout the pour. Document any deviations from the plan for quality control later.
During and after installation, perform routine visual checks for level seating, clean contact with the rebar, and stable positioning. Post-pour checks should verify chairs remained in place and there are no obvious shiftings or gaps. Use the project’s standard inspection criteria to capture evidence.
Pre-pour layout and spacing rules
Use this checklist before pouring concrete to ensure chairs are placed correctly for even coverage and proper cover depth.
- Check spacing: Maintain consistent gaps between chairs. Too close can cause overcrowding, too far apart may lead to weak spots.
- Verify layout: Ensure chairs follow the designed pattern. Off-grid placement can result in uneven concrete distribution.
- Measure cover depth: Confirm chairs are at the right height for desired slab thickness. Insufficient cover exposes rebar, excessive cover wastes material.
- Avoid chair overlap: Overlapping chairs can cause weak points and increase risk of punch-through.
- Check footing size: Ensure chairs fit within the formwork dimensions to prevent displacement during pour.
- Inspect chair stability: Chairs should stand upright without wobbling. Unstable chairs may shift during vibration.
- Check for obstructions: Remove any debris or formwork imperfections that could interfere with chair placement.
- Verify chair type: Use the correct chair type (plastic or wire) as specified in your design plans.
Quick rule: Regular spacing and layout verification help prevent weak spots and ensure consistent concrete strength.
On-site inspection checklist
Use this checklist before pouring concrete to ensure chairs are in good condition and properly seated.
- Check chair displacement: Ensure chairs haven’t shifted since initial layout. Displaced chairs can cause weak spots or uneven surfaces.
- Inspect for contamination: Grease, rust, or other contaminants on chairs can stain the concrete and affect its strength.
- Verify proper seating: Chairs should sit level and stable on the formwork. Unstable chairs may shift during vibration.
- Check chair integrity: Inspect for damaged or broken chairs that could compromise their support function.
- Ensure rebar alignment: Rebar should run through chair openings smoothly. Misaligned rebar can cause weak points and staining.
- Confirm formwork fit: Chairs should fit snugly within the formwork to prevent displacement during pour.
- Check for missing chairs: Ensure all designed chairs are present and properly placed.
- Inspect chair type: Confirm you’re using the correct chair type (plastic or wire) as specified in your design plans.
Quick rule: Thorough on-site inspection helps prevent weak spots, staining, and other issues that can compromise concrete quality.
Post-pour inspection for staining and punch-through
Use this checklist after the concrete has cured to identify any signs of rust staining or punch-through that may require remediation.
- Check for rust stains: Look for reddish-brown stains on the surface, which indicate rust from exposed rebar or contaminated chairs.
- Inspect for cracks: Fine cracks around chair locations can signal punch-through or weak spots in the concrete.
- Feel for hollow spots: Gently tap the surface with a hammer. A dull thud could indicate a void or weak spot beneath the surface.
- Check rebar exposure: Exposed rebar at the edges or surface indicates insufficient cover depth, which can lead to rust staining and punch-through.
- Inspect for delamination: Peeling or flaking of the concrete surface around chair locations may indicate punch-through or other underlying issues.
- Check for discoloration: Yellowish or greenish hues on the surface can indicate contamination from chairs or admixtures.
- Verify proper curing: Ensure the concrete has cured properly. Insufficient curing can lead to weak spots and other issues.
- Document findings: Photograph and log any signs of staining, punch-through, or other issues for warranty or remediation planning.
Quick rule: Early detection of staining and punch-through allows for timely remediation, preventing further damage and costly repairs.
Tools, Materials Checklist, and Simple Field Tests
Prepare a practical toolkit with basic chairs, ties or clips if needed, and simple grading tools to verify alignment. Include items for cleaning contact surfaces and securing seating prior to pour. Have a plan for sourcing replacements if any chair shows damage.
Field tests can be low-cost and straightforward, such as visual verifications of seating stability and alignment, along with pre-pour checks of contact points. If in doubt, compare observations against the product label, data sheet, or manufacturer instructions. Do quick spot checks to confirm no obvious movement or gaps.
Tools and consumables for proper installation
Before you start installing chairs, make sure you have the right tools and supplies. This checklist helps ensure a smooth process.
- Tape measure: To accurately space your chairs.
- Chalk line: For marking out chair lines quickly.
- Temporary supports: Like wooden blocks or wedges, to keep chairs level and stable during installation.
- Hard hat and safety glasses: Essential PPE for any concrete work.
- Gloves: To protect your hands from sharp edges and debris.
- Chair spacers (if needed): For maintaining consistent spacing between chairs.
- String line or laser level: To ensure chairs are at the correct height.
- Wire cutters (for wire chairs): To trim excess wire and prevent tripping hazards.
Quick rule: Having the right tools makes installation faster, safer, and more accurate.
Simple corrosion risk tests for wire chairs
Before using wire chairs, perform these quick checks to assess their condition and reduce the risk of rust staining.
- Visual pitting inspection: Look for small holes or pits on the wire’s surface. These indicate corrosion has already started.
- Coating adhesion probe: Gently scratch the chair’s coating with a sharp object. If it flakes off, the protection is compromised.
- Review storage/exposure history: Chairs exposed to harsh conditions or stored improperly are at higher risk of corrosion.
- Check for rust stains: Any visible rust stains mean the chair has already started corroding and should be replaced.
Quick rule: If in doubt, replace. It’s cheaper than fixing rust stains later.
Field test for chair stability under load
Before pouring concrete, perform this simple field test to ensure your chairs won’t penetrate or shift under the weight of the concrete.
- Push test: Gently push on each chair. If it moves easily, it’s not stable enough.
- Load test (optional): Place a heavy object (like a sandbag) on the chair and check if it penetrates or shifts.
- Check footing resistance: Try to pull chairs out of their footings. If they come out easily, consider using supplemental supports.
- Vibrate chairs: Gently vibrate each chair with a small hammer to ensure they’re securely in place.
Quick rule: Unstable chairs mean unstable concrete. Always test before pouring.
Cost, Durability, and Life-Cycle Considerations
Think about upfront costs in the context of long-term durability and maintenance needs. Downstream repair costs for staining or failures can affect total project expenses. Use a project-wide view rather than unit price alone when evaluating chair choices.
Note factors that commonly influence service life without committing to exact values. Consider exposure conditions, concrete type, and maintenance plans. Always cross-check with product guidance and local requirements for a safe, durable selection.
Upfront material and labor cost comparison
The upfront costs of rebar chairs can vary significantly, affecting your overall budget.
- Plastic Chairs: Generally cheaper per unit. Lightweight, easy to handle, reducing labor costs. No rusting, so no extra maintenance needed.
- Wire Chairs: Cheaper upfront but consider the added cost of rust prevention and maintenance. Require careful handling to avoid damage.
- Plastic Spacers: More expensive than chairs alone but often included in chair sets. Provide better spacing accuracy, reducing rebar waste.
- Installation Speed: Plastic chairs are faster to install due to their lightweight and stability. Wire chairs can slow down work due to rust risk and handling precautions.
- Handling Precautions: Wire chairs need extra care during transport and storage to prevent damage. Plastic chairs are more durable, reducing waste and replacement costs.
Long-term durability and warranty expectations
The lifespan of rebar chairs is crucial for the longevity of your concrete structure. Here’s what to expect:
Plastic chairs are resistant to corrosion, UV degradation, and creep. They maintain their shape and strength over time, ensuring consistent support for your rebar.
Wire chairs, however, are susceptible to rusting, which can lead to staining, cracking, and reduced bond strength with concrete. This can compromise the structural integrity of your pour over time.
When comparing products, look for warranties that cover both material defects and performance under load. A good warranty should provide peace of mind regarding long-term durability.
Environmental and disposal impacts
The environmental impact of rebar chairs is another factor to consider in your decision-making process:
Plastic chairs are typically recyclable, reducing waste sent to landfills. They also have a lower embodied carbon footprint compared to metal chairs.
Wire chairs, on the other hand, contribute to landfill waste and have a higher embodied carbon due to their metal content. Additionally, corroding metal chairs can introduce iron into stormwater, potentially leading to water quality issues.
When disposing of used chairs, ensure they are recycled or disposed of responsibly to minimize environmental impact.
Decision Guide and Recommendations by Project Type
Offer practical selection guidance based on architectural finishes, marine exposure, structural slabs, or heavy-load industrial floors. Tailor recommendations to the conditions you expect on site. Provide trade-offs rather than hard rules to fit real-world constraints.
Clarify how to balance aesthetics, durability, and cost in your choice. When in doubt, consult the relevant project specifications and ask for manufacturer instructions or label details to confirm suitability for the intended environment.
When to prefer plastic chairs
Plastic rebar chairs are your best bet when you’ve got exposed finishes. Rust stains on that fancy exterior would be a real eyesore.
High staining sensitivity? Go with plastic. They won’t leave rust marks even if they’re exposed after the pour.
Corrosive environments, like marine exposure or deicing salts, can eat away at wire chairs. Plastic holds up better in these tough conditions.
When to prefer coated or stainless wire chairs
For heavy compressive loads, like thick slabs or industrial floors, wire chairs can handle the pressure. They’re stronger than plastic.
Elevated temperatures? Stainless steel wire chairs won’t warp or melt like plastic might.
Specific structural requirements? Sometimes you just need a metal chair to get the job done right.
Hybrid and specialty solutions
When you’ve got exposed finishes but need the strength of wire, try plastic-topped wire chairs. Best of both worlds.
Stainless steel inserts for wire chairs can reduce corrosion risk in tough environments.
Precast pedestals are another option when you need to raise slabs off the ground or improve drainage. They come in plastic and metal varieties.
Conclusion
Protecting concrete from rust stains and punch-through starts with choosing the right chair and installing it correctly. Use plastic chairs when you need better corrosion resistance and visual cleanliness, and keep wire chairs only if you can manage rust risk and potential staining. The payoff is a smoother finish, fewer cracks, and code-compliant durability.
In the field, proceed in this order: verify the chair type and condition, set chairs on stable bearing, align them with the rebar grid, confirm there is no gap that could trap water, and check for visible rust or staining after placement. Do a quick field test in a small area first, then scale up if the test passes. Keep tools clean, wipe off any dust, and document any deviations from plan before pouring.
Common mistakes to avoid are mixing chair types without a clear reason, leaving sharp metal edges exposed, and rushing installation near the pour time. Always keep a simple safety rule: inspect for seating stability and surface contact, and never force chairs into position or leave holes or gaps that could trap water. If in doubt about load, exposure, or adhesion to the base, call a professional instead of pushing ahead, and stay focused on safety. Do the job right, and the concrete will thank you with a clean, long-lasting surface.
FAQ
Do plastic rebar chairs and wire chairs both work for every project, or should I pick one over the other?
Plastic chairs are good for avoiding rust streaks, but check that the chairs are rated for the concrete load and spacing you need. Wire chairs can be fine if you’re careful about corrosion, but they may stain or corrode in certain mixes. Always follow the manufacturer’s load and use guidelines for your job.
How can I prevent rust staining if I must use wire chairs?
Use epoxy-coated or stainless wire chairs if possible, and keep the steel away from the wet concrete as much as you can. Ensure chairs sit firmly on the form and are not in contact with the water table or any moisture-prone areas. Check product labels for corrosion resistance specs and follow local best practices.
Are plastic chairs strong enough for heavy slabs or exposed settings?
Plastic chairs must be rated for the concrete thickness and rebar spacing you’re using. If you’re unsure, ask the supplier for the load rating and field-test two or three units in a mock-up area before pouring. Do not exceed the manufacturer’s stated limits.
What should I verify on labels or installation instructions before pouring concrete?
Look for the chair type, material, load rating, spacing recommendations, and any temperature or cure notes. Compare those specs to your project requirements and follow the exact installation steps in the manual. If anything is unclear, contact the manufacturer or consult local guidelines to confirm compatibility.