
Introduction
Rebar shadowing on thin countertops happens when embedded metal rebar or mesh shows through the surface. This article explains practical ways to prevent that by using proper cover, pigment strategy, and sealing steps. Always verify manufacturer instructions and local rules for materials and installation before you start.
Cover techniques focus on keeping the metal fully buried and well away from the edge of the countertop. Pigmentation can help mask any slight shadows, and a good seal helps protect the surface, but check labels for compatibility with your material and climate.
Key takeaways
- Understanding rebar shadowing on thin countertops and its visual impact.
- Use appropriate covers, sleeves, and spacers to prevent shadow lines.
- Pigment and color strategies to mask shadows without compromising strength.
- Sealers with UV resistance and compatibility to reduce shadowing effects.
- Plan design and rebar layout early to minimize shadow risk.
- Safety: follow PPE, ventilation, and local codes; consult pro when unsure.
Table of Contents
- Introduction
- Key takeaways
- What Rebar Shadowing Is and Why It Matters
- Planning and Design to Minimize Shadow Risk
- Rebar Placement Techniques for Thin Countertops
- Rebar Covers, Sleeves, and Spacers
- Pigment and Coloring Strategies to Mask Shadows
- Sealing and Finishing to Prevent and Reduce Shadowing
- Troubleshooting, Repairs, and Remediation
- Safety, Costs, and Tools Checklist for Diyers and Pros
- Conclusion
- FAQ
What Rebar Shadowing Is and Why It Matters
Rebar shadowing is a visible tracing of reinforcement through thin concrete countertops. You’ll see dark bands, ghosted lines, and irregular shading along the surface. These cues signal where the metal sits beneath the finish and how close it is to the surface.
Thin slabs amplify this effect because there is less paste cover and closer proximity to the reinforcement. Edge proximity, mesh spacing, and rebar placement can all contribute to pronounced shadowing. Distinguishing shadowing from staining, efflorescence, or air pockets helps you gauge whether issues are cosmetic or structural concerns.
Causes of shadowing
Rebar shadowing in thin concrete countertops happens when light passes through the concrete and gets reflected or absorbed by the rebar, creating visible lines or discoloration.
The closer the rebar is to the surface, the more pronounced the shadowing. In thin countertops, this proximity amplifies the effect due to limited paste cover.
Mix and finish factors also play a role. A consistent mix with proper aggregate grading helps minimize shadowing. A smooth finish reduces light reflection, making shadows less noticeable.
Visual checkpoints and early detection
Inspect your countertops for rebar shadowing as soon as the concrete is poured and again after it has cured. Early detection helps prevent costly repairs.
- Check under raking light: Inspect the countertop at an angle to see any shadows cast by the rebar.
- Compare shaded vs. sunlit areas: Look for consistent discoloration or lines that follow the rebar pattern.
- Photograph for reference: Take pictures of suspected shadowing areas to document their appearance and location.
- Check embedment depth: Ensure the rebar is at the specified depth. If it’s too close to the surface, shadows will be more pronounced.
- Inspect for cracking patterns: Hairline cracks aligned with reinforcement can indicate shadowing issues.
- Check edge/overhang behavior under load: Apply gentle pressure on edges and overhangs to see if they behave differently than the rest of the countertop, indicating potential structural concerns.
- Look for visible grout/cement paste near rebar: This can indicate insufficient cover or improper finishing.
- Compare with supplier/spec sheets: Ensure your countertops meet the specified embedment depth and cover requirements.
Quick rule: If you notice any of these issues, document them and consider professional assessment or overlay repair to maintain the quality and longevity of your countertops.
Planning and Design to Minimize Shadow Risk
Start planning with both structural and aesthetic goals in mind. Define the countertop thickness, reinforcement approach, and how they interact to minimize visible shadow lines. Seek sign-off from the engineer and manufacturer guidance before finalizing layouts.
Think about reinforcement placement and cover to keep shadows away from the surface. Consider recessed or concealed reinforcement strategies where practical and compatible with pigment plans. Plan pour sequence and formwork to avoid abrupt shadow breaks from joints or transitions.
Rebar placement planning and clearances
The key to avoiding shadowing is careful planning of rebar layout. Start by determining the required reinforcement based on structural needs.
Cover depth: Aim for a minimum cover of 2 inches (50mm) from the top of the slab to the rebar. This helps prevent shadows caused by close proximity to the surface. Always confirm this with your product or engineer specs.
Routing: Plan bar routing to avoid sharp turns near the surface. Straight, smooth paths minimize shadow lines.
When to choose alternative reinforcement
While rebar is standard, thin countertops may benefit from alternatives to reduce shadowing risk.
Fiberglass Reinforced Polymer (FRP) or Fiber Reinforcement: These options can provide strength without the visual impact of steel bars. They’re ideal for thin sections where minimal visibility is crucial.
Welded Wire Mesh: This can be a good compromise between strength and visibility, but it may still cast shadows if not properly planned and placed.
Common planning mistakes to avoid
To minimize shadowing issues, steer clear of these common planning pitfalls:
- Insufficient cover: Not providing enough distance between the rebar and the surface can lead to prominent shadows.
- Last-minute design changes: Late adjustments can disrupt careful planning and increase shadowing risk.
- Ignoring finish thickness: Not accounting for the final countertop thickness in reinforcement planning can result in unexpected shadows.
- Poor formwork quality: Inconsistent or low-quality forms can cause visible lines and shadows.
Regularly review your plans, consult with experts, and maintain open communication to avoid these mistakes.
Rebar Placement Techniques for Thin Countertops
Establish a practical grid and spacing pattern to reduce visible shadows, and align with the countertop thickness and edge detail. Keep the bars centered enough to stay below the surface during pour and cure. Verify consistency before the concrete sets.
Use secure anchoring methods suitable for thin slabs, such as epoxy-coated rods with two-way anchors, mechanical clips, or wire ties. Handle pre-bending and threading with spacers to avoid high points near the surface. Check levelness with a straightedge or laser/spot level before pours.
Positioning, supports, and anchoring best practices
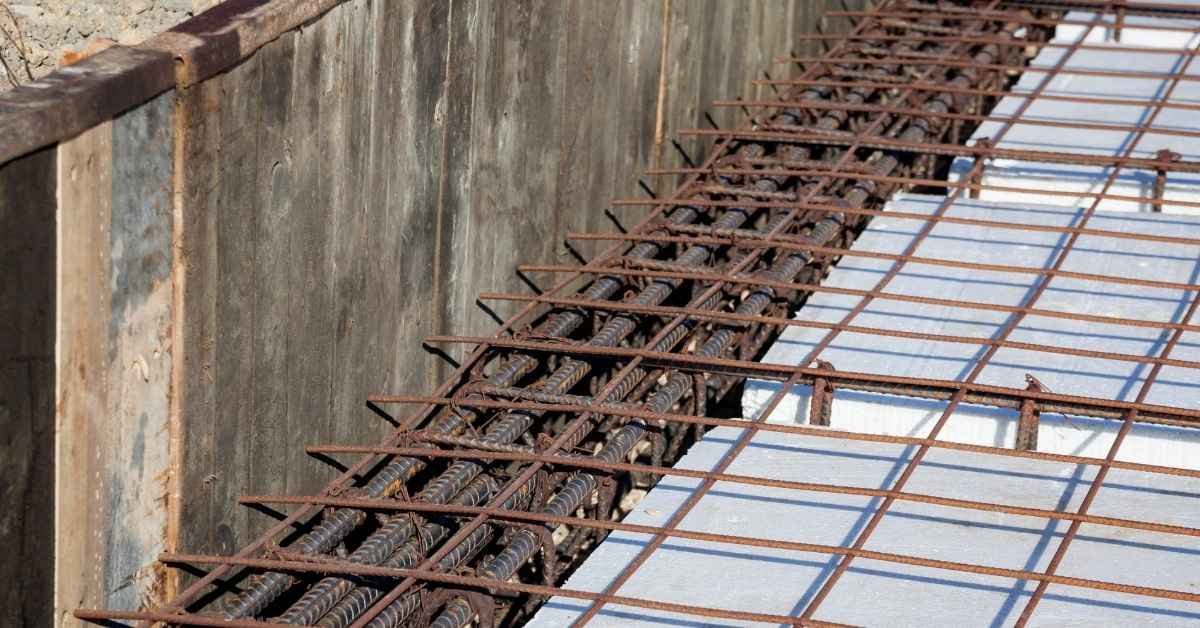
To keep rebar from showing through thin countertops, proper positioning and secure anchoring are crucial. Use supports like chairs or blocks to maintain the desired spacing and depth.
Epoxy-coated rods with two-way anchors work well for thin slabs. They provide grip and prevent movement during vibration or pouring. Ensure anchors are securely fastened to the formwork before placing rebar.
Tie rebar using wire ties or mechanical clips at regular intervals, like every 12-18 inches. This keeps bars aligned and prevents them from shifting out of plane.
Routing and bending strategies
Bending rebar correctly helps avoid high points near the surface. Use a rebar bender or hydraulic press to create smooth, consistent bends. Pre-bend bars before placing them in the formwork.
Route reinforcement runs so they don’t line up directly beneath visible flat areas or thin edges. Stagger or step rebar runs like you would with bricklaying patterns to distribute shadows evenly and minimize their visibility.
Thread bars through formwork holes or use spacers to maintain consistent depth and prevent high points. Verify levelness using a straightedge and laser/spot level before pouring concrete.
Rebar Covers, Sleeves, and Spacers
Rebar covers, sleeves, and spacers limit direct metal-to-surface contact and help block light transmission that reveals shadows. They support durability and can improve the finish’s uniformity. Choose options that suit the slab and pigment plan.
Compare solid sleeves, perforated sleeves, coated rebar, and decorative forms to see how each affects shadow reduction and heat transfer. Establish selection criteria based on rebar size, spacing, thickness, substrate, curing method, and edge treatments. Install with careful clearance, alignment, and secure fastening to prevent contact with concrete.
Types of covers and when to use each
Choosing the right rebar cover is crucial for minimizing shadows on thin countertops. Here are common solutions:
Plastic sleeves are inexpensive, easy to install, and work well with standard rebar sizes. They’re ideal when you need a simple, quick solution.
Foam covers provide better insulation against heat transfer, reducing thermal cracks. They’re great for thin slabs exposed to temperature fluctuations.
Purpose-made bar clips or decorative forms offer aesthetic appeal and can be custom-fitted. Use these when you want a more finished look or need to match specific design elements.
Installation tips for covers and sleeves
Proper installation ensures your rebar covers do their job. Here’s how:
Check clearance: Ensure there’s enough space between the cover and formwork to avoid crowding during concrete placement.
Align continuously: Keep the covers aligned with the formwork to prevent displacement during vibration or placement.
Pre-fit sleeves: Before installing rebar, pre-fit the sleeves to ensure they stay in place and cover the entire length of the bar.
Secure with corrosion-resistant fasteners: Use stainless steel or galvanized hardware to prevent rust stains on your countertop.
Pigment and Coloring Strategies to Mask Shadows
Shadow lines form where the base color, aggregate, and sealer interact with the reinforcement path. Pigment-based solutions can help disguise linear discoloration. Plan color to harmonize with the underlying concrete and shadows you aim to mask.
Compare integral pigments, color hardeners, dyes, and surface washes for depth, penetration, durability, and compatibility with sealers. Develop a strategy for visible color that minimizes obvious shadow lines and supports a uniform appearance.
Choosing integral vs surface colorants
Integral pigments and surface washes both have their roles in hiding rebar shadows, but they work differently. Let’s break it down.
Integral Pigments: These are added to the concrete mix before pouring. Benefits include consistent color throughout the slab and good shadow masking. However, they can’t be changed once poured, so get the color right first time.
Surface Washes/Dyes: Applied after curing, these allow for more flexibility in color choice. They can help blend shadows but may not penetrate as deeply or evenly as integral pigments. Some dyes might require sealers to protect them.
Blending and texturing techniques
To break up those pesky shadow lines, try these blending and texturing tricks:
Mottling: Vary the color slightly as you pour or apply a wash to create a natural, mottled effect. This helps disguise linear discoloration.
Layered Washes: Apply multiple thin washes of varying colors and shades to build depth and complexity. Start with a base color, then add lighter or darker washes in controlled patterns to break up shadows.
Micro-Textures: Use tools like trowels, brushes, or sponges to create fine textures on the surface. This can help scatter light and make shadow lines less noticeable.
Sealing and Finishing to Prevent and Reduce Shadowing
Different sealers and topcoats change sheen and perceived color depth, influencing how shadows read on the surface. Select finishes that maintain concealment under kitchen use a