

Introduction
Plaster key failure on wood lath happens when the plaster pulls away from or loses grip on the lath, leaving loose or hollow areas that will crack or fall out. This write-up shows practical ways to diagnose where keys failed, how to re-key small patches, and when adding mesh or repairing lath is the safer choice. The tone is hands-on and aimed at a homeowner who wants to do the job without overcomplicating it.
Start by probing and tapping to find hollow areas, removing loose plaster, and checking the condition of the lath and fasteners before you commit to a repair method. I’ll cover re-keying techniques, how to handle broken or missing lath, tips for mixing and applying follow coats, and simple steps to preserve surrounding original plaster during the fix.
Key takeaways
- Inspect plaster key failure early to map damage and avoid over-rekeying.
- Verify wood lath condition; replace or secure loose lath before plaster work.
- Decide re-key, partial replacement, or full lath replacement based on damage.
- Re-keying methods require clean, dry surfaces and proper plaster mix application.
- When to add mesh, ensure joints tie into existing plaster without crowding edges.
- Safety: wear respirator, goggles, and control dust during chiseling, mixing, and sanding.
Table of Contents
- Introduction
- Key takeaways
- What Is Plaster Key Failure and Why It Matters
- Inspecting and Diagnosing the Extent of Damage
- Decide: Re-Key, Partial Replacement, or Full Lath Replacement
- Re-Keying Plaster on Wood Lath — Tools, Materials, and Preparation
- Step-by-Step Re-Keying Methods
- When to Add Mesh and How to Choose/Install It
- Patching, Finishing, and Blending Repaired Areas
- Safety, Testing, and Dust-Control Best Practices
- Conclusion
- FAQ
What Is Plaster Key Failure and Why It Matters
Plaster key failure on wood lath happens when the mechanical “keys”—the hardened plaster that squeezes through and locks behind lath gaps—lose their grip on the wood. Without those keys the plaster can delaminate, crack, sag, or fall away, creating immediate safety and finish problems.
Keys form during the scratch or base coat when wet plaster is forced through lath openings and cures around the back of each strip; anything that weakens that bond—moisture, rot, vibrations, old binder breakdown, or poor prior repairs—raises the risk of failure. Inspect for hollow sounds, loose nails, visible cracking, staining, and other signs to judge severity, and check product labels or manufacturer instructions for specific bonding or remediation limits when planning repairs.
Causes of key failure
The keys that hold your plaster to the wood lath can fail due to several reasons. Here are the common culprits:
Moisture is a big one. It can rot the wood lath, weaken the plaster, and cause delamination.
Movement or vibration, like from heavy foot traffic or nearby construction, can also break those keys. Poor original keying, overpainting without proper preparation, and substrate deterioration are other causes to watch out for.
Typical symptoms to watch for
When plaster keys start failing, you’ll see certain signs. Here’s what to look out for:
First off, tapping the wall or ceiling might sound hollow. This indicates that the plaster has lost its bond with the lath.
You might also notice bulging or surface cracking. If you see powder falling from the cracks, it’s a sure sign of deterioration. And if pieces start falling off, it’s time to act fast!
Inspecting and Diagnosing the Extent of Damage
Start with non‑destructive checks: do a systematic tap test to map hollows, take moisture readings at several elevations, and note visual cues like staining, efflorescence, or rusted fasteners. Use an inspection sketch or photo map to mark local versus widespread areas so you can see whether damage is isolated to a room, a few studs, or a whole ceiling run.
If non‑destructive results leave questions, make a few small exploratory openings in strategic spots to expose lath and back coats and confirm rot, missing lath, or hidden decay; plan those cuts so they’re easy to patch and contained. Record findings with photos and notes, then translate them into a remediation priority list that references product data sheets or local rules where specific material behavior matters.
Sounding, probing, and mapping affected areas
Start by systematically tapping the plaster surface with a wooden or plastic tool. A hollow sound indicates delamination – where the plaster has separated from the lath.
Mark these spots for further inspection. Use a probe to gently poke through cracks or suspected weak zones. If it goes in easily, you’ve found a weak spot that needs repair.
Create a map of your wall, marking all affected areas. This will help you plan your repairs and track progress.
Opening small test patches safely
To check key depth and lath condition without damaging surrounding areas, make minimal exploratory cut-outs. Use a utility knife to score a line along the crack or suspected weak zone.
Carefully cut out a small section (around 4″ x 4″) using a drywall saw or reciprocating saw. Be sure to support the area below with a ladder or helper to prevent further damage.
Patch the opening temporarily with drywall tape and joint compound to maintain containment and aesthetics until full repair.
Assessing the lath and framing condition
Inspect wood lath for rot, termite damage, or other signs of deterioration. Tap on it with a hammer – if it sounds hollow or feels spongy, there’s likely rot.
Check lath spacing. It should be no more than 12″ to 16″ apart. If wider, you’ll need to add new lath during repair.
Inspect the framing behind the lath. Ensure it’s solid and securely attached. Loose or damaged framing may require additional repairs before re-plastering.
Decide: Re-Key, Partial Replacement, or Full Lath Replacement
Base your choice on substrate condition, moisture history, and the extent of delamination: re-keying is appropriate when the lath is essentially sound and failure is limited to loose plaster keys. If lath strips are broken, rotted, or many keys are missing across multiple bays, consider partial or full lath replacement.
Partial replacement can preserve most existing work when damage is localized, while full replacement or substrate conversion is warranted for widespread rot, ongoing moisture problems, or when long‑term stability is required. Weigh tradeoffs—labor complexity, how well repairs integrate with surrounding plaster, and whether mesh or a new substrate will give a more durable result—and check manufacturer instructions and local code guidance before committing.
When re-keying is appropriate
Re-keying is a cost-effective solution when damage is localized and lath remains intact. It’s best suited for:
Intact Lath: If the wood lath behind the plaster is solid, with no missing or severely deteriorated sections.
Localized Key Failure: When key failure is confined to small areas, not widespread across the entire surface.
Stable Framing: If the underlying framing is sound and stable, with no signs of movement or structural issues.
When to replace lath or switch to a modern substrate
Replacement may be necessary when damage is extensive, or the existing system is outdated. Consider replacing:
Missing or Severely Deteriorated Lath: If large sections of lath are missing or severely rotted, replacement is crucial.
Widespread Rot: When rot is widespread and affects a significant portion of the lath, it’s better to replace rather than attempt repairs.
Structural Movement: If there’s evidence of structural movement that could compromise the integrity of re-keying, consider full replacement or switching to a modern substrate like drywall or cementitious backer board.
Cost, time, and durability trade-offs
Each repair option has its own cost, time, and durability implications:
Re-keying: Least expensive in terms of materials but may require more labor for proper execution. Durability depends on the quality of the repair.
Lath Replacement: More costly due to material and disposal fees. Labor is also intensive, but durability can be high if done correctly.
Drywall/Modern Substrates: Most expensive upfront but offers long-term durability and ease of maintenance. Professional installation ensures optimal performance.
Long-term value often favors professional restoration to ensure the job is done right, saving you money in the long run.
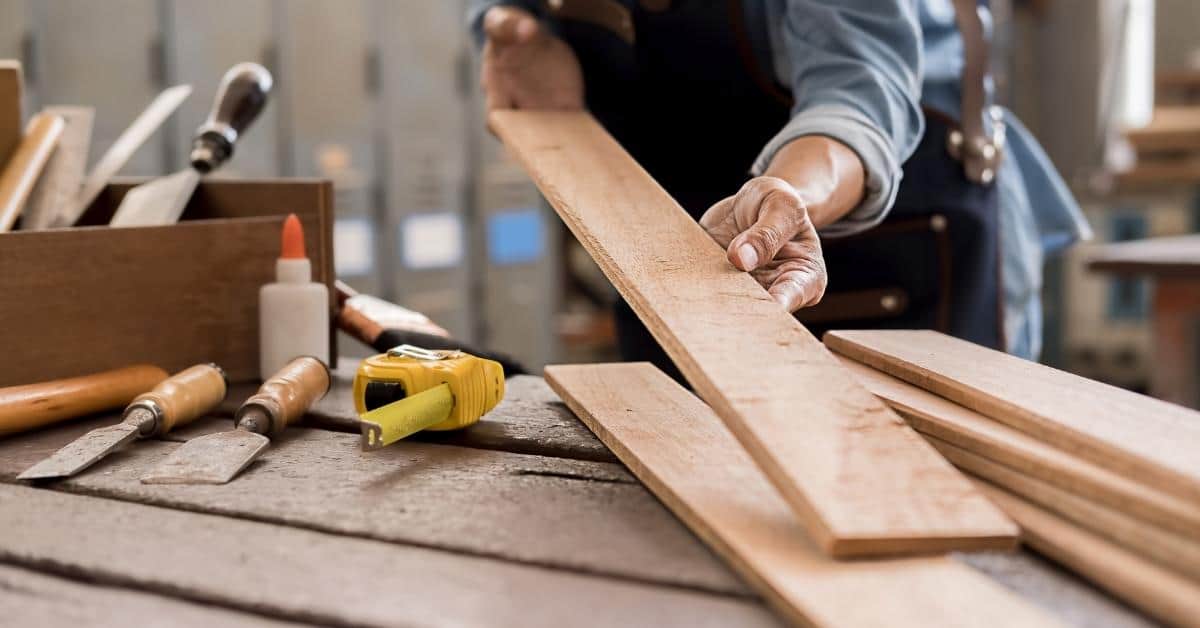
Re-Keying Plaster on Wood Lath — Tools, Materials, and Preparation
Plan like a pro: assess plaster and lath condition first, then lay out PPE, containment, and a materials list that includes bonding agent, appropriate plaster mix (verify compatibility on product labels), repair lath, and the right hand tools. Prep includes removing loose plaster to sound edges, checking and drying lath, and cleaning salts or efflorescence that can prevent adhesion.
Typical tools are a mixer or drill with paddle, hawk and trowels, scratch comb, brushes, and basic carpentry tools for lath repair; include dust masks, eye protection, and drop cloths for containment. Follow product data sheets and local code for cure and application guidance, and plan for staged coats and drying checks rather than guessing times or temperatures.
Tools and materials checklist
Before you start re-keying, consult this checklist to ensure you have everything needed for a successful job.
- Plaster mixer or drill: For mixing plaster. Don’t skip, or you’ll tire yourself out mixing by hand.
- Hawk and trowel set: Essential for applying and spreading plaster. Get the right size for your job.
- Wood lath repair items: Like screws, nails, or staples to fix damaged lath. Don’t ignore, or repairs won’t hold.
- Bonding agent: To improve adhesion between old and new plaster. Skip at your peril; it’ll peel off later.
- Cementitious or lime-based plaster mix: Choose the right type for your job. Check product instructions to get it right.
- Scratch comb or combing tool: For creating a key in the scratch coat. Don’t forget, or new coats won’t stick.
- Sponges: For dampening surfaces and cleaning up. Essential for a neat finish.
- Dust mask and eye protection: Safety first! Protect yourself from dust and debris.
- Drop cloths: To protect floors and furniture. Don’t skip, or you’ll have a big mess to clean up.
Quick rule: Always check product instructions for specific tools and materials needed.
Surface prep and environmental considerations
Prepping the surface properly ensures your new plaster adheres well and lasts. Here’s how:
Clean the surface: Remove all loose material, dirt, and old salts (efflorescence). If not, new plaster won’t stick.
Control dust: Wet down the area to minimize dust. It’s safer and neater this way.
Condition the plaster and lath: Moisten the surface lightly before applying new plaster. This helps it adhere better and reduces suction, giving you more working time.
Control temperature and humidity: Ideal conditions are 50-70°F (10-21°C) with 40-60% relative humidity. Too hot or cold, or too dry or humid, can affect curing and adhesion.
Product compatibility and what to check
Ensuring your materials are compatible is crucial for a successful repair. Here’s what to check:
- Plaster type: Check if your plaster is lime, gypsum, or cement-based. Each has different properties.
- Bonding agent compatibility: Ensure it’s compatible with your chosen plaster mix and wood lath. Don’t assume; check product tech sheets.
- Cure time: Make sure the bonding agent allows for proper curing before applying finish coats. Too fast, and new coats won’t stick.
- Moisture resistance: Check if your plaster mix is moisture-resistant. If not, it could fail in damp conditions.
- Salt resistance: Ensure your plaster can handle salts in the substrate to prevent efflorescence.
- Local codes: Check if your chosen materials comply with local building codes. Don’t risk fines or having to redo work.
Quick rule: When in doubt, consult a professional or the manufacturer’s tech support.
Step-by-Step Re-Keying Methods
Re‑keying restores the mechanical bond between plaster and lath by reestablishing or creating keys and bedding new scratch coat material into the lath openings. Begin with substrate checks, remove loose material, and prepare the surface so bonding agents and the scratch coat can do their job.
Typical sequence: clean and dampen lath, apply recommended bonding agent, force scratch/bond coat through the gaps to form new keys, comb or score for key formation, then allow proper cure per product instructions before brown and finish coats. Perform small adhesion tests after each stage, consider mesh if cracking or feathered edges persist, and avoid over‑wetting or rushing cure stages—check manufacturer instructions for timing specifics.
Step-by-Step Process
The following steps outline the practical process of re-keying plaster on wood lath, ensuring a strong bond and preventing future failures.
- Inspect and prepare the substrate: Ensure the lath is stable and clean. Remove any loose or rotten sections and test for existing keys.
- Create or restore key patterns: Use a scratch tool to create or restore mechanical keys on the lath surface, ensuring they’re evenly spaced and deep enough.
- Bond loose plaster to lath: Apply an appropriate bonding agent according to manufacturer’s instructions. Ensure full coverage of loose areas.
- Rebuild the scratch coat: Mix a proper slump and aggregate for your plaster. Apply the scratch coat, embedding it into the key patterns and ensuring it’s level with the lath surface.
- Cure and test: Follow product-specific cure times and moisture management instructions. Perform incremental adhesion tests after each stage to ensure a strong bond.
Inject-and-pack re-key technique
When plaster has loosened from the lath, injecting and packing bonding adhesive can help reestablish the bond and form new keys.
First, identify loose areas. Use a putty knife or similar tool to carefully lift any completely detached plaster. Be cautious not to damage the lath.
Next, inject bonding adhesive into voids using a caulking gun or syringe. Ensure the adhesive reaches all the way to the back of the void. Then, pack the area with fresh plaster. Use a trowel to press the plaster firmly into place, filling any gaps and ensuring good contact with the lath.
Allow the adhesive to cure according to manufacturer’s instructions before proceeding with subsequent coats.
Recreating keys and embedding scratch coat
The scratch coat is crucial for creating new mechanical keys that bond into the lath, providing a strong foundation for subsequent coats.
After preparing the substrate and applying bonding agent, use a scratch tool or comb to create new key patterns. Ensure these are evenly spaced and deep enough to provide good mechanical interlocking with the plaster.
Mix your plaster to the correct slump and aggregate ratio. Apply the scratch coat using a trowel, embedding it into the key patterns. Ensure the coat is level with the lath surface and has adequate coverage over the entire area.
Allow the scratch coat to cure according to manufacturer’s instructions before proceeding with the next stage.
Common mistakes and how to avoid them
To ensure a successful re-keying process, be aware of these common pitfalls and how to avoid them.
- Over-reliance on surface adhesives: While bonding agents are crucial, they’re not a substitute for proper keying. Always create or restore mechanical keys.
- Inadequate substrate preparation: Ensure the lath is clean, stable, and free from rot before applying any plaster.
- Rushing cures: Follow product-specific cure times and moisture management instructions to prevent premature cracking.
- Over-wetting or overheating curing coats: Both can lead to weakened plaster and increased risk of failure. Maintain consistent temperature and humidity during curing.
- Exacerbating hairline cracks: Address any existing cracks before re-keying to prevent them from worsening over time.
By avoiding these common mistakes, you’ll increase the likelihood of a successful re-keying project that lasts for years to come.
When to Add Mesh and How to Choose/Install It
Add mesh when repairs need bridging across cracks, feathered edges, or when the existing lath cannot provide consistent keying—mesh helps distribute stress and reduce future crack propagation. Decide on mesh type by matching crack width, expected movement, and the chosen plaster system; compare metal lath for rigidity versus alkali‑resistant fiberglass mesh for flexibility and compatibility.
Install mesh over a prepared bonding coat or embed it in the scratch coat per the product instructions, overlapping and anchoring without creating ridges; treat corners and edges with extra care to avoid bulges. Verify compatibility with your plaster mix and follow manufacturer guidance for embedment depth and overlap dimensions rather than guessing numerical values.
Situations that merit mesh reinforcement
Mesh is your secret weapon for strengthening repairs on wood lath. But when do you need it? Here are the telltale signs:
Wide delaminations: If you see large areas where plaster has pulled away from the lath, mesh can bridge these gaps and hold everything together.
Missing lath over patch areas: When you’ve patched a section of damaged lath, mesh provides extra support to prevent new cracks from forming.
Thin feathered edges or seams: Mesh stabilizes these weak points and stops them from crumbling under stress.
Types of mesh and compatibility considerations
You’ve got options when it comes to mesh. Let’s weigh the pros and cons:
Metal lath: Cheap, rigid, and easy to find. But it can rust over time and may not play nice with all plasters.
Expanded metal: More expensive but stronger than metal lath. It’s less likely to rust and works well with most plasters. However, it might be harder to find.
Alkali-resistant fiberglass mesh: Pricey but durable and flexible. It won’t rust and is compatible with most plasters. But it might not be as strong as metal options for heavy-duty repairs.
Before you buy, check compatibility with your plaster mix and any coatings. If you’re unsure, ask a pro or consult the manufacturer’s guidance.
How to install and embed mesh correctly
Installing mesh right is crucial. Here are some best practices:
Fastening: Use staples or nails to secure the mesh to the lath. But don’t go overboard – too many fasteners can create ridges in your finish.
Overlap and embedment: Overlap mesh pieces by at least 2 inches. This helps distribute stress evenly. Follow material instructions for embedding depth, usually around 1/4 to 3/8 inch into the bonding coat or scratch coat.
Corners and edges: For corners, use L-shaped mesh pieces or miter joints. For edges, fold the mesh over and secure it with fasteners.
Remember, mesh should become a structural part of your repair, not just a separate layer on top. Follow material instructions for best results.
Patching, Finishing, and Blending Repaired Areas
Follow the proper coat sequence—scratch, brown, finish—or an approved alternative for thin patches, always using bonding agents where old and new plaster meet. Feather edges gradually and match texture patterns on the surrounding surface so repairs blend visually; choose a texture method that matches the original and practice on a scrap piece first.
After final curing, prime patched areas with a primer compatible with aged plaster and the selected paint system, then test color and sheen in a small, inconspicuous area before full painting. Take final inspection steps—light sanding, touchups, and humidity checks in wet rooms—and consult product data sheets for recommended sealing or topcoat performance where needed.
Layering coats and curing considerations
Plaster repairs require multiple coats to ensure strength and durability. Each coat serves a purpose: the scratch coat bonds with the existing surface, the brown coat builds thickness, and the finish coat provides the final appearance.
Curing time between coats is crucial. Too soon, and you’ll weaken the bond; too late, and you risk cracking or peeling. Judge readiness by gently touching the previous coat – if it’s dry to touch but still slightly flexible, it’s ready for the next.
If lath or plaster is damaged, use a bonding agent in your first coat. For severe damage, consider alternative patching methods like inject-and-pack or mesh reinforcement before applying coats.
Blending textures and matching finishes
Matching texture is key to invisible repairs. Use a flexible putty knife for your first coat, feathering the edges into surrounding plaster. For the second coat, use a stiffer blade, working from the center outwards.
For textured surfaces, match the surrounding texture using techniques like knockdown, stipple, or light skip-trowel. Be consistent – use the same technique and pressure across the entire area.
Priming is vital for adhesion and sealing dust. Use a primer compatible with aged plaster and paint. Apply two thin coats, allowing adequate drying time between each.
When a skim coat or re-plastering is needed
A skim coat (thin layer of plaster) can help even out minor imperfections. It’s ideal when patches are small, and the surrounding surface is in good condition.
However, if damage is extensive, or you’re dealing with multiple patches, consider re-plastering larger areas. This ensures a consistent finish and prevents visible patchwork. Re-plastering also allows for better integration of any mesh reinforcement needed.
Before deciding, assess the overall condition of your plaster. If there are signs of widespread damage or aging, it might be best to replaster the entire area for a uniform, long-lasting result.
Safety, Testing, and Dust-Control Best Practices
Before starting demolition, test for lead paint and asbestos if the building era makes them possible; follow local rules on sampling or hire a licensed inspector for suspect materials. When hazardous materials are present, do not proceed without proper clearance and certified abatement guidance.
Set up containment with plastic sheeting, negative‑pressure ventilation where possible, and use HEPA filtration to control airborne dust during removal. Use appropriate PPE—properly fitted respirators, eye protection, and disposable coveralls—and follow safe waste handling and decontamination steps; check lab reports, product labels, and local disposal rules for specifics on handling contaminated debris.
Asbestos and Lead Testing Protocols
Before you start any work, test suspect materials for asbestos and lead. These hazardous substances can cause serious health issues.
Lead: Use a certified lab or hire a licensed inspector if you’re unsure. Spot tests like 3M LeadCheck swabs are easy to use but have limitations. Bulk samples sent to labs provide more accurate results.
Asbestos: DIY testing kits exist, but they’re not as reliable as professional sampling. Hire a certified pro if you find any suspect materials. They’ll take bulk samples and send them to a lab for analysis.
Dust Control, Ventilation, and PPE
Contain the work area with plastic sheeting. Set up negative-pressure ventilation if possible to keep dust from spreading.
HEPA-equipped air cleaners: Use them inside the containment area to filter out 99.97% of particles as small as 0.3 microns.
PPE: Wear a P100 respirator or PAPR with appropriate cartridges, safety glasses, and disposable coveralls. Fit-test your respirator before use and follow disposal guidelines for used equipment.
Conclusion
Plaster key failure on wood lathed walls is fixable, but the work must be staged, careful, and focused on safety, durability, and a clean finish. The right re-key or replacement approach protects both the wall and your investment.
Do this: assess the damage in a small, non-critical area first; choose Re-Key, partial replacement, or full lath replacement based on real damage, then gather the exact tools, materials, and a prepared plan; re-key or patch in logical steps, adding mesh only where it improves crack resistance, then finish and blend to match the surface; test the repaired area for stability and dust control before calling it done. Safety first and methodical checking at every stage prevent costly mistakes.
Common mistakes to avoid are pushing ahead without confirming the extent of damage, skipping mesh where it’s needed, and skipping patching or finishing steps that leave the surface weak or uneven. Always work in a well-ventilated area, wear a dust mask and eye protection, and stop if you see signs of structural movement or rot that goes beyond plaster recovery. If you’re unsure about lath condition, or the project requires removal beyond a small trial area, consider a professional to prevent hidden damage from becoming a bigger repair.
FAQ
How do I repair plaster patches on wood lath without losing the original look?
Match the texture and color as you patch. Use a patching plaster that’s compatible with your base plaster, apply in thin coats, and feather the edges to blend with the surrounding work. Keep curing times reasonable and don’t rush the finish.
What’s the best way to fix damaged wood lath or loose pieces before plastering?
Stabilize any loose lath first. If a piece is cracked or rotted, replace it or back it with a solid strip, then re-nail or screw securely. Re-check the surface for soundness before applying patch material.
How should I mix and apply plaster coats for a seamless repair?
Follow the patching plaster label for mixing, aiming for a workable slump. Apply a thin first coat, cover embedded patches, then build up in light layers, allowing each to set before the next. Finish with a gentle feather to blend into the surrounding plaster.
What safety steps should I take when repairing plaster on wood lath?
Wear a respirator or dust mask, eye protection, and gloves. Keep dust control tight; use plastic barriers and contain debris. If you’re unsure about a patch or suspect lead paint, stop and check local advice and product instructions before proceeding.