
Introduction
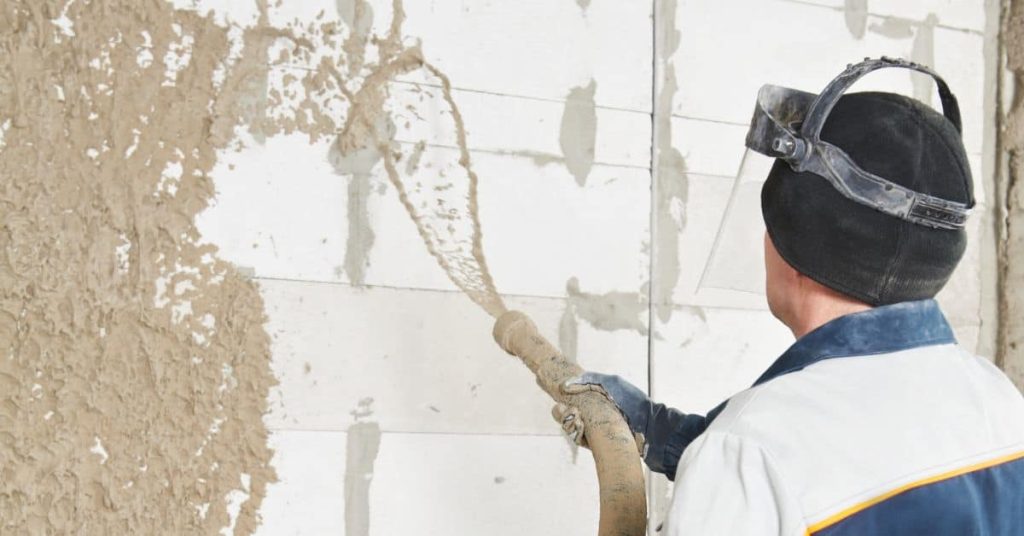
A plaster base coat on metal lath is the first plaster layer that bonds to the lath and creates a solid surface. Apply it over clean, prepared metal lath and follow the guidance on the product label or manufacturer instructions. Keep the mix at a workable consistency and follow any local rules or instructions for surface prep.
Scratch patterns give the base coat a key for the next coat and help it hold. Use a clean plaster scratch tool and make even, shallow lines while the base is still workable. Avoid overworking or over-wetting; check that you’re within the guidelines on your bag or local rules.
Key takeaways
- Verify plaster base coat thickness and scratch depth using manufacturer guidelines and site checks.
- Choose scratch patterns based on lath type and substrate compatibility, test small areas.
- Inspect critical measurement points with a straightedge and calipers; avoid gaps.
- Maintain safe mixing and application temps per product label and local rules.
- Document inspection and curing checks; address sheen, cracks, or debond promptly.
- Use proper PPE and secure ladders, ventilation, and dust containment during work.
Table of Contents
- Introduction
- Key takeaways
- Why Base Coat Thickness and Scratch Patterns Matter
- Thickness Targets: Typical Ranges and What to Verify
- Tolerances, Allowances, and Critical Measurement Points
- Scratch Patterns: Designs, Purposes, and Selection Criteria
- Scratch Depth and Spacing: Practical Targets and Safe Ranges
- Tools, Materials, and Prep Practices to Achieve Targets
- Application Technique: Methods to Control Thickness and Create Durable Scratches
- Inspection, Testing, Curing, and Troubleshooting
- Conclusion
- FAQ
Why Base Coat Thickness and Scratch Patterns Matter
Thickness and scratch patterns influence how well the plaster grabs the metal lath. They affect resistance to deformation and the initial key that holds the finish in place. The right targets help prevent cracking and improve flatness in the final coat.
Think of these choices as part of the foundation for bond strength and long-term durability. Proper thickness and scratching promote even mortar distribution and reduce movement under load. Use this as a guide to align performance outcomes with the job at hand.
Structural and aesthetic functions of the base coat
The base coat on metal lath serves a crucial role. It provides mechanical key to the lath, ensuring your plaster sticks.
It also gives you a flat substrate for your finish coats. No bumps or hollows here, just smooth sailing.
But that’s not all. The base coat moderates shrinkage stresses. Plaster wants to shrink as it dries? Not on our watch.
Key failure modes from wrong thickness or pattern
Get your base coat wrong, and you’re asking for trouble. Delamination’s the big one – that’s when your plaster peels off like sunburnt skin.
Telegraphing’s another pain. Every imperfection in your lath or substrate shows through, ruining your finish.
And then there are cracks. They start small but can run wild if you’re not careful. All these failures trace back to poor thickness control or inadequate scratch patterns.
Thickness Targets: Typical Ranges and What to Verify
Base coat thickness tends to be guided by the product and the substrate, with practical ranges used in the field. Always compare your plan to the manufacturer data and any local requirements before committing to a target. Knowing the minimum versus nominal helps you plan builds and checks on-site.
If you are unsure, check the product label and datasheet, or ask the supplier for the recommended range. Verify any local code or specification that might influence your numbers. Use the verified range to guide your multiple-pass application plan.
Typical thickness ranges (practical guidance)
The typical range for a scratch coat is 1/4″ to 3/8″. This gives enough depth for the next layer to bond well. For the brown or finish coat, it’s usually 1/8″ to 1/4″ thick.
Remember, these are just guidelines. Always check your product specs and local codes. They might have different recommendations.
The minimum thickness is crucial. Too thin, and the plaster won’t hold together or bond properly.
Which thickness to use by lath type and exposure
Open lath needs a thicker coat, usually around 1/2″ or more. This fills the gaps between wires. Self-furred lath can be thinner, about 1/4″ to 3/8″.
Exterior walls need thicker coats too, at least 3/8″ for both scratch and brown coats. They’re exposed to weathering after all.
Substrate movement matters too. If the wall moves a lot, you’ll need a thicker coat to accommodate that.
Tolerances, Allowances, and Critical Measurement Points
Set clear tolerances for flatness and overall thickness to guide inspections. Tell your crew where to measure and what to record for QA. Focus on critical spots like fasteners, corners, and edges to catch deviations early.
Document the target tolerances so you can compare actual results during work. Use simple checks and adjust as needed before moving to the next phase. Consistency is the goal for a reliable finish.
Where to Measure for Reliable Results
To ensure your base coat is up to par, you need to measure it in the right spots. Here’s where to focus:
Joints and Penetrations: These are high-risk areas. Check around fasteners, pipes, and other penetrations.
Corners and Edges: Base coat thickness can vary here due to lath tension. Make sure it’s consistent.
For inspections, take samples every 10-15 feet along these critical locations. This way, you’ll catch any issues early.
Recording and Communicating Tolerance Requirements
Keeping track of tolerances is crucial for quality control. Here’s how to do it:
Acceptance Criteria: Clearly define what’s acceptable. For example, ‘±1/8″ from target thickness’.
Communicate this to your site crew and inspectors.
Marking for Rework: Use different colors or symbols to mark areas that need rework. This could be red for unacceptable and green for acceptable. Make sure everyone on the team understands the system.
Scratch Patterns: Designs, Purposes, and Selection Criteria
Horizontal, vertical, cross-hatch, and circular patterns each create a different mechanical key. Pattern geometry influences mortar movement and finish bond. Choose a pattern based on the job conditions and the expected load path.
Assess how the pattern will interact with the substrate and anticipated stresses. When in doubt, reference the product guidance or consult the manufacturer or local rules for recommended patterns. Safety on the scaffold and the grip of the coat come first.
Pattern types and when to use each
The pattern you choose affects how well the plaster sticks. Here’s what each does:
Horizontal: Good for windy areas. It holds the base coat down.
Vertical: Keeps the base coat from sagging under its own weight.
Cross-hatch: Best for heavy finishes. It locks the plaster in place.
Circular: Not common, but can be used where other patterns won’t work.
Practical pattern layout and sequencing on walls and ceilings
Laying out your pattern right is key. Here’s how:
Start at the bottom left corner. Work up, then across.
At joints and corners, match the patterns. This keeps a consistent key.
On ceilings, start from one corner, work outwards. This helps keep the plaster level.

Scratch Depth and Spacing: Practical Targets and Safe Ranges
Depth and spacing determine how well the scratch coat locks into the lath. Too shallow or too deep scratches can compromise adhesion and finish quality. Use practical ranges as starting points and verify with product data before finalizing the pattern.
On-site you can judge effectiveness by testing a small area and inspecting suction between coat and lath. If you see weak keying or loose spots, reassess the depth and spacing before continuing. Keep notes for consistency across panels.
Visual and tactile checks for adequate scratch depth
The easiest way to check if your scratches are deep enough is by looking at them. If you can clearly see the lath through the scratch, it’s too shallow.
Another quick check is to pull a trowel along the scratch. If the mortar pulls back cleanly and evenly, that’s a good sign your scratch depth is right.
Remember: The goal is to have scratches deep enough to give the next coat something to grab onto, but not so deep they weaken the base coat.
When to adjust spacing or depth for mixes and conditions
If your mix is too wet or has large aggregate, you might need to make your scratches deeper. This gives the mortar more room to flow and fill the spaces.
On the other hand, if it’s cold or damp on site, you might need to space your scratches closer together. This helps the base coat set evenly.
Here’s a simple rule of thumb: If your mix is hard to spread, make your scratches deeper. If it’s setting slow, space them closer.
Always: Double-check with your product data and adjust as needed. It’s better to be safe than sorry.
Tools, Materials, and Prep Practices to Achieve Targets
Prepare a DIY-friendly checklist of essential tools and materials before starting. Clean and inspect the lath, fasten securely, and add any reinforcement as required. Mixing and timing steps must support the intended thickness and scratch integrity.
Follow a clean prep routine so the base coat adheres well and scratches hold. Keep materials organized and ready to avoid delays. This foundation supports the entire plaster job and helps prevent rework.
Tools and measuring devices checklist
Before you start, make sure you have the right tools. This list will help you achieve consistent thickness and accurate patterns.
- Straightedge: For drawing lines and checking levels. Skip this, and your patterns won’t be straight.
- Depth gauge: To measure scratch depth and ensure consistency. Without it, you might end up with varying depths.
- Scoring tools (straight edge or comb): For creating initial scratches. Don’t have one? You’ll struggle to maintain a consistent pattern.
- Hawk/float: To apply and spread the plaster. No hawk, no float? You won’t get an even coat.
- Tape measure: For measuring and marking distances accurately. Guesswork here leads to inconsistent patterns.
- Level: To ensure your scratches are level. Without it, your base coat will be wavy.
- Chalk line: For snapping long, straight lines quickly. No chalk line? You’ll waste time drawing lines by hand.
- Plastering trowel (1/2″ to 3/4″): For applying and spreading the plaster mix. The right trowel ensures even application.
Quick rule: Don’t skip any tools. Each one serves a purpose in maintaining consistent thickness and patterns.
Lath fastening, support, and substrate prep
Proper lath preparation is crucial for a stable base coat. Here’s how to do it right.
Fastener pattern: Use the 6″ on center rule for screws or nails. This ensures even support across the entire surface. Skip this, and your plaster might crack or fall off.
Edge supports: Reinforce edges with additional lath or furring strips. Without edge support, your base coat could sag or pull away from the wall.
Corner reinforcement: Use corner beads to protect outside corners and metal angles for inside corners. Skipping this step leaves corners vulnerable to damage.
Cleaning: Remove any dust, debris, or grease from the lath before applying plaster. A dirty surface leads to poor adhesion and a weak base coat.
Application Technique: Methods to Control Thickness and Create Durable Scratches
Use build passes and consistent striking rules to approach the target thickness. Coordinate team actions so everyone understands where to strike and how deep to scratch. Reference points on the surface help maintain uniformity.
Document the method you use and maintain a steady pace to prevent thickness drift. Focus on even mortar distribution and continuous scratching to improve bond. Clear communication keeps the crew aligned during the work.
Layering, striking, and maintaining consistent thickness
The key to a successful plaster base coat is consistency in thickness. Here’s how to achieve it:
Screeds and straightedges are your friends. Set them up at the desired thickness (usually 1/2″ to 3/4″) before you start applying the mortar.
Work in passes. Apply a layer, then use the screed or straightedge to strike it off to the desired thickness. Let it set for a bit, then come back and feather any overbuilds or high spots. This way, you maintain consistency across the whole surface.
Making consistent, durable scratches (tools and motion)
The goal here is to create scratches that give a good mechanical key for the next coat without overworking the mortar.
- Scratch tool: A stainless steel or fiberglass hawk with a notched edge works best. It’s durable, won’t rust, and gives consistent scratches.
- Angle: Hold the hawk at a 45-degree angle to the surface. This gives you good control and creates strong, even scratches.
- Pressure: Apply even, steady pressure. Too much will overwork the mortar; too little won’t create a good key.
- Motion: Use a smooth, continuous motion. Start at the top and work your way down in straight lines. Don’t rush – it’s about quality, not speed.
- Rentable option: If you’re not planning to do this often, consider renting an air-powered scratch tool. It’s around $50-$75 per day and gives consistent results with less effort.
Inspection, Testing, Curing, and Troubleshooting
Plan on simple on-site checks for flatness, thickness, and key engagement with the lath. Note curing conditions and any environmental factors that may affect drying. Address issues promptly with corrective steps before applying the finish coat.
When problems arise, follow a structured troubleshooting approach and delay the next phase if needed. Use environment and work conditions as guidance for curing expectations. Recording observations helps with future projects and QA reviews.
Inspection checklist and simple on-site tests
Use this checklist before finishing to ensure your concrete is ready. Perform these checks daily after placement.
- Check surface level: Ensure it’s even, no low or high spots. Use a 2′ level for quick verification.
- Inspect for honeycombing: Tap the surface with a hammer; listen for hollow sounds indicating voids.
- Check for excessive bleeding: Too much water rising to the top can weaken concrete. If it’s more than 1/8″ thick, consider redoing that area.
- Perform adhesion test: Stick a piece of duct tape on the surface, then pull it off quickly. If concrete sticks to the tape, it’s not ready for finishing.
- Measure thickness: Use a concrete probe or screwdriver to check depth at various points. Aim for consistent thickness within 1/4″ of design specs.
- Check for cracks: Even hairline cracks can lead to bigger problems. Seal any visible cracks before finishing.
- Inspect formwork: Ensure forms are straight, level, and secure. Any movement can cause concrete to slump or bulge.
- Verify finish is acceptable: Check for proper consolidation, no segregation, and even distribution of aggregates.
Quick rule: If in doubt, wait a day before finishing. Concrete can look ready but still need time to gain strength.
Common defects, root causes, and repair strategies
Use this checklist during your final walkthrough before signing off on the concrete job. It’ll help you spot issues early and avoid expensive rework.
- Cracking: Check for hairline cracks or wider gaps. Use a ruler to measure width; anything over 0.2mm needs attention. Cracks can let water in, leading to further damage.
- Lath corrosion: Inspect steel reinforcement (lath) through expansion joints or exposed areas. Rust indicates corrosion. Check manufacturer’s instructions for suitable rust inhibitors.
- Bond failure: Tap the surface with a hammer; a hollow sound may indicate bond failure between concrete and substrate. Rework involves chipping off old material, cleaning, and reapplying fresh concrete.
- Uneven thickness: Measure thickness at multiple points using a screwdriver or depth gauge. Variations beyond 10% of the designed thickness may affect strength and durability.
- Pop-outs: Look for small, cone-shaped pieces missing from the surface. They’re often caused by air bubbles trapped during placement. Ensure proper vibration during pouring to prevent this.
- Scaling: Check for flaking or peeling of the concrete surface. This can be due to improper curing or freeze-thaw cycles. Sealants may help, but addressing the root cause is crucial.
- Discoloration: Inspect for stains, patches, or inconsistent color. These could indicate contamination during mixing or placement. Check product labels for compatibility and cleaning methods.
- Settlement: Measure elevations at control points to check for uneven settling. Differences beyond 1/4″ per 10′ may require re-leveling or underpinning.
Quick rule: Always address defects promptly. Small issues can become big problems over time, leading to costly repairs and reduced lifespan of your concrete surfaces.
Conclusion
Getting the base coat thickness and the scratch pattern right is how you lock in safety, durability, and a clean, even finish. Do it right and the plaster bonds well to the metal lath and lasts through years of use.
Keep it simple and methodical: confirm the substrate, set your target thickness, verify critical measurement points, choose and lay the scratch designs and spacing you planned, mix and apply in controlled passes, measure as you go, maintain proper cure conditions, and then inspect and test for adhesion before the area is put to work. Do all of this in a careful, repeatable sequence so you can reproduce it if you ever need to repair a patch.
Common mistakes to avoid are over thick coats that squeeze into the lath, skipping or mis matching scratch patterns, and rushing curing or testing. Never skip small-area testing first, and always follow safety rules for mixing, ventilation, and lifting or handling materials. If anything looks uncertain—uneven substrate, hidden corrosion, or inconsistent measurements—pause and reassess before continuing.
If the metal has damage beyond simple refinishing, or you’re unsure about measurements, air quality, or code requirements, call a professional. Otherwise, follow the steps, stay conservative with targets, and stay on top of inspection and curing. Stay steady and you’ll finish strong.
FAQ
What should I look for to confirm my plaster base coat is following the scratch pattern correctly?
Keep the scratches visible and evenly spaced as you apply. If you can’t see the scratch marks clearly after a test area, re-scratch lightly before continuing. Check manufacturer instructions or product labels for any pattern guidance specific to your mix and base coat system.
How do I verify that my base coat thickness stays within safe limits without fancy gauges?
Use a simple gauge block or a straight edge with a consistent feel in multiple spots. Compare to the feel of a known-good patch from a previous job or a label recommendation. If you’re unsure, pause and confirm with the product instructions or local trade guidance before proceeding.
What mistakes commonly ruin adhesion between the metal lath and base coat, and how can I avoid them?
Avoid over-wetting the mix and don’t apply over rusty, loose, or damaged lath. Clean and prepare the metal surface first. When in doubt, follow the manufacturer’s prep instructions and local guidance for surface readiness.
What signs tell me I should stop and troubleshoot rather than keep going?
Look for cracking, delamination, or soft spots in the base coat. If you see inconsistent scratch marks, sagging, or feathering at edges, pause and re-check surface prep, mix consistency, and time to cure. Consult the product instructions or talk to a local supplier if you’re unsure how to fix it.