
Introduction
Scratch coat thickness is the initial layer of plaster or stucco applied to a surface to create a good bond and a flat base for the finish. If this layer is too thin or too thick, the finish can crack or peel. Make sure the surface is clean, dampened, and ready before you apply it, and check the product instructions for bonding requirements.
To keep it flat, work in small sections, scratch the surface to create keys, and smooth with a straight edge as you go. Keep the mix workable and cover it before it dries to avoid curl or pull. Always verify with the product label or local rules for any thickness guidance and curing notes.
Key takeaways
- Plan scratch coat thickness for strong bond and level plaster foundation.
- Prepare substrate and lath properly to avoid early bond failure.
- Select compatible mixes, additives, and workable consistency for controlled thickness.
- Apply in staged passes with tools that flatten and feather edges.
- Maintain consistent humidity and protect curing area to prevent cracking.
- Safety: wear eye and hand protection; avoid dust inhalation during mixing.
- Inspect for bond issues and flatness before proceeding to next coat.
Table of Contents
- Introduction
- Key takeaways
- Why Scratch Coat Thickness Matters
- Substrate Preparation and Lath Considerations
- Tools and Materials Checklist
- Mix Design, Additives, and Workability for Controlled Thickness
- Application Techniques to Ensure Bond and Flatness
- Curing, Drying, and Timing Between Coats
- Visual Checkpoints, Inspection Criteria, and Troubleshooting
- Conclusion
- FAQ
Why Scratch Coat Thickness Matters
The scratch coat is the base that ties the stucco or cement plaster to the wall. It helps control where cracks begin and how the surface stays true and flat. Thickness in this coat influences how well the next coats bond and how the final texture reads on the wall.
Think of it as the foundation for bond strength and dimension control. If the coat is inconsistent, you’ll see movement or waviness later. Verify the intended thickness with the project specs and the product instructions before you start.
Structural and performance functions
The scratch coat is the foundation of your multi-coat stucco or cement plaster system. It’s not just about looks, it’s about strength and durability.
First off, a proper scratch coat gives you a level base to work on. No more trying to fix slopes or dips with later coats. It’s like starting with a flat canvas before painting.
Secondly, that ‘scratch’ part isn’t just for fun. It creates keying – tiny grooves that give the next coat something to grab onto. Think of it as giving your nails something to hold on to when you’re climbing a wall (metaphorically speaking).
Lastly, the thickness of this coat influences how your whole system moves and ages. Too thin, and it can crack under stress. Too thick, and it might not dry evenly, leading to all sorts of issues down the line.
Consequences of incorrect thickness
Get your scratch coat thickness wrong, and you’re in for a world of trouble. Here’s what can happen:
Too thin, and you’re looking at poor adhesion. That next coat isn’t going to stick like it should. It’ll be like trying to glue two pieces of sandpaper together – not good.
Too thick, and you’ve got a sagging, cracking mess on your hands. The weight of the excess material can cause it to slide down, leaving you with an uneven surface. Plus, all that extra thickness takes forever to dry, setting you back days or even weeks.
And here’s something you might not think about – different drying behaviors. A thick coat dries slower than a thin one. That can lead to all sorts of moisture-related issues, like efflorescence (that white powdery stuff) and cracking as it shrinks.
Substrate Preparation and Lath Considerations
Clean and prepare the surface so the scratch coat can bite in. Remove loose material and dampen the substrate as needed to avoid rapid drying. Repair any damaged areas before you apply the first coat.
Lath choice matters for adhesion and thickness control. Decide between metal, paper-backed, or mesh based on the system you’re using and follow manufacturer guidance. Check that lath installation will support the desired scratch thickness and bond.
Preparing common substrates (wood, CMU, concrete, gypsum)
Before applying your scratch coat, prep surfaces right to ensure a solid bond and proper thickness.
Wood: Clean, dry, and sand. Prime if needed. Thickness: 1/4″ – 3/8″.
Concrete Masonry Units (CMU): Clean, wet, and seal. Thickness: 3/8″ – 1/2″.
Concrete: Clean, acid-wash if needed, wet. Thickness: 1/4″ – 3/8″.
Gypsum: Sand, prime, wet. Thickness: 1/4″ – 3/8″.
Lath type, fastener spacing, and attachment quality
Your lath’s type and installation impact scratch coat thickness. Here’s what to consider:
Metal Lath: Stiff, needs 1/2″ – 3/4″ thick coat. Fasten every 6″-8″.
Paper-backed or Mesh Lath: Flexible, needs 1/4″ – 1/2″ thick coat. Fasten every 4″-6″.
Inspect: Ensure lath is taut, fasteners are secure, and there’s no overlap.
Tools and Materials Checklist
Gather the basics: trowels, a by-hand gauge or straightedge, and a mixing container suitable for batches. Have a mixing drill or paddle on hand for consistent texture. Keep a level or straightedge ready to monitor flatness as you work.
Stock the right materials for the job: the scratch coat mix, water, ad mixtures if approved, and any reinforcing mesh or mesh accessories specified. Have a spray bottle or mister to keep surfaces damp if the mix needs it. Always confirm with the product instructions about compatibility and safe handling.
Essential hand and power tools
Before you start mixing concrete, make sure you have all the necessary tools on site. This checklist will help you ensure you’re well-equipped to tackle your project.
- Concrete Trowel (4″ – 12″): Check for straight edges and no nicks. A good trowel ensures a smooth, even finish.
- Hawk (16″ – 24″): Ensure it’s in good condition with no cracks or warping. A stable hawk keeps your mix steady while working.
- Concrete Float (8″ – 12″): Inspect for straight edges and no damage. A float helps level and smooth the concrete surface.
- Concrete Edger (4″ – 6″): Check for sharp, clean edges. An edger defines your slab’s perimeter and prevents raveling.
- Bull Float (24″ – 36″): Ensure it’s in good condition with no cracks or warping. A bull float levels and smooths large areas of concrete.
- Concrete Mixer (capacity suitable for your project): Verify it’s in working order. A mixer ensures a consistent, well-blended concrete mix.
- Straightedge (2′ – 4′): Check for straightness and no bends. A straightedge helps level and finish your slab.
- Concrete Vibrator (internal or external): Make sure it’s functioning properly. A vibrator removes air pockets and ensures a dense, strong concrete.
Quick rule: Always inspect your tools before starting work to avoid unexpected delays and ensure a quality finish.
Materials and accessory items to verify before starting
Before you start mixing concrete, use this checklist to ensure all your materials are present, compatible, and in good condition. This will save you time and prevent costly mistakes.
- Cement: Check the bag for the correct type (e.g., Type I or Type II) and that it’s within its expiration date. Confirm it’s suitable for your project’s requirements.
- Sand: Ensure it’s clean, free of organic matter, and has a fine to medium grain size. Check if it’s sharp sand (silica) for better bonding or soft sand (limestone) for a smoother finish.
- Aggregates (Gravel): Verify the size is appropriate for your mix design (e.g., 10mm, 20mm). Check for any foreign materials and ensure they’re clean and dry.
- Water: Test the water’s pH level. It should be between 5.5 to 8.5. Avoid using water with a high chloride content as it can cause corrosion in reinforced concrete.
- Additives (e.g., accelerators, retarders): Check they’re compatible with your cement type and mix design. Follow the manufacturer’s instructions for dosage rates.
- Bonding agents: Ensure they’re suitable for the surface you’ll be applying them to. Check if they’re compatible with your concrete mix and follow the manufacturer’s guidelines.
- Lath or mesh reinforcement: Verify it’s the correct size, gauge, and spacing for your project. Check for any damage or rust before installing.
- Anchors: Ensure they’re suitable for the load you’ll be applying and compatible with your concrete mix. Check if they meet local building codes.
- Curing supplies (e.g., curing compounds, plastic sheeting): Confirm they’re appropriate for your climate and project type. Check their expiration dates and that they’re stored correctly.
Quick rule: Always check the product labels and manufacturer instructions to ensure compatibility with your specific concrete mix design and project requirements.
Mix Design, Additives, and Workability for Controlled Thickness
Use the cement to sand ratio recommended for your system and stay within the allowable work window. The water amount should be enough for cohesion without making the mix too fluid. Ad mixtures, if used, must be approved and compatible with the base material.
Adjust workability to prevent sag or slump while still letting you apply to the exact thickness you target. Check label warnings and manufacturer instructions for any limits or timing notes. Practice on a test area if possible to confirm how the mix behaves.
How workability affects application and flatness
Workability is key to applying your scratch coat evenly and keeping it flat. Too much water makes the mix slump, leading to sagging and uneven thickness. Not enough water results in a stiff mix that doesn’t stick or level properly.
Strike a balance: Your mix should hold its shape but still spread easily. If it’s too wet, add more sand. Too dry? Add water, a bit at a time.
Check workability by dropping a small amount of mix onto a flat surface. It should spread slightly and hold its shape without slumping or cracking.
Bonding agents and accelerators — when to use them
Bonding agents help your scratch coat stick to the substrate, while accelerators speed up setting time. Both can be added to your mix, but use them wisely.
Bonding agents: Use on porous or difficult-to-stick surfaces like concrete or CMU. Follow product instructions for dosage. Too much can weaken the mix.
Accelerators: Ideal when you need a quick set, like in cold weather or when applying multiple coats in one day. Again, follow product instructions. Overuse can cause excessive heat and cracking.

Application Techniques to Ensure Bond and Flatness
Start with a firm, even pressure to key the scratch coat into the substrate and lath. Apply in consistent passes to create a uniform base thickness. Use a straightedge to track flatness as you go and address high spots or hollows promptly.
Maintain a damp surface and edges to prevent premature drying and cracking. Keep the coat corners and joints solid by working methodically across the wall. Refer to the product instructions for the recommended techniques and cure-aware handling.
Feathering, scoring/scratching, and mechanical key creation
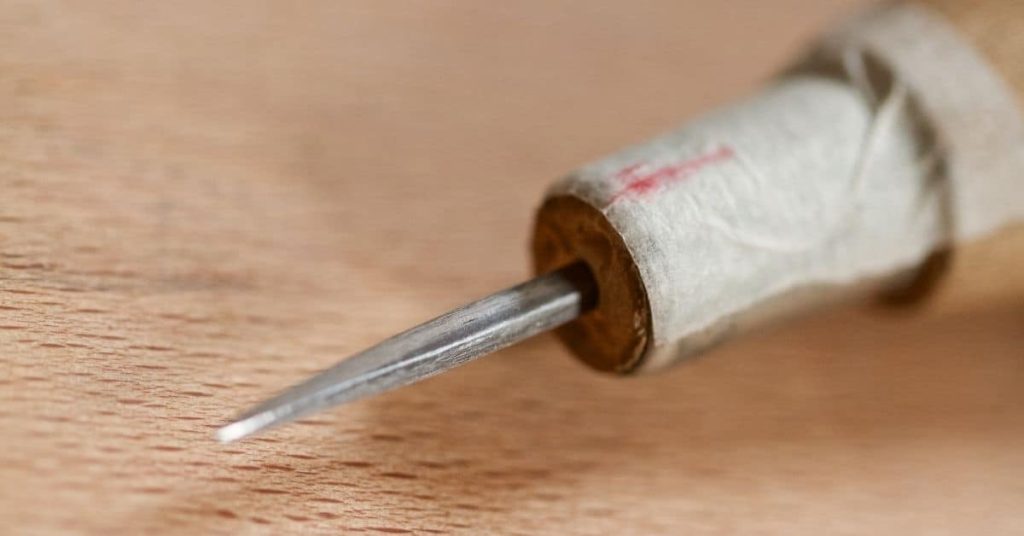
The scratch coat’s bond relies on a good ‘key’. This is created by scratching the surface. Here’s how:
First, feather the edges of your mix to avoid thick buildups. Then, while the mix is still workable, use a scratch tool or broom to score the surface in a criss-cross pattern. This creates grooves for the next coat to bond with.
Be careful not to over-scratch. You want a uniform key without compromising thickness or bond. Let it set slightly before applying the next coat.
Working in courses and controlling flatness
A flat, even surface is crucial for a good finish. Here’s how to achieve it:
Divide your wall into courses. Start at the bottom and work upwards. Use a straightedge or screed to level each course as you apply it.
For openings like doors and windows, use guides to maintain even thickness. Beat the surface with a beating rod to remove air pockets and ensure flatness.
Regularly check your work with a level to ensure it’s true. If any areas are too thick or thin, adjust your application technique accordingly.
Curing, Drying, and Timing Between Coats
Control drying to minimize shrinkage and cracks, using appropriate curing methods for your climate and product. Protect the surface from rapid evaporation and temperature swings where practical. Plan the schedule so the brown coat and finish coats follow within the approved interval.
Monitor the surface for consistent dryness before the next coat, resisting the urge to rush. If you see any signs of distress, pause and consult the instructions before proceeding. Rely on substrate and product guidelines to determine safe timing.
Moisture management and environmental considerations
The cure rate of your scratch coat depends on temperature, wind, and humidity. Here’s how to manage these factors:
Temperature: Ideal curing temp is 50-90°F (10-32°C). Below 50°F, curing slows down, above 90°F it speeds up too fast, causing cracks. Keep an eye on the weather forecast.
Wind: Wind dries out the coat quickly, leading to cracking. Use windbreaks or schedule work for calm days.
Humidity: High humidity helps retain moisture in the coat. If it’s too dry, mist the surface lightly during curing. Avoid applying in rain or high humidity as it can cause delamination.
When to proceed to the next coat or delay
There’s no fixed time for proceeding to the brown coat. Here are decision points to consider:
First, check manufacturer’s guidelines. They provide specific cure times based on their product.
Next, perform a surface test. Gently scratch the surface with a trowel or nail. If material comes off easily, it’s not ready. If it sticks but doesn’t crumble, it’s curing well.
Lastly, feel the surface. It should feel firm and cool to touch. If it’s still warm or soft, wait longer. Don’t rush; let the coat cure fully to prevent delamination in later coats.
Visual Checkpoints, Inspection Criteria, and Troubleshooting
Look for uniform thickness across walls and at edges or transitions. Check for bonding sounds and feel by gentle probing in low-stress areas. Use a straightedge to confirm surface flatness and planarity.
Document any high spots, hollows, or delamination and address them per the product and code references. If defects appear, verify substrate conditions, mix compatibility, and application technique with the label or manufacturer instructions. When in doubt, check local rules or consult the product data sheet for guidance.
Visual checkpoints and acceptance criteria
Before proceeding to the next coat, use this checklist to ensure your scratch coat is ready. It’s best to inspect the work after it has cured for 24-48 hours.
- Uniform keying: Check that the surface has a consistent, evenly spaced pattern of scratches or mechanical keys. Inadequate keying can lead to poor bond and delamination.
- Consistent plane: Inspect for any high or low spots that could indicate uneven application. A level tool can help confirm flatness.
- No major voids: Look for any large holes, gaps, or missing areas in the coat. These need to be patched before proceeding.
- Adhesion test: Perform a simple pull test by sticking a piece of duct tape on the surface and pulling it off quickly. If the plaster comes off with it, adhesion is poor.
- Surface moisture: Check for any wet spots or signs of excess moisture. This can lead to cracking or delamination if not addressed.
- Cracking: Inspect for any hairline cracks that may have formed during curing. These should be patched before proceeding.
- Trowel marks: Look for any visible trowel marks or swirls. While these can often be sanded out, they indicate a lack of proper feathering and mixing.
- Color consistency: Ensure the color is uniform across the entire surface. Any discoloration could indicate improper mixing or contamination.
Quick rule: If any issues are found, address them before proceeding to the next coat to prevent costly repairs later on.
Troubleshooting common problems and repair methods
If you encounter any of these issues, don’t panic. Here are some troubleshooting steps to help you resolve them.
- Delamination: If the coat is peeling or lifting, it’s likely due to poor adhesion. Remove the affected area and reapply with a bonding agent.
- Trowel marks: While these can often be sanded out, they indicate a lack of proper feathering and mixing. Rework the area for better results.
- Uneven thickness: High or low spots can lead to an uneven finish. Remove and reapply any areas that are too thick or thin.
- Cracking: Hairline cracks can often be patched, but if they’re extensive, it’s best to remove and reapply the coat.
- Excessive moisture: If the surface is still wet after curing, allow more time for drying or use a dehumidifier to speed up the process.
- Contamination: If the coat has discolored due to contamination, remove and reapply the affected area with fresh material.
- Poor workability: If the mix is too stiff or soft, it can lead to application issues. Adjust your mix design accordingly.
Quick rule: Always address any issues promptly to prevent them from worsening and causing more extensive damage.
Conclusion
Protecting the structure and ensuring a durable, flat finish comes down to getting the scratch coat thickness right and sticking to the workflow you’ve learned. If you nail the prep, mix, and timing, you’ll avoid costly call-backs and a poor-looking surface.
Start by checking the substrate and lath condition, then confirm the scratch coat thickness with your chosen mix design and workability, mix only what you can apply within the working time, apply in even passes, scratch at the right time, and cure and dry per guidance before the next coat. Inspect as you go: no thin spots, no high ridges, and test bond before you proceed. If any step feels off, pause and recheck rather than forcing it, and document the checks you did.
Common mistakes to avoid are skipping substrate prep, too-thick or uneven coats, and letting cure or dry times slip. Never rush curing, never apply the next coat over damp material, and always wear eye and skin protection, clean tools promptly, and keep a safe distance from mixing materials. Stay conservative with additives and test a small area first to confirm bond and workability; if in doubt, delay work and re-evaluate the plan.
If the substrate or lath looks questionable, or you’re dealing with unusual structural movement, consider bringing in a pro before you commit to another coat. When you keep the process controlled and document each step, you’ll finish with a solid bond, a true plane, and peace of mind. You’ve got this—steady pace, careful checks, solid results.
FAQ
How can I tell if my scratch coat thickness is correct without measuring every spot?
Look for an even, uniform layer when you run a straightedge across the wall. You should see consistent contact with the metal lath or scratch marks all around. If you’re unsure, reference the substrate type and follow the manufacturer’s guidance on acceptable variance.
What should I do if the scratch coat shows cracks or delamination before applying the brown/top coat?
Stop and assess the substrate and lath. Re-scratch where needed and re-embed, making sure loose material is removed. If the bond seems suspect, check the product label and instructions for bonding recommendations.
How should I handle variations in thickness across corners and edges?
Fill low spots first and feather the edges so transitions are smooth. Don’t pile material in one spot; it creates weak areas. Keep the surface as flat as possible according to the product guidance.
What are red flags that mean I should stop and reassess?
Sticky or rubbery surface, cracks that keep opening, or obvious loss of bond are all warning signs. Check the material instructions, label, and any local rules before continuing.