
Introduction
Pervious concrete is a porous patio surface that lets rain pass through interconnected voids into a designed stone reservoir and then into soil, an underdrain, or both. It is not ordinary concrete with a different finish: the open surface, reservoir, native soil, outlet, overflow route, and maintenance all have to work together.
Why it clogs: fine sediment, leaves, grass clippings, and runoff from bare soil can fill surface voids. But slow drainage is not always a surface-clogging problem. A patio can have an open surface and still pond because its stone reservoir is full, native soil drains slowly, or an underdrain or outlet is missing or blocked. Diagnose the whole system before cleaning aggressively.
Key takeaways
- Use pervious concrete for a small pedestrian patio only when the site can safely receive, store, discharge, and overflow its water.
- Map every roof, walk, slope, and paved area that drains toward the patio; do not size it for rainfall on the patio alone.
- Do not attempt a placement until the mix supplier, an ACI 522.1-based project specification, or a qualified pervious-concrete installer has provided the compaction method, target thickness, density, and acceptance checks.
- Keep soil, sand, leaves, and construction debris out of both the surface voids and the open-graded aggregate reservoir.
- Vacuum loose debris first. Do not assume washing will solve a saturated reservoir, slow soil, or failed outlet.
- Do not routinely seal pervious concrete with a product that can reduce pore connectivity.
Table of Contents
- Introduction
- Key takeaways
- Overview — What Pervious Concrete Is and When to Choose It
- Site Assessment and Design-Phase Considerations
- Hydrologic and Structural Design Basics
- Materials, Aggregates, and Mix Specifications
- Soil Testing, Infiltration Testing, and Underdrain Options
- Placement and Construction Best Practices
- Maintenance, Why Pervious Concrete Clogs, and Remediation
- Drainage Details, Water Quality, and Overflow Planning
- Conclusion
- FAQ
What Pervious Concrete Is and When to Choose It
Pervious concrete uses a cementitious paste to bind aggregate while preserving interconnected voids. Rain enters through the walking surface, moves into the open-graded stone below, and then infiltrates into the subgrade or leaves through a designed underdrain. Federal guidance treats the pavement, reservoir, soil, underdrain, outlet, overflow, and contributing drainage area as separate parts of one system; one part can limit performance even when the surface is still permeable. See the FHWA permeable-concrete pavement guide for that system-level design approach.
It can be a good fit for a modest, pedestrian-only patio on a simple site with stable grades, known soil conditions, and a safe overflow route. It has a distinctive textured appearance and needs routine debris control. It is not automatically appropriate near foundations, wells, retaining walls, unstable slopes, high groundwater, expansive soil, or where substantial roof, driveway, or upslope runoff will be directed onto it.
Benefits and tradeoffs vs. traditional patios
The principal benefit is on-site stormwater management: water can enter the patio rather than immediately running across its surface. Actual runoff reduction, water-quality performance, and groundwater recharge depend on the complete system, rainfall, contributing area, soil, outlet, and maintenance; they are not guaranteed by the concrete alone.
The tradeoffs are specialized placement, a less smooth appearance, sensitivity to sediment, and a need to protect the surface during construction and afterward. Do not apply ordinary decorative-concrete sealing advice: a coating that blocks voids defeats the patio’s drainage function.
Site Assessment and DIY Limits
Before ordering concrete, locate utilities, verify local building and stormwater requirements, and confirm applicable setbacks from structures, wells, property boundaries, and drainage features. Call 811 before excavation. Local requirements—not generic distance rules—control where a system may infiltrate or discharge water.
Mapping runoff sources and slopes
Measure patio area as length × width. Then draw arrows showing where water comes from and goes: roof downspouts, walks, driveways, lawn slopes, and neighboring hardscape may add more water than falls on the patio itself. Identify a safe surface route for water when a storm exceeds the system’s storage or discharge capacity. Keep sediment-bearing runoff from bare soil, mulch, or eroding lawn edges off the patio.
Grade is project-specific. Coordinate the finished surface, excavation, edge restraint, drainage route, and overflow; do not use a universal slope range. A patio should not direct concentrated water toward a foundation or create a low point with no safe escape route.
When DIY is realistic—and when it is not
The placement sequence below is only for a small pedestrian patio with a completed, site-specific drainage design and a supplier-confirmed pervious-concrete mix. DIY may be reasonable only when the site is simple, the drainage design is locally accepted, there is no substantial roof or upslope runoff entering the patio, and the crew can place and cure the entire load without interruption. Related guidance: DIY Pervious Concrete Patio: Mix, Place, and Keep It From Clogging.
Use a qualified drainage designer or pervious-concrete contractor when soil is unknown or variable; groundwater, frost/heave, or expansive soil is a concern; an underdrain, liner, outlet, or overflow is required; vehicle loads or accessibility requirements apply; the patio is near a foundation, well, retaining wall, or property boundary; or roof, driveway, or slope runoff will enter it. A contractor should have pervious-concrete experience, not only ordinary slab experience.
Drainage and Structural Design Basics
Sizing for drainage performance
Do not select a base depth from a generic patio recipe. First identify the local design storm and all contributing drainage area. The reservoir-storage relationship is storage volume = patio area × designed aggregate depth × aggregate void ratio. Depth and void ratio are design inputs, not universal numbers.
Next, compare water entering the system with the combined capacity of native-soil infiltration and any underdrain/outlet during the locally required drawdown period. Plan a visible, non-erosive overflow route for storms beyond that capacity. A reservoir can be necessary for storage even where infiltration is good; it may be shallower or unnecessary in some applications only when the project design supports that choice.
Structural design and surface thickness
Specify thickness, reservoir support, edge restraint, and joint layout for actual loads: pedestrian traffic, furniture, planters, and any occasional equipment. Do not assume that a pervious slab intended for a patio is suitable for vehicles. Surface texture, strength, skid resistance, paste coverage, and void connectivity are separate properties; do not smooth or trowel the surface in pursuit of strength.
Materials, Aggregates, and Mix Specifications
Order a pervious-concrete mix from a supplier familiar with the application. The mix needs enough paste to bind aggregate without filling the designed void structure. Do not add water or substitute ordinary flatwork finishing practices in the field unless the mix supplier and placement specification permit it.
Pervious concrete mix and quality control
Pervious concrete has a short, timing-sensitive placement process. Arrange labor, forms, screeds, the required compaction equipment, curing plastic, and access before the truck arrives. The applicable construction standard is ACI 522.1, the specification for pervious concrete pavement; it addresses subgrade, placing, finishing, jointing, curing, and quality control. Related guidance: Control Joints Vs Expansion Joints in Concrete: Placement, Spacing, and Timing.
Before placement, confirm that the delivered ticket and mix match the approved pervious mix and inspect reservoir aggregate for visible soil, dust, or other fines. Obtain the project-specific compaction method, equipment, passes or procedure, target slab thickness, density requirement, and inspection method from the supplier, approved drawing, ACI 522.1-based specification, or qualified installer. There is no safe universal DIY substitute for those values. Too little consolidation can leave an unstable slab; too much closes the void system.
Reservoir aggregates and geotextiles
Use clean, open-graded reservoir aggregate free of fines. Keep excavated soil, muddy tires, sand, and loose landscape material away from it. If the design calls for a separation layer, liner, or geotextile, install that specific material in the specified location; fabric is not a universal cure for poor soil and can itself be affected by fine sediment.
Soil Testing and Drainage Options
Native-soil infiltration, groundwater, and seasonal moisture determine whether the patio can fully infiltrate, partially infiltrate with an underdrain, or needs a lined/no-infiltration approach with a designed outlet. Obtain soil information before excavation and use the test method accepted by the local authority or project designer.
How to perform and interpret infiltration tests
A quick hole-and-stopwatch test or a single one-inch drop in a ring is not a reliable design infiltration rate. Valid field testing needs defined ring geometry, test depth, water head, pre-soak or stabilization, repetitions, and a method for interpreting results. Record test locations and conditions, but do not turn a casual result into a base-depth or underdrain decision.
Underdrain design, placement, and access
Low or uncertain infiltration may require an underdrain, liner, outlet, observation point, and overflow, but their pipe size, slope, perforation orientation, aggregate envelope, outlet, and cleanout access must come from the drainage design and local standards. An underdrain without a functional outlet does not solve a saturated reservoir. Where access is provided, an observation well or cleanout lets you check whether stored water is draining down after rain.
Placement and Construction
Tools, materials, and PPE: use forms and edge restraint, screeds, the project-required compaction equipment, jointing tools, clean reservoir aggregate, drainage components required by the design, and plastic curing sheets. Wear boots, gloves, eye protection, and clothing that prevents wet concrete from staying against skin. Wet cement is caustic and can cause burns; review the American Cement Association’s concrete safety guidance before handling it.
Placement sequence for a small patio
- Confirm utilities, approved drainage plan, weather, crew, mix delivery, forms, curing cover, compaction method, target thickness/density, acceptance checks, and a safe overflow route. Stop if rain, freezing conditions, drying wind, extreme heat, or an interrupted placement would prevent proper placement and curing.
- Excavate to the designed elevation. Protect the prepared subgrade from rutting, construction traffic, and sediment; do not overwork or contaminate it.
- Install any specified liner or separation layer, then the clean aggregate reservoir, underdrain/outlet, observation access, and edge restraint. Keep each layer free of soil and fines.
- Set forms and verify grade. Immediately before placement, moisten the subgrade so it does not pull moisture from fresh concrete.
- Place continuously and close to final position. Avoid isolated piles and long dragging that can segregate the mix or disturb the reservoir.
- Screed to grade. Apply only the project-specified controlled consolidation, using the equipment and procedure supplied by the mix supplier, ACI 522.1-based project specification, or qualified installer. Do not improvise with extensive floating, troweling, or repeated rolling; stop if the surface is being smeared closed rather than remaining visibly open.
- Edge and form joints by the selected project method. Do not steel-trowel, extensively float, or smear paste across the surface.
- Begin plastic-sheet curing promptly. Pervious-concrete guidance identifies curing within approximately 20 minutes of placement and at least seven days under cover as important practices; follow a longer or otherwise different project specification where required.
- Protect the covered slab from rain, drying wind, freezing, foot traffic, and debris. Open it only after the specified curing/protection period and required acceptance checks—not merely because seven days have elapsed.
Completion checks and common pitfalls
- Check: consistent specified thickness, stable edges, joints where planned, no loose aggregate, and no obvious paste-smearing or sealed-over patches.
- Confirm acceptance: after curing, evaluate surface infiltration at multiple clean locations using the project specification or locally required acceptance criterion. A screening water check is useful for comparing locations, but it is not a universal pass/fail test or infiltration-rate measurement. If the specified criterion is not met, stop and have the supplier, installer, or designer determine whether the issue is surface construction, contamination, or drainage design.
- Avoid contaminated aggregate: fines in the reservoir or surface create an early clogging problem that cleaning may not correct.
- Avoid over-finishing and over-compaction: pervious concrete should remain visibly open, not resemble a smooth conventional slab.
- Do not shorten curing: rapid drying and early traffic can weaken the surface and promote raveling.
Why It Clogs and What to Do
Inspect after major storms and at least seasonally. Remove leaves, soil, grass clippings, and mulch before they are ground into the voids. Watch the patio during rain and note whether ponding is isolated, uniform, or appears only after prolonged storms.
A practical diagnosis before cleaning
- Observe the timing. Record whether ponding starts immediately in a light rain, occurs only in a larger or prolonged storm, and how long it remains after rainfall stops.
- Compare locations. At several clearly clean and clearly dirty areas, pour similar small amounts of water and record whether one location accepts water noticeably faster. This comparison identifies uneven surface behavior; it does not establish a design infiltration rate.
- Inspect incoming water. During or after rain, look for roof discharge, lawn erosion, mulch, bare soil, or paved areas delivering water and sediment onto the patio.
- Check stored water where access exists. At an observation well or accessible cleanout, record the water level as soon as practical after rain and again over time. Compare the observed decline with the project’s or local agency’s required drawdown period. Water that remains high beyond that controlling period, rises to the access point, or does not decline indicates a reservoir, subgrade, underdrain, or outlet investigation—not more surface washing.
- Inspect the outlet if it is accessible and safe. Look for a blocked, damaged, submerged, or non-discharging outlet. Do not enter a structure, excavate around utilities, or alter a drainage connection to inspect it.
Uniform ponding on clean areas points away from ordinary surface clogging. If there is no observation access, the outlet cannot be safely checked, or no design drawdown period is available, use a drainage designer to assess the reservoir and discharge path.
Causes of clogging and repair strategies
| What you observe | More likely cause | What to do next |
|---|---|---|
| Fast ponding in isolated dirty areas; nearby clean areas drain | Surface clogging | Dry sweep or vacuum loose debris first; address the sediment source. |
| Uniform ponding across clean-looking areas | Slow soil, full reservoir, poor grade, or outlet problem | Use the observation-well/cleanout and outlet checks before washing. Escalate when water does not meet the project or local drawdown criterion. |
| Works in light rain but ponds after larger storms | Reservoir saturation, insufficient storage, outlet, or overflow | Review contributing runoff, storage, outlet, and overflow route with a drainage designer. |
| Water remains below the surface long after rain | Slow subgrade or failed/missing underdrain outlet | Record reservoir water level over the required drawdown period; inspect accessible outlet and obtain drainage-design help if it remains high. |
| Sediment enters from lawn, bare soil, roof runoff, or an adjacent slope | Inlet and maintenance problem | Stabilize the source and intercept sediment upstream before restoring the surface. |
| Cleaning helps briefly, then failure returns | Ongoing sediment loading or a deeper system limitation | Correct the source; do not rely on repeated washing. |
Cleaning without making the problem worse
Start dry: sweep off bulky debris and vacuum loose fines. For a small, sound patio, use a vacuum method approved for porous pavement; an ordinary wet/dry vacuum may not remove embedded fines effectively and can damage loose aggregate if used aggressively. A professional porous-pavement vacuum system is appropriate when sediment is embedded in localized areas, the patio area exceeds what household equipment can clean effectively, or the contractor needs to collect and remove fines without driving them deeper into the surface.
If vacuuming improves an isolated area only briefly, correct the upstream sediment source. If vacuuming does not improve an isolated, visibly clogged area after the source is controlled, use a qualified pervious-pavement maintenance contractor for an approved restoration method. Air-scouring, where appropriate, is a specialist operation—not a homeowner instruction—and should be performed only by qualified maintenance personnel who can contain and remove the released sediment.
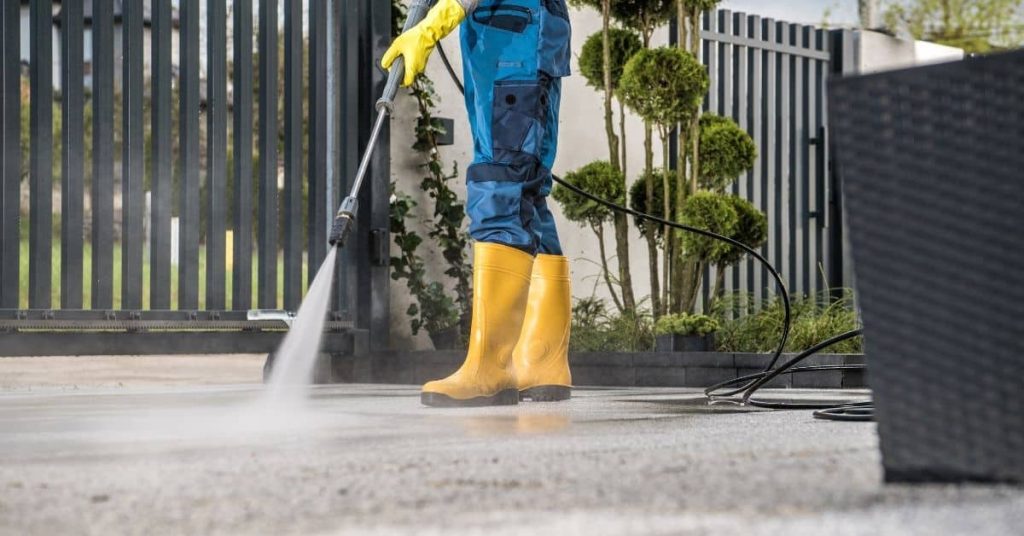
If controlled water cleaning is necessary, direct the spray so sediment moves off the surface for collection rather than straight down into pores. Avoid rotary surface cleaners, zero-degree jets, abrasive blasting, or any method that erodes cement paste or packs fines into the voids. There is no universal safe PSI for every pervious-concrete patio; verify nozzle, pressure, flow, and standoff distance for the specific system or use a qualified maintenance contractor. Collect removed sediment and dispose of it rather than washing it into a storm drain, lawn edge, or patio perimeter.
Stop cleaning and obtain professional assessment if the surface is raveling, cracking, soft at edges, uniformly ponding while apparently clean, or if reservoir water remains unusually high after the controlling project or local drawdown period. Use a qualified pervious-concrete contractor for surface damage and a drainage designer for reservoir, soil, underdrain, outlet, or overflow symptoms.
Overflow and Sediment Control
Keep sediment out rather than trying to remove it later. Stabilize bare soil, maintain lawn and mulch edges, clean gutters, and prevent downspouts or slope runoff from delivering concentrated dirty water to the patio. A simple vegetated strip or other sediment-intercepting feature may help where it fits the site, but it must not redirect water toward the foundation.
Every patio system needs a safe route for water that exceeds its capacity. This can be a graded surface path or another approved drainage connection; it should not erode soil, flood a structure, or send water onto a neighbor’s property. Complex conveyance, detention, or engineered water-quality systems are beyond a typical patio DIY project.
Before You Build
Proceed only after you know where water will enter, store, infiltrate or discharge, and overflow. Confirm the contributing drainage area, soil information, loads, local requirements, clean aggregate source, pervious-concrete mix, supplier or installer placement requirements, uninterrupted placement plan, and curing protection before excavation.
The most preventable failures are contaminated reservoir stone, excessive finishing or compaction, delayed curing, and allowing sediment-bearing runoff onto the finished surface. If the project requires an underdrain, liner, structural design, significant runoff handling, or work near a foundation or difficult soil, treat it as a designed drainage project rather than ordinary DIY flatwork.
FAQ
Should I seal a pervious-concrete patio?
Not as routine maintenance. A conventional sealer can reduce the open pore network that makes the patio drain. Consider a treatment only when it is specifically approved for pervious concrete, is compatible with the exposure, and is documented not to materially reduce infiltration. Related guidance: Pervious Concrete Maintenance: Prevent Clogging and Restore Drainage.
Can I fix poor drainage with a pressure washer?
Only if diagnosis points to loose surface sediment in isolated areas. Vacuum first, use controlled cleaning only when appropriate, and collect the sediment. Washing will not fix slow native soil, a full reservoir, inadequate overflow, or a blocked underdrain outlet.
How do I know whether the reservoir is the problem?
Where an observation well or cleanout exists, record the water level after rain and its decline over the project-specific or locally required drawdown period. If water remains high beyond that period, or the accessible outlet does not discharge as designed, stop surface cleaning and have a drainage designer investigate.
How long should I keep people off the patio?
Keep it protected through the specified curing period. Pervious-concrete guidance identifies plastic-sheet curing for at least seven days as an important practice, but traffic opening and acceptance must follow the project specification and required checks—not elapsed time alone.