
Introduction
Painting PVC trim means preparing the surface so paint sticks and stays flexible enough to move with the plastic; that starts with scuffing, a solvent wipe, and using the right flexible topcoat. This is a hands-on sequence more like sanding, cleaning, and choosing paints than a chemistry test, but check product labels for adhesion and flexibility recommendations. Do a small test area first to confirm the finish moves without cracking and that the color and sheen match what you want.
Think of it as three practical steps: knock down the gloss with scuffing, remove wax and contaminants with an appropriate solvent, then apply a compatible flexible topcoat. Use good ventilation and follow manufacturer instructions for dry times, recoat windows, and temperature limits. If you’re unsure about a product’s flexibility or adhesion, ask the supplier or check the technical data sheet before you commit.
Key takeaways
- Inspect PVC trim for cracks before painting; replace damaged sections promptly.
- Scuff-sand lightly and wipe with solvent per manufacturer guidance; wear gloves.
- Use adhesion-promoting primer compatible with PVC and chosen topcoat.
- Apply topcoat in thin, even coats to maintain flexibility and sound adhesion.
- Work in moderate temps and avoid painting in direct sun or wind on PVC.
- Regularly inspect for paint cracking or peeling and address promptly to extend life.
Table of Contents
- Introduction
- Key takeaways
- Why Paint PVC Trim and What to Consider First
- Tools and Materials Checklist
- Surface Preparation: Scuffing and Solvent Wiping That Work
- Primers and Adhesion Promoters for PVC
- Choosing Topcoats That Stay Flexible and Adhere
- Application Techniques for Lasting, Flexible Finishes
- Testing, Troubleshooting, and Repairs
- Maintenance, Longevity, and Warranty Considerations
- Conclusion
- FAQ
Why Paint PVC Trim and What to Consider First
Painting PVC trim makes sense when you want color consistency, UV protection, or to match adjacent millwork, but think through whether the PVC is already factory-finished or integral to warranty coverage. Consider the risks: poor adhesion and heat buildup from dark colors can lead to lifting or dimensional change.
Weigh project goals against substrate condition, sun exposure, and whether the piece can be removed for work or must be done in place. Check product labels and the manufacturer instructions for the PVC and the coating system to confirm compatibility before you start.
When painting PVC makes sense
Painting PVC trim can enhance its appearance and extend its lifespan. But it’s not always the best option.
Consider painting: when you want to change the color of your trim, or if it’s looking faded due to sun exposure. It’s also a good idea if the trim is in good condition but needs a refresh.
Think twice about painting: if the trim is damaged, warped, or has deep scratches. In these cases, replacement might be the better option. Also, avoid painting if you live in an area with extreme heat, as paint can trap heat and cause warping.
Key pre-paint checks
Before you start painting, it’s crucial to inspect your PVC trim. This ensures the paint adheres properly and lasts.
Check for: UV damage – look for areas that are cracked or brittle due to sun exposure. Also, examine seam joints to ensure they’re secure and intact.
Inspect existing coatings – if there’s already paint on the trim, make sure it’s in good condition. If not, you might need to remove it before painting.
Follow manufacturer guidance – always check the manufacturer’s recommendations for painting their PVC products. Some may advise against painting due to heat-related warping risks.
Tools and Materials Checklist
Gather abrasives (fine-grit sandpaper and scuff pads), lint-free cloths, a suitable solvent or cleaner, compatible primers or adhesion promoters, and one or more flexible topcoat options. Include application tools—brushes, short-nap rollers, or a spray setup—and personal protective equipment like gloves and eye protection.
Match cleaners and primers to the PVC and to each other by reviewing product data sheets or label instructions so you don’t mix incompatible chemistries. If unsure about a product’s compatibility, check the manufacturer’s technical data sheet or contact their technical support.
Prep and application tools
Before you start painting, gather these essential tools to ensure a smooth job.
- Scuff pads or sanding blocks: To lightly abrade the PVC surface. Skip this and paint may not adhere well.
- 120-grit sandpaper: For touch-ups or heavier scuffs. Neglect to use and you’ll see imperfections through the paint.
- Tack cloth: To remove dust after sanding. Miss this step, risk paint bubbles.
- 2-inch angled brush: For trim edges and corners. Without it, expect sloppy lines.
- 9-inch roller cover: For large surfaces. Don’t have one? Expect longer application times.
- Roller frame: To fit your roller cover. No frame? You’ll struggle to apply paint evenly.
- Spray gear (optional): For hard-to-reach areas or large projects. Skip this and you might miss spots.
- Masking tape: To protect adjacent surfaces. Without it, expect overspray messes.
- Drop cloths: To catch drips. No cloth? Prepare for a sticky cleanup.
- Safety glasses: To protect your eyes from debris and paint splatter. Don’t wear them? Risk eye irritation or injury.
Quick rule: Gather all tools before starting to avoid mid-job trips to the store.
Cleaners, solvents, and safety equipment
Proper cleaning is crucial for paint adhesion. Here’s what you need:
- Isopropyl alcohol or manufacturer-recommended PVC cleaner: To remove dirt, grease, and contaminants. Skip this step, paint won’t stick.
- Lint-free cloths: For applying and buffing the cleaner. Use rags? Expect streaks and residue.
- Gloves: To protect your hands from chemicals. Don’t wear them? Expect skin irritation.
- Respirator: For sanding or spraying paint. No mask? Risk inhaling harmful particles.
- Safety glasses: To protect your eyes from cleaner splashes. Don’t wear them? Risk eye irritation.
- Ventilation (window fans, etc.): To remove fumes. No ventilation? Expect headaches and dizziness.
Quick rule: Always follow manufacturer instructions for safe handling of cleaning agents and paint.
Primer and topcoat selection basics
Choosing the right products ensures a durable, long-lasting finish. Here’s what to look for:
- PVC/vinyl compatibility: Check product labels. Using incompatible primer/topcoat can cause peeling.
- Flexibility claims: PVC expands and contracts with temperature changes. Choose products that flex with it.
- Recommended substrates: Ensure the product is designed for exterior trim. Wrong substrate? Expect poor performance.
- Dry time: Consider how long you have to complete your project. Long dry times can slow you down.
- Color and sheen: Choose a color and sheen that matches your desired finish. Don’t like the result? You’ll have to repaint.
Quick rule: Always test primer and topcoat on a small, hidden area first to ensure compatibility.
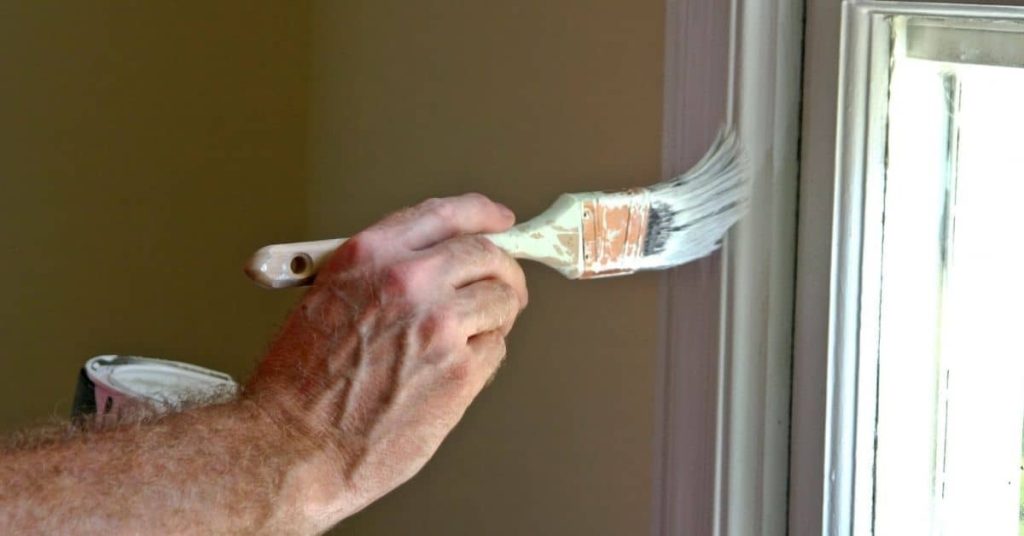
Surface Preparation: Scuffing and Solvent Wiping That Work
Begin by removing loose dirt and oils, then use light scuffing with fine abrasives to dull the glossy surface—enough to create a uniform tooth without gouging the PVC. Follow scuffing with a solvent wipe sequence to remove sanding dust and contaminants; pick a cleaner that the primer maker recommends.
Work in small sections and allow solvents to flash off according to the cleaner’s label before applying primer so you don’t trap residue. If the PVC has stains or mold, address those specifically per product guidance before scuffing and wiping.
Scuffing techniques for consistent adhesion
The key to a good paint job on PVC trim is proper surface preparation. Scuffing, or abrading the surface, helps paint adhere better and last longer.
Use a fine abrasive pad designed for plastics. Too coarse will damage the PVC. Apply even pressure, not too hard. The goal is to dull the surface evenly, not create deep scratches.
Tip: Use a light touch with a circular motion. Check your progress often to avoid over-scuffing.
Solvent-wipe process and safe solvents
After scuffing, wipe the PVC with a suitable solvent to remove any contaminants. This step is crucial for paint adhesion.
Start from the top and work your way down. Use a clean, lint-free cloth dampened with the solvent. Wring it out well – too much liquid can cause residue.
Safety first: Always use solvents in a well-ventilated area. Wear gloves and eye protection. Follow manufacturer’s guidelines for specific solvents.
Pre-paint visual and tactile checkpoints
Before you prime or paint, double-check your surface preparation. A quick inspection ensures a smooth painting process.
- Check for dust: Wipe with a damp cloth to ensure no abrasive particles remain.
- Feel the surface: It should be uniformly dull, not smooth or rough.
- Look for residue: Ensure no solvent residue is left behind. It can prevent paint adhesion.
- Inspect corners: Make sure they’re properly scuffed and wiped. They’re easy to miss.
- Check for moisture: PVC trim should be completely dry before painting.
- Verify primer compatibility: Ensure your chosen primer is suitable for the paint you’ll use.
- Confirm paint type: Use 100% acrylic latex paint designed for plastics. Other types may not adhere well or last.
- Temperature check: Paint when temps are between 50°F and 90°F (10°C and 32°C) for best results.
Quick rule: If in doubt, recheck your work. A few extra minutes now can save hours of repainting later.
Primers and Adhesion Promoters for PVC
There are primers formulated for vinyl/PVC and adhesion promoters designed to bridge difficult substrates; choose one intended for exterior rigid vinyl when working on trim. Use a primer when the manufacturer recommends it or when testing shows the topcoat won’t stick reliably without it.
Compare options by reading product data sheets for substrate lists and cure requirements, and pick a system that specifies vinyl compatibility and flexibility. If a product’s suitability is unclear, contact the manufacturer and ask for recommendations for painted PVC trim.
Types of primers and how they work
Primers for PVC trim fall into three main categories: vinyl-specific, universal adhesion promoters, and solvent-based. Each plays a unique role in creating a strong bond.
Vinyl-specific primers, like Zinsser Bulls Eye 1-2-3, are designed to react with PVC’s plasticizers, forming a chemical bridge for better adhesion.
Universal adhesion promoters, such as KILZ Adhesion Bonding Primer, create microscopic surface roughness that improves paint grip. They’re great when you’re unsure about the substrate.
Solvent-based primers, like Bondall PVC Primer, clean and prepare surfaces by dissolving contaminants. They’re ideal for older PVC with weathered surfaces.
How to validate primer performance
Before slapping on a full coat, test your primer’s compatibility and effectiveness. Here’s how:
1. Adhesion check: Apply a small amount of primer to an inconspicuous area. Let it dry, then lightly score with a utility knife. If the primer peels off easily, it’s not bonding well.
2. Small-scale trial: Paint a test patch using your chosen primer and topcoat. Let it cure completely, then perform a pull test or scratch test to ensure good adhesion. If the paint lifts or chips off, try another primer.
Choosing Topcoats That Stay Flexible and Adhere
Acrylics, polyurethanes, and elastomeric coatings each offer different flexibility and UV resistance; prioritize coatings that list vinyl or PVC compatibility and room for substrate movement. For exterior trim, prioritize UV stability and stretch to resist cracking as the PVC expands and contracts.
Verify cure characteristics and recommended film thickness on the product data sheet so you don’t overbuild a brittle coat. When in doubt, seek technical guidance from the coating manufacturer about long-term flexibility on PVC trim.
Pros and cons of common flexible coatings
When it comes to topcoats for PVC trim, you’ve got a few options. Each has its own strengths and weaknesses.
Pros
- Acrylics: Inexpensive, easy to apply, and offer good color retention.
- Polyurethanes: Excellent durability, resistance to chemicals and abrasion, plus they provide a high-gloss finish.
- Elastomerics: Superior flexibility, making them great for areas with frequent temperature changes or movement.
- All three: Widely available at hardware stores, easy to find in various colors.
Cons
- Acrylics: Less durable than others, can chip or peel over time. Not ideal for high-traffic areas.
- Polyurethanes: More expensive and require proper ventilation during application due to strong fumes.
- Elastomerics: Can yellow over time when exposed to sunlight, may not be suitable for exterior use without a UV-resistant topcoat.
- All three: May not adhere well if surface preparation is inadequate. Always prime first!
Choose based on your budget, the specific needs of your project, and the conditions your trim will face.
What to read on technical data sheets
Before you buy, check the technical data sheet (TDS). It’s your friend. Here’s what to look for:
Compatibility: Make sure it explicitly states compatibility with PVC or vinyl.
Flexibility: Look for info on flexibility or elongation. This tells you how much the paint can stretch before cracking.
Film Thickness: Check recommended film thickness. Too thick, and it might crack; too thin, and it won’t protect.
Temperature Limits: Ensure it can handle your climate’s extremes. Don’t guess, check the data!
Color choices and heat-related risks
Dark colors absorb more sunlight than lighter ones. This can make your PVC trim hotter, causing it to expand and contract more, stressing the material.
If you’re in a hot climate or your trim is exposed to direct sunlight for hours each day, consider lighter colors or finishes that reflect heat.
Remember, even with a flexible topcoat, excessive heat can still cause issues. So, keep an eye on those dark hues!
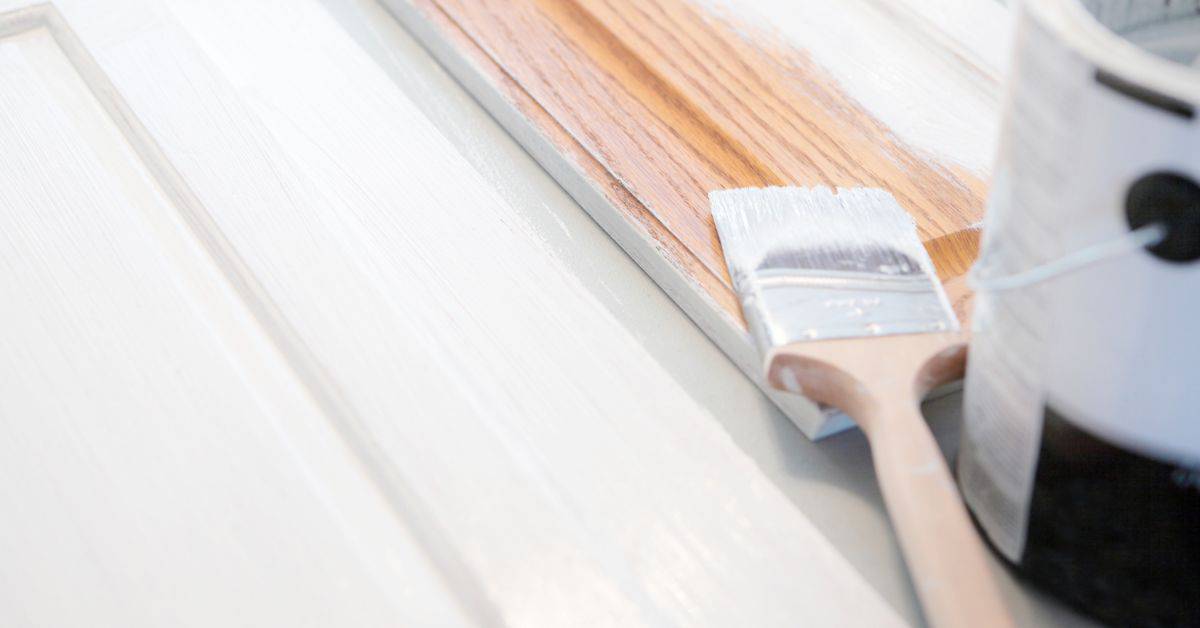
Application Techniques for Lasting, Flexible Finishes
Apply thin, even coats—whether brushing, rolling, or spraying—to maintain flexibility and avoid runs or sagging that can trap stress points. For brush or roller work, use light pressure and multiple passes; for spray, manage atomization and overlap to get a uniform coat without excessive buildup.
Follow recoat windows and substrate temperature guidance from product instructions to avoid fish-eyes or poor intercoat adhesion. Test your chosen technique on a scrap piece of the same PVC to confirm coverage and flexibility before committing to the whole job.
Brushing and rolling tips
Use a 2″ angled sash brush for tight corners. For wider areas, opt for a 4″ roller with a 3/8″ or 1/2″ nap cover to apply thin, even coats.
Work in manageable sections, about 3-4 feet at a time. Apply paint in long, smooth strokes, following the grain of the PVC. Don’t overwork the paint; let it level out on its own.
Key: Thin coats are your friend. They dry faster and reduce the risk of runs or excessive film thickness, which can crack as the PVC expands and contracts.
Spraying best practices
Set up your sprayer with a tip that produces fine atomization. A 1.8-2.0 mm tip is usually suitable for PVC trim.
Maintain a consistent distance of about 6-8 inches from the surface to ensure even coverage and prevent overspray. Overlap each pass by about 50% to avoid missed spots and maintain a smooth finish.
Tip: Always test your spray setup on a scrap piece of PVC first to ensure you’re getting the right atomization and flow rate.
Recoat timing and curing considerations
Follow the manufacturer’s recoat window guidelines. Typically, this is around 16-24 hours for primers and 24-48 hours for topcoats.
Curing time depends on environmental conditions. In ideal temps (70-90°F) with moderate humidity, a full cure can take 30 days. Colder or humid conditions can extend this to several weeks.
Rule of thumb: Don’t rush it. Wait until the surface is completely dry and touch-dry before recoating. Check the paint’s surface tension – if it feels ‘tacky’, wait longer.
Testing, Troubleshooting, and Repairs
Start with a small test panel to confirm adhesion and flexibility before full application, and perform simple checks like cross-hatch adhesion tests and bend tests where appropriate. If you see lifting, peeling, or cracking, determine whether the failure is adhesive, cohesive, or due to substrate movement.
Address failures by removing loose material, re-prepping the surface, and switching to a recommended primer or a more flexible topcoat as indicated by product guidance. For localized damage, feather back to sound edges and spot-prime and topcoat per the manufacturer’s repair instructions.
Simple adhesion and flexibility tests
Before you start painting, perform these quick checks to ensure your PVC trim is ready.
Adhesion Test: Gently scratch the surface with a coin or a utility knife. If the paint comes off easily, it’s not properly adhered. Re-sand and clean the area before priming again.
Flexibility Test: Bend a small, hidden piece of trim gently. It should flex without cracking. If it cracks, consider using a more flexible primer or topcoat.
Diagnosing common failures and remedies
If your paint job starts to fail, here’s how to diagnose the problem and fix it.
Peeling: This is usually due to poor adhesion. Scrape off the loose paint, sand the area, clean it with a solvent wipe, and re-prime before repainting.
Cracking or Bubbling: These are signs of lack of flexibility. If it’s just a few spots, you can spot-sand, clean, and touch up with a flexible topcoat. For larger areas, you might need to recoat the entire section.
Maintenance, Longevity, and Warranty Considerations
Routine cleaning and inspections will extend the life of painted PVC trim; remove dirt, mildew, and deposits according to the coating maker’s maintenance instructions. Be mindful that environmental factors like strong sun, reflected heat, and pollution accelerate wear and can affect appearance and performance.
Check warranty terms from both the PVC and coating manufacturers before you paint, and follow their prep and application requirements to avoid voiding coverage. If you’re unsure how a choice affects warranty, contact the manufacturer for clarification and keep records of products and batch numbers used.
Inspection and touch-up best practices
Regularly inspect your PVC trim to catch issues early. Here’s a simple checklist:
- Check for fading: UV exposure can cause color loss over time.
- Look for chalking: Fine powdery residue indicates paint breakdown.
- Inspect corners: Chipping often starts here due to stress and impact.
- Feel for flexibility: Rigid areas may indicate cracking under the surface.
- Check for moisture: Water can cause warping or delamination.
- Look for mold or mildew: These can grow in damp, shaded areas.
- Inspect caulking: Cracked or missing caulk allows water intrusion.
- Check fasteners: Loose or rusted screws/nails can cause trim to shift.
Quick rule: Touch up small chips and cracks immediately. Use a flexible touch-up paint to preserve longevity.
Environmental impacts and warranty advice
Climate and color choices can affect your trim’s performance and warranty coverage:
Heat: Dark colors absorb more heat, causing expansion and contraction. Check if your warranty covers this.
UV exposure breaks down paint over time. Most warranties cover this, but check the fine print.
Moisture: Excessive moisture can cause warping or delamination. Ensure proper drainage and caulking to prevent this.
Preparation: Follow manufacturer prep instructions for best results. This includes surface cleaning, priming, and application temperatures.
Conclusion
Finishing PVC trim with the right prep, materials, and technique pays off with a durable, flexible finish that looks good year after year. Prioritize safety and test drives on a small area so you don’t risk costly mistakes or damage.
Before you start, verify the surface is properly scuffed and solvent wiped, select a PVC-appropriate primer or adhesion promoter, choose topcoats that stay flexible, test a patch under real conditions, and work in a clean, dry space with good ventilation. Follow the order you established: scuff, wipe, prime, topcoat, and cure. Respect open times, avoid sudden temperature swings, and clean up before any dust can settle into the finish.
Common mistakes to avoid are skipping the scuff or solvent wipe, using a standard roof or exterior paint that won’t stay flexible, and skipping a test area. Don’t rush the cure, don’t thin beyond product guidance, and don’t apply in damp conditions or over dirty surfaces. Always wear eye protection and a mask, ventilate well, and keep solvents away from skin and heat sources.
If the project scope feels unfamiliar, or you encounter stubborn adhesion on older trim, it makes sense to call a pro for a spot test or a full refresh. Stay disciplined with the prep, choose the right products, and you’ll end up with a durable, flexible finish that looks steady for years. You’ve got this—stick to the plan and stay safe, and you’ll finish strong.
FAQ
Will any paint stick to PVC trim, or do I need a specific type?
PVC is tricky. Use coatings labeled for PVC or plastic substrates, and follow the manufacturer instructions. If in doubt, check the label or datasheet for adhesion and flexibility notes.
How do I ensure the topcoat stays flexible and doesn’t crack with movement?
Choose a topcoat that lists flexibility or adhesion on plastic as a feature. Look for products with recommended applications on PVC and follow curing and recoat guidelines from the manufacturer.
What’s the best sequence after scuffing and solvent wiping?
Clean, let dry, then apply a bonding promoter or primer if required. Finish with the topcoat that’s compatible with PVC and your primer, following the product’s order and dry times.
What are common failure causes I should avoid?
Skipping scuffing, using the wrong solvent, or applying coats in improper conditions can cause poor adhesion or film failure. If something flakes or delaminates, recheck product compatibility and surface prep per the label, then redo with approved steps.