
Introduction
Painting over chalky fiber cement means you must remove, neutralize, and prime a rough, powdery surface before any paint sticks. Rinse and scrub the surface to remove chalk, dust, and debris. Choose a primer that keys to the chalky layer and a weatherproof topcoat, and follow label directions.
Watch for signs like flaking, chalking, or peeling paint that indicate a repaint is needed. Proper cleaning involves a stiff brush, mild cleaner, thorough rinsing, and letting the surface dry completely before priming. For coatings, use exterior-grade primers and paints designed for fiber cement; check the product instructions, weather windows, and any local rules before you start.
Key takeaways
- Thoroughly surface-test chalkiness before painting to determine cleaning and priming needs.
- Clean with approved methods, ensuring no loose flakes or dusty residue remains; wear PPE.
- Prime with breathable, stain-blocking options suitable for chalky fiber cement surfaces.
- Seal joints and repair gaps before topcoats to prevent moisture intrusion.
- Use weatherproof topcoats compatible with fiber cement for long-term durability.
- Inspect for adhesion issues after cleaning and prep; address failures before painting.
Table of Contents
- Introduction
- Key takeaways
- Why Fiber Cement Goes Chalky and Why It Matters for Repainting
- Assessing Cleanliness: Tests and Thresholds Before Painting
- Cleaning Methods for Chalky Fiber Cement: Step-by-Step Options
- Surface Prep Beyond Cleaning: Repairs, Joints, and Sealing
- Choosing the Right Primer for Chalky or Contaminated Fiber Cement
- Topcoats and Coating Systems for Durability and Weather Resistance
- Common Mistakes, Troubleshooting Adhesion Failures, and Fixes
- Tools, Safety, Costs, and Long-Term Maintenance Planning
- Conclusion
- FAQ
Why Fiber Cement Goes Chalky and Why It Matters for Repainting
Chalking on fiber cement comes from both chemical changes in the binder and physical wear from UV and moisture cycling, which leaves a powdery residue that kills paint adhesion. That powder undermines primer bonding and shortens the life of the finish, and identifying how chalky the surface is tells you what cleaning and primer approach to take. The goal is to match the cleaning effort and primer type to how severe the chalking shows up.
A DIY viewer should use simple checks like wipe tests, smooth-scratch feel, and noting residue color and thickness to judge its severity. Depending on what you find, you’ll decide if mild surface prep suffices or if cleaning and a bonding or stain-blocking primer are needed, and whether you’ll need to abrade or etch before priming. Always wear PPE, consider lead-safe practices for older homes, and plan to dispose of wash water according to local rules to protect plants and drains.
Visual checkpoints for chalking
Before diving into tests, use these easy visual and tactile signs to assess chalking severity.
- Powdery residue: Gently rub the surface with a dry cloth. If it comes away white or gray, you’ve got chalking.
- Faded appearance: Chalking can make your fiber cement look dull and faded. Check if colors have lost their vibrancy.
- Uneven wear: Look for areas where the chalking is heavier, like south-facing walls or near windows.
- Cracking or peeling paint: These are signs of serious chalking that’s already affecting your paint job.
- Sandy texture: A gritty feel underfoot (if it’s a walkway) or to the touch can indicate mineral leaching, a form of chalking.
- Discolored areas: Dark spots or stains could be where chalking is worst, as it often concentrates in these areas.
- Flaking paint: If paint is flaking off, you’ve got severe chalking that needs immediate attention.
- UV damage: Check for discoloration or fading patterns that match where the sun hits most.
Quick rule: If you see any of these signs, it’s time to test and clean before repainting.
How chalking reduces adhesion
Chalking happens when binders in your fiber cement break down. This leaves a powdery residue that prevents new paint from sticking properly.
Loose binders: As binders degrade, they lose their grip on the cement particles. This creates a loose, flaky surface that can’t hold onto new paint.
Surface contaminants, like dirt or dust, also accumulate in chalky areas. These contaminants further reduce adhesion by creating a barrier between your new paint and the substrate.
When you apply primer and topcoat over chalking, they can’t bond properly with the loose surface. This increases the risk of early failure, peeling, and uneven sheen.
When to repaint, when to strip or replace
Not all chalking requires the same approach. Here’s how to decide:
Minor chalking (clean and prime): If your visual checks show light powdery residue but no major damage, cleaning and priming should do the trick.
Moderate chalking (consider stripping): Heavier chalking might need more aggressive cleaning or even partial stripping. If you find areas where paint is peeling or flaking, consider removing it before repainting.
Severe breakdown (replace substrate): If your fiber cement is cracking, crumbling, or has large areas of delamination, it’s time to replace the substrate. Repainting won’t fix these issues, and you risk further damage if you try.
Assessing Cleanliness: Tests and Thresholds Before Painting
Before you spray, define what “clean enough” means for your fiber cement. Follow manufacturer data sheets for final acceptance criteria and target removing loose chalk, chalk residue, mildew, efflorescence, and surface contaminants. Use practical tests for visible residue, dust, mildew, salt indicators, and oil or wax contamination, with pass/fail tied to those datasheets.
These tests guide your actions and prevent wasted primer. If a test fails, re-clean using the recommended approach (pressure wash or scrub with an appropriate cleaner, then rinse and dry), and re-test before priming. Document results and refer to the product label or datasheet to confirm the acceptable thresholds.
The white-rag (wipe) chalk test
Before painting, perform a simple wipe test to check for loose chalk and residue. This helps ensure your primer and paint will adhere properly.
Grab a clean, white cloth or rag. Dampen it slightly with water, then rub it firmly across the fiber cement surface in small areas.
Pass: If the cloth comes away clean or with minimal chalk residue, your surface is ready for priming. A little chalk is normal; just ensure it’s not excessive.
Fail: If the cloth is heavily coated with chalk or has visible residue, you need to clean deeper using a suitable cleaner and possibly a pressure washer. Re-test after cleaning.
Solvent and adhesion spot tests
Before priming, check for soluble contaminants or brittle finishes that could impair paint adhesion with these simple tests.
First, apply a drop of mild alcohol (like isopropyl) to a hidden area. Let it sit for 15 minutes, then wipe off with a clean cloth. If the surface becomes tacky or feels different, you may have a contaminant or weak finish.
Next, apply painter’s tape to another hidden spot and press firmly. After 24 hours, pull it off quickly at a 90-degree angle. If paint comes off with it, your surface needs more prep work before painting.
Weather and moisture timing thresholds
Follow product temperature and moisture guidelines to ensure optimal primer and paint adhesion. Most primers and paints require several consecutive dry days before application.
Check your primer datasheet for exact temperature ranges, typically between 50°F (10°C) and 90°F (32°C). For moisture, aim for a dew point below 55°F (13°C), and ensure the surface is dry to the touch.
Wait for at least three consecutive dry days before priming or painting. If rain is forecasted, delay your project until conditions improve. Always consult your paint/primer datasheet for specific guidelines.
Cleaning Methods for Chalky Fiber Cement: Step-by-Step Options
For chalky fiber cement, we’ll match the method to the chalkiness level and any mold growth. Use low-pressure washing for lightly chalked areas and reserve hand-scrubbing for tougher spots, and do a quick surface test to sense porosity and water intrusion risk before you start.
Rinse thoroughly, choose a cleaning method, then scrub gently with a soft brush, and treat mildew or efflorescence as a targeted step. Rinse again, neutralize cleaners, and remove salts and residues so primer can bite, then let the surface dry before any priming. Check for remaining chalk dust or staining and perform a tack-free/dry surface check before moving on, and know when to re-clean or call a pro for high-risk installations.
Step-by-Step Cleaning Process
The following steps guide you through cleaning chalky fiber cement surfaces effectively and safely.
- Preparation: Inspect the surface, wear protective gear (gloves, goggles), and cover nearby plants or shrubs to protect them from cleaners.
- Initial Rinse: Use low-pressure water to rinse off loose chalk and dirt. Start from top to bottom to avoid creating muddy streaks.
- Choose Cleaning Method: Based on your surface test, select either low-pressure washing or hand-scrubbing for stubborn areas.
- Scrubbing Technique: Use soft-bristled brushes or non-abrasive pads. Work in small sections, applying cleaner, scrubbing gently, then rinsing before moving on.
- Targeted Treatments: For mildew, use a commercial mildewcide or mild bleach solution. For efflorescence, apply a muriatic acid solution (follow safety guidelines).
- Rinse and Neutralize: Thoroughly rinse off all cleaner residue using low-pressure water. Neutralize any remaining cleaner with clear water.
- Drying Time: Allow the surface to dry completely before priming or painting, typically 24-48 hours depending on weather conditions.
- Post-Cleaning Assessment: Perform a tack-free test and check for any remaining chalk dust, salts, or staining. Re-clean if necessary.
Low-pressure washing best practices
Low-pressure washing is ideal for removing chalk from fiber cement surfaces without damaging the material. Aim for a pressure range of 500-1200 PSI.
Use a fan nozzle to distribute water evenly and maintain a consistent distance (6-12 inches) from the surface. Work in small sections, overlapping each pass slightly.
Never use a zero-degree nozzle or high-pressure settings, as they can gouge or damage the fiber cement.
Always start with the lowest pressure setting that effectively removes chalk and gradually increase if needed. Test a small, hidden area first to ensure you’re not causing damage.
Detergents, mildewcides, and rinse protocols
Use an alkaline detergent or a commercial mildewcide product to clean chalky fiber cement surfaces. For mild bleach solutions (1 part bleach to 3 parts water), allow it to dwell for 10-15 minutes before rinsing.
Apply cleaner evenly using a pump sprayer or soft-bristled brush, ensuring full coverage of the area you’re working on.
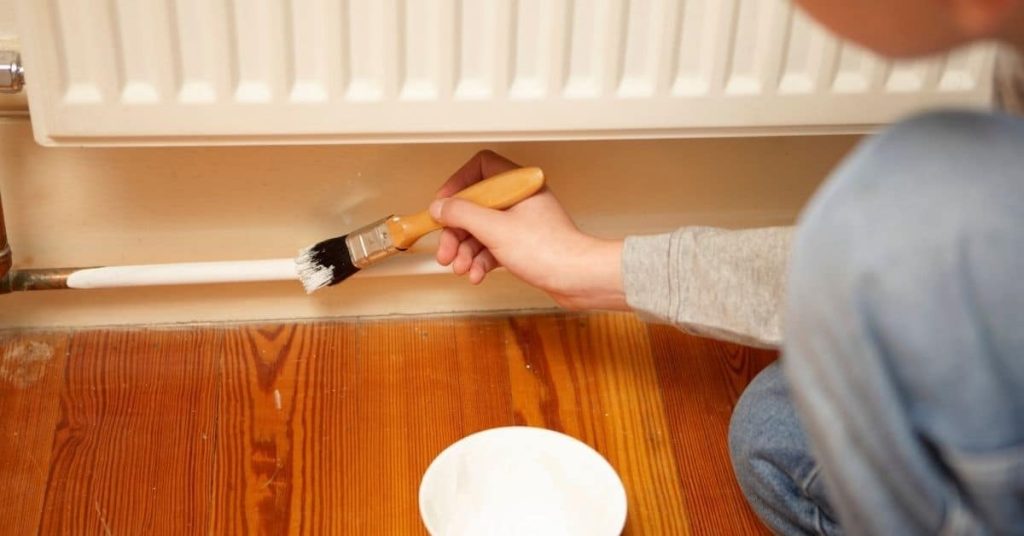
Always rinse thoroughly with low-pressure water after cleaning. Rinse from top to bottom and ensure no residue remains, as it can hinder primer adhesion.
For stubborn mildew stains, you may need to re-clean the surface or consult a professional for high-risk installations.
Mechanical abrasion and sanding options
For stubborn chalk buildup, light sanding or abrasive brushing may be necessary. Use fine-grit sandpaper (120-220 grit) or a soft-bristled brush with stiff bristles.
Before sanding, test a small, hidden area first to ensure you’re not removing too much material or damaging the surface. Work in small sections, following the grain of the fiber cement.
Avoid using metal tools or harsh abrasives that can gouge or scratch the surface. After sanding, vacuum and wipe off any dust before proceeding with your cleaning process.
Surface Prep Beyond Cleaning: Repairs, Joints, and Sealing
Before you paint, tackle the non-paint prep: repair cracks, replace failed caulk, consolidate loose edges, and confirm backer-rod and proper joint sealing. These steps stop moisture behind the coating and prevent paint failure. Plan targeted repairs for hairline cracks, delaminating edges, and movement that may affect adhesion.
Consolidating edges and sealing joints keeps moisture out and helps paint adhesion last longer. It also sets up a durable repair strategy and makes future maintenance easier. Check product labels and manufacturer guidance for primers, consolidants, and backer-rod installation.
Inspecting and repairing defects
Before you prime, inspect your fiber cement surface for any defects. These can compromise paint adhesion.
Look for: hairline cracks, spalls (small pieces breaking off), delaminating edges (peeling or flaking), and nail pops (nails pushing through).
Repair basics: For small cracks, use a fiber cement repair mortar. For larger defects, use an epoxy filler. Allow repairs to cure before priming.
Caulking and sealant selection
Choose the right caulk or sealant for your fiber cement surface. This ensures longevity and compatibility with paint.
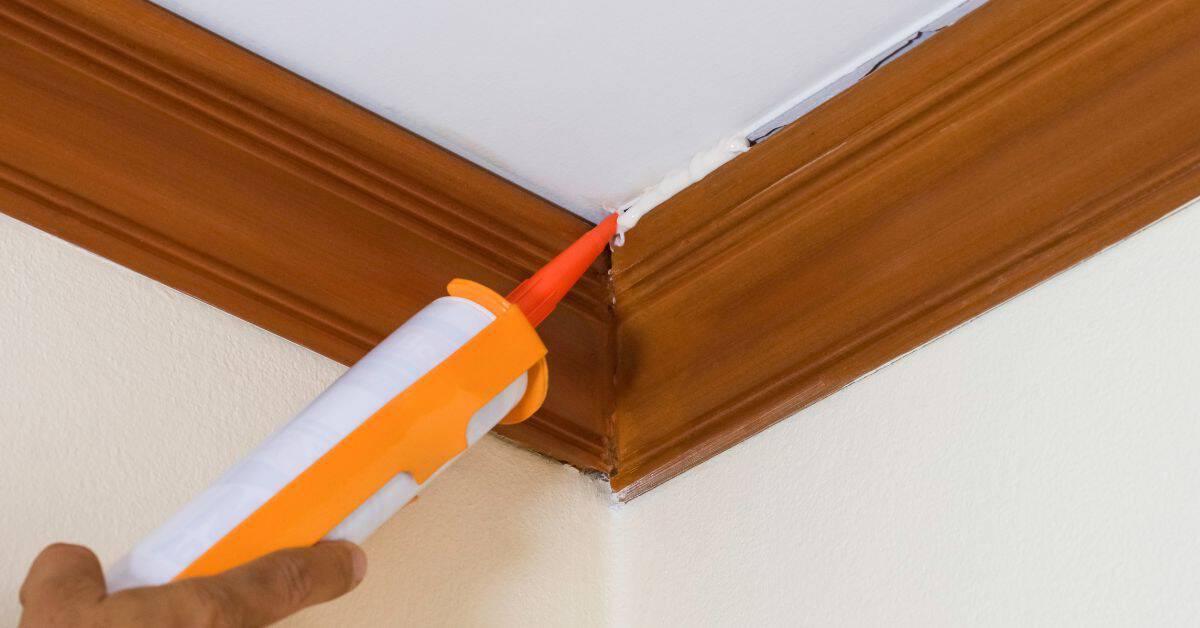
Opt for: Long-life, paintable sealants compatible with fiber cement. Consider polyurethane, hybrid, or high-adhesion sealants.
Match flexibility: To expected joint movement. Too rigid, it may crack. Too flexible, it may sag.
Visual checkpoints after prep
Before priming, use this checklist to ensure your surface is sound, clean, dry, and ready for paint.
- Check for: Any missed defects. Incomplete repairs can cause paint failure.
- Confirm: All surfaces are clean. Dirt or residue can hinder adhesion.
- Ensure: Surfaces are dry. Moisture can affect primer and paint performance.
- Verify: Joints and edges are well-sealed. Inadequate sealing invites moisture ingress.
- Inspect: Caulking and sealants. Ensure they’re compatible with fiber cement and paint.
- Examine: Primer application. It should be even, without missed spots or overapplication.
- Check: Weather conditions. Prime when temperatures are between 50-90°F (10-32°C).
- Confirm: No signs of rot, mildew, or other moisture issues. These can compromise paint adhesion.
Quick rule: If in doubt, recheck. Better safe than sorry when it comes to painting prep.
Choosing the Right Primer for Chalky or Contaminated Fiber Cement
Choosing the right primer depends on the surface condition: chalky, dusty, or slick fiber cement calls for different primer types—high-adhesion acrylics for slick or dusty spots, specialty bonding primers for chalky contamination, and oil/alkyd primers for tougher or older textures. Follow the manufacturer guidance when chalking is severe, and pick the product that best matches the surface condition. Don’t mix categories without guidance; use the one that aligns with the surface reality.
This matters because proper primer choice and surface prep set up topcoat adhesion and durability. Scrub or light mechanical abrasion as needed, remove dust, and verify readiness per label instructions before priming. Also check substrate compatibility, moisture exposure, temperature range, and recoat windows so you don’t trap moisture or cause delamination, and plan for safe ventilation when using solvent- or oil-based primers.
High-adhesion acrylic primers
High-adhesion acrylic primers are a great first choice for properly cleaned fiber cement. They’re breathable, allowing moisture to escape, and flexible, accommodating minor substrate movement. Plus, they’ve got excellent UV resistance.
Use them: when you’ve thoroughly cleaned your fiber cement, following the steps outlined earlier. They work best on surfaces free of severe chalking or contaminants.
These primers promote good topcoat adhesion and can help prevent peeling or delamination down the road. Just remember to follow manufacturer guidelines for application and drying times.
Specialty bonding and peel-bridging primers
When your fiber cement has marginal or chalky areas, consider using specialty bonding primers. They’re designed to improve topcoat adhesion without the need for full stripping.
Use them: when you’ve done a thorough cleaning but there’s still some residual dust or light chalking. Or if you’re dealing with slick residues that won’t budge with regular cleaning methods.
These primers can help ‘bridge’ over minor surface imperfections, improving the final finish. But they’re not a substitute for proper surface preparation. Always follow manufacturer instructions to ensure the best results.
Oil-based/alkyd primer considerations
Alkyd or solvent-based primers can be useful in certain scenarios. They’re good at blocking stains and can adhere well to problematic surfaces like slick residues.
Consider them: when you’ve got tough stains to deal with, or if your topcoat requires an oil-based primer for optimal adhesion. But remember, they’re not always the best choice for fiber cement. Check compatibility with your chosen topcoat and follow manufacturer guidelines for application.
Keep in mind that oil-based primers have longer drying times and can be more sensitive to temperature changes compared to acrylic or latex counterparts. Always ensure proper ventilation when applying them.
Topcoats and Coating Systems for Durability and Weather Resistance
Topcoat choices like 100% acrylic, elastomeric, and mildew‑resistant formulations give you flexibility, waterproofing, and UV protection for chalky fiber cement. Pair them with the right primers to build a durable, weather‑ready system suited to your exposure and climate. Color and sheen can help or hurt longevity, so pick wisely.
Your surface maturity, humidity, and sun exposure affect adhesion and film integrity, so follow the product label for prep, thickness, and recoat windows. A proper system reduces chalking, mildew, and delamination and makes maintenance easier over time.
Acrylic exterior paints vs elastomeric coatings
When it comes to topcoats for your chalky fiber cement, you’ve got two main choices: acrylic exterior paints and elastomeric coatings. Both have their strengths.
Acrylic exterior paints are great for their durability, breathability, and UV resistance. They’re perfect for areas with normal to moderate wear and tear. But they might not be flexible enough for high-movement surfaces or extreme temperature swings.
Elastomeric coatings, on the other hand, are super flexible. They can stretch and move with your fiber cement as it expands and contracts. This makes them ideal for areas with wide temperature fluctuations or high movement. But they might not be as breathable as acrylics, so they’re not always the best choice in humid climates.
Sheen, color, and UV considerations
Color and sheen aren’t just about looks. They can affect your paint’s longevity too. Lighter colors reflect heat better than darker ones. So, in high-UV areas, lighter shades can help keep your fiber cement cooler and reduce the risk of cracking.
Sheen also plays a role. Higher-sheen finishes reflect more light, which can help hide chalking over time. But they can also show every imperfection on your surface. So, make sure your prep work is thorough before applying high-sheen paints.
As for UV resistance, most quality exterior paints these days have built-in UV protection. But if you’re in a high-UV area, it’s worth checking the label to ensure your chosen paint can handle the sun where you live.
Coating choices for coastal and humid climates
If you’re painting in a coastal or humid area, you’ve got some extra challenges. But don’t worry, there are coatings designed to handle these conditions.
For coastal exposures, look for paints with built-in mildew/algicide protection. These will help prevent mold and algae growth on your fiber cement. Also, check the label for salt-spray resistance. This ensures your paint can stand up to the corrosive effects of sea spray.
In humid climates, breathability is key. Acrylic exterior paints are a good choice here because they allow moisture to escape through the surface. But remember, even with breathable coatings, proper ventilation is crucial to prevent moisture buildup behind your paint.
Common Mistakes, Troubleshooting Adhesion Failures, and Fixes
Common adhesion failures on chalky fiber cement usually come from four mistakes: insufficient cleaning, using the wrong primer, painting on damp substrate, and poor caulking or surface prep. Each misstep has practical fixes, like thorough cleaning, choosing a compatible primer, drying the surface, and re-sealing joints before coating again.
Why it matters: catching problems early saves work and money. A simple DIY flow helps you verify readiness: check moisture, gauge porosity or roughness, run a patch test with primers, and confirm adhesion before committing to a full coat. Keep notes on what you saw and fix cleaning, moisture, and caulking as you go to extend the coating life.
Avoiding surface prep shortcuts
Skipping proper cleaning and priming can lead to adhesion failures. Here’s what to avoid:
- Insufficient cleaning: Dirt, dust, or contaminants prevent paint from sticking. Solution: Re-clean with a degreaser and scrub brush.
- Wrong primer: Using the wrong primer can cause adhesion issues. Solution: Strip old paint, clean, and use a bonding primer.
- Painting on damp substrate: Moisture under paint causes peeling. Solution: Ensure surface is dry before priming and painting.
- Poor caulking: Inadequate sealing leads to water intrusion and failure. Solution: Re-caulk using a high-quality, flexible sealant.
Remember, proper prep saves time and money in the long run.
Weather-related painting mistakes
Painting in marginal weather conditions can lead to failures. Avoid these:
- Low temperatures: Paint doesn’t cure properly below 50°F (10°C). Solution: Wait for warmer temps or use a low-temperature primer.
- High humidity: Moisture in the air affects paint curing. Solution: Paint on dry days with low humidity.
- Direct sunlight: Painting in direct sun can cause blistering. Solution: Paint in shade or on cooler parts of the day.
- Rain after painting: Rain before paint cures causes failure. Solution: Protect painted surfaces from rain until fully cured.
Check weather forecasts and adjust your schedule accordingly.
Repairing peeling, flaking, or chalking after repaint
If you’re seeing failures after painting, follow this protocol:
1. Assess the failure: Check for moisture, loose paint, or other issues.
2. Strip and clean: Remove failed paint, clean the surface using a degreaser, and let it dry.
3. Prime and paint: Apply a bonding primer, let it dry, then repaint with the recommended topcoat. If chalking re-emerges, consider an elastomeric coating for better durability.
Tools, Safety, Costs, and Long-Term Maintenance Planning
This section covers a practical tools-and-materials checklist, safety basics, and the main cost drivers you’ll face when cleaning, priming, and painting chalky fiber cement. You’ll see surface cleaning tools, abrasion supplies, patching or reinforcement items, bonding primer, exterior primers, weatherproof paint, caulk, rollers, brushes, masking, drop cloths, and PPE, with notes to size up quantities and storage. We also flag safety gear, ladder basics, ventilation, chemical handling, and special precautions for aging or unknown substrates.
Knowing the cost drivers helps you budget for DIY vs hiring, seasonal timing, waste, and contingency for weather-downtime. Prep choices, like whether to use bonding or stain-blocking primer, directly affect paint longevity and warranty, so follow product instructions and check labels. Finally, set a simple maintenance rhythm: inspect, re-clean or re-prime as needed, and store materials properly to maximize life.
Tools and materials checklist
Before you start, tick off these essentials to ensure a smooth job.
- Soft-bristle brush: For gentle cleaning without damaging the surface.
- Low-pressure washer: To rinse off residue without blasting away paint.
- Degreaser: Choose a mild, eco-friendly one to avoid harsh chemicals.
- Abrasive pad (e.g., Scotch-Brite): For stubborn spots. Skip this if you’re using a pressure washer.
- Sanding block: To smooth out rough patches before priming.
- Bonding primer: High-adhesion acrylic for chalky surfaces. See our primer guide.
- Exterior paint: Acrylic or elastomeric, depending on your climate. Refer to our coating guide.
- Caulk and sealants: To fill gaps and prevent water intrusion.
- Rollers and brushes: High-quality for even coverage. Don’t skimp on these.
- Masking tape: For clean edges.
- Drop cloths: Protect your surfaces and catch drips.
- PPE (Personal Protective Equipment): Gloves, eye protection, and a respirator for dust/solvents.
Quick rule: Always check your tools and materials before starting. It’s cheaper to replace something now than redo work later.
Safety and environmental precautions
Your safety and the environment are top priorities. Here’s how to protect both.
PPE: Wear gloves, eye protection, and a respirator when using chemicals or sanding.
If your home is old, test for lead before disturbing any surfaces. Lead-safe practices are crucial.
Properly dispose of waste materials according to local regulations. Never pour chemicals down drains. Always follow the manufacturer’s guidelines for cleaner disposal.
Ventilation: Ensure your workspace is well-ventilated when using solvents or paints. Open windows and doors, use fans, or work outdoors if possible.
Budgeting and maintenance schedule
Understanding your project’s costs and maintaining your finish will save you money in the long run.
Cost drivers: Prep depth, primer choice, coatings selected, and access can all affect your budget. Get local quotes for accurate pricing.
Maintenance schedule: Inspect your surfaces annually. Re-clean or re-prime as needed. Repaint every 5-10 years depending on climate. Store leftover paint properly to extend its life.
Quick tip: Regular maintenance prevents small issues from becoming big, expensive problems.
Conclusion
Cleaning chalky fiber cement and choosing the right primer matters for safety, durability, and how your paint will look for years. When you follow the thresholds, clean thoroughly, and seal joints properly, you lock in a clean surface that will hold color and resist weather without peeling or chalking again.
Move forward with a simple check sequence: confirm surface cleanliness with a quick test patch, pick a cleaning method that fits the chalk level, repair and seal as needed, then apply the right primer designed for chalky or contaminated fiber cement, finish with a durable topcoat, and plan ongoing maintenance. Do each step in small, test areas first, and recheck adhesion before committing to a full job. Focus on safety gear, dry surfaces, and clear follow-through so you don’t double-work or trap moisture.
Two common mistakes trip homeowners up: skipping the initial test and rushing to paint over a still-tacky or damp surface, and choosing the wrong primer or skipping proper sealing at joints. Always ventilate, wear eye and skin protection, and let surfaces dry fully between steps. If you see persistent adhesion problems after basic fixes, back off and reassess rather than forcing a coat that will fail soon.
If the project calls for mixed materials, severe chalking, or persistent leaks around seams, consider a professional before risking costly repairs. When you stick to tested thresholds, careful cleaning, proper priming, and a weather-ready topcoat, you finish with a solid, long-lasting result. Stay deliberate, stay safe, and you’ll keep the exterior looking sharp for years to come.
FAQ
Why is proper surface preparation essential before painting chalky fiber cement?
Good prep locks in the paint. It helps adhesion, reduces peeling, and extends the coating’s life. Skipping steps invites early failures and more work later.
What weatherproof coating options work well on chalky exterior fiber cement?
Look for coatings labeled for exterior fiber cement or masonry, and that are compatible with chalky surfaces. Check the manufacturer’s instructions for suitable primers and topcoats, and follow local guidance.
How do you properly clean exterior chalky fiber cement before painting?
Rinse off loose dust and chalk with water first. Use a gentle detergent or cleaner as directed, scrub with a soft brush, and rinse clean. Let the surface dry completely before applying primer or primer/topcoat systems.
What signs indicate repainting is needed, and what factors affect paint longevity?
Fading, chalking, cracking, peeling, or color change are red flags. Sun exposure, moisture, heat cycles, and surface contamination all shorten how long the paint lasts. Address clean surface, correct primer, and proper coating choices to improve longevity.