
Introduction
Painting fiber-cement siding means choosing compatible primers, sealing exposed cut edges, and recognizing that factory finishes can still peel or wear. This is a practical, hands-on guide you can follow without fancy tools or theory. Check manufacturer instructions and local rules for product compatibility and weather windows.
Start by inspecting boards for damage, then mask, clean, and apply primer to cut edges. Allow the primer to cure as directed and finish with a compatible topcoat; if a finish fails, look into surface prep, moisture, or substrate issues. If in doubt, verify label directions and local building code guidelines.
Key takeaways
- Inspect factory finishes for peeling and moisture signs before repaint planning.
- Assess fiber-cement properties like porosity and edge exposure to select primers.
- Treat cut edges with edge sealant before priming and coating continuity.
- Wear eye protection and masks; breathable topcoats reduce indoor odors.
- Prep surfaces: clean, dry, and free of dust; verify adhesion with test patches.
- Confirm warranties, standards, and product labels meet local rules and project specs.
Table of Contents
- Introduction
- Key takeaways
- Why Factory Finishes Fail on Fiber-Cement
- Understanding Fiber-Cement Properties That Affect Coating Performance
- Assessing Existing Siding Before Repainting
- Primer Selection: Types and What to Prioritize
- Best Practices for Treating Cut Edges and Exposed Raw Fiber-Cement
- Topcoat Selection: Breathable Versus Impervious Finishes and Sheen Choices
- Surface Preparation, Application Techniques, and Quality Control
- Tools, Materials Checklist, Standards, and Warranties to Verify
- Conclusion
- FAQ
Why Factory Finishes Fail on Fiber-Cement
Factory finishes on fiber-cement boards can fail for several practical reasons. The coating may not bond well to the board’s surface, or it can deteriorate if the underlying material absorbs moisture. Repaint is often needed because the factory film loses adhesion over time and exposes the substrate to environmental wear.
Common causes include variations in board porosity, improper surface conditioning, and edge exposure after installation. Before re-coating, verify with the product label or manufacturer instructions to confirm recommended steps and compatibility. Check local rules or guidance if unsure about surface preparation requirements.
Common failure modes (peeling, chalking, delamination)
Factory finishes on fiber-cement siding can fail in several ways. The most common are:
Peeling: This happens when the paint starts lifting off the surface. It’s usually due to poor adhesion, often caused by contaminants or moisture.
Chalking: Over time, you might see a white, powdery residue on your siding. This is chalking, which occurs when the binder in the paint breaks down and turns into a fine powder.
Delamination: In this case, the finish starts to bubble or flake off. It’s often caused by moisture getting trapped between the paint and the siding, leading to delamination.
Underlying causes: moisture, thermal movement, and poor adhesion
Several factors can lead to factory finishes failing prematurely on fiber-cement siding:
Moisture: Fiber-cement is porous. If it absorbs too much water, it can cause the finish to fail. This often happens in areas with high humidity or near sources of moisture like gutters.
Thermal movement: Fiber-cement expands and contracts with temperature changes. If the paint doesn’t flex with it, it can crack and peel.
Poor adhesion: At cut edges or where fasteners are used, if the paint doesn’t adhere properly, it can start to lift off. This is often due to contaminants like dust or oil not being removed before painting.
Understanding Fiber-Cement Properties That Affect Coating Performance
Fiber-cement has characteristics that directly influence primer and paint choice. Porosity and surface texture determine how well coatings grip and dry. Alkali content can impact on-surface chemical reactions and long-term durability.
Dimensional movement from temperature and humidity shifts also plays a role in coating resilience. Always cross-check the material spec sheet or manufacturer guidance to pick compatible primers and topcoats. If in doubt, consult local codes or a product representative for specifics.
Composition and permeability of fiber-cement
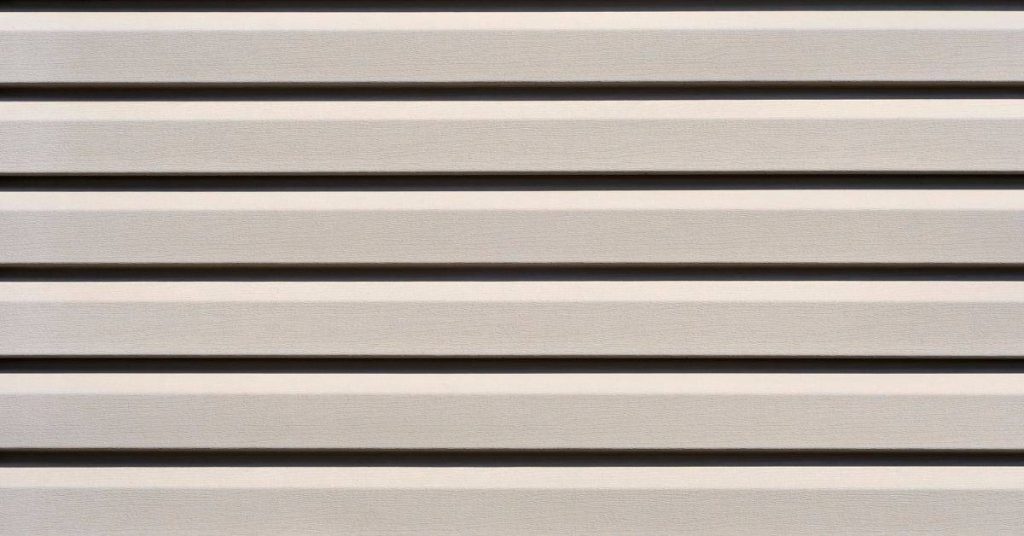
Fiber-cement siding is made up of cement, cellulose fibers, and fillers. The exact recipe varies by manufacturer but typically follows this ratio: 11-15% cellulose, 20-30% fly ash or silica, and the rest cement.
The cement binds everything together, while the cellulose fibers add strength and durability. Fillers like fly ash or silica help with workability and reduce costs.
This mix makes fiber-cement porous but not overly so. It’s designed to let water in during curing but keep it out once dried. This permeability affects how paint bonds and performs.
How factory coatings are applied and their limitations
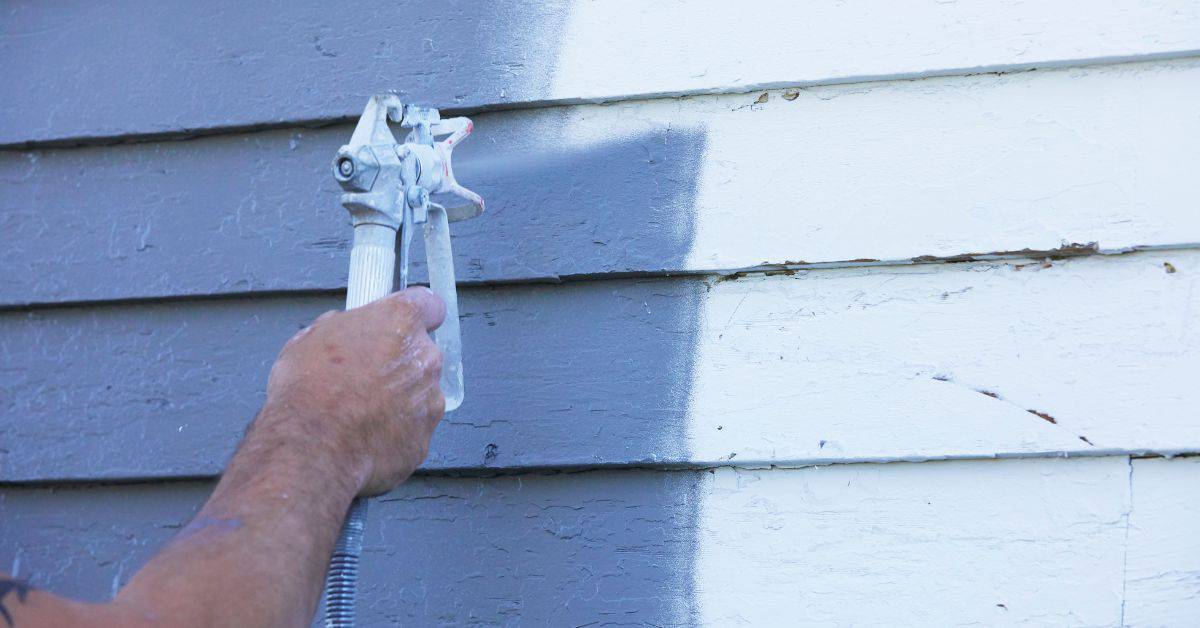
Factory finishes are usually applied by spraying a primer followed by one or two coats of paint. This is done in controlled conditions, ensuring even coverage and minimal waste.
The main limitation of factory-applied coatings is that they can’t account for variations in climate and site conditions. They’re designed to protect the siding during transport and storage but may not be optimal for long-term performance once installed on your home.
Another issue is that factory finishes often use different paint systems than what’s recommended for field application. This can lead to compatibility issues when you try to touch up or repaint.
Assessing Existing Siding Before Repainting
Start with a visual survey to identify obvious damage like cracking, delamination, or soft spots. Use a simple touch test on flat areas to gauge coating integrity. Look closely at edges, trim lines, and transitions where moisture can intrude.
Follow a basic test checklist to decide if you need full replacement, spot repair, or a repaint. Refer to the siding manufacturer instructions for repair limits and surface prep requirements. If you’re unsure, verify with product data sheets or local building guidance.
Visual inspection checklist and red flags
Before you start painting, use this checklist to document the condition of your fiber-cement siding.
- Edge flaking: Check all edges for any signs of peeling or flaking. This is often a sign of poor adhesion.
- Rust stains: Look for rust stains, especially on the bottom rows. These could indicate moisture issues behind the siding.
- Blistering: Check for any blisters or bubbles in the paint. This indicates that moisture is trapped under the paint.
- Cracking: Inspect for cracks, especially around windows and doors. These can let water in and cause further damage.
- Chalking: Rub your hand over the siding to check for chalky residue. This indicates that the paint is breaking down.
- Delamination: Tap on the siding with a hammer or screwdriver handle. If it sounds hollow, there might be delamination (separation of the paint from the siding).
- Mold or mildew: Check for any green or black spots, which could indicate mold or mildew growth.
- Warping: Look for any warped or bowed areas. This could be a sign of moisture damage.
Quick rule: If you find more than a few issues, it might be time to consider full replacement rather than just repainting.
Quick adhesion and moisture checks
Before you proceed with painting, perform these quick checks to ensure your siding is ready for a new coat.
Adhesion check: Gently tap on the siding with a hammer or screwdriver handle. If it sounds solid and doesn’t feel hollow, the paint should be well-adhered. If it sounds hollow or feels spongy, there might be delamination.
Moisture check: Use a moisture meter to test for excess moisture in the siding. If you don’t have one, look for signs like warping, swelling, or discoloration. Proceed cautiously if you find any of these signs.
Pro tip: If your siding feels cold to the touch on a warm day, it might be retaining moisture. This could indicate a problem that needs further investigation before painting.
Primer Selection: Types and What to Prioritize
Choose primers that emphasize alkali resistance and strong bonding to fiber-cement. Look for compatibility with the intended topcoat to avoid peeling or staining. Consider primers that address porosity and provide a stable base for color shifts.
Assess the topcoat compatibility and follow label notes to ensure good adhesion and weather resistance. If you can’t find clear guidance, check the manufacturer instructions or product data sheet. When in doubt, consult a local pro or supplier for recommendations.
Primer chemistry: acrylic, bonding, and masonry/alkali-resistant primers
When choosing a primer for your fiber-cement siding, understanding the different types is crucial. Here’s what you need to know:
Acrylic Primers are versatile and suitable for most fiber-cement applications. They provide good adhesion and can be used on factory-finished surfaces. However, they may not offer the best protection against alkali damage from fresh cement.
Bonding Primers are designed to enhance adhesion between the primer and the topcoat. They’re ideal for new fiber-cement boards or cut edges where the factory finish has been removed.
Masonry/Alkali-Resistant Primers are formulated to resist damage from alkaline substances in fresh cement. Use these when painting new or recently installed fiber-cement siding, or when repainting areas with exposed edges.
Primer compatibility and label checks
Before applying any primer, ensure it’s compatible with both your fiber-cement siding and the topcoat you plan to use. Here’s how:
First, check the manufacturer’s recommendations for your specific fiber-cement product and the topcoat you’ve chosen. They often provide guidance on suitable primers.
Next, inspect the primer label. It should clearly state that it’s compatible with fiber-cement substrates and the type of topcoat you’re using (e.g., acrylic, latex). If it doesn’t, consider another option.
Also, look for labels indicating alkali resistance, especially if you’re painting new or recently installed siding. This ensures your primer can withstand any alkaline substances in fresh cement.
Best Practices for Treating Cut Edges and Exposed Raw Fiber-Cement
Back-priming exposed edges helps seal the board and reduces moisture ingress. Apply primer to raw edges before full assembly where possible. Ensure edges are dry and free of loose particles before coating.
Seal and protect cut ends with the appropriate edge sealant or primer specified by the product instructions. Verify cycle times and recoat windows on the label to avoid trapping moisture. If you’re unsure, consult the manufacturer data sheet or local guidance for edge treatment requirements.
Back-priming and edge-sealing techniques
Before installing, back-prime cut boards to seal raw edges. This stops moisture from wicking in, causing paint failure later.
How: Apply primer to the backside of each board, focusing on edges. Use a brush or roller, ensuring full coverage. Don’t just run a single stroke; paint the entire width and length of the edge.
Do this immediately after cutting to prevent moisture absorption. Let it dry before installation.
Sealants, flashing, and fastener protection
Protect joints and fasteners with the right sealants and flashings. This prevents water intrusion and keeps your paint job looking good.
Joints: Use a high-quality, flexible, paintable caulk. Apply it generously along horizontal and vertical seams. Smooth it out with your finger or a damp rag for a clean finish.
Fasteners: Flashing tape or self-adhesive flashing should be used around nails and screws. This stops water from getting behind the siding, causing rot and paint failure. Apply it before installing the siding, following manufacturer’s instructions.
Topcoat Selection: Breathable Versus Impervious Finishes and Sheen Choices
Evaluate the tradeoffs between breathable acrylics and more impermeable finishes. Breathability helps moisture escape, while impervious coatings can offer weather resistance. Consider the climate and sun exposure when selecting the sheen level.
Check how each topcoat interacts with your primer and fiber-cement. Verify performance claims on product labels or data sheets and align with local weather considerations. If you’re unsure, ask for guidance from your supplier or refer to manufacturer instructions.
When to choose acrylic latex vs. elastomeric or specialty coatings
Acrylic latex, elastomeric, and specialty coatings each have their strengths. Here’s when to pick one over the others.
Acrylic Latex: Go for these if you want a breathable finish that’s easy to apply and clean up. They’re great for new siding with no cracks or damage. They don’t bridge gaps like elastomeric, though.
Elastomeric: Choose these when your siding has hairline cracks or movement. They stretch and flex with the substrate, hiding minor imperfections. But they’re less breathable than acrylics.
Specialty Coatings: Consider these if you’ve got unique issues like mold, algae, or extreme weathering. They often require professional application but offer superior protection.
Sheen selection and long-term maintenance implications
The sheen you choose affects how your siding looks and how much upkeep it needs.
Flat or Matte: These hide imperfections well but show dirt easily. They’re great for new, perfect siding. Expect more frequent washing to keep them looking good.
Satin or Eggshell: These offer a balance between hide and cleanability. They’re a good choice for most situations, needing less frequent cleaning than flat sheens but still hiding well.
Gloss: Glossy finishes are durable and easy to clean but show every imperfection. They’re best for siding in great shape that needs to reflect light, like on trim or accent areas. Repairs will be more visible.
Surface Preparation, Application Techniques, and Quality Control
Establish a clean, dry work surface and remove loose material before coating. Use compatible abrasives to create a suitable profile for adhesion. Repair any damaged areas as needed before primer and paint.
Implement a consistent application technique and monitor for uniform coverage. Use the product label or data sheet to confirm spray, brush, or roller methods and recoat intervals. If you’re uncertain, check local rules or manufacturer recommendations for quality control steps.
Cleaning, sanding, and minor repairs before priming
Start by removing any loose paint or dirt. Use a soft-bristle brush and mild detergent. Rinse thoroughly with clean water.
Sanding: Lightly scuff the surface to improve primer adhesion. 120-grit sandpaper works well. Don’t over-sand; you’re not trying to remove material, just create a ‘bite’ for the primer.
Repairs: For chips and gouges, use a fiber-cement patching compound. Apply with a putty knife, let it dry, then sand smooth. Prime patched areas separately before painting.
Application methods, environmental considerations, and inspection
Use this checklist to ensure a successful paint job. Start before you begin painting.
- Surface temperature: Check it’s above 50°F (10°C). Primer won’t bond well if it’s too cold.
- Humidity: Keep it below 85%. High humidity can cause poor adhesion and mildew growth.
- Wind: Minimize it. Wind dries paint too quickly, causing poor coverage and adhesion.
- Brush/roller/spray: Choose based on surface size and complexity. Brush for small areas, roller for large flat surfaces, spray for complex shapes or large areas.
- Primer application: Apply evenly, following the manufacturer’s instructions. Don’t over-apply; it won’t improve adhesion and may cause drips.
- Dry time: Allow primer to dry as instructed before painting. Rushing can lead to poor topcoat adhesion.
- Topcoat application: Apply evenly, following the manufacturer’s instructions. Don’t over-apply; it won’t improve coverage and may cause drips or runs.
- Dry time between coats: Allow each coat to dry as instructed before applying the next. Rushing can lead to poor adhesion and reduced durability.
Quick rule: Always follow manufacturer’s instructions for best results.
Tools, Materials Checklist, Standards, and Warranties to Verify
Assemble the essential tools and compatible products ahead of time. Review labels for surface prep, application instructions, and cure times. Look for alignment with your siding’s brand and warranty terms.
Be aware of warranty pitfalls and any exclusions that could affect coverage. Compare manufacturer instructions, product data sheets, and local requirements to ensure compliance. When in doubt, verify details with the supplier or the building code authority.
Tools and PPE checklist for a safe, efficient job
Before you start painting your fiber-cement siding, make sure you have all the necessary tools and safety gear. Here’s a quick checklist to ensure you’re prepared.
- Ladders or scaffolding: You’ll need stable access to reach all areas of the siding. Ensure they’re in good condition and follow manufacturer guidelines for safe use.
- Paint sprayer or roller: Choose a paint applicator that suits your preference and the size of the job. Sprayers offer faster coverage, while rollers provide better control.
- Paint brushes: Have various sizes on hand for cutting in edges and tackling small areas.
- Drop cloths or tarps: Protect your landscaping and walkways from overspray and drips.
- Safety glasses: Protect your eyes from paint splatter and debris.
- Gloves: Wear gloves to protect your hands from chemicals and provide a better grip on tools.
- Ear protection: Use earplugs or earmuffs when using power tools like sprayers.
- Respirator: Wear a respirator when sanding or spraying to protect against harmful particles and fumes.
Quick rule: Always prioritize safety first. Double-check your gear before starting each day’s work.
Material specs, standards, and warranty notes
To ensure you’re using the right products for your fiber-cement siding, follow this checklist to verify manufacturer specifications, industry standards, and warranty conditions.
- Product approvals: Check if the paint is approved by the fiber-cement manufacturer. Using unapproved paints can void warranties.
- Paint type: Ensure the paint is suitable for exterior use on fiber-cement siding. Acrylic latex or elastomeric paints are typically recommended.
- Color and sheen: Choose a color and sheen that matches your desired aesthetic and provides adequate protection against UV rays and moisture.
- Primer compatibility: Ensure the primer is compatible with both the fiber-cement siding and the chosen topcoat. Always follow manufacturer guidelines for best results.
- Industry standards: Look up industry standards, such as those set by ASTM International or the National Paint & Coatings Association, to ensure you’re using quality products.
- Warranty conditions: Understand if your warranty covers factory-applied finishes or field-applied coatings. Some warranties only cover one or the other.
- Paint and primer coverage: Calculate how much paint and primer you’ll need based on square footage and recommended coverage rates.
Quick rule: Always read and follow manufacturer instructions to ensure your project’s success and longevity.
Conclusion
First, protect the siding and your investment by following a practical, test-first approach that considers the fiber-cement’s quirks, the right primer, and a compatible topcoat. When you plan, you prevent failures, save time, and avoid costly redo work.
Proceed with a simple check sequence: confirm the substrate is clean and dry, choose a primer that matches the existing property and edges, treat cut edges and exposed fiber-cement per guidance, select a breathable or impervious topcoat with the right sheen, and finally sample and verify surface preparation and finish on a small patch before committing to the full job. Move from inspection to prep, then priming, edge treatment, coating, and final quality check in that order.
Common mistakes to avoid include skipping a proper edge treatment or using an incompatible primer and topcoat, which leads to peeling or uneven color. Always test in a small area first, wear eye and skin protection, and work in dry, moderate conditions. Don’t rush cure times or overthink overcoats that aren’t designed for fiber-cement; choose a finish that breathes and respects the substrate’s needs.
If the siding is severely weathered, responses to paint are inconsistent after prior coatings, or you’re unsure about edge treatment or primer compatibility, it makes sense to call a qualified pro. Stay disciplined, follow these next steps, and you’ll protect the look and longevity of the siding while staying safe and within your budget—you can do this, one clear step at a time.
FAQ
Should I prime cut edges differently from the field areas on fiber-cement siding?
Yes. Cut edges absorb moisture more than the face, so use a primer suited for exposed edges and follow the manufacturer’s directions. Check the label for edge-priming recommendations and apply evenly to all freshly cut surfaces.
What should I look for in a primer to use on fiber-cement siding?
Look for primers that specifically say they’re compatible with fiber-cement. Avoid products that aren’t listed for this substrate. If unsure, check the product datasheet or ask the manufacturer where you’re buying it.
How do I handle moisture concerns before painting and after rain?
Make sure the siding is dry to the touch before priming or painting. If you’ve had rain or high humidity, give it time to dry and recheck the surface. Don’t paint on damp boards or you’ll trap moisture under the finish.
How long should I expect the finish to hold up, and when should I recoat?
We don’t give exact timelines here. Check the coating’s label for guidance on recoat intervals and conditions. If you see peeling, bubbling, or faded color, reassess readiness and follow the manufacturer instructions for recoating or maintenance.