
Introduction
Self-consolidating mortar is a flowable mix that fills small voids and cracks without the need for vibration. For DIY repairs, it behaves like a high-flow grout that can level and settle in tight spaces, mimicking SCC behavior without renting a pump. Always check the product label and manufacturer instructions to confirm compatibility with your project and local rules.
What you need typically includes a cement-based mix, clean water, and any additives the maker recommends. Mix according to the label to reach a smooth, flowable consistency, adding materials gradually to avoid segregation. Do a quick test on a scrap area, then place the mix into the repair and work with it as directed by the product instructions.
Key takeaways
- Definition of SCM: flowable, pre-mixed mortar that fills voids without vibration.
- Benefits for small repairs: easier place-ability, reduced segregation, less hand tooling.
- Ingredients and DIY materials: cementitious mix, aggregates, water, admixtures, mixing tools.
- Step-by-step mixing: measure, combine dry, add liquids gradually, achieve workable consistency.
- Safety: wear PPE, avoid skin contact, read labels, follow local handling rules.
- Planning and costs: compare SCM to traditional repairs, note access and omission pitfalls.
- Request Access (2/2 competitors) to view example SCM formulations and guidance.
Table of Contents
- Introduction
- Key takeaways
- What Is Self-Consolidating Mortar (SCM)?
- Advantages of SCM for Small Repairs
- Tools and Materials Checklist
- Material Specs and Mix Design Guidance
- Step-by-Step Mixing and Application Techniques (no Pump)
- Troubleshooting Common Issues with Manual SCM
- Safety and Handling Considerations
- Planning, Cost Comparison, and Common Mistakes to Avoid
- Conclusion
- FAQ
What Is Self-Consolidating Mortar (SCM)?
SCM is a mortar designed to flow readily and level itself without the need for external vibration. It mirrors the behavior of self-consolidating concrete, but at a mortar scale suitable for small repairs. This enables patching with a smooth surface and minimal risk of voids.
What sets SCM apart from traditional mortars are its additives and viscosity modifiers that balance flow, stability, and setting. These features support stable, pump-free placement for cracks, spalls, and veneer patches where finish matters. Practical use cases include patches around fixtures and delicate edges where a good surface finish is desired.
Definition and key characteristics
Self-Consolidating Mortar (SCM) is a specialized mix designed to mimic the behavior of Self-Consolidating Concrete (SCC) at the mortar scale. It’s high deformability allows it to flow freely around reinforcement and obstructions, ensuring full coverage without external vibration.
Key traits include:
Passing ability: SCM can navigate complex shapes and narrow spaces with ease, making it ideal for repairs in hard-to-reach areas.
Resistance to segregation: Unlike traditional mortars, SCM resists the separation of its components during transport and placement, ensuring a consistent mix throughout the repair.
How SCM differs from SCC and ordinary mortar
SCM is not just a scaled-down version of SCC. It’s designed specifically for small repairs and patching, with unique characteristics that set it apart:
Aggregate size: SCM uses smaller aggregates than SCC to facilitate better flow in narrow spaces and around complex shapes.
Rheology emphasis: Unlike ordinary mortars, SCM focuses on achieving high flowability without sacrificing stability. This is achieved through the use of viscosity-modifying agents and careful balancing of cementitious materials.
Application focus: While SCC is designed for large-scale, structural applications, SCM targets small repairs where high flow, good surface finish, and easy placement are crucial. It’s perfect for fixing cracks, spalls, delaminated patches, veneer joints, and patching around fixtures or edges.
Advantages of SCM for Small Repairs
For small repairs, SCM offers faster placement, easier control of compaction, and a smoother surface finish compared with conventional mortars. It helps you work cleanly in confined spaces without heavy vibration equipment. The result is a more consistent patch with fewer rework steps.
SCM reduces voids and cold joints by filling tight corners without vibration. This improves feathered edges for overlays and patch repairs while cutting labor time. Consider how the finish and workflow change when you can place and shape in one pass.
Performance benefits (flow, consolidation, finish)
SCM’s improved flowability and passing ability make it a dream to work with on small repairs. It flows like water into tight corners and intricate geometries, filling voids and reducing cold joints.
With SCM, you can forget about extensive vibrating. Its self-compacting behavior means it consolidates evenly and densely under its own weight, producing a smooth finish without the need for extra effort.
Tip: This doesn’t mean no vibration at all. A quick pass with a poker vibrator can help ensure there are no air pockets left behind.
Practical jobsite benefits (speed, labor, aesthetics)
SCM saves you time and effort. Its ease of placement means fewer steps and less formwork or rework. In confined areas, one person can handle the job with minimal setup.
Even DIYers can achieve professional-looking results with SCM. It contributes to a uniform texture and reduced blemishes, making it ideal for overlays or patch repairs where aesthetics matter.
Pro tip: For thin repairs, use SCM’s feathered edges to blend the repair into the existing surface seamlessly.
Tools and Materials Checklist
List must-have tools for manual SCM mixing and application, plus pump-avoidance options such as small-batch grinders, plastic containment tubs, and mixing paddles. Plan for tight spaces with bucket-to-form workflows and compact hand tools.
Assemble a concise materials kit including a cementitious mix, SCM powder or pre-blended mortar, water, admixtures if needed, bonding agents, and suitable aggregates if specified. Don’t forget formwork, release agents, PPE, and a curing plan for DIY patches.
Essential materials (cement, sand, admixtures)
Use this checklist before you start mixing to ensure you have the right ingredients for a strong, durable concrete. Check everything on this list before you begin.
- Cement: Verify it’s Portland cement (Type I or Type II). Check the bag label for the type and expiration date. Expired cement can weaken your concrete.
- Fine aggregate (sand): Ensure it’s clean, angular sand with no visible organic matter or clay. Test by washing a sample; if it rinses clear, it’s good to go.
- Coarse aggregate (gravel): Confirm it’s clean and within size range (usually 3/8″ to 1-1/2″). Check for any oversized or undersized pieces that could weaken your concrete.
- Water: Use clean, drinkable water. Avoid using salty, brackish, or polluted water as it can corrode rebar and reduce strength.
- High-range water reducer (HRWR) or viscosity-modifying admixture (VMA): Check the product label to ensure it’s compatible with your cement type. Follow manufacturer instructions for dosage rates.
- Air-entraining agent: If required, check the product label and follow dosage instructions. This helps protect concrete from freeze-thaw damage.
- Fiber reinforcement (optional): If using, verify they’re compatible with your mix design. Check for any damaged or short fibers that could reduce effectiveness.
- Admixtures (color, accelerators, etc.): If using, check the product labels and follow manufacturer instructions for dosage rates and compatibility with other admixtures.
Quick rule: Always mix your concrete in the right order: water first, then cement, followed by aggregates. This helps ensure a consistent, strong mix.
Tools for manual mixing and placement (no pump)
Use this checklist when you’re mixing and placing concrete manually, without a pump. It’s ideal for small jobs like walkways, patios, or steps.
- Concrete Mixer: Check it’s in good working condition with no leaks or damaged parts. Ensure the motor starts easily and runs smoothly.
- Mixing Vessel (Drum): Inspect for cracks, rust, or damage. It should be clean and free of debris before use.
- Wheelbarrow: Check tires are inflated and the wheel spins freely. Ensure the tub is in good condition with no cracks or leaks.
- Shovel: Inspect for a strong, secure handle and no damage to the blade. It should be clean before use.
- Hoe (Float): Check for a straight, secure handle and no damage to the float head. Ensure it’s clean before use.
- Trowel: Inspect for a strong, secure handle and no damage or dull edges on the blade. It should be clean before use.
- Edger (Jointer): Check for a straight, secure handle and no damage to the edging tool. Ensure it’s clean before use.
- Vibrating Rod or Bull Float: Test the vibration function to ensure it works correctly. Check for any damage or leaks in the power cord.
Quick rule: Always inspect your tools before starting work. Damaged tools can cause poor concrete quality and rework, costing you time and money.
Material Specs and Mix Design Guidance
Check cementitious product datasheets for cement type, SCMs, admixtures, water demand, set time, and workability windows. These factors influence SCC-like behavior when you are not pumping.
Control the main variables in mix design for mortar: paste binder content, water-to-binder ratio, aggregate grading for mortars, flow modifiers, and the timing of superplasticizer. Use starter tests to verify pump-free performance before full-scale repair.
Proportions and admixture types to mimic SCC behavior
To achieve self-consolidating mortar (SCM) behavior without a pump, you’ll need the right mix proportions and admixtures. Here’s what matters:
Cement and sand ratio: Start with a lower aggregate size for better flow. Aim for around 2-3 parts fine aggregate to 1 part cementitious materials.
Admixture types:
- Superplasticizers: These reduce water demand and increase flow. Use polycarboxylates (PCE) or naphthalene-based (NSF) for mortars.
- Viscosity-modifying admixtures (VMAs): VMAs thicken the paste, preventing segregation and improving stability. They’re crucial for SCC-like behavior without pumping.
- Stabilizers: These help maintain flow over time. Consider using air-entraining agents or retarding admixtures to control setting time.
Sample mix guidance and safe parameter ranges
When designing your SCM mix, stick to these general parameters for a safe starting point:
Water-to-binder ratio (w/b): Aim for 0.45-0.55 to ensure good flow without segregation.
Admixture dosages:
- Superplasticizers: Start with 1-2% by weight of cementitious materials.
- VMAs: Begin with 0.3-0.5% by weight of cementitious materials.
- Stabilizers: Use as per the manufacturer’s recommendations, usually around 0.1-0.3% by weight of cementitious materials.
Always verify: These parameters with your chosen products’ datasheets and perform trial batches to fine-tune your mix.
Request Access
To access the necessary data for designing your SCM mix, you’ll need to obtain technical datasheets and relevant standards:
Product datasheets: Visit manufacturers’ websites or contact their tech support. Some may require registration or API access for bulk downloads.
Standards and guidelines:
- ASTM International: ASTM.org – Look for standards related to self-consolidating concrete (SCC) and mortars.
- EN Standards: EN Standard – Search for relevant SCC and mortar standards under the ‘Construction materials’ category.
Step-by-Step Mixing and Application Techniques (no Pump)
Develop a repeatable workflow from planning to finishing that suits manual mixing and compaction. Define site conditions, tool selection, and batching rhythm to stay organized. Use a simple checklist to stay on track.
Monitor material quality and proportions, including SCM ratio targets, cementitious content, and water control. Follow a clear mixing sequence and watch for lumping or overheating as you progress toward a stable, self-consolidating mix.
Step-by-Step Process
Follow these practical steps to successfully mix and apply self-consolidating mortar (SCM) for small repairs without a pump.
- Preparation: Gather tools, materials, and safety gear. Ensure the site is clean and dry.
- Mixing: Begin with dry ingredients, then add water gradually while mixing to achieve desired consistency.
- Quality Check: Perform visual checks for lump-free, consistent mix. Use a slump-like test to ensure flowability.
- Placement: Pour SCM into the repair area, using controlled timing and technique to avoid segregation.
- Consolidation & Finishing: Gently consolidate with tapping or rodding methods, then smooth and finish the surface as desired.
- Cleanup/Final Checks: Clean tools, assess repair quality, and ensure proper curing conditions before leaving the site.
Surface preparation and containment/formwork
Proper surface preparation is crucial for successful SCM repairs. Clean and roughen the area to enhance adhesion.
Use a bonding agent if required, following manufacturer’s instructions. Prepare edges carefully to prevent leakage or cold joints.
For larger repairs, create temporary containment using formwork or other methods to control fill and maintain desired dimensions.
Manual mixing methods and consistency checks
Mix SCM in small batches for better control. Begin with dry ingredients, then add water gradually while mixing to prevent segregation.
Use a small mixer or hand tools for manual mixing. Ensure consistent mixing time (around 2-5 minutes) and check for lumps regularly.
Perform visual checks on the mixed SCM: it should flow easily yet hold its shape briefly. Conduct small-scale trial pours to confirm consistency and flowability before proceeding with larger repairs.
Placement, consolidation, and finishing techniques
Pour SCM into the repair area using a controlled, steady motion to avoid segregation. Work from one side of the repair to the other, ensuring even coverage.
Consolidate gently using tapping or rodding methods. Be careful not to over-consolidate or introduce air pockets. For larger repairs, use small vibrators if available.
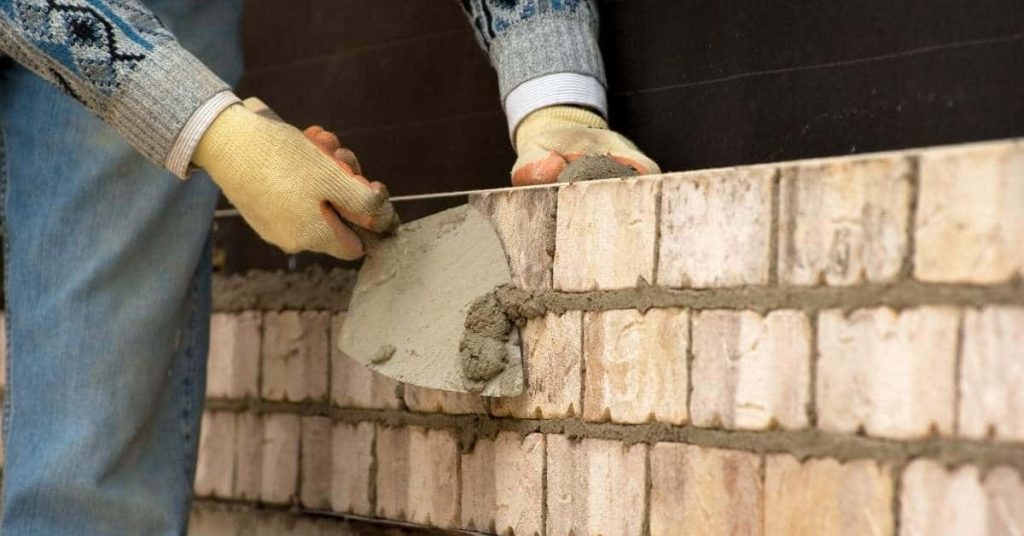
Finish the surface by smoothing it with a trowel or float. Allow some bleed water to escape naturally, then wipe off excess material and touch up any rough edges to avoid cold joints.
Troubleshooting Common Issues with Manual SCM
Common issues include excessive stiffening, poor flow, segregation, and surface dusting. Identify these early and adjust as needed to keep placement smooth. Have a plan for quick remedies on site.
Use simple diagnostic checks such as flow tests and surface observation to guide corrections. Tweak water cautiously and consider compatible admixtures to restore flow without compromising finish or early strength.
Segregation, bleeding, and settlement problems
These issues often stem from excess water, poor aggregate grading, or inadequate viscosity-modifying admixtures (VMAs). Too much water causes segregation – aggregates settling out. Bleeding happens when water rises to the surface. Settlement occurs as heavier particles sink.
Fixes:
Adjust your mix design: reduce water content, improve aggregate grading, or add VMAs. If you’re already at minimum water, consider re-mixing to ensure proper distribution of materials.
Workability loss and cold/heat effects
Temperature and time can wreak havoc on your mix’s workability. Cold weather slows down hydration, while heat speeds it up.
Cold Weather:
Use retarders to slow setting time. Stage batches – mix small amounts at a time to keep materials fresh. Adjust admixture dosing for lower temperatures.
Hot Weather:
Keep materials cool, use shading, and consider adding more water (but beware of segregation). Again, adjust admixture dosing for higher temps.
Safety and Handling Considerations
Wear appropriate PPE, maintain good ventilation, and keep the workspace organized to minimize exposure. Use eye protection, gloves, and respiratory protection when recommended by the product label. Plan for a clean mixing area with non-slip floors.
Follow SDS and labeling for safe handling of cement and admixtures. Set up an emergency rinse station and know basic first aid steps for exposure. Store materials separately and keep surfaces clean to prevent contamination.
PPE and safe handling of cement and admixtures
Protect yourself first. Eye protection is a must – goggles, not just glasses. Use chemical-resistant gloves to keep your hands safe. Long sleeves protect your skin from splashes.
Respirators are crucial when working with cement dust or silica-containing admixtures. Ensure good ventilation in your workspace. Keep it clean and organized to minimize exposure.
Always read Material Safety Data Sheets (MSDS) or Technical Data Sheets (TDS) before handling chemicals. Follow the instructions on SDS/WARNING labels for safe mixing and storage.
Environmental and disposal considerations
Contain wash water to prevent it from entering waterways or sewers. Use containment barriers around your work area if necessary.
Properly dispose of leftover mortar according to local regulations. It’s often considered hazardous waste due to the cement content, so check with your local waste management department.
Never pour wash water or leftover mortar down drains. This can cause blockages and environmental damage.
Planning, Cost Comparison, and Common Mistakes to Avoid
Outline the repair scope, surface prep steps, and expected workability to guide planning. Create a realistic timeline based on the patch size and site conditions. Use a simple checklist to track progress.
Compare costs by listing labor, equipment needs, and potential downtime for manual work versus pumping. Identify common mistakes such as over-watering or poor consolidation, and note practical ways to avoid them through preparation and testing.
Project planning checklist and visual checkpoints
Before you start, use this checklist to ensure a smooth repair job. It’s best to do this when the repair area is clear and accessible.
- Estimate quantity: Measure the repair area accurately to calculate how much SCM you’ll need.
- Trial mix: Make a small batch to test workability, set time, and ensure it matches your target.
- Gather tools: Collect all necessary tools – mixers, paddles, buckets, trowels – before you start.
- Stage materials: Keep cement, aggregates, water, and admixtures close to the repair area for easy access.
- Check surface prep: Ensure the substrate is clean, dry, and free of loose material. Patch any cracks or holes.
- Set up containment: If needed, install formwork or barriers to contain the SCM during placement.
- Confirm fresh-state workability: Perform a slump/flow test on your trial mix to ensure it meets your target. If not, adjust water content.
- Establish repair timeline: Plan when you’ll start and finish each phase of the repair to stay on schedule.
Quick rule: Skipping these steps can lead to poor mix quality, delays, or wasted materials.
Cost analysis: manual mixing vs renting a pump
When deciding between manual mixing and using a pump, consider these cost factors. Manual methods can be more economical for small repairs.
Renting a pump incurs equipment rental fees, fuel costs, and potentially labor if you need help operating it. Plus, there’s the risk of downtime if the pump malfunctions.
Manual mixing saves on rental and fuel costs but may increase labor time due to mixing and placement. It also requires more space for containment and formwork.
Tip: Run your own cost estimates based on local rates, repair size, and available equipment to find the most economical option.
Common mistakes and how to avoid them
Even with SCM’s self-consolidating nature, mistakes can happen. Here are some frequent errors and ways to prevent them.
- Overwatering: Too much water weakens the mix and increases segregation risk. Always follow your trial mix’s water content.
- Insufficient trials: Skipping multiple trial mixes can lead to inconsistent results. Make at least three trial batches to ensure consistency.
- Skipping admixture checks: Not checking admixture dosages can result in poor workability or premature set. Always double-check your admixture amounts.
- Premature set: If the mix sets too quickly, it might be due to high ambient temperatures or improper storage of materials. Keep materials cool and use accelerators sparingly.
By avoiding these common pitfalls, you’ll ensure a successful repair with minimal waste and rework.
Conclusion
Paragraph 1: Self-consolidating mortar gives you a reliable, durable repair without a pump, so you get solid contact and a clean finish with less effort. Stick to proper mixing, careful placement, and steady curing to keep safety and appearance at the top.
Paragraph 2: To right-size the work, keep this practical flow in mind: verify mix design and SCM compatibility, measure and mix to spec, test a small patch first, work in manageable portions, place and consolidate by hand with controlled pressure, avoid overwork, wipe joints clean, and cover for curing and protection until set.
Paragraph 3: Common mistakes to avoid are clear: don’t rush the mix or use the wrong ratios, don’t add water after you start, and don’t overwork or underfill the repair. Always wear eye protection and gloves, test a tiny area first, and keep the work area clean and dry to prevent contaminating the mix or causing damage.
Paragraph 4: If the repair involves structural concerns, large cracks, or moisture issues, call a professional rather than pushing ahead alone. Stay safe, stay patient, and commit to a small, controlled repair today so you don’t pay later for a sloppy fix.
FAQ
What exactly is self-consolidating mortar (SCM)?
SCM is a grout-like mix that flows into tight spots without vibration. It holds its shape after placement and fills voids on its own. For DIY projects, you’re aiming for a mix that stays workable long enough to place, then stiffens as it sets.
Why would I use SCM for small repairs?
SCM reduces the need for tremors or banging to seat material. It can reach corners, voids, and narrow joints more reliably than traditional mixes. This saves time and helps you get a smooth, even surface with less effort.
What ingredients and basic components do I need for DIY SCM?
You’ll need a cementitious binder, a fine aggregate, and a plasticizer or superplasticizer if your mix design calls for it. Additives or colorants may be used depending on the job. Always check the product label or manufacturer instructions for compatibility and handling.
What’s the step-by-step mixing process for SCM without a pump?
Mix dry ingredients first until even, then add water gradually while stirring to a smooth, flowable consistency. Stop short of runny slop; you want a consistency that can be scooped and will flow into gaps on its own. Work in small batches to keep the mix workable and avoid premature stiffening.
How do I apply SCM without a pump and ensure good results?
Place the mix at the repair area and use a trowel or rubber float to guide and consolidate it into joints and voids. Gently strike and smooth the surface to avoid pulling the mix away from corners. Work quickly but without forcing material; aim for full contact without air pockets.