
Introduction
Polished plaster on kitchen backsplashes is a smooth, glossy finish applied to a prepared wall to create a seamless, durable surface. It’s a hands‑on finish that requires proper substrate prep, mixing, and controlled troweling. If you’re unsure about the prep or finish, check the product label and follow manufacturer directions for compatible substrates and curing hints.
Grease tests, sealer choices, and maintenance reality all affect look and longevity. Test a small area for stain resistance, then pick a penetrating or film-sealing option compatible with your plaster and kitchen use. Keep expectations realistic, and plan for regular cleaning and occasional touch‑ups as the finish ages.
Key takeaways
- Assess kitchen heat zones; polished plaster may require heat-safe sealers and ventilation.
- Test grease interaction pre-installation; use a small sample patch and observe.
- Choose sealer based on kitchen oils; check recoat intervals from manufacturer.
- Maintenance reality: routine cleaning with recommended products; avoid harsh abrasives.
- Repair, patch, or reseal promptly after staining to minimize damage.
- Safety and codes: request product documentation, installation guides, and local requirements.
Table of Contents
- Introduction
- Key takeaways
- Quick Overview: Is Polished Plaster a Good Choice for Kitchen Backsplashes?
- How Grease, Oils, and Cooking Byproducts Actually Interact with Polished Plaster
- Practical Grease-Testing Protocols You Can Run Before Installation
- Sealer and Topcoat Options: Types, Pros/Cons, and Kitchen Suitability
- Application Best Practices and Visual Checkpoints for a Kitchen-Ready Finish
- Maintenance Reality: Routine Cleaning, Stain Removal, and the Reseal Decision
- Repair, Patching, and Aging—What Happens over Time and How to Fix It
- Safety, Codes, and Product Documentation to Request Before You Buy or Install
- Conclusion
- FAQ
Quick Overview: Is Polished Plaster a Good Choice for Kitchen Backsplashes?
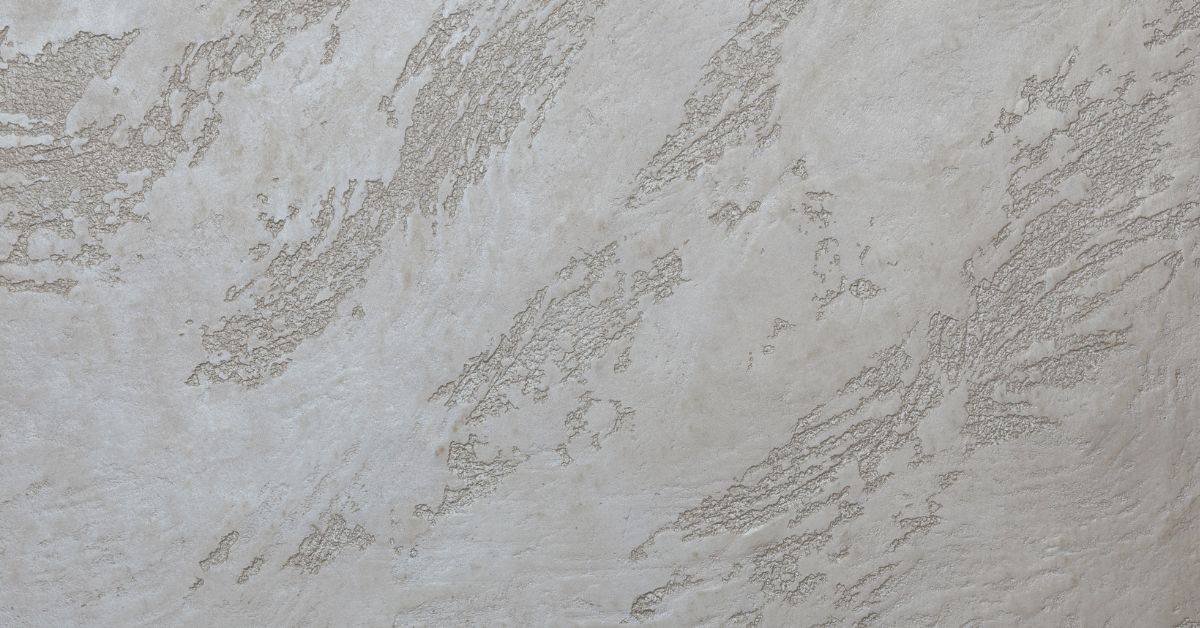
Polished plaster refers to lime- or gypsum-based decorative plasters finished to a smooth, glassy surface. It includes polished Venetian-style finishes that mimic marble through a refined burnish. For backsplashes, weigh aesthetics, durability, and breathability against tile or metal options before deciding.
Expectations should be realistic: the look is distinctive, but performance varies with substrate, cleaning practices, and maintenance. The finish can be less forgiving than ceramic tile or stainless steel in high-splash areas. Always check product label and manufacturer guidance for kitchen use and installation details.
Where it performs well and where it doesn’t
Polished plaster can be a great choice for kitchen backsplashes, but it’s not perfect everywhere. Let’s break down where it shines and where you might want to reconsider.
Behind the sink: This is typically the safest spot for polished plaster. It’s less prone to heat and grease compared to other areas. The smooth surface makes cleaning easy, too.
Stove splash: Here’s where things get a bit tricky. Polished plaster can handle heat well, but it’s not designed for direct high-heat exposure. Keep it at least 18 inches away from the stove top to be safe.
High-heat/hood areas: Avoid these zones altogether. The intense heat and grease can damage the finish over time. Stick with tile or stainless steel here.
Visual and style benefits homeowners care about
Polished plaster brings a unique charm to kitchens that tiles can’t match. Here’s what you need to know.
The seamless look is one of the biggest draws. Unlike tiles, there are no grout lines to collect dirt or discolor over time. It gives your kitchen a sleek, modern feel.
Customization is another plus. You can choose from a range of colors and textures to match your decor. From smooth and subtle to bold and textured, the options are endless.
But there are trade-offs. Polished plaster requires more maintenance than tiles. It needs sealing every few years, and it’s not as easy to clean as stainless steel. And while it’s generally less expensive than high-end tile, it might cost more than basic ceramic or porcelain.
How Grease, Oils, and Cooking Byproducts Actually Interact with Polished Plaster
Oil-based soils tend to sit on a surface, while lime- and gypsum-based plasters are more porous and can absorb beneath a thin film. This affects how stains develop and how easily cleaning can remove them. Heat and cooking aerosols can influence adhesion and the surface feel over time.
Because plaster is breathable, it responds differently to moisture than nonporous finishes. Check the plaster system’s data sheet and test a small area to understand how grease behaves with your chosen finish. Always verify with the manufacturer instructions for kitchen-specific guidance.
Surface porosity and capillary action explained
Polished plaster is a breathable material, meaning it has microscopic pores. These pores can absorb liquids, including grease and oils.
Capillary action is the process by which these liquids are drawn into the pores due to surface tension. The smaller the pore size, the more effectively this happens.
The key here is that polished plaster isn’t a solid, non-porous surface like glass or stainless steel. It’s more like a fine-textured stone, and it behaves accordingly when it comes to absorbing liquids.
Impact of cooking method and stove location
Different cooking methods produce different amounts and types of grease. Frying, for instance, produces a lot of liquid fat that can easily spread and stick.
Stove location also matters. If your stove is under a hood or near an open window, grease can be dispersed more widely. But if it’s in a corner or against a wall, grease can build up quickly on nearby surfaces.
High-risk areas include the backsplash directly behind and to the sides of the stove, especially if you do a lot of frying or have an enclosed cooking space.
Practical Grease-Testing Protocols You Can Run Before Installation
Set up simple tests that mimic kitchen conditions, using a few common cooking oils and sauces. Do visual checks, blot tests, and controlled oil exposures on sample boards. Document the results with notes and date each test for comparison.
Keep a log of how each finish reacts to heat, steam, and repeated cleaning. Photograph each stage and compare over time to chosen sealers or topcoats. Reference product data sheets for recommended test methods and safety notes.
Simple DIY blot and wipe tests
Before you install polished plaster on your kitchen backsplash, run a quick test to see how it handles grease. Here’s a simple, safe method using household oils and common cleaners.
First, apply a small amount of cooking oil (olive or vegetable) onto the sample. Let it sit for 15 minutes, then wipe off with a paper towel. Check if there’s any staining or residue left behind.
Next, use different cleaning agents like dish soap and water, white vinegar, or commercial kitchen cleaners to see which one works best. Apply, let it soak for a few minutes, then wipe off and inspect the surface.
Document your results with photos and notes for comparison later on.
Accelerated grease exposure and aging (home-lab approach)
For a more thorough test, simulate long-term grease buildup in a controlled environment. This isn’t about heat or unventilated conditions; it’s about consistent, repeated exposure.
Set up your sample in a well-ventilated area. Apply a thin layer of cooking oil daily for a week. Let it sit for 24 hours before wiping off with a paper towel. Repeat this process for several weeks to mimic long-term use.
Inspect the surface regularly for signs of staining or buildup. Compare your results with the initial sample and document your findings with photos and notes.
Remember, safety first. Keep the area well-ventilated and avoid open flames or heat sources.
When to consider lab or manufacturer testing (standards to ask about)
If you’re still unsure after your DIY tests, consider professional lab testing. But don’t just take their word for it – know what standards they’re using.
Ask about cleanability tests like ASTM D5402 or EN 1330, which measure a material’s ability to resist and remove soil. Also, inquire about stain resistance tests such as ASTM D4829 or EN ISO 10627, and water absorption tests like ASTM C140 or EN 520.
Don’t rely on marketing claims alone. Check the technical data sheets for these specific test results to make an informed decision.
Sealer and Topcoat Options: Types, Pros/Cons, and Kitchen Suitability
Penetrating or impregnating sealers protect from within and tend to preserve texture and color. Film-forming finishes like acrylics, polyurethanes, or epoxies create a surface layer that can be easier to wipe but may require maintenance if damaged. Waxes offer a soft hand and appearance but often need frequent reapplication in kitchens.
Grease resistance, breathability, and repairability depend on the combination you choose. Always review the specific product’s data sheet and cure instructions for kitchen use and reapplication intervals. Check compatibility with your plaster system and any priming requirements.
Penetrating vs. film-forming sealers
When it comes to sealers, you’ve got two main types: penetrating and film-forming.
Penetrating sealers soak into the plaster, preserving its breathability and natural texture. They’re great for maintaining that ‘polished’ look but might not offer as much surface protection against grease.
Film-forming sealers, on the other hand, create a barrier on top of the plaster. They provide better grease resistance but can slightly alter the sheen and feel of your backsplash.
It’s a trade-off. Choose based on what matters most to you – breathability or surface protection.
Food-safety, VOCs, and heat tolerance considerations
Before you seal, check the manufacturer’s claims. You want low-VOC formulas to keep your kitchen air fresh.
Also, look for food-contact or kitchen-safety statements. Some sealers aren’t meant for areas where food is prepared or served.
Lastly, confirm heat resistance. Kitchens get hot, especially around the stove. Make sure your sealer can handle it.
Always follow manufacturer guidelines to ensure safety and longevity of your sealed plaster.
Choosing a finish level and visual impact
The finish level – matte, satin, or high-gloss – affects how visible grease is on your backsplash.
Matte finishes hide grease better but can look dull. They’re great for textured plasters where you want to emphasize the tactile aspect.
Satin and high-gloss finishes show grease more easily but reflect light beautifully, enhancing the polished look of your plaster.
Choose based on how much maintenance you’re willing to do and what style you want. Remember, high-gloss means more frequent cleaning.
Application Best Practices and Visual Checkpoints for a Kitchen-Ready Finish
Prepare the substrate thoroughly, including dust removal and compatible priming for plaster. Use a consistent technique for even distribution and avoid runs or gaps in the finish. Apply coats as recommended by the sealer or topcoat maker and let each layer cure per instructions.
Watch for uniform gloss, color consistency, and edge coverage near outlets or seams. Inspect indoors with typical kitchen lighting after each stage. Always verify primer and sealer compatibility with the plaster type you are using per manufacturer guidance.
Tools and materials checklist for installers and DIYers
Before you start your concrete project, use this checklist to ensure you have everything you need. This will help you avoid common mistakes and achieve a kitchen-ready finish.
- Safety gear: Hard hat, safety glasses, work gloves, ear protection, and steel-toed boots.
- Measuring tools: Tape measure (at least 25ft), level, and a straight edge for checking flatness.
- Concrete mixer: A portable electric mixer or a gas-powered mixer for larger jobs. Check it’s in good working order before starting.
- Shovel and wheelbarrow: For mixing and transporting concrete.
- Concrete finishing tools: Float, bull float, edger, and a magnesium o