
Introduction
Painting copper and brass to prevent tarnish under clear coats means preparing the metal, using the right sealer or barrier primer, and choosing a clear finish that won’t allow corrosion to spread. In plain terms: clean and remove tarnish, treat or isolate reactive metal, and topcoat with a compatible clear product. Check product labels and manufacturer instructions for compatibility and cure times before you start.
This is a hands-on DIY job that’s about sensible prep and patience rather than fancy tools. Expect to do cleaning, possible etching or corrosion-stop treatment, and test a small area before coating large surfaces. If you’re unsure about a product’s interaction with copper or brass, test first or consult the manufacturer.
Key takeaways
- Always degrease and clean copper and brass surfaces before painting to ensure adhesion.
- Wear gloves and a respirator when cleaning and priming metals.
- Choose adhesion-promoting primers compatible with clear coats and metal substrates.
- Apply barrier treatments to minimize under-film tarnish without sealing vents.
- Test a small area for color shift and coating compatibility before full spray.
- Inspect under good lighting and follow manufacturer data for cure times.
Table of Contents
- Introduction
- Key takeaways
- Overview: Challenges When Painting Copper and Brass
- Tools and Materials Checklist
- Surface Preparation Best Practices
- Primers and Adhesion Strategies
- Barrier Treatments to Prevent Under-Film Tarnish
- Choosing and Applying Clear Coats
- Material Specs and Standards Explained
- Testing, Inspection, and Visual Checkpoints
- Conclusion
- FAQ
Overview: Challenges When Painting Copper and Brass
Copper and brass are non-ferrous alloys that form surface oxides and can release metal ions that move under coatings, so they behave differently than ferrous metals. These behaviors create failure modes that differ from rust-driven problems on steel.
Common failures include blistering, under-film tarnish, loss of clarity, and poor adhesion caused by residual oils, active oxides, or ionic migration. Verify product compatibility and any specific substrate instructions on the label or technical data sheet before proceeding.
Metallurgical and chemical causes of tarnish
Copper and brass tarnish due to oxidation, sulfide formation, and metal ion migration. Here’s what happens:
Oxidation: When exposed to air, copper and brass form a layer of copper oxide (Cu2O), which gives them their characteristic patina.
Sulfide formation: In the presence of sulfur compounds from the air or other sources, copper sulfides (like Cu2S) form. These are usually black or brown and less desirable than the green patina.
Metal ion migration: Over time, metal ions can migrate to the surface, furthering tarnish and weakening the underlying metal.
How clear coats can trap or accelerate tarnish
Clear coats can protect copper and brass, but they can also trap contaminants or allow outgassing, leading to under-film corrosion or discoloration.
Inadequate barriers: If the clear coat doesn’t form a perfect seal, oxygen and contaminants can still reach the metal surface, promoting tarnish.
Trapped contaminants: Dirt, grease, or other contaminants trapped under the clear coat can accelerate corrosion or discoloration as they break down over time.
Outgassing: Some clear coats release gases (outgassing) as they cure. If these gases get trapped under the film, they can cause blisters or bubbles that allow tarnish-causing agents to reach the metal.
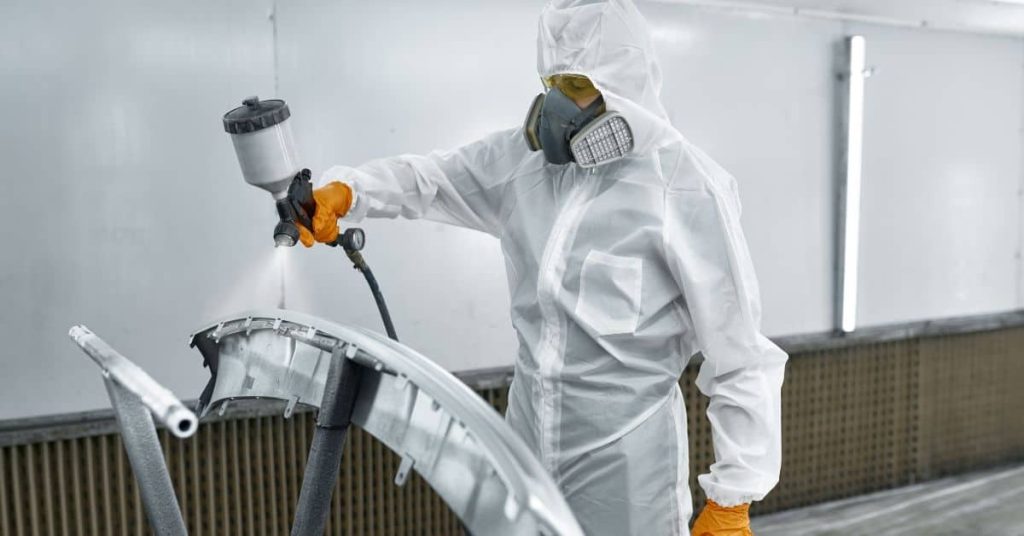
Tools and Materials Checklist
Gather non-sparking hand tools, low-lint rags, appropriate chemical cleaners, and a range of abrasives suited to light metal work before you start. Include personal protective equipment and containment items for chemical use.
Select primers, adhesion promoters, and clear coats that list compatibility with copper or brass on their data sheets; if unsure, check the manufacturer’s instructions. Keep a small quantity of several options for testing rather than relying on a single product you haven’t trialed.
Cleaning agents and surface prep tools
Before you start painting, it’s crucial to clean your copper or brass surfaces thoroughly. Here’s a checklist of safe cleaning agents, solvents, brushes, and abrasives to use.
- Degreaser: Use a mild degreaser like dish soap and warm water to remove grease and dirt.
- Solvents: For tougher grime, use mineral spirits or denatured alcohol. Always test in an inconspicuous area first.
- Soft-bristle brush: A soft-bristle brush is gentle on copper and brass while effective at scrubbing.
- Scotch-Brite pad: For stubborn spots, use a Scotch-Brite pad with light pressure. Avoid steel wool as it can scratch the surface.
- Fine-grit sandpaper (220-320): Lightly sand the surface to remove any tarnish and provide better paint adhesion. Remember, too much sanding can damage the metal.
- Wire brush: For textured surfaces or heavy tarnish, use a brass-bristled wire brush for gentle scrubbing.
- Safety glasses: Protect your eyes from debris during cleaning and sanding.
- Ventilation: Ensure proper ventilation when using solvents to prevent fumes from building up.
Quick rule: Always test cleaners and abrasives on a small, hidden area first to avoid damaging your surfaces.
Paint, primer, and clear coat categories to consider
Choosing the right paint, primer, and clear coat is vital for preventing tarnish under your clear coats. Here’s a checklist of suitable categories.
- Primer: Use a metal primer specifically designed for copper or brass. These primers create a barrier against tarnish and improve paint adhesion.
- Acrylic paint: Opt for acrylic paints as they are durable, water-resistant, and suitable for metal surfaces.
- Oil-based paint: For a more traditional look, oil-based paints can be used. They require proper ventilation during application and drying.
- Clear coat: Choose a clear coat with UV protection to prevent sun damage and tarnish. Lacquers or varnishes are good options for copper and brass.
- Aerosol spray paints: For small projects or intricate details, aerosol spray paints can be convenient. Ensure they are compatible with your chosen primer and clear coat.
- Test patches: Before applying to your entire project, test your chosen paint, primer, and clear coat on a small, hidden area to ensure compatibility and desired results.
Quick rule: Always verify the compatibility of your chosen products by testing them on a small, inconspicuous area first.
Surface Preparation Best Practices
Preparation aims to remove oils, grease, loose oxides, and any surface contaminants so the coating bonds to a stable substrate. Use solvents or cleaners appropriate for non-ferrous metals and follow label directions for dwell time and rinsing.
Mechanical action with suitable abrasives often helps produce a consistent profile, but avoid overworking thin areas and check manufacturer guidance for acceptable surface roughness. Finish with a clean, dry surface and perform a tack or adhesion test on a small area first.
Cleaning, Degreasing, and Rinsing Technique
Start by removing any dust with a soft cloth. Then, use a mild detergent or dish soap mixed with warm water to clean the surface.
Degrease using a specialized cleaner or rubbing alcohol to remove oils and greases that could hinder adhesion.
Rinse thoroughly with clean water and dry immediately using a clean, lint-free cloth. A clean, dry surface is crucial for primer and coating adhesion.
Removing Existing Tarnish and Patina Safely
For light tarnish, use a soft cloth and mild abrasive like baking soda mixed with water. Gently rub in circular motions.
For heavier tarnish, consider using a commercial brass or copper cleaner. Always test on a small, hidden area first to ensure no damage occurs.
Avoid over-polishing or using harsh chemicals that can pit the metal or cause discoloration.
Rinse and dry thoroughly after removing tarnish.
Mechanical vs Chemical Prep: When to Use Each
Use mechanical abrasion like sanding or steel wool for heavy tarnish, rust, or when you want a matte finish. Start with coarse and progress to fine grit.
For light tarnish or maintaining a shiny finish, use chemical brighteners. These can be harsh; always test first and follow safety guidelines.
If the metal is severely oxidized or you want to create a protective layer, consider using a conversion treatment like a chemical bath. This converts the surface into a stable compound that resists tarnish.
Always perform small-scale tests before applying any method across the entire surface.
Primers and Adhesion Strategies
A dedicated primer or adhesion promoter is frequently necessary because bare copper and brass may not allow direct clear-coat bonding. Choose products that state suitability for non-ferrous metals and list bond-strength or surface-compatibility data on their technical literature.
Consider conversion-type primers or products formulated to inhibit ion migration when specified by the manufacturer; where labels are vague, consult the product data sheet. Apply according to the maker’s instructions and test adhesion on a representative sample before treating the whole piece.
Types of adhesion promoters and their roles
When painting copper or brass, a suitable primer or adhesion promoter is crucial. These products help prevent metal migration – where the clear coat attracts and traps tarnish-causing elements from the substrate – and improve paint bond.
Zinc Phosphate Primers: These are commonly used on copper and brass. They create a conversion coating that reacts with the metal’s surface, forming a protective layer that improves adhesion and prevents corrosion.
Epoxy Primers: Epoxies provide excellent adhesion and resistance to chemicals. They’re great for high-traffic areas or where chemical exposure is likely.
Acrylic-Latex Primers: These are water-based, easy to apply, and suitable for most indoor projects. They offer good adhesion and stain-blocking properties.
Surface profiling and adhesion promotion methods
Before applying a primer or paint, it’s essential to prepare the surface for optimal bonding. This involves light abrasion, tack testing, and solvent wipes.
Light Abrasion: Gently abrade the surface using fine-grit sandpaper or steel wool. This removes any existing tarnish, patina, or contaminants, creating micro-pores that improve mechanical bonding.
Tack Testing: After cleaning and light abrasion, perform a tack test by applying a small amount of primer to the surface. If it ‘tacks’ – sticks but isn’t yet dry – the surface is ready for priming. This ensures optimal adhesion.
Solvent Wipes: Use a suitable solvent like acetone or denatured alcohol to wipe the surface clean of any dust, grease, or residue before priming. This removes any remaining contaminants that could hinder adhesion.
Barrier Treatments to Prevent Under-Film Tarnish
Barrier treatments such as conversion coatings, sealers, and inhibitive layers are designed to block moisture, sulfur compounds, and metal ions that cause under-film tarnish. These treatments aim to stabilize the metal surface and prevent migration of corrosive agents into the clear coat system.
Different products use different chemistries and application steps; read the product label or technical data sheet for required dwell times and compatibility notes. When in doubt, test the barrier on a small discreet area to confirm it prevents discoloration under the chosen clear coat.
Conversion Coatings and Sealers Overview
A conversion coating changes the surface of copper or brass to prevent tarnish. It’s like giving your metal a new, protective skin.
Sealers, on the other hand, create a barrier between the metal and the air. They lock out moisture and corrosive agents that cause tarnish.
Use conversion coatings when you want to change the surface’s chemical makeup for better protection. They’re great for high-traffic areas or pieces exposed to harsh conditions.
Sealers are ideal for protecting against moisture and minor corrosion. They work well in less demanding environments, like indoor display pieces.
Temporary vs Permanent Barrier Strategies
For short-term protection during storage or assembly, use temporary barriers. These are usually easy to apply and remove. They protect against minor corrosion and tarnish while your piece is in transit or waiting to be finished.
For long-term protection on finished pieces, opt for permanent barriers. These create a durable shield against tarnish and corrosion. They’re ideal for display items or hardware that won’t be disassembled often.
Before applying any barrier, test it first. Make sure it’s compatible with your specific metal type and clear coat. You don’t want to end up with a nasty surprise after all your hard work.
Choosing and Applying Clear Coats
Clear coat chemistry and application technique both affect long-term clarity and adhesion on copper and brass. Compare product families (for example, lacquer, polyurethane, or acrylics) using manufacturer information to determine UV resistance, flexibility, and solvent resistance relevant to your project.
Follow the recommended application variables—surface temperature, film thickness, and flash times—from the product instructions and perform a small test to observe clarity and edge behavior. If the label lacks specifics for non-ferrous metals, contact the maker or choose a product with explicit compatibility statements.
Clear Coat Chemistries: Pros and Cons
The choice of clear coat is crucial for long-term protection. Here’s a quick rundown on common types:
Pros
- Lacquer: Fast drying, easy to apply, good UV resistance.
- Acrylic: Excellent adhesion, durable, resists yellowing over time.
- Polyurethane: High durability, excellent chemical and water resistance.
- Silicone: Superior waterproofing, resistant to extreme temperatures.
Cons
- Lacquer: Susceptible to humidity and temperature changes, short pot life.
- Acrylic: Can be sensitive to harsh chemicals, may require topcoat for best protection.
- Polyurethane: Slower drying time, strong fumes during application.
- Silicone: May not adhere well to all surfaces, can be difficult to repair.
The ‘best’ clear coat depends on your specific project. Consider the surface’s exposure to elements and chemicals, as well as your desired finish and maintenance level.
Application Technique and Cure Considerations
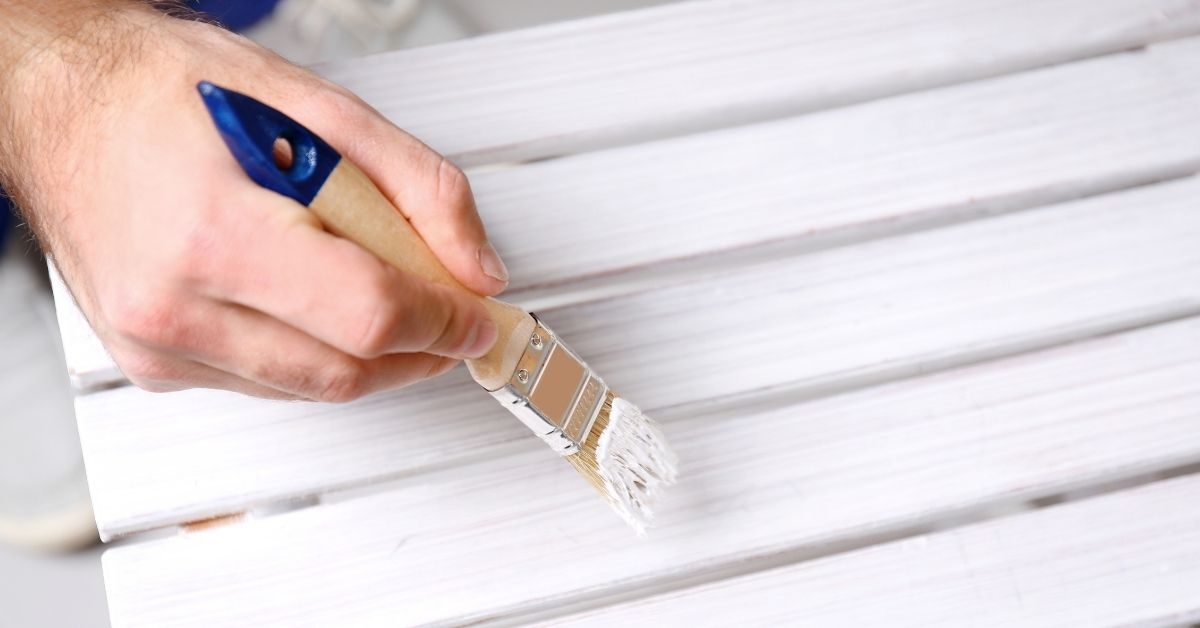
Spray or brush? Spraying gives a smoother, more even coat but requires proper ventilation and equipment. Brushing is easier to control but may leave visible strokes.
Environment matters. Apply clear coats in a well-ventilated area, away from direct sunlight and heat sources. Ideal temperature range is typically 70-85°F (21-29°C).
Follow manufacturer’s cure and recoat guidance to avoid trapped solvents or failure. This usually involves letting the first coat dry for a specific time before applying subsequent coats.
Material Specs and Standards Explained
Manufacturer technical data sheets and product labels contain the specs you need to evaluate compatibility, shelf life, and safety precautions for primers and clear coats. Learn to find key items on those documents such as recommended substrates, surface prep notes, and environmental limits for application.
If a spec is missing or unclear, consult the product safety data sheet or contact the manufacturer for clarification before proceeding. Rely on documented instructions rather than assumptions when matching coatings to copper and brass.
What to check on technical data sheets
Before you start, review the manufacturer’s technical data sheet (TDS) to ensure a successful job.
- Substrate compatibility: Check if your copper or brass surface is suitable for the chosen product. Incompatibility can lead to poor adhesion and tarnishing.
- Recommended surface prep: Follow the suggested cleaning, degreasing, and profiling methods to ensure proper adhesion.
- Application limits: Note the ideal temperature, humidity, and other application conditions. Ignoring these can result in poor performance or failure.
- Cure guidance: Understand the required cure time and conditions for optimal protection.
- Corrosion resistance: Verify that the product offers sufficient corrosion resistance to prevent under-film tarnish.
- Primer compatibility: If using a primer, ensure it’s compatible with both your chosen topcoat and the substrate.
- Safety precautions: Review any necessary safety measures before handling the product.
- Warranty information: Check if the product comes with a warranty and what it covers.
Quick rule: Always compare your specific surface conditions to the TDS recommendations. If in doubt, contact the manufacturer for clarification.
Safety, VOCs, and environmental considerations
Handling paints and coatings requires careful attention to safety and environmental concerns.
Ventilation: Ensure adequate ventilation during application and drying. This prevents the buildup of harmful fumes and ensures a smooth finish.
Always check the product’s Safety Data Sheet (SDS) for specific hazards, handling instructions, and emergency procedures. Some products may contain volatile organic compounds (VOCs), which can contribute to air pollution and have health effects if not handled properly.
Disposal: Follow local regulations for disposing of leftover product and cleaning materials. Never pour paint or solvents down drains as they can harm the environment. Instead, use designated hazardous waste facilities.
Testing, Inspection, and Visual Checkpoints
Before committing to full coverage, run a small-scale test that mimics your process and environmental exposure to catch adhesion, clarity, or under-film tarnish issues. Include both fresh and aged samples in your checks where practical to evaluate short-term and potential longer-term reactions.
Use visual and physical checks—adhesion pull or tape tests, clarity inspection for haze or discoloration, and tactile checks for blistering or soft spots—and document results. If problems appear, revise surface prep, barrier selection, or primer choice and retest until the sample passes.
Test patches and accelerated checks
Before applying clear coats to your entire copper or brass surface, set up test patches to ensure adhesion, clarity, and tarnish prevention.
- Prepare small test panels: Use areas that are representative of your main surfaces.
- Apply adhesion promoter: Follow the same process as you would on the full surface. Check for any discoloration or blushing, which could indicate incompatibility.
- Apply clear coat: Use the same technique and product you’ll use on the main surfaces.
- Inspect immediately: Look for any signs of failure such as blushing, bubbling, or poor adhesion.
- Tape pull test: After the clear coat has cured, apply painter’s tape to the surface and pull it off. If the coating lifts, re-evaluate your application process.
- Accelerated testing: Expose test panels to heat, humidity, or other conditions that mimic long-term exposure. Check for any signs of degradation after a few days.
- Check for tarnish: Look for any discoloration under the clear coat, which could indicate trapped tarnish.
- Compare results: Make sure your test patches match the desired outcome before proceeding with full application.
Quick rule: If test patches fail, re-evaluate your process and materials before applying to the entire surface.
Visual indicators of trapped tarnish or failure
During application and after curing, visually inspect your clear coated copper or brass surfaces for any signs of trapped tarnish or failure.
- Blooming: A hazy or cloudy appearance under the clear coat could indicate blooming, where the clear coat has reacted with the underlying surface.
- Localized discoloration: Dark spots or patches under the clear coat may indicate trapped tarnish or contamination during application.
- Lifting: If edges of the clear coat are lifting or peeling, it’s a sign of poor adhesion and should be addressed immediately.
- Soft spots: Areas that feel soft or spongy under the clear coat could indicate trapped moisture or other contaminants.
- Cracking or crazing: Fine cracks or hairline fractures in the clear coat may indicate incompatibility with the substrate or improper curing conditions.
- Orange peel effect: An uneven, textured surface under the clear coat could indicate application issues such as incorrect spray distance or product viscosity.
- Check for consistency: Make sure the entire surface maintains a consistent appearance. Any variations may indicate underlying issues.
Quick rule: If you observe any of these warning signs, re-evaluate your process and consider redoing the affected areas to prevent further issues.
Conclusion
With copper and brass, your finish hinges on solid surface prep, proper primers and barrier coatings, and careful application of the clear coats. Do the prep right, then follow a disciplined coating routine to keep tarnish away and your piece looking clean and durable.
First, wash and degrease the parts, lightly scuff the surface, and dry completely; test adhesion on a small area, then apply a compatible primer and barrier treatment before coating with thin, even clear coats in sequence, allowing proper cure times and inspecting each pass before moving on.
Common mistakes smoke out fast: skipping surface prep or using the wrong primer for copper or brass, piling on thick coats that trap moisture, or skipping testing and cure steps. Safety rules matter too—work in a well-ventilated area, wear protective gear, and never mix products unless the manufacturer approves the combination.
If you’re dealing with heavy corrosion, complex shapes, or you’re near electrical components, consider a pro for the barrier and coat system. Stay steady, follow the steps, and you’ll finish with a look that lasts and performs as intended.
FAQ
Why might tarnish sneak under a clear coat after painting copper or brass?
Tarnish can form if the base metal isn’t fully sealed or if the coating underneath isn’t compatible with the clear. Make sure you’ve cleaned, primed, and allowed the layer to cure as specified before applying the top coat.
How do I test for adhesion and prevent under-film tarnish before finishing?
Do a small test patch with your chosen primers and clear coat. Look for peeling, whitening, or dull spots, and verify the metal stays at the same color under the film. If you see issues, fix the surface or swap products as needed.
What should I check about the clear coat’s compatibility with the painted surface?
Read the product label or datasheet for compatibility with metal paints and primers. If in doubt, contact the manufacturer or check local rules to confirm no chemical reaction is expected between layers.
How do I know when to recoat or recheck after applying clear coats?
Follow the product’s guidance on recoat windows, cure times, and environmental conditions. If you notice creeping tarnish or adhesion loss after exposure to light or moisture, reexamine the full stack from cleaning to topcoat.