
Introduction
Water-first and plaster-first are two simple ways to mix plaster without lumps.
With water-first, you add water to the bowl first, then sift plaster into it and stir. With plaster-first, you dump dry plaster into the water and mix until it smooths.
Both methods affect how fast you get a smooth mix and how long you have to work.
Start with small batches, mix steady, and scrape the sides to keep the texture even.
If you see any lumps, stop, remix, or sift again and check the product instructions for guidance.
Key takeaways
- Water-first reduces lump risk by wetting mix and allowing smooth plaster entry.
- Plaster-first can trap dry clumps; add water gradually while stirring constantly.
- Sift plaster or screen before mixing to remove visible lumps.
- Use clean water at ambient temperature and mix in a wide bowl.
- Safety: wear goggles, gloves, and mask; avoid inhaling powder or dust.
- Clear cleanup: scoop remaining material, wipe tools, and dispose per local rules.
Table of Contents
- Introduction
- Key takeaways
- Why Mixing Order Matters
- Water-First Method — Step-by-Step
- Plaster-First Method — Step-by-Step
- Comparing Results: Water-First Vs Plaster-First
- Common Causes of Lumps and How to Fix Them
- Tools, Materials, and Visual Checkpoints
- Environmental and Additive Effects
- Safety, Cleanup, and Waste Minimization
- Conclusion
- FAQ
Why Mixing Order Matters
Understanding the chemistry behind plaster mixes helps you predict lump formation and workability. Water-first and plaster-first approaches change how the mixture hydrates and how air gets trapped. This is why different methods feel different in the same batch.
Set realistic expectations for setting time, sheen, and finish quality based on the method you choose. Checking the product label and manufacturer instructions can confirm any method-specific notes. Local rules or trade guidance may also influence which approach is preferred for specific jobs.
How setting chemistry and hydration work
Plaster, made from gypsum, sets through a chemical process called hydration. When water is added, it reacts with the gypsum to form calcium sulfate dihydrate.
Water-first mixing allows for better particle dispersion and quicker heat release. This is because water wets the plaster particles evenly, helping them react uniformly.
Plaster-first mixing, on the other hand, can lead to uneven wetting and localized heat buildup, causing lumps and a longer setting time.
Common symptoms of poor mixing
Poorly mixed plaster will show signs like:
Lumps: You’ll feel and see small, hard lumps in the mix. These are unreacted gypsum that didn’t get enough water.
Graininess: The mix feels gritty to touch. This indicates incomplete hydration and poor particle dispersion.
Short setting time: If the plaster sets too quickly, it’s a sign of too much water or improper mixing order. It can lead to weak adhesion and a rough finish.
Water-First Method — Step-by-Step
Begin with clean water in the mixing container. Slowly sprinkle plaster into the water while you stir constantly to avoid lumps. Keep the initial mix moving until it looks smooth before adding more plaster.
Continue adding plaster in portions, stirring at a steady pace. Aim for a consistent, lump-free slurry before finishing with the remaining dry material. If you see grit or clumps forming, pause and re-stir until the surface looks even.
Step-by-Step Process
The following steps guide you through the water-first method of mixing plaster, ensuring a smooth, lump-free finish.
- Preparation: Ensure your work area is clean and dry. Gather your materials: plaster, water, bucket, drill with paddle attachment, trowel, and safety gear (gloves, goggles).
- Measure water: Pour the required amount of water into the bucket based on the desired water-to-plaster ratio (typically 3-4 parts water to 1 part plaster).
- Add plaster: Slowly pour the plaster into the water, ensuring it’s evenly distributed across the surface.
- Mixing: Using your drill with the paddle attachment, mix the plaster and water at a slow speed. Scrape any plaster from the sides of the bucket as needed. Mix for about 2-3 minutes or until the mixture is smooth and lump-free.
- Rest and remix: Allow the mixture to rest for 5-10 minutes, then remix briefly to ensure consistency. Check for lumps by running a trowel through the mix; if any are present, continue mixing until they’re gone.
- Final check: Before application, check the plaster’s consistency. It should be smooth and spreadable. If it’s too thick, add more water; if too thin, add more plaster.
- Cleanup: Clean your tools immediately after use to prevent dried plaster from causing damage or making future cleaning difficult.
Measuring water and plaster accurately
Accurate measurement of water and plaster is crucial for a successful mix. The typical safe range is 3-4 parts water to 1 part plaster, but always check the manufacturer’s specifications.
To measure, use a clean, dry bucket with clear markings or measuring lines. Pour the required amount of water into the bucket first, then slowly add the plaster while stirring gently with your trowel to ensure even distribution.
Pro tip: For larger quantities, consider using a second bucket for measuring plaster to maintain accuracy and prevent spills.
Mixing technique and tools to use
The right tools and techniques can significantly reduce lump formation during mixing. Here are some recommendations:
- Bucket size: Use a bucket that’s large enough for your mix, allowing the paddle to move freely without splashing.
- Drill with paddle attachment: A drill with a paddle attachment is essential for efficient mixing. Choose one with a variable speed setting and a sturdy handle.
- Trowel: Use a trowel to scrape plaster from the sides of the bucket, ensuring even mixing and preventing lumps.
- Pouring technique: When adding plaster to water, pour it slowly and evenly across the surface. This helps distribute the plaster and prevents clumps from forming.
- Mixing speed: Start at a slow speed to avoid splashing and incorporate the plaster into the water. Gradually increase the speed as the mixture thickens.
- Rest time: Allow the mix to rest for 5-10 minutes before remixing. This helps ensure a smooth, lump-free finish.
- Optional tools: For larger projects or when working alone, consider renting a plaster mixer with a flexible shaft. These can be more efficient and easier to use but come at an additional cost.
Plaster-First Method — Step-by-Step
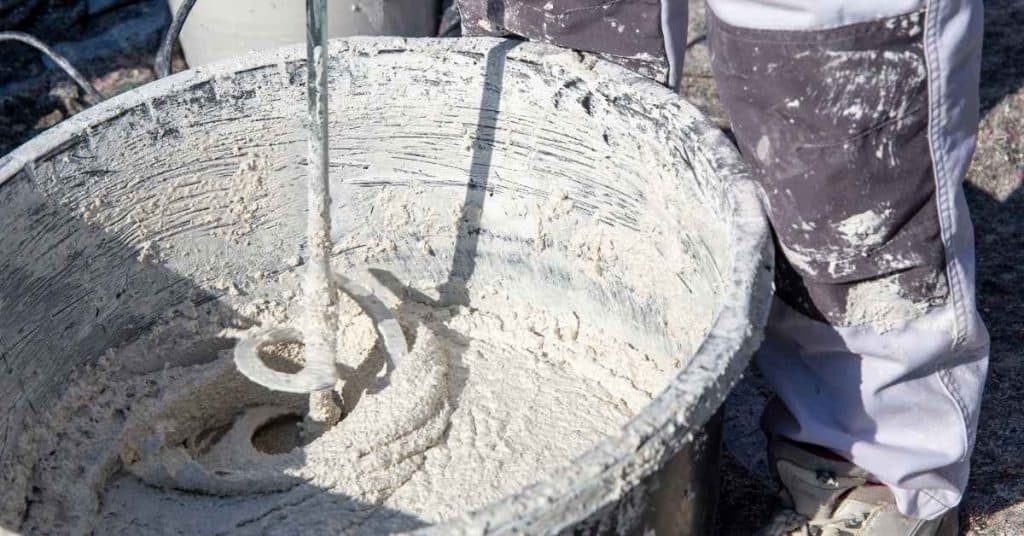
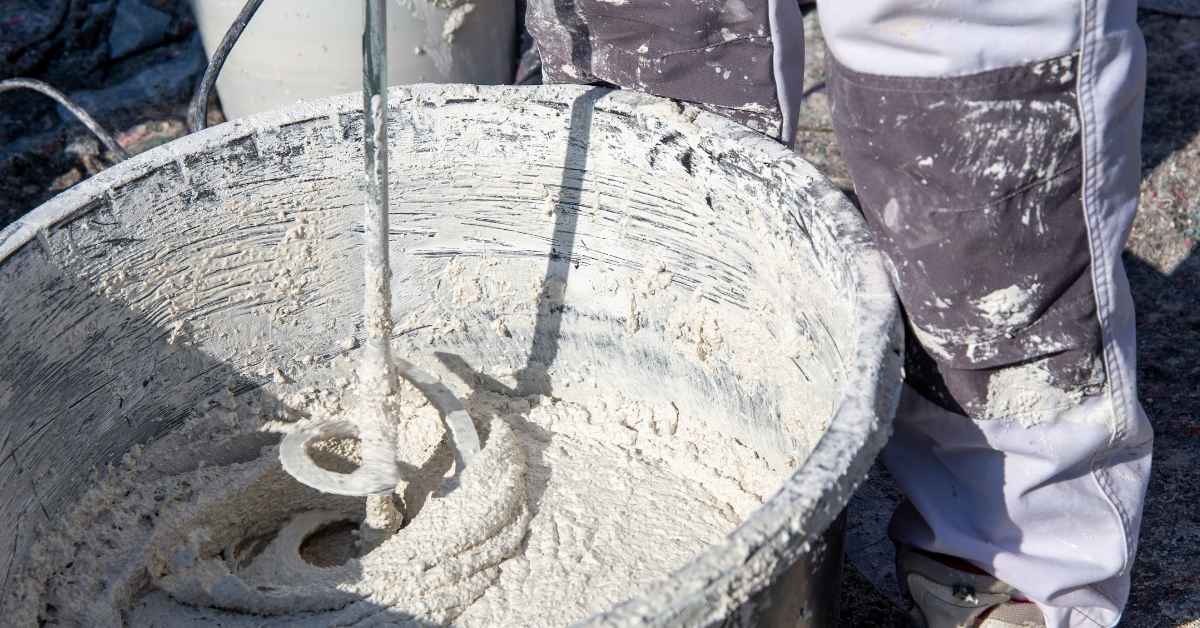
Pour plaster into a container of water rather than dropping water into plaster. Use a slow, steady pour and keep the flow controlled. Stir continuously as the plaster starts to hydrate to prevent dry pockets.
Once the mix begins to thicken and smooth out, continue mixing with a steady motion until you reach the desired consistency. If the consistency seems inconsistent, pause to scrape the sides and remix briefly. Always verify with the product instructions for any method-specific guidance.
Step-by-Step Process
The plaster-first method is a straightforward process that ensures even mixing and minimal lumps. Here’s your step-by-step guide.
- Preparation: Check your safety gear – gloves, goggles, and a dust mask. Gather your tools – a mixing paddle, drill, bucket, and measuring cups.
- Measure plaster: Pour the measured plaster into the bucket. Start with a small amount to avoid waste.
- Add water gradually: Slowly pour water onto the plaster while using the mixing paddle at low speed. This helps prevent dust clouds.
- Mix thoroughly: Once all water is added, increase the drill’s speed and mix for 2-3 minutes. Scrape any plaster from the sides of the bucket into the mix.
- Check consistency: The mixture should be smooth with no lumps. If it’s too thick, add more water; if too thin, add more plaster. Let it rest for a minute before using.
- Final check: Before applying, ensure there are no lumps or dry spots. If unsure, consult a professional.
Benefits and risks of plaster-first
The main advantage of the plaster-first method is faster wetting of plaster particles. This can lead to a more even mix and reduced risk of lumps.
However, it also comes with risks. If not mixed properly, you may end up with uneven hydration or dust clouds, which can cause health issues if inhaled.
Pro tip: Always use a dust mask when mixing plaster to protect your lungs.
Technique adjustments to prevent lumps
To ensure even dispersion with the plaster-first method, consider these practical tips:
Pre-wet your mixing paddle and bucket. This helps plaster particles stick to the paddle rather than clumping together.
Gradually add water while mixing at low speed. This gives the plaster time to absorb water evenly and prevents it from forming lumps.
Use a figure-eight mixing stroke. Start in the middle of the bucket, then make a wide ‘8’ shape with your paddle to ensure all plaster gets mixed well.
Comparing Results: Water-First Vs Plaster-First
Water-first often yields a quicker start and can reduce dust if done carefully, but it may require more vigilance for lumps. Plaster-first can feel more forgiving for beginners when you control the water addition, though it may produce more initial dust. Expect differences in how the mix holds workability over time.
Finish quality, bonding behavior, and suitability for different plaster types can vary with the method. Verify compatibility with the plaster you are using by checking manufacturer data sheets and local guidelines. Consider the job type and tool capabilities when choosing a method.
Performance on different plaster types
Different plasters react to mixing order based on their composition. Here’s what you need to know:
Gypsum Plasters: These are sensitive to over-mixing and setting too quickly. Water-first helps maintain workability longer, but plaster-first can result in a smoother finish if done right.
Lime Plasters: Lime plasters need more water for proper hydration. Water-first ensures better distribution of water, reducing the risk of lumps and improving bonding. Plaster-first might lead to dry patches if not mixed well.
Pre-mixed compounds often specify a mixing order on their labels. Always follow these instructions for best results.
When to choose each method
Choosing between water-first and plaster-first depends on your project, conditions, and skill level:
Water-First: Ideal for large-scale projects, hot or dry conditions, and beginners. It’s more forgiving with mixing time and reduces the risk of lumps.
Plaster-First: Suitable for small projects, cool or humid conditions, and experienced users. It offers a smoother finish but requires precise timing and technique to prevent lumps.
Always consider your specific job site conditions and your comfort level with each method before deciding.
Common Causes of Lumps and How to Fix Them
Lumps usually come from improper ratios, dry pockets, or rushing the pour. Poor mixing tools or cold water can also promote lump formation. Review the entire process if you notice clumps forming early in the mix.
For partially mixed batches, slow down, add a little water or plaster as needed, and remix thoroughly. For finished work with lumps, you may need to rework or re-mix affected areas in small sections. Always consult product instructions and adjust for temperature and humidity conditions.
Troubleshooting a lumpy mix mid-job
If you find lumps while mixing, don’t panic. Here’s how to fix it:
Stop mixing. Overmixing can turn small lumps into big ones.
Use a strainer if the lumps are small. Pour the mix through it back into your bucket, leaving the lumps behind.
For bigger lumps, remix with small water increments until smooth. If lumps persist, discard and start fresh to avoid compromising your finish.
Preventative maintenance and habits
Prevention is better than cure. Here’s how to keep lumps at bay:
Clean tools before each use. Leftover plaster can harden and cause lumps.
Calibrate your measuring vessels. Incorrect ratios are a common cause of lumps. Use a reliable measuring cup or bucket.
Maintain a consistent technique. Follow the same mixing method each time to avoid surprises.
Tools, Materials, and Visual Checkpoints
Keep a clean mixing container, a suitable paddle or trowel, and a reference guide for your plaster type. Use fresh, dry plaster and clean water as specified by the manufacturer. Have rags or a splash guard handy to control dust and spills.
Visual checkpoints include a uniform, streak-free surface with no visible lumps, and a consistent thickness when lifted with a paddle. A slide test or dragging a finger across the surface should leave a smooth track. If you see pockets or weathering edges, remix the mix in small increments.
Tools and materials checklist
Before you start mixing, make sure you have all the right tools and materials. This checklist will help you stay organized and avoid mistakes.
- Mixing container: A large, clean bucket or tub to mix your plaster in.
- Drill with paddle attachment: A powerful drill (at least 1/2 inch) with a sturdy paddle attachment for mixing.
- Sieves: Mesh sieves (around 80-100 micron) to sift your plaster and remove lumps before mixing.
- Thermometer: A thermometer to ensure water temperature is between 50°F – 70°F (10°C – 21°C).
- Plaster: High-quality, lump-free plaster. Check for any clumps or hard bits before use.
- Water: Clean water from a reliable source. Avoid using water with high mineral content.
- Optional – Retarder: A chemical additive to slow down the setting time of your plaster (for larger projects).
- Optional – Conditioner: An additive to improve the workability and finish of your plaster.
- Safety gear: Gloves, goggles, and a dust mask for protection during mixing and application.
Quick rule: Always check your tools and materials before starting. Missing or faulty items can lead to lumpy mixes and poor results.
Visual and tactile quality checkpoints
Once you’ve mixed your plaster, it’s crucial to check its quality before application. Here are some quick checks to ensure a lump-free, high-quality mix.
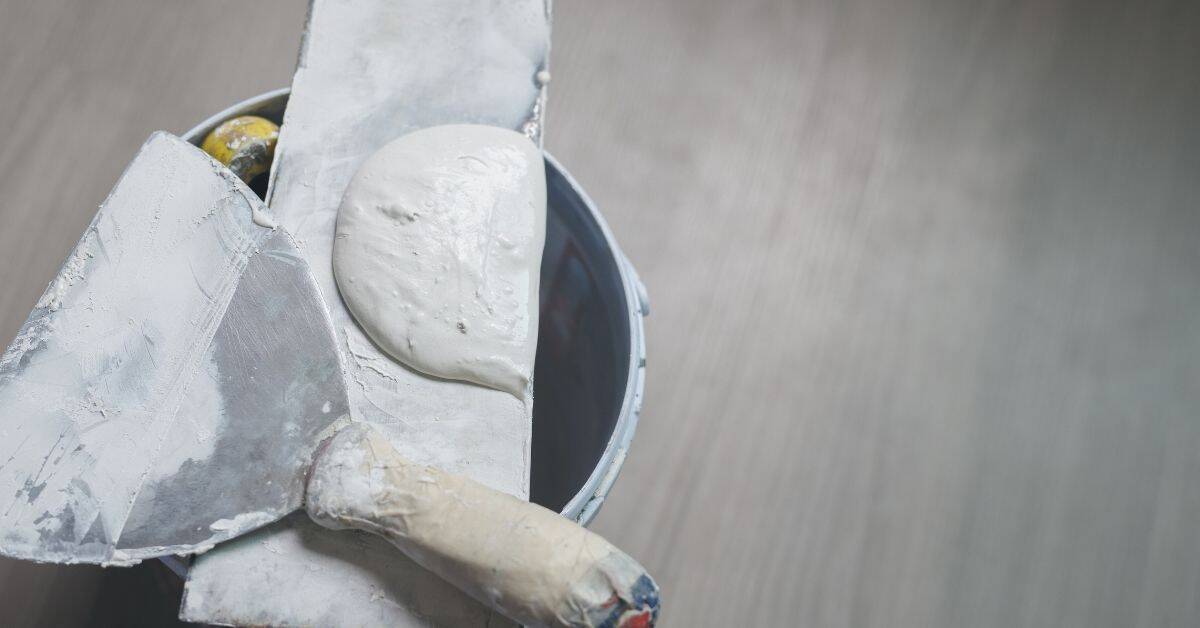
- Consistency: The plaster should have a smooth, creamy consistency, like thick yogurt. It shouldn’t be too runny or lumpy.
- Sheen: A properly mixed plaster will have a slight sheen to it. If it’s dull, it might be too dry; if it’s overly shiny, it could be too wet.
- Absence of grit: Smooth plaster should feel silky and free from any gritty particles. Run the mix through your fingers to check.
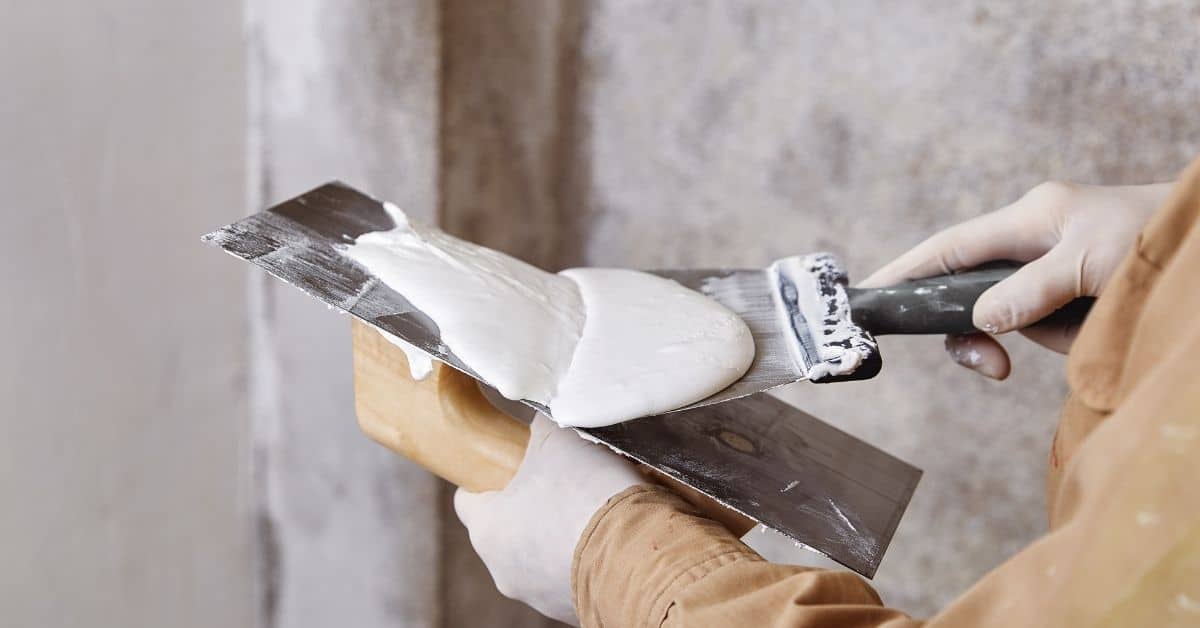
- Scoop test: Scoop some plaster onto a trowel or flat surface. It should hold its shape without running or crumbling.
- Drop test: Drop a small amount of plaster from a height (around 12 inches). It should plop down smoothly, not splat or drip.
- Stick test: Dip a trowel into the mix and pull it out. The plaster should coat the trowel evenly without any lumps or bare spots.
Quick rule: Always perform these checks before application. Skipping them can lead to poor results, wasted material, and extra work.
Environmental and Additive Effects
Temperature and humidity affect how quickly plaster hydrates and how the mix feels in the pot or on the wall. Warmer, drier conditions can speed up setting and increase the risk of dust or cracking if not managed. Check the working conditions and adjust your technique accordingly.
Additives like retarders, accelerators, or fibers change the flow and lump tendency. Always verify with the product label and data sheet before using additives. Local guidelines or job-site requirements may influence what you can mix with.
Adjusting mixes for temperature and humidity
Temperature and humidity can affect your plaster mix. Here’s how to adjust:
Hot weather: Use cooler water, increase mixing time, consider accelerators.
Cold weather: Warm the water slightly, reduce mixing time, use retarders if needed.
High humidity: Reduce water content, mix thoroughly. Low humidity: Add a bit more water, mix well.
Additives that help or hurt lump prevention
Some additives improve workability, others can increase lumps:
Retarders (delay setting): Can help prevent lumps by allowing more mixing time. Check product instructions for dosages.
Accelerators (speed up setting): May cause lumps if not mixed thoroughly. Use sparingly and mix well.
Fibers: Can improve workability but too many can cause lumps. Follow manufacturer’s guidelines for amounts.
Safety, Cleanup, and Waste Minimization
Wear a dust mask or respirator when handling plaster powders and during cleanup to reduce inhalation risk. Keep stains and dust away from skin and eyes, and wash hands after handling materials. Plan wet cleanup to prevent hardened waste in the shop or on the job site.
Contain and dispose of waste according to local rules, and reuse or recycle excess mix where permitted. Clean tools promptly to avoid dried plaster that is hard to remove. Verify any hazardous materials guidance from the product label or local regulations.
Personal protective equipment and dust control
Protect yourself from plaster dust and wet mixes. Here’s what you need:
- Dust mask: Protects your lungs. Use N95 or P100 for best results. < $20.
- Gloves: Prevent skin irritation. Disposable or reusable. < $5 – $30.
- Eye protection: Goggles or safety glasses. Protects eyes from dust and splashes. < $10 – $20.
- Wet cloth: Dampen to wipe surfaces and control dust. Free, but keep clean ones handy.
- Local exhaust ventilation (LEV): Optional tool to suck up dust at source. Rentable. Around $50/day.
Cleaning best practices and reuse of leftovers
Clean tools promptly to prevent waste:
Within 15 minutes: Clean buckets, trowels, and hawks with water. Use a wire brush for tough spots.
For leftover mix, follow these rules:
Reuse within 2 hours if it’s still workable. After that, dispose of responsibly in sealed bags to prevent dust and contamination. Don’t let it harden in your tools or buckets.
Conclusion
Pick the method that fits your space, keep water measured and plaster added gradually, and check for lumps before you set any material. A solid mix means better strength, finish, and less rework, delivering a lump-free finish.
Start with a small test batch in a clean bucket, measure water first or add plaster to water as your chosen method dictates, stir steadily to a smooth consistency, scrape the sides, let it rest briefly, and only apply when it looks uniform and free of big clumps, so you can rely on a consistent workability and a test patch before you commit to the whole job.
Common mistakes: rushing the mix or adding powder to dry water, which causes lumps; over-wetting or trying to fix with more plaster; and skipping a test patch. Safety rules: wear eye protection and gloves, work in a ventilated area, clean up spills before they set, and never leave unfinished plaster where it can harden in awkward spots.
If you hit stubborn lumps, unsure of mixing ratios, or face moisture issues, call a professional. Stay disciplined, test small areas, and push forward with steady, safe steps toward a durable, clean finish.
FAQ
When should I choose water-first vs plaster-first for a new batch?
Choose based on the plaster type and your mixer setup. Always check the manufacturer instructions for mixing order. If in doubt, start with a small test batch and compare texture before scaling up.
What are the most common mistakes that cause lumps, and how can I fix them quickly?
Lumps usually come from adding dry plaster to too-wet mix or dumping powder in all at once. Stop and let the mix rest briefly, then add small amounts of plaster while stirring steadily. If needed, sift the dry plaster to remove clumps before re-mixing.
How do I adjust consistency without creating new lumps?
Add material in small increments and mix thoroughly after each addition. Keep the stirring medium consistent and avoid chasing dry pockets at the bottom or sides. If you see a skin forming, pause and fold it back into the mix gently with a clean paddle.
Do temperature, mixing speed, or additives affect lump formation, and what should I check?
Yes. Warmer temps can speed up setting and encourage lumping if you rush. Use a steady mixing rate and follow the product label for any additives. If unsure, verify instructions and any local tips, and test a tiny amount first.