
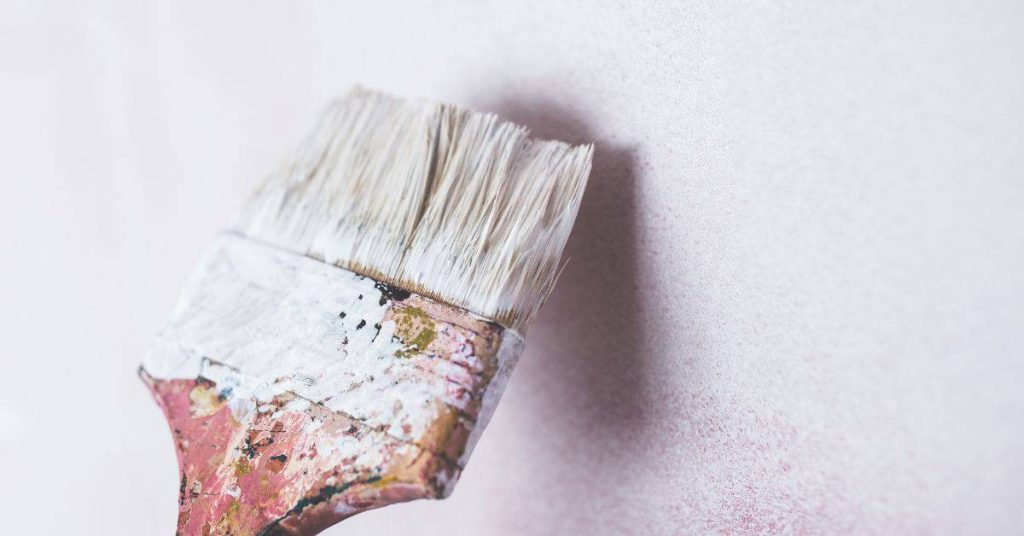
Introduction
Pigments are color additives you mix into cement to change its look, and using white or gray cement sets the undertone you’ll work from. In practice, you’ll notice white cement tends to brighten and cool things, while gray gives a neutral base that can lean warm or cool depending on the pigment. Start with small test patches and compare them as they dry, because undertone shifts can surprise you in daylight.
The amount of pigment matters for saturation, and different surfaces can reflect color differently. Material type, finish, and base color all affect the final shade, so plan tests on the exact surface you’ll pour or apply. Always check the pigment and cement manufacturer’s instructions and local rules for mixing limits, and read the product label for any guidance on compatibility.
Key takeaways
- Undertone and saturation depend on cement type; test on small panels first.
- White cement limits gray undertones; use pigments to tune warmth or cool.
- Pigment concentration changes perceived color; start light and adjust gradually.
- Surface texture and lighting alter pigment outcomes across white and gray mixes.
- Follow manufacturer instructions for pigments and cement; work small batches safely.
- Safety: wear eye/skin protection and dust control; never mix indoors.
Table of Contents
- Introduction
- Key takeaways
- Why Undertone and Saturation Matter for Cement Finishes
- Pigments Vs Dyes — the Fundamentals You Need to Know
- Basic Color Science for Practical Mixing
- White Cement Vs Gray Cement — Material Differences That Change Color Outcomes
- How White Cement Affects Undertone and Saturation — Practical Guidance
- How Gray Cement Affects Undertone and Saturation — Practical Guidance
- Practical Mixing Workflows, Testing Protocol, and Starter Guidelines
- Common Mistakes, Troubleshooting, and Safety Considerations
- Conclusion
- FAQ
Why Undertone and Saturation Matter for Cement Finishes
Undertone is the subtle base hue that can shift with pigment and cement choices. Saturation is the intensity of that color on the cured surface. Together they shape how a finish reads in different environments, from warm interiors to cool exteriors.
In decorative overlays, colored concrete, terrazzo, and stained looks, precise control matters. White versus gray bases influence how the undertone and saturation appear under light and with wear. Planning tests and documentation helps you communicate expectations to clients and tradespeople.
Visual and long-term performance impacts
Undertone and saturation play a big role in how your cement finish looks and holds up over time. Here’s what you need to know:
Contrast: A warm undertone with high saturation can make surfaces pop, while cool tones with low saturation create subtle, understated looks.
Lighting also affects perception. Direct sunlight can intensify colors, while indirect light or artificial sources may soften them. Test your samples in different conditions to see what you’re really getting.
Fading: Highly saturated colors fade faster than muted ones. Pigments also lose vibrancy over time due to weathering and wear. To maintain a consistent look, consider adding a sealer or using UV-stable pigments.
Common applications and desired outcomes
Different projects call for different undertones and saturations. Here are some examples:
Warm, vibrant looks: Use white cement as your base for a clean canvas. Add warm pigments like reds, oranges, or yellows to create bold, eye-catching surfaces.
Cool, subtle effects: Gray cement has a natural cool undertone that works well with blues, greens, and purples. Keep pigment load low for a soft, muted look.
Decorative overlays and terrazzo: Here, control is crucial. Use test panels to dial in your desired undertone and saturation before pouring. Consider the overall design – cool tones can make patterns pop, while warm hues create a cohesive look.
Stains: Undertone and saturation affect how stains interact with the surface. Lighter bases show more variation, while darker ones provide deeper, richer colors.
Pigments Vs Dyes — the Fundamentals You Need to Know
Pigments are insoluble particles that stay dispersed in cement, while dyes dissolve and can migrate. Cement systems prefer pigments for predictable color behavior and minimal blending across a matrix. This choice affects how hue and brightness hold through curing and weathering.
Consider how particle size, dispersion, and surface charge influence flow, slump, and settling in thick pours. Durability and lightfastness of pigments matter for outdoor or stained finishes, where color stability is critical.
Material behavior: particle, solubility, and binder interaction
The size, opacity, and chemical compatibility of pigment particles with cement binders significantly impact color strength and stability in your concrete mix.
- Particle Size: Smaller particles offer better dispersion but can lead to reduced workability. Larger particles provide stronger color but may cause segregation or settling.
- Opacity: Higher opacity pigments create more vibrant colors, but they can also make the mix stiffer and harder to place.
- Chemical Compatibility: Pigments that react with cement binders can cause cracking, staining, or weak bond strength. Always check compatibility before use.
- Surface Charge: Pigment surface charge affects dispersion and flow properties in the mix. Neutral or slightly negative charges work best for concrete.
- Avoid Clustering: Poorly dispersed pigments can cluster, leading to inconsistent color and reduced durability. Use dispersants to prevent this.
Choosing pigments for cement: inorganic vs organic
Inorganic pigments are typically preferred for concrete due to their high opacity and excellent durability. Organic pigments, on the other hand, offer brighter colors but may have lower UV stability.
Inorganic Pigments: These are usually more expensive but provide superior color strength, lightfastness, and weather resistance. They’re ideal for outdoor concrete applications where long-term performance is crucial.
Organic pigments can offer a wider range of vibrant colors at a lower cost. However, they may fade over time when exposed to sunlight or moisture. Use them with caution in exterior applications, and always check manufacturer performance data.
Regardless of pigment type, ensure you’re using high-quality products from reputable manufacturers to guarantee consistent results and long-term durability.
Basic Color Science for Practical Mixing
Hue is the actual color category, while lightness and saturation describe how bright or muted it appears. These terms help explain why two similar browns can look different under various lighting. Cured cement surfaces reveal these properties more clearly than raw samples.
Undertone and spectral properties of pigments interact with white or gray cement, so the same mix can shift after curing. Practical testing with controlled lighting helps you predict those shifts before full batching.
Spectral Reflectance and Why It Matters
Pigments have unique spectral reflectance curves. This means they reflect different wavelengths of light, creating color.
When you mix pigments, their reflectance curves combine. But predicting the result by eye is tricky due to metamerism – colors that match under one light source may not under another.
Example: A blue and a purple might look similar in daylight but appear different under incandescent light because of their reflectance curves.
Masstone Versus Undertone in Cement Contexts
In cement, masstone is the full-strength color you see when pigment is mixed at its intended ratio. It’s visible in thick, cast finishes.
The undertone, however, appears in thin layers or diluted mixes. It’s more noticeable in trowel-finished surfaces and can shift the overall hue.
Both masstone and undertone are important to consider when mixing pigments for cement. They interact differently with white vs gray cement bases.
White Cement Vs Gray Cement — Material Differences That Change Color Outcomes
White cement aims to minimize iron and carbon and often uses brightening agents. Gray cement contains iron oxides and carbon that create a warmer base. These differences drive undertone and saturation when pigments are added.
Check product datasheets for oxide content, whiteners, and any additives that affect pigment binding. Small trials with the same pigment on white and gray batches help you compare results and plan adjustments.
How base color influences final hue and saturation
The base cement color significantly impacts your final concrete hue and saturation. Here’s how:
White cement has a lighter, brighter base. It preserves the original pigment chroma, giving you vibrant, true-to-color results.
Gray cement, on the other hand, has a neutral to warm base tone. It can mute or shift your pigment undertone. Lighter grays might cool down your colors slightly, while darker ones can warm them up.
Material specs and standards to review
Before you mix pigments with cement, check these material specs to ensure a successful outcome:
- Cement Whiteness Index (CWI): Higher CWI in white cement means purer whites. For gray, lower CWI is better for deeper grays.
- Iron Content: Less iron in white cement means less chance of color variation. In gray, higher iron content creates warmer tones.
- Manufacturer Colorant Compatibility Notes: Some cements may not play well with certain pigments. Check for compatibility to avoid surprises.
- Avoid High Iron Content in White Cement: Too much iron can cause discoloration and weaken the cement’s strength.
- Beware Dark Grays with Low CWI: Very dark grays with low CWI might not achieve desired colors due to excessive pigment absorption.
How White Cement Affects Undertone and Saturation — Practical Guidance
White cement tends to brighten pigments and preserve true undertones, supporting vivid or pastel results. It reduces the gray bias that can dull saturation and warmth. Expect to adjust pigment load to achieve the desired color intensity.
Test panels and simple documentation help verify undertone accuracy and saturation before committing to a full batch. Be mindful of dispersion, admixtures, and drying conditions that can shift the final look.
Typical visual effects and when to choose white cement
White cement’s main advantage is its ability to maximize pigment brightness. This means you’ll get truer undertones and more vibrant or pastel colors compared to gray cement.
Choose white cement for:
- Accurate color matches – it helps pigments show their true hue without a gray bias.
- Light pastels – whites, pinks, yellows will be brighter and truer.
- Subtle tints – even small amounts of pigment will show up better in white cement.
Compatibility tips and admixture considerations
White cement can react differently with admixtures compared to gray. Here’s what you need to consider:
Retarders and plasticizers – Test them with white cement first to ensure they don’t affect the color or performance.
Pigment dispersants – Make sure they’re compatible with white cement. Incompatibility can cause flocculation (clumping) or shading, ruining your mix.
How Gray Cement Affects Undertone and Saturation — Practical Guidance
Gray cement often lowers apparent saturation and nudges undertone toward cool or earthy directions, depending on the gray source. This can suit muted, industrial, or historic finishes when planned carefully. Side-by-side tests with white cement reveal how the base shifts color perception.
Document pigment choices, batch identifiers, and curing conditions to guide future work. Sealers and topcoats can further influence undertone and saturation, so plan controls early.
When gray cement is an asset
Gray cement can be a real advantage when you’re after a certain look. It’s great for exposed aggregate work, where you want that natural stone to shine through without too much color interference.
It also works well for urban or industrial aesthetics. Those muted, earthy tones? That’s gray cement’s forte. It helps create that raw, unpolished feel.
Just remember, less is more. Too much gray can overwhelm the other colors in your mix and make it hard to achieve those subtle hues you might be after.
Techniques to neutralize or manage gray undertones
If you find the gray undertone’s too strong, there are ways to tame it. One way is using higher-opacity pigments. They can help mask that gray and bring out the colors you want.
Another option is lightening with white pigments or fillers. It’s like diluting a paint color with white. Just be careful not to lose too much strength in your mix.
Staged testing is key here. Start with small test batches, gradually adding more neutralizers until you get the undertone just right. That way, you’re not wasting materials and you know exactly what works for your project.
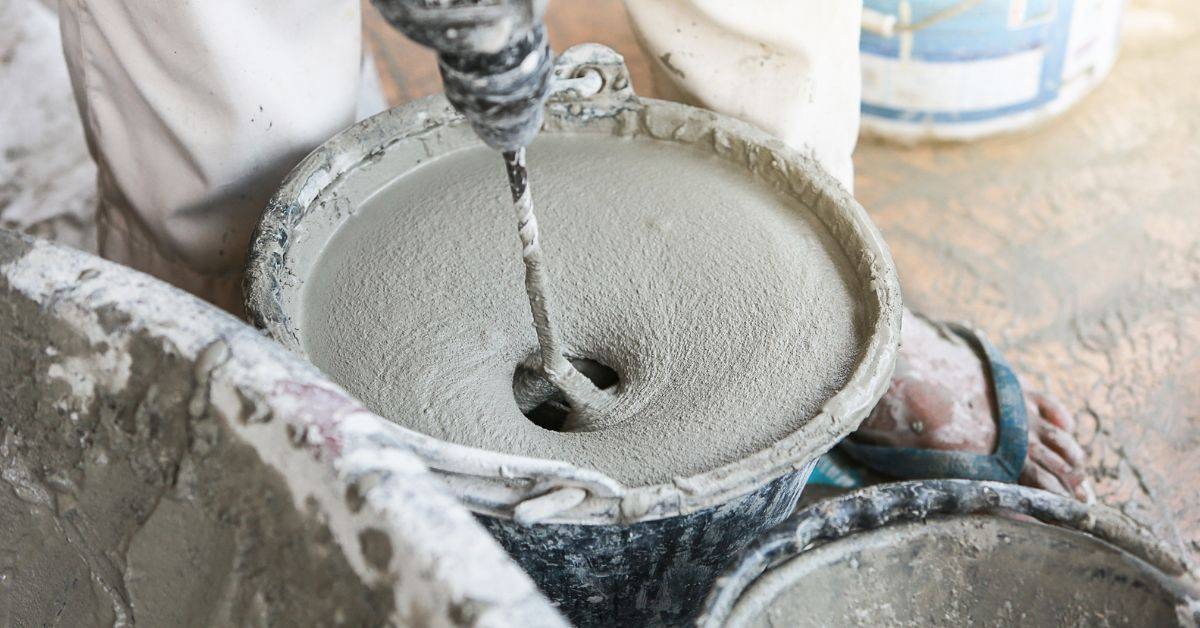
Practical Mixing Workflows, Testing Protocol, and Starter Guidelines
Outline a concrete-focused pigment workflow: choose pigment type, assess base compatibility, and anticipate undertone behavior under different lighting. Define a clear path from test to production with repeatable steps. Keep notes organized for future batches.
Standardize small-batch testing and swatches with controlled slump and curing. Use an evaluation rubric to compare undertone accuracy, saturation, and sealer compatibility, then iterate as needed.
Tools and materials checklist
Before you start mixing, make sure you have all the necessary tools and materials. This will save you time and ensure accurate results.
- Sample mixers: Use a small, portable mixer for test batches to maintain consistency.
- Precise scales: Weigh ingredients accurately to 0.1 lb or less for reproducible results.
- Containers: Have clean, labeled containers ready for each batch.
- Dispersion aids: Use approved dispersion aids to ensure even pigment distribution.
- Standard mockup panels: Prepare uniform panels for consistent testing conditions.
- MSDS sheets: Keep Material Safety Data Sheets on hand for all materials used.
- Protective gear: Gloves, goggles, and aprons to protect from chemicals and concrete dust.
- Lighting source: Use a consistent light source for color evaluation.
Quick rule: Always check your tools and materials before starting any mixing process.
Test swatch protocol and visual checkpoints
To effectively evaluate color, follow this test swatch protocol and document your results at each checkpoint.
- Masstone swatches: Prepare side-by-side masstone swatches to assess full-strength color.
- Thin-layer swatches: Create thin-layer swatches to evaluate undertone and saturation.
- Consistent lighting: Photograph samples under consistent light conditions for accurate comparison.
- Record mix ratios: Document precise cement, pigment, and aggregate ratios used in each batch.
- Curing conditions: Note curing conditions (sealed vs. unsealed, temperature, humidity) for each swatch.
- Initial cure check: Evaluate color shift during initial cure to identify any issues early on.
- Dry-out check: Assess color after dry-out to understand long-term stability.
- Full-cure check: Document final color after full cure for a complete record.
Quick rule: Thorough documentation and consistent testing conditions are key to accurate color evaluation.
Safe starting ratios and adjustment strategy
Start with conservative pigment loadings to avoid over-saturating your concrete mix. This approach allows for incremental adjustments while minimizing waste.
Pigment loading: Begin with 1-2% pigment by weight of cement for white or gray bases, depending on desired saturation and tinting strength.
Incremental adjustment: Increase or decrease pigment load in small increments (e.g., 0.5%) to fine-tune color as needed. Always note the exact dose used in each batch.
Verify with manufacturer: Consult technical data sheets provided by your pigment supplier for specific guidance on starting ratios and adjustment strategies.
Common Mistakes, Troubleshooting, and Safety Considerations
Avoid skipping small tests, ignoring the base cement color, and overdosing pigments. Poor dispersion and short mixing times are common culprits. Safety and environmental handling should be part of every job setup.
Use a practical troubleshooting checklist for hue shifts, mottling, or batch-to-batch drift. Document ratios, mixing sequences, and cleanup practices to keep color consistent and safe for crews.
Troubleshooting checklist
Use this checklist when you notice issues with your colored concrete. It’ll help you pinpoint problems and fix them quickly.
- Check dispersion: Uneven color? Stir the mix again or use a mechanical mixer to ensure pigments are well-dispersed.
- Inspect pigment batch: Check if there’s variation in color or consistency. If so, remix or discard and start fresh.
- Evaluate admixtures: Some admixtures can react with pigments, altering hue or workability. Review your mix design.
- Examine curing conditions: Concrete cured too fast? Check if it was covered properly and kept moist during initial curing.
- Check for color bleed: If batches are bleeding into each other, separate them better or adjust pigment dosages.
- Inspect for mottling/banding: Uneven stripes? Stir the mix more thoroughly next time or reduce water content.
- Test final strength: Reduced strength? Check if pigments were overdosed, or if there’s an issue with the cement itself.
- Evaluate workability: If concrete is too stiff or soupy, adjust pigment dosages and water content accordingly.
Quick rule: Always check dispersion first. Most issues stem from poor pigment distribution.
Safety, handling, and environmental notes
Always consult Material Safety Data Sheets (MSDS) for your pigments to understand potential hazards. Use appropriate Personal Protective Equipment (PPE): a respirator for powdered pigments, gloves, and eye protection.
Control dust during mixing and application to minimize inhalation risks. Follow local regulations for proper disposal of concrete waste and any pigment spills.
Ventilation: Ensure your workspace is well-ventilated when handling powders. If using a respirator, make sure it’s certified by NIOSH or other relevant bodies.
Storage: Store pigments in a cool, dry place away from heat sources and incompatible materials. Keep them out of reach of children and pets.
Conclusion
Getting the undertone and saturation right comes down to smart material choice, careful testing, and watching the curing process. White and gray cement behave differently, and small, deliberate adjustments now save costly fixes later.
Do a small test patch on a representative surface in your project area, mix in pigments in a controlled, incremental way, record exactly how much pigment you used, compare undertone and saturation as it cures, and repeat with adjustments in the same manner. Treat each patch as a miniature recipe: note cement type, pigment amount, water ratio, and time to cure so you can reproduce or correct as needed. If you’re unsure, start with a minimal addition and build up, never dump a large amount at once, and keep notes for future batches.
Common mistakes to avoid include overloading pigment early, skipping small tests, and assuming the same color result across all batches. Safety matters: wear a mask when handling dry pigments, use eye protection, ensure good ventilation, and clean spills promptly. If a finish looks off after initial testing and you can’t isolate the variable, pause and reassess rather than pushing ahead with more pigment or faster curing. If the project surface is large, or the finish must meet strict appearance or durability requirements, consider bringing in a pro rather than forcing a DIY shortcut. Stay deliberate, stay safe, and you’ll end up with a cement finish that matches your intent and holds up over time.
FAQ
What are pigments and how do they behave in cement mixers?
Pigments are solid color particles added to cement to tint the mix. They stay in the mix and don’t wash out like dyes. Check the product label or datasheet for where they’re suitable and how they should be mixed.
In cement, pigments can shift as the mix cures and as the surface dries. Use small test batches to see how the color develops on your substrate, and follow manufacturer instructions for dosing and mixing order.
How does pigment concentration affect undertone and saturation?
More pigment generally lowers brightness and can deepen the undertone, making the finish look warmer or cooler depending on the color. Start with small tests and increment in steps to avoid overdoing it.
Keep track of what you change. Even slight increases can noticeably shift the final look, especially on large surfaces. If unsure, review the pigment label for recommended ranges and test before committing.
How do white cement and gray cement change undertone control when you add pigments?
White cement reveals the true tint of the pigment more clearly. It’s easier to hit subtle undertones, but mistakes show up quickly. If you’re chasing a specific hue, test on white first.
Gray cement already has inherent undertones that can mute or mix with pigment color. You may need less pigment to reach the same look, and the result will skew toward the cement’s natural tones. Always test on both substrates if you have options.
What are basic techniques for testing pigment attributes on different surfaces?
Mix a small batch and apply a thin, even coat to representative samples of each surface you’ll finish. Compare under the same lighting and let it cure as you would in real use. Mark the exact pigment amount used for future reference.
Evaluate both color and consistency. If the color shifts with texture or moisture, you’ll want to adjust coverage, finish, or pigment choice. Use manufacturer guidance as your baseline, and don’t skip cure time before judging.